System Integrity Protection (SIP) protects the entire system by preventing the execution of unauthorized code on macOS devices. During development, temporarily disabling SIP may be required in order to install and test code.
To create a new System Integrity Protection Disabled policy:
From Device Posture, select + ADD:

Select Add to macOS.
Coro displays the Add new device policy to macOS dialog.
The System Integrity Protection Disabled device policy is currently supported for macOS devices.
Select System Integrity Protection Disabled from the Select policy type dropdown:
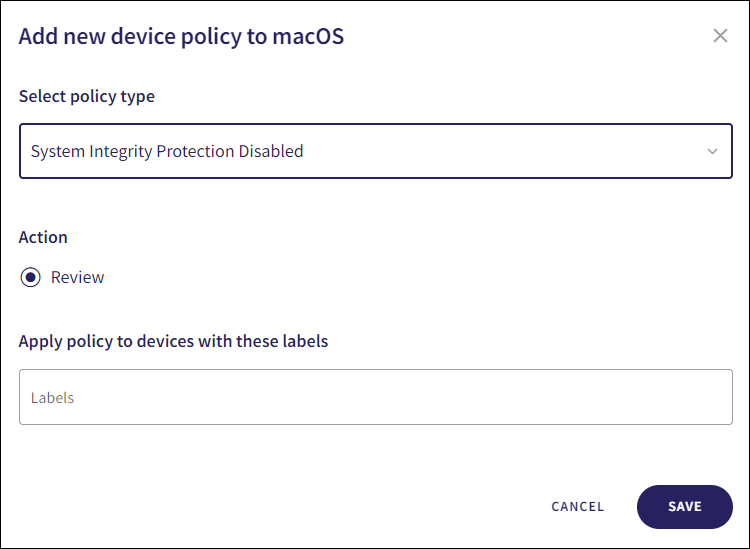
Select the policy Action:
- Review: Coro does not perform auto-remediation and creates a review ticket that remains open for 10 days before closing automatically. During this time, Coro adds any newly detected affected devices to the ticket. Admin users can close the ticket manually at any time.
If the policy violation reoccurs after a ticket is closed, Coro automatically creates a new ticket.
Enter label names (predefined or custom) to the Labels field listed under Apply policy to devices with these labels to apply the new policy to specific groups of devices.

Select SAVE.
Coro creates the policy with the configured settings.
When System Integrity Protection is disabled on a macOS device, a System Integrity Protection disabled ticket type is created.
Select the dropdown next to System Integrity Protection Disabled on the Device Posture tab to view the policy. See Device posture configuration overview.
Coro displays the following policy details:
Device labels applicable to the policy.
The action(s) applicable to the policy, for example, Review.
