This guide describes the process for deploying the Coro Agent to Windows devices.
To deploy the Coro Agent to your Windows devices using a PowerShell script, see Using PowerShell to deploy the Coro Agent to Windows devices.
Before you begin, make sure your Windows device meets the following prerequisites:
Coro utilizes a Bitdefender Software Development Kit (SDK). To prevent installation conflicts, uninstall Bitdefender and any other antivirus software based on Bitdefender before installing the Coro Agent.
Windows devices must meet the minimum specifications.
You must have administrative permissions to install applications on your Windows device.
Install the Coro Agent through one of the processes described below:
Self-install on single devices: An admin user provides specific users with an installer link via email. Users select the link and follow the on-screen instructions to install the software on their devices. Use this method to upgrade existing Agent versions (1.5 and later).
Mass deployment: An admin user downloads the Agent installer package and deploys it across all devices using a mass deployment tool.
Coro provides a number of articles covering mass deployment scenarios. To learn more:
For details on upgrading the Agent software, see Upgrading the agent.
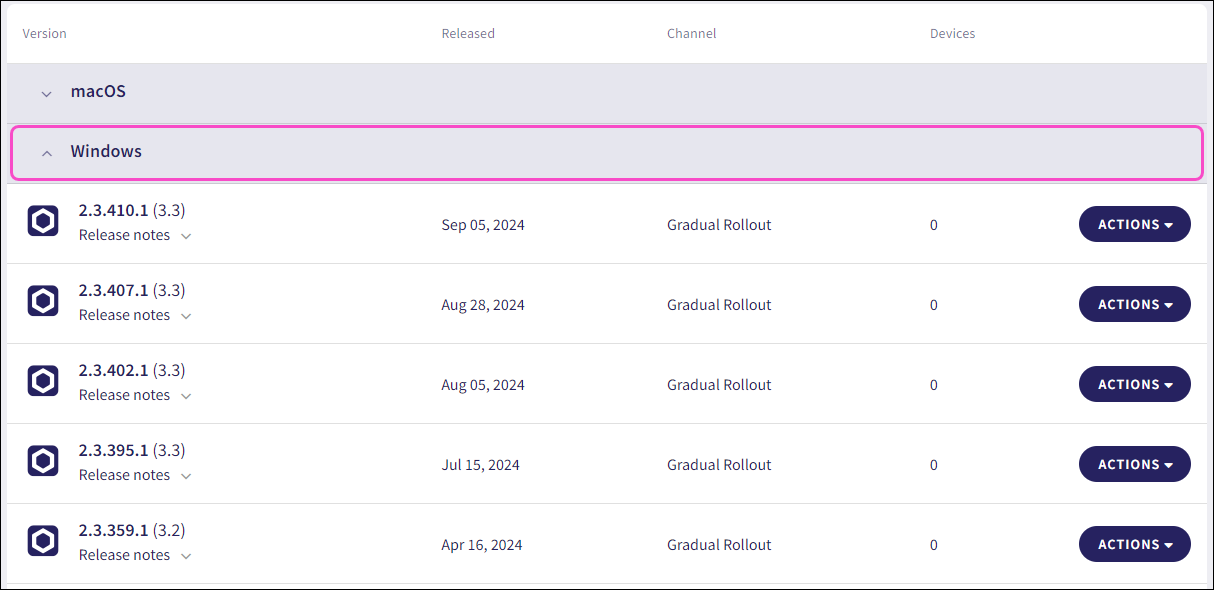
Admin users with sufficient permissions can download the Agent from the Agent Deployment tab on the Control Panel > Devices page:
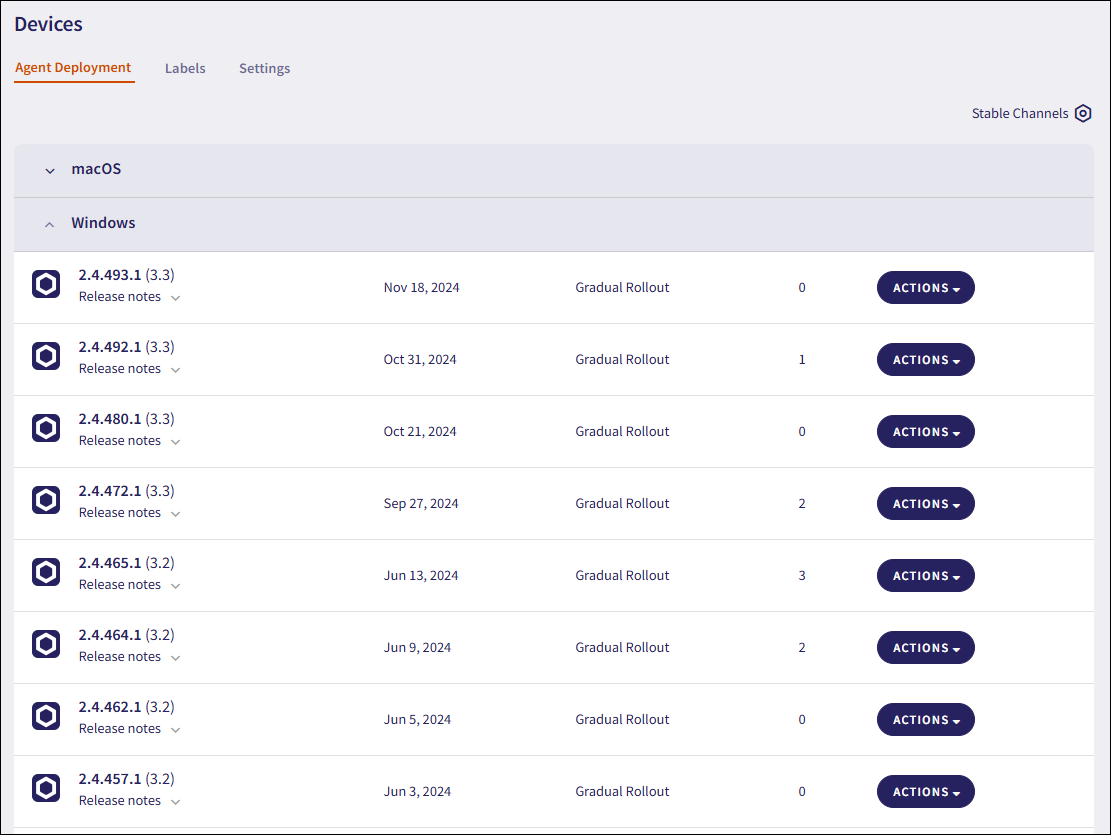
The Agent deployment list shows each Agent version's stage in the release life cycle:
| Release Stage | Description |
|---|---|
| Beta | The initial development and promotion phase of the Agent. |
| Release Candidate | Quality assurance testing starts, followed by the initial internal deployment of the Agent. |
| Gradual Rollout | Incremental update rollout starts for the stable Agent. |
| General Availability | The incremental rollout concludes, and the Agent is fully released to all Coro protected users. |
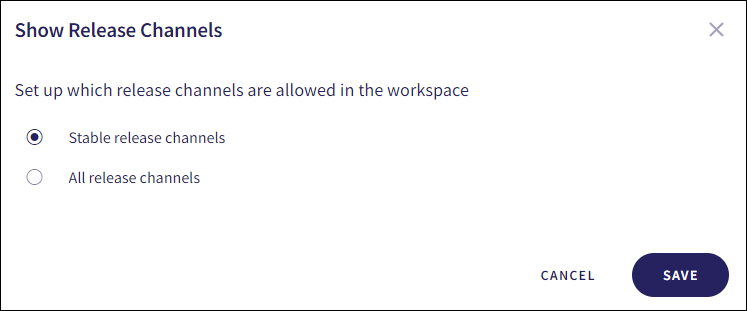
The All channels option allows admin users to select which release channels are allowed in the workspace:

The following options are available:
Stable release channels: Only Gradual Rollout and General Availability release channels are allowed in the workspace.
All release channels: All release channels are allowed in the workspace.
To download and install (or upgrade) the Coro Agent:
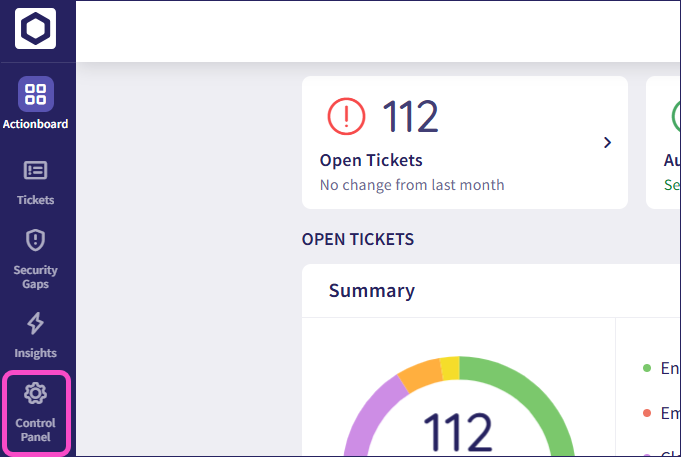
From the sidebar, select Control Panel:
Select Devices > Agent Deployment.
Go to the Windows section:
Select ACTIONS:

Choose from the following actions:
Obtain a download link URL for the Agent installer:
Select Copy link.
Coro displays a Copy Download Link dialog, which contains a URL link to the Agent installation file:
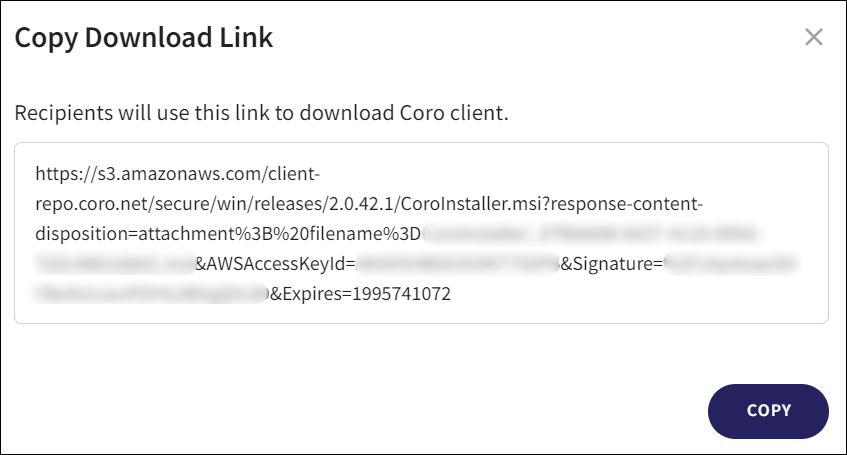
Select COPY to copy the download link to your clipboard.
Paste the link into a web browser and follow the instructions to install.
Admin users distribute this link to endpoint device users for direct installation of the Agent. Additionally, they use the same link for mass deployment through appropriate tools.
Download the Agent installer file:
Select Download.
Your device downloads the Agent installation file.
Do not rename the downloaded Agent installation file.
After the download is complete, open the installation file and follow the instructions to install.
After completing the installation, the Agent may download additional updates:

After the installation and update process completes, open the Agent from the Windows system tray:

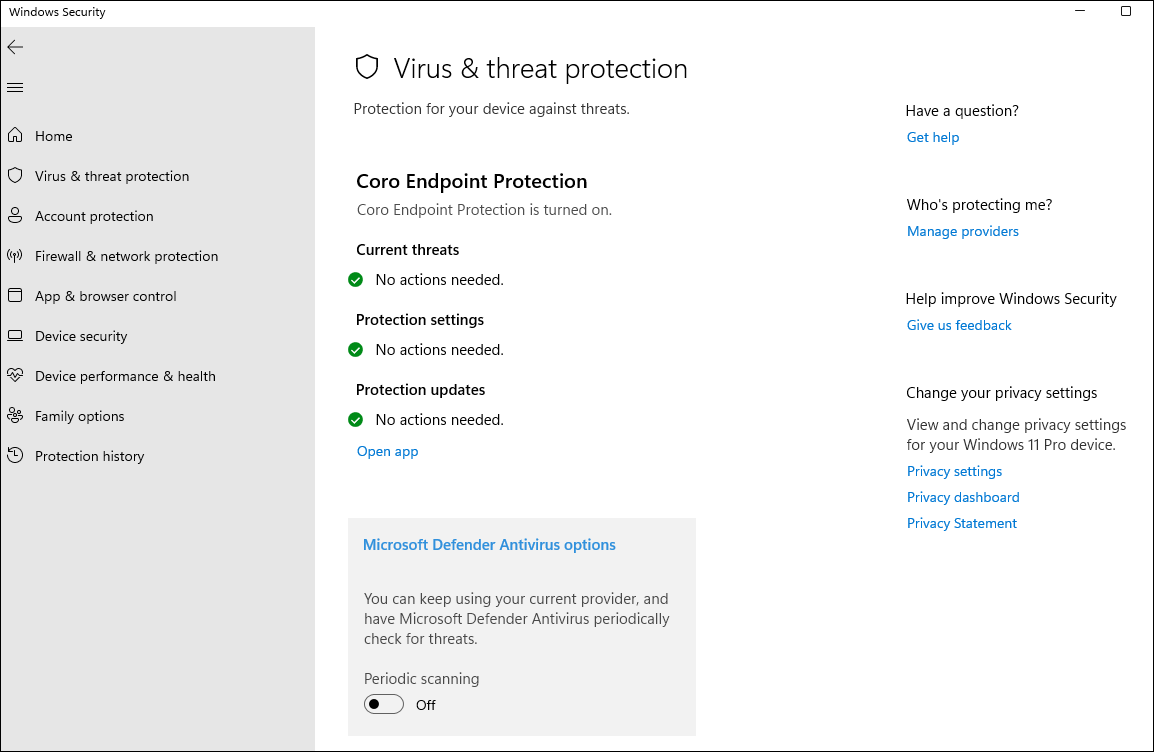
Coro is now the primary antivirus (AV) software for the device and is listed as an authorized Windows Security Center (WSC) provider in the Virus & threat protection section of the Windows Security component:
 Important
To register Coro as an authorized WSC provider, your device must have:
- Coro Agent v3.2 (beta 2.5.65.1) or later installed.
- Windows 10 or later installed.
After installing the Coro Agent, disable any firewall rules that might interfere with its connectivity.
After deployment, Windows Security Center (WSC) might not immediately display the Coro Agent.
To verify WSC registration of the Coro Agent:
Run the following PowerShell command:
Get-WmiObject -Namespace "root\SecurityCenter2" -Class "AntiVirusProduct"Locate displayName: Coro Endpoint Protection:
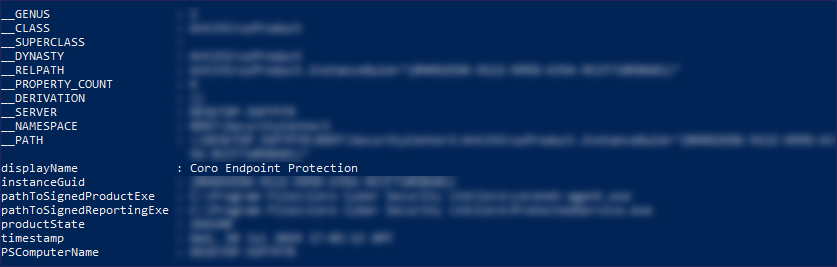
The Coro Agent is confirmed as an authorized WSC provider.
See also:
In addition to its basic functions, Coro provides specific endpoint monitoring capabilities that you can enable or disable.
To configure your endpoint monitoring settings, log in to your Coro console and select Control Panel > Devices > Settings. To learn more, see Protection Settings.
These settings apply to all devices in the workspace.
Coro provides a PowerShell deployment script to enable organizations to install the Coro Agent to their Windows devices either individually or through Remote Monitoring and Management (RMM) tools. See Using PowerShell to deploy the Coro Agent to Windows devices for details.