Deploying Coro to Windows devices with Microsoft Intune
This guide describes how to deploy the Coro Agent to your Windows endpoint devices through the Microsoft Intune endpoint management platform.
To successfully deploy Coro to Windows devices via Intune, you need to:
- Download Coro Agent and the Microsoft Win32 Content Prep Tool
- Package Coro as an Intune file
- Create the deployment in Intune
Download Coro Agent and the Microsoft Win32 Content Prep Tool
Perform the following steps:
- Sign in to the Coro console .
-
From the sidebar, select
 to access the
Control Panel
.
to access the
Control Panel
.
-
Select
Devices
:

-
Select
Agent Deployment
and locate the latest version of the Windows agent from the list of available versions. From the
Actions
menu, select
Download
to download a copy of the agent .msi file to your local device:

- Download the Microsoft Win32 content prep tool from the Microsoft GitHub repository.
Package Coro as an Intune file
Perform the following steps:
-
On your local device, create a folder called
Coro App
, and then create an additional folder within it called
CoroInstaller_<workspace ID>, where the workspace ID is derived from the Coro Agent .msi file downloaded from the Coro console. -
Copy the Coro Agent installer .msi file into the
Coro App
folder.
Your directory structure should resemble this example:

-
Locate and run
IntuneWinAppUtil.exe
, downloaded in a
previous step
.
The program starts a command prompt window, requesting Please specify the source folder:

-
For this and each subsequent prompt, enter the follow information:
- Please specify the source folder: Enter the location of your Coro App folder.
- Please specify the setup file: Enter the name of the .msi file in the Coro App folder.
-
Please specify the output folder:
Enter the location of the
CoroInstaller_<workspace ID>folder within the Coro App folder. - Do you want to specify catalog folder: Enter N .

-
The utility creates an .intunewin file within the
CoroInstaller_<workspace ID>folder:
Create the deployment in Intune
Perform the following steps:
- In Microsoft Azure, go to Microsoft Endpoint Manager admin center .
- Go to Apps > All Apps , then select + to add a new app.
-
For the app type, select
Windows app (Win32)
.
This app type enables you to upload the .intunewin file created in this section. Locate this file through the App package file file browser, then select OK:

-
In the
App Information
step, confirm the details and add
Coro
to the
Publisher
field:

Select Next to continue.
-
In the
Program
step, leave all fields with their prefilled values:
Important
Do not modify the actions for the Windows Installer return codes as this might cause system errors.

Select Next to continue.
-
In the
Requirement
step, set the following fields:
- Operating system architecture : Select 64-bit .
- Minimum operating system : Specify the minimum allowed Windows version for your endpoint devices, as per your organization's security protocols.
- Leave all other fields blank.

Select Next to continue.
- In the Detection Rules step, set Rules Format to Manually configure detection rules , then select + Add to specify a new rule.
-
In the
Detection Rule
pane, configure the following fields:
- Rule type : Select File .
-
Path
: Enter
C:\Program Files\Coro Cyber Security Ltd\Coro\user_working_dir. - File or folder : Enter Coro.exe .
- Detection method : Select File or folder exists .
- Associate with a 32-bit app or 64-bit clients : Select No .

Select OK to create the rule, then select Next to continue.
- Coro requires no configuration in the Dependencies or Supersedences steps. If no additional settings are needed, select Next for each step.
-
Add the groups to which to deploy the Coro Agent:
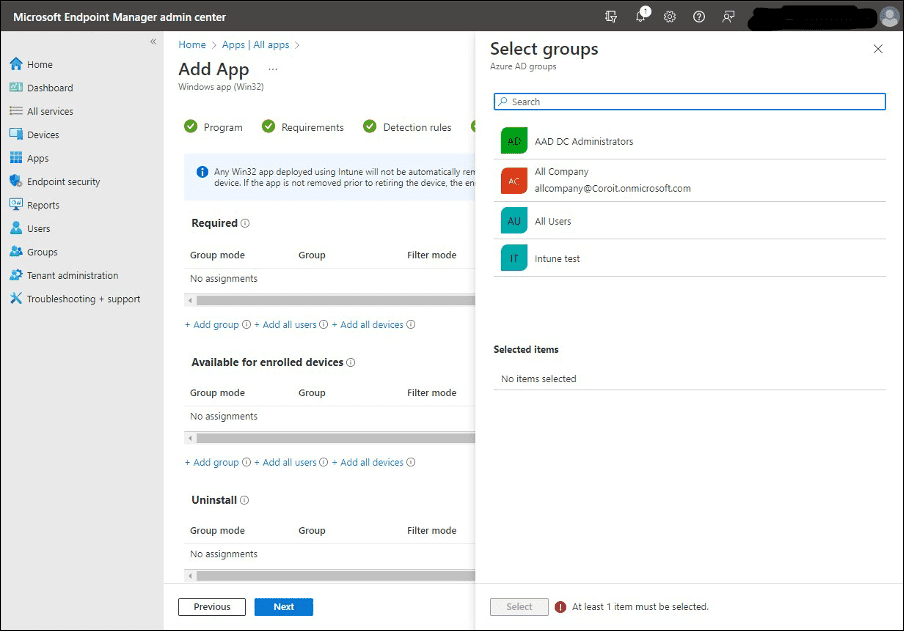
Select Next to continue.
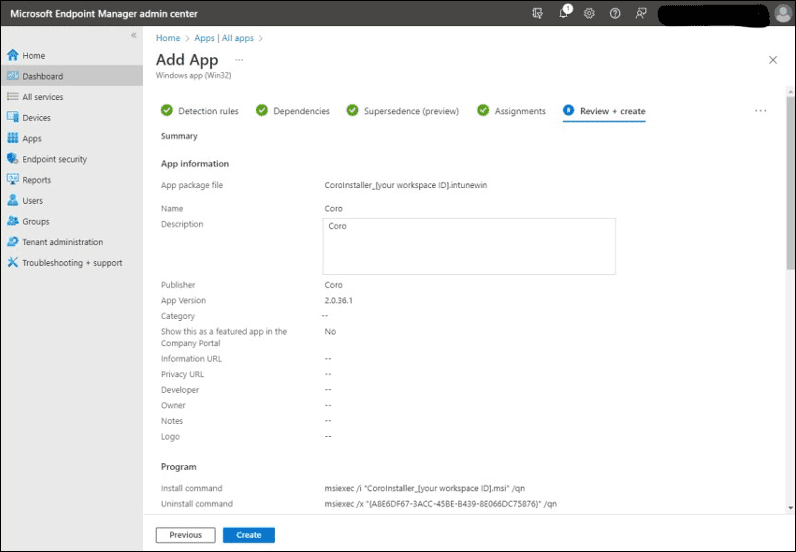
-
In the
Review + create
step, verify the information added for your deployment app, then select
Create
to start the Coro Agent deployment process:
note
For additional information regarding Intune’s application distribution, refer to the following article: https://learn.microsoft.com/en-us/mem/intune/apps/lob-apps-windows
note
For additional information about packaging applications as .intunewin files, refer to the following article: https://learn.microsoft.com/en-us/mem/intune/apps/apps-win32-prepare