This guide describes how to deploy the Coro Agent to your macOS endpoints through the Microsoft Intune endpoint management platform.
To successfully deploy Coro to macOS endpoints via Intune, you need to:
- Deploy a configuration profile for full disk access permissions
- Deploy a configuration profile to automatically enable Coro notifications
- Deploy a configuration profile to automatically approve Coro system extensions
- Deploy a configuration profile to automatically approve Coro Network Filter extension
- Prepare a shell script for deploying the Coro Agent
- Create the deployment in Intune
Steps 1 to 4 are optional and designed to minimize user intervention for a silent deployment. If your organizational policies limit such configuration settings, skip straight to steps 5 and 6.
If you proceed with steps 1 to 4, make sure you force-synchronize the profiles to your macOS endpoint devices after each step.
Perform the following steps:
Sign in to the Microsoft Intune admin center at https://intune.microsoft.com.
Go to Devices > Configuration profiles:
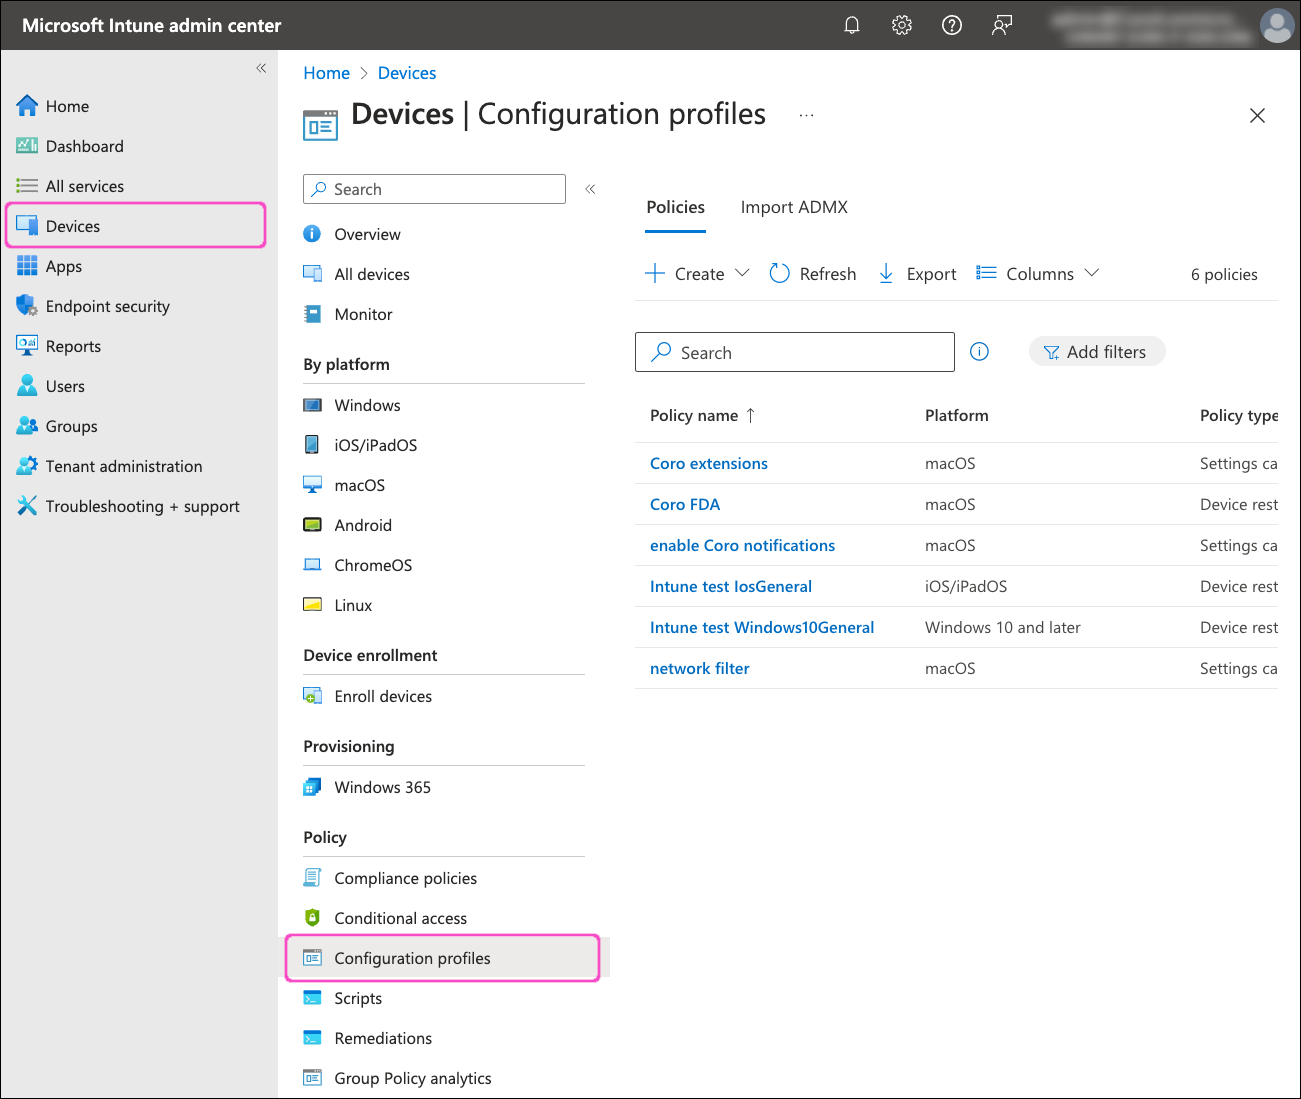
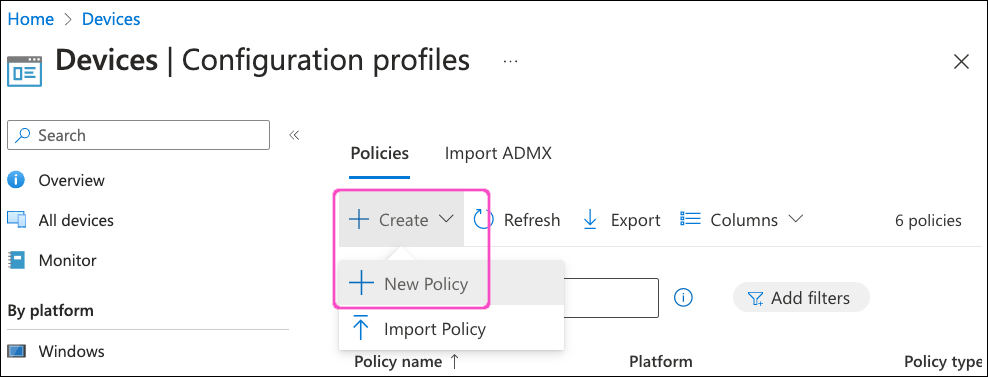
In the Policies tab, select Create > New Policy:
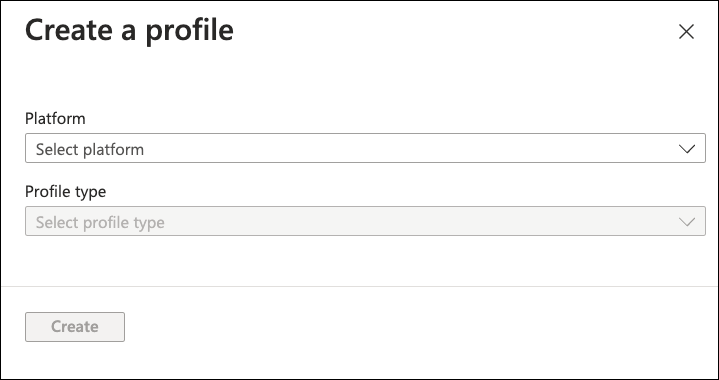
Intune displays the Create a profile dialog:
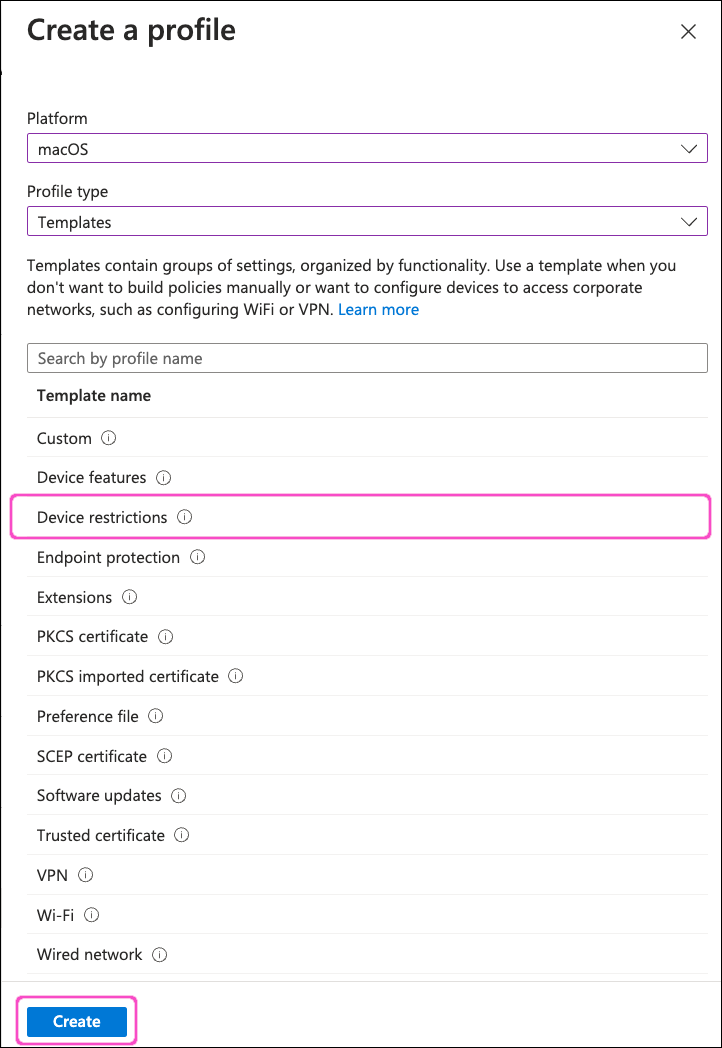
In the Platform dropdown, select macOS. Then, for Profile type, select Templates.
From the list of templates, select Device restrictions, then select Create:
Intune displays the Device restrictions profile dialog, starting at the Basics step:

Enter the following details for the new profile:
- Name: Enter a name. For example, "Coro Full Disk Access".
- Description: (Optional) Enter a short description.
Select Next to continue to the Configuration settings step:
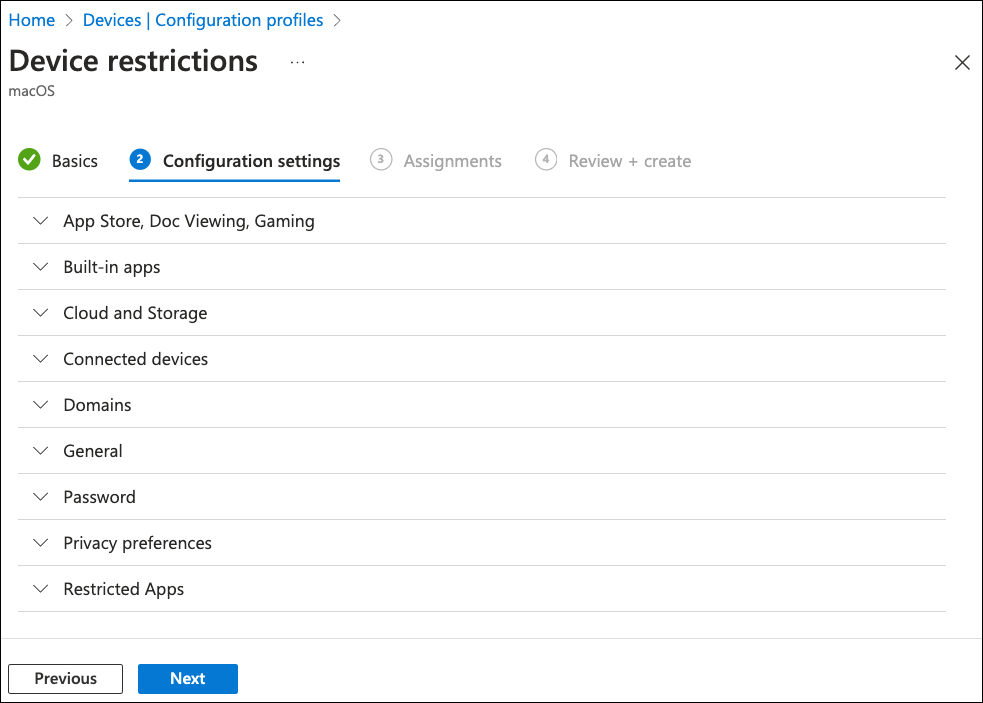
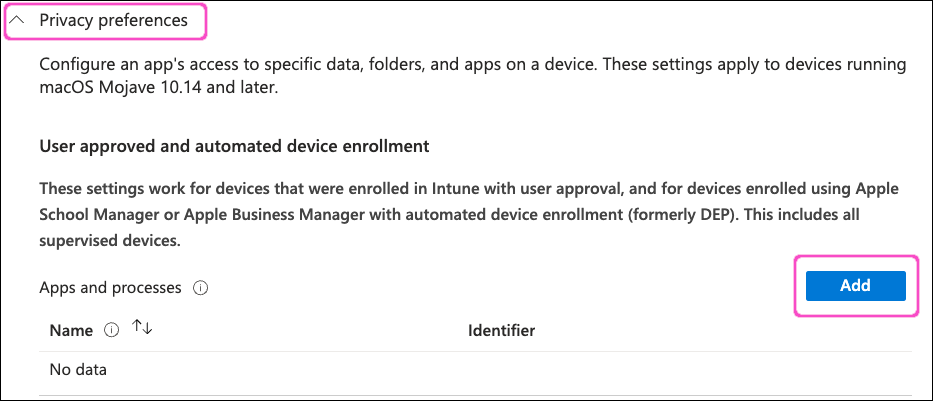
Expand the Privacy preferences section, then select Add:
Intune displays the Add Row dialog:
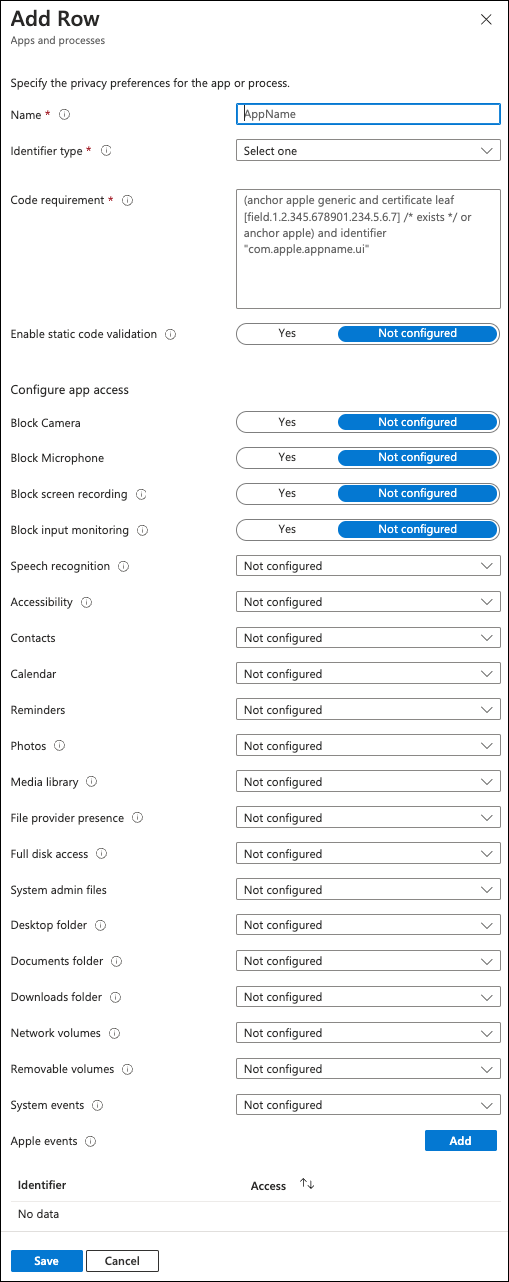
Enter the following details:
Field Value Name Coro Endpoint Protection Identifier type Select Bundle ID Identifier net.coro.endsec.Coro Code requirement anchor apple generic and identifier "net.coro.endsec.Coro" and (certificate leaf[field.1.2.840.113635.100.6.1.9] /* exists */ or certificate 1[field.1.2.840.113635.100.6.2.6] /* exists */ and certificate leaf[field.1.2.840.113635.100.6.1.13] /* exists */ and certificate leaf[subject.OU] = E3P52EVK39)Reminders Select Allow Full disk access Select Allow System admin files Select Allow Leave all remaining settings as their default values.
Select Save.
In the Privacy preferences section, select Add again to add a second row with the following new settings:
Field Value Name Coro Endpoint Protection Identifier type Select Bundle ID Identifier net.coro.endsec.CoroService Code requirement anchor apple generic and identifier "net.coro.endsec.CoroService" and (certificate leaf[field.1.2.840.113635.100.6.1.9] /* exists */ or certificate 1[field.1.2.840.113635.100.6.2.6] /* exists */ and certificate leaf[field.1.2.840.113635.100.6.1.13] /* exists */ and certificate leaf[subject.OU] = E3P52EVK39)Reminders Select Allow Full disk access Select Allow System admin files Select Allow Leave all remaining settings as their default values.
Select Save.
In the Privacy preferences section, select Add again to add a third row with the following new settings:
Field Value Name Coro Endpoint Protection Identifier type Select Bundle ID Identifier net.coro.endsec.TrafficService Code requirement anchor apple generic and identifier "net.coro.endsec.TrafficService" and (certificate leaf[field.1.2.840.113635.100.6.1.9] /* exists */ or certificate 1[field.1.2.840.113635.100.6.2.6] /* exists */ and certificate leaf[field.1.2.840.113635.100.6.1.13] /* exists */ and certificate leaf[subject.OU] = E3P52EVK39)Reminders Select Allow Full disk access Select Allow System admin files Select Allow Leave all remaining settings as their default values.
Select Save.
In the Privacy preferences section, select Add again to add a fourth row with the following new settings:
Field Value Name Coro Endpoint Protection Identifier type Select Bundle ID Identifier net.coro.endsec.CoroGuard Code requirement anchor apple generic and identifier "net.coro.endsec.CoroGuard" and (certificate leaf[field.1.2.840.113635.100.6.1.9] /* exists */ or certificate 1[field.1.2.840.113635.100.6.2.6] /* exists */ and certificate leaf[field.1.2.840.113635.100.6.1.13] /* exists */ and certificate leaf[subject.OU] = E3P52EVK39)Reminders Select Allow Full disk access Select Allow System admin files Select Allow Leave all remaining settings as their default values.
Select Save.
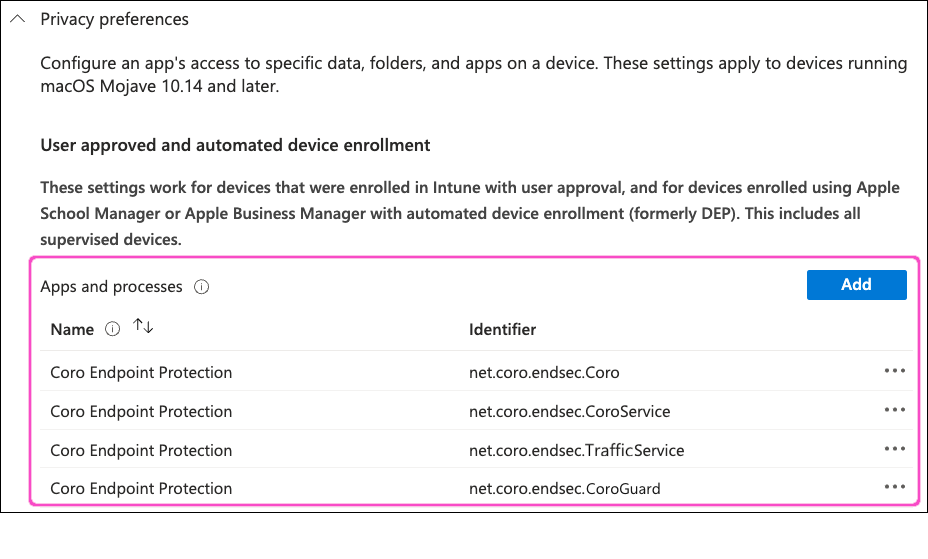
Your Privacy preferences section should now resemble the following:
Select Next to continue to the Assignments step:
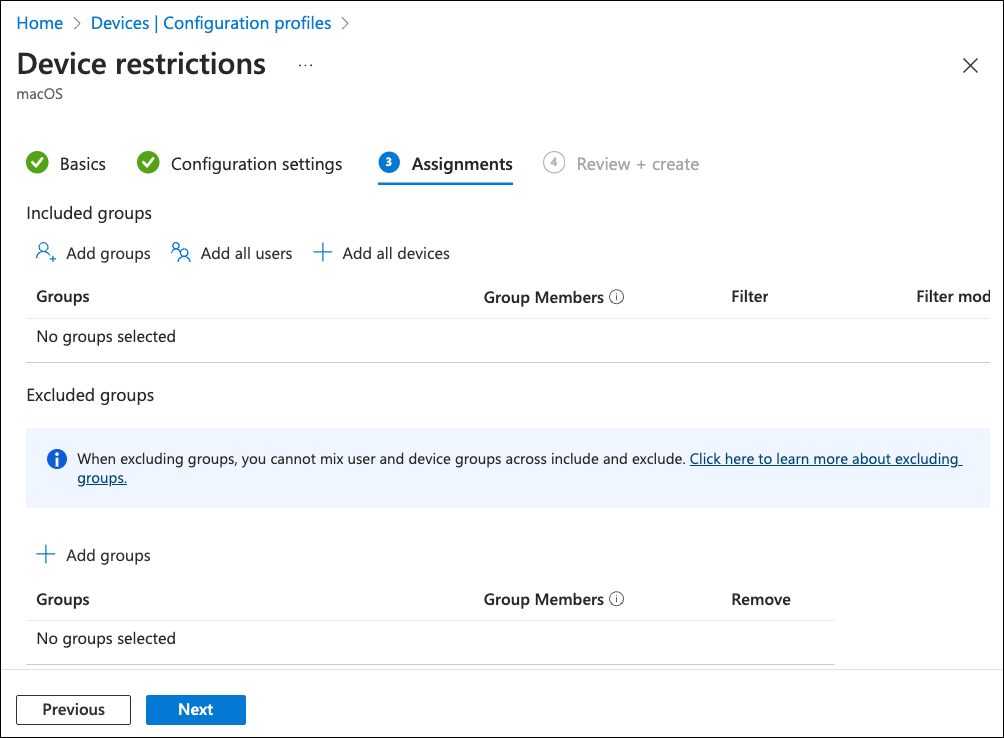
Use the available options to select your required macOS devices.
Select Next to continue to the Review + create step.
Review your settings, then select Create:

On your macOS devices, the Coro Agent might not show as having full disk access in System Preferences > Security and Privacy. However, the Agent shows correctly in System Preferences > Profiles.
Perform the following steps:
Sign in to the Microsoft Intune admin center at https://intune.microsoft.com.
Go to Devices > Configuration profiles:
In the Policies tab, select Create > New Policy:
Intune displays the Create a profile dialog:
In the Platform dropdown, select macOS. Then, for Profile type, select Settings catalog.
Select Create.
Intune display the Create profile dialog, starting at the Basics step:
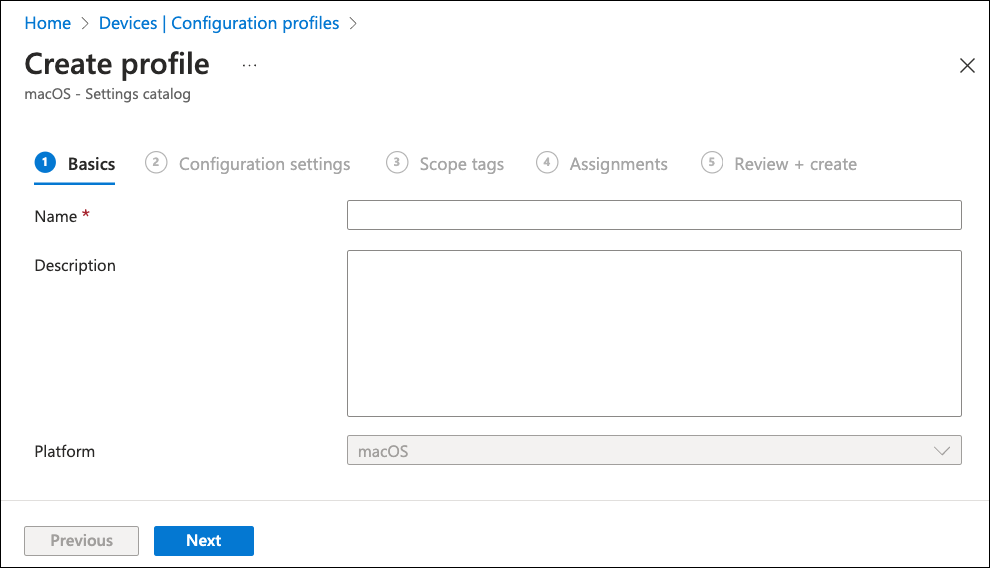
Enter the following details for the new profile:
- Name: Enter a name. For example, "Auto enable Coro notifications".
- Description: (Optional) Enter a short description.
Select Next to continue to the Configuration settings step:
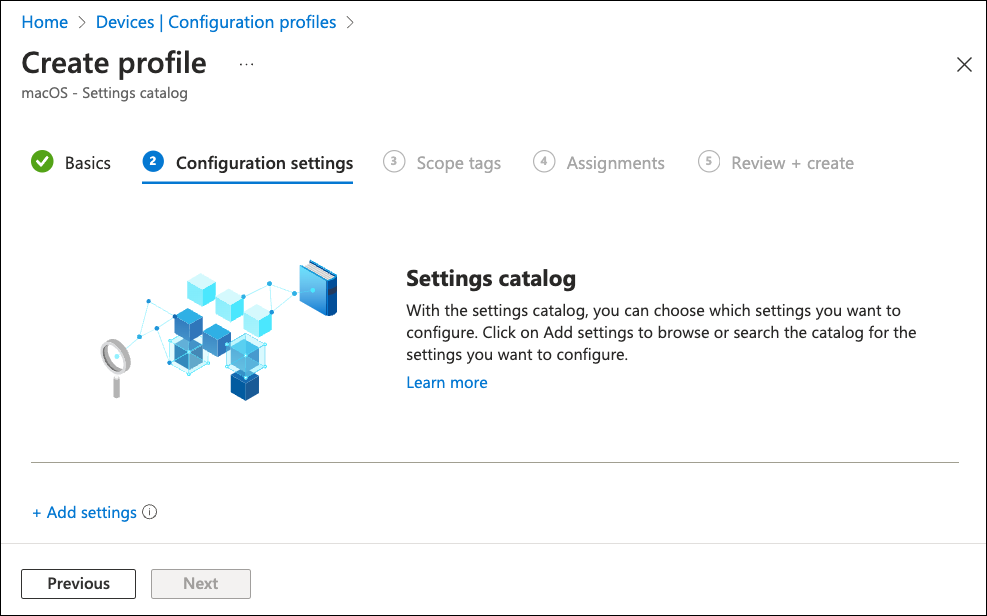
Select + Add settings.
Intune displays the Settings picker dialog:
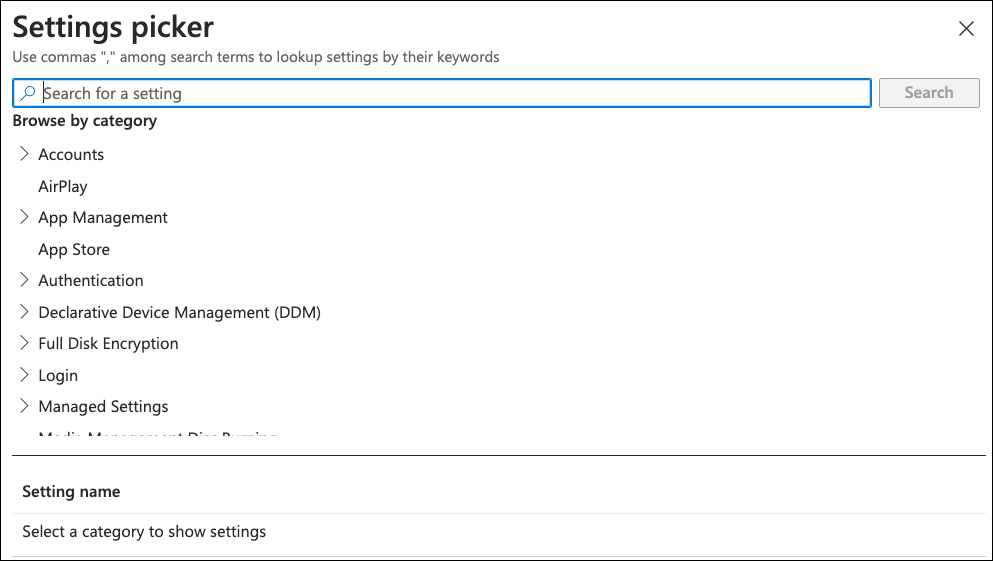
From the category list, select User Experience > Notifications. Then select Select all these settings:
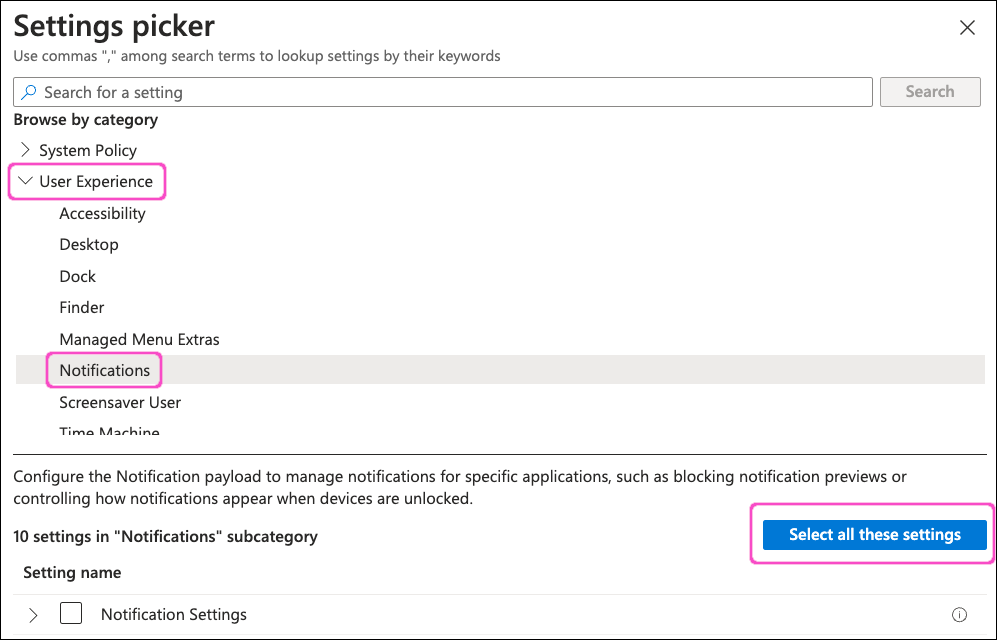
Select X at the top-right to close the Settings picker dialog.
In the Notification Settings section, select + Edit instance:

Intune displays the Configure instance dialog:
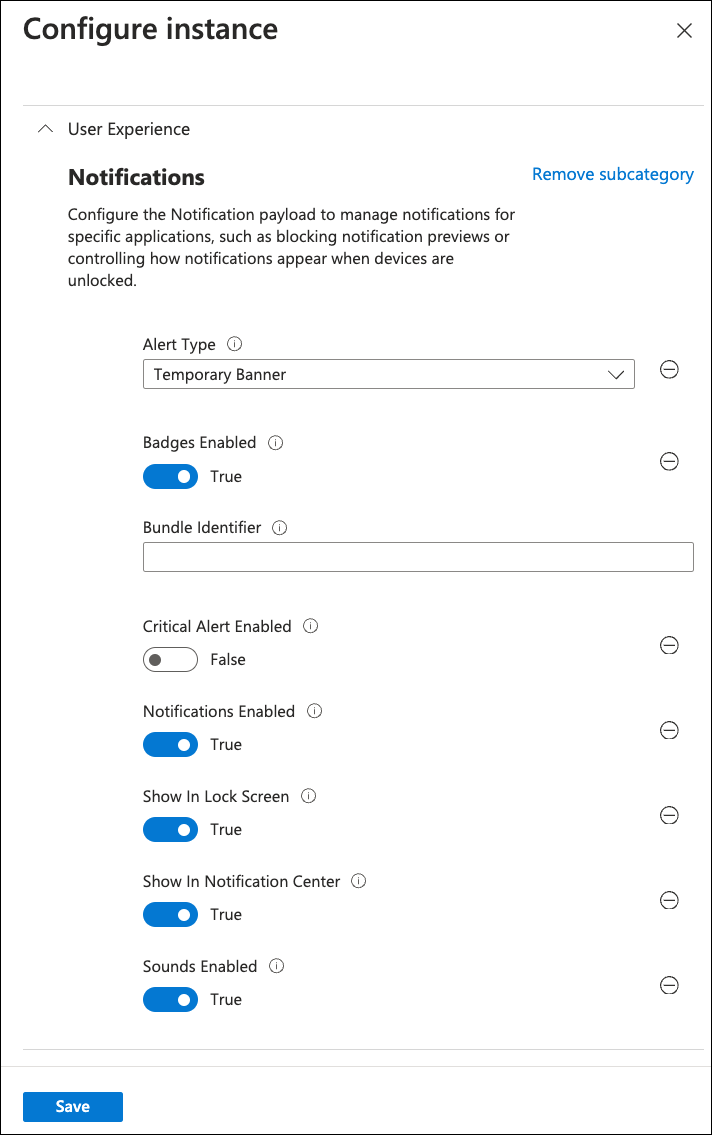
In Bundle Identifier, enter "net.coro.endsec.Coro". Leave all other settings as their default values.
Select Save to save your changes and close the Configure instance dialog.
In the Create profile dialog, select Next to continue to the Scope tags step.
Leave all settings in this step as their default values.
Select Next to continue to the Assignments step:

Select your required macOS devices.
Select Next to continue to the Review + create step.
Review your settings, then select Create:
Perform the following steps:
Sign in to the Microsoft Intune admin center at https://intune.microsoft.com.
Go to Devices > Configuration profiles:
In the Policies tab, select Create > New Policy:
Intune displays the Create a profile dialog:
In the Platform dropdown, select macOS. Then, for Profile type, select Settings catalog.
Select Create.
Intune displays the Create profile dialog, starting at the Basics step:
Enter the following details for the new profile:
- Name: Enter a name. For example, "Auto approve Coro extensions".
- Description: (Optional) Enter a short description.
Select Next to continue to the Configuration settings step:
Select + Add settings.
Intune displays the Settings picker dialog:
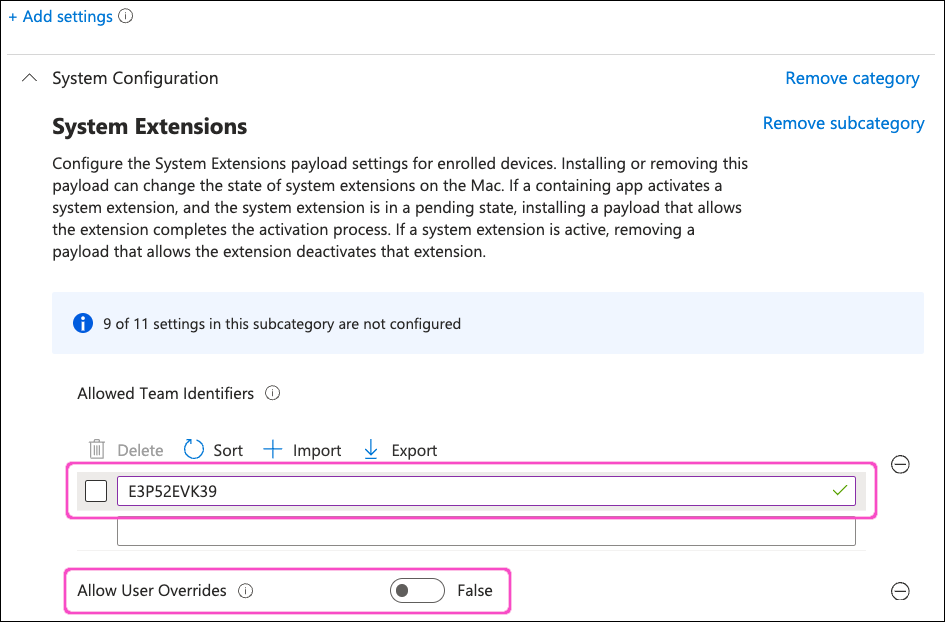
From the category list, select System Configurations > System Extensions. Then, select Allow User Overrides and Allowed Team Identifiers:
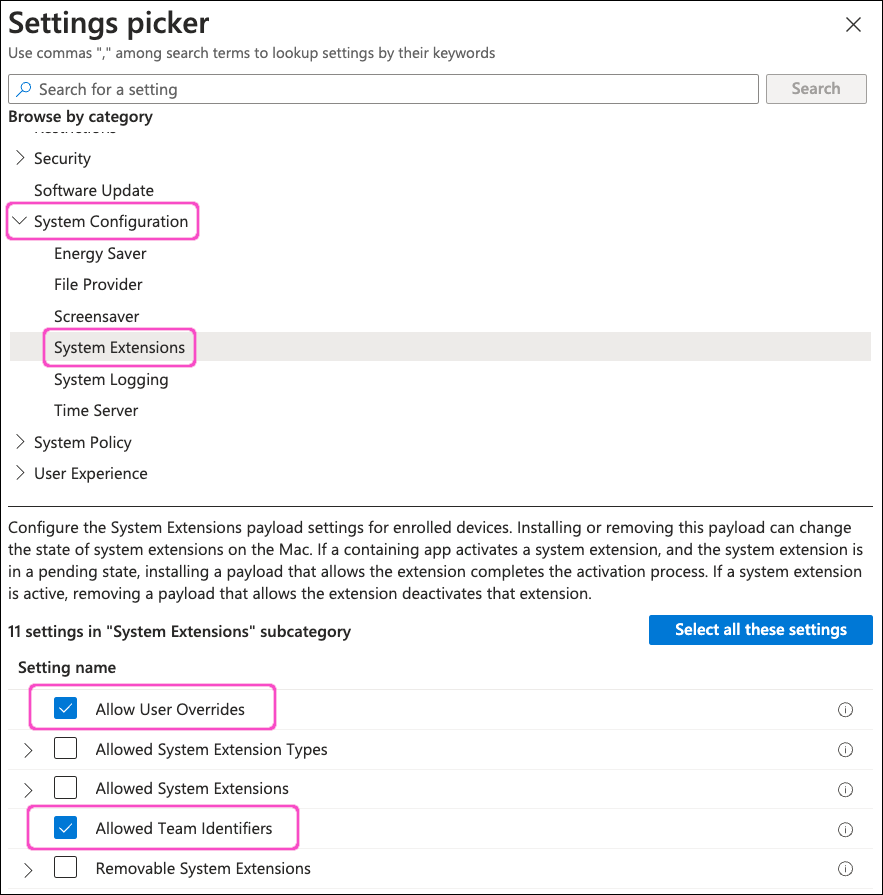
Select X at the top-right to close the Settings picker dialog.
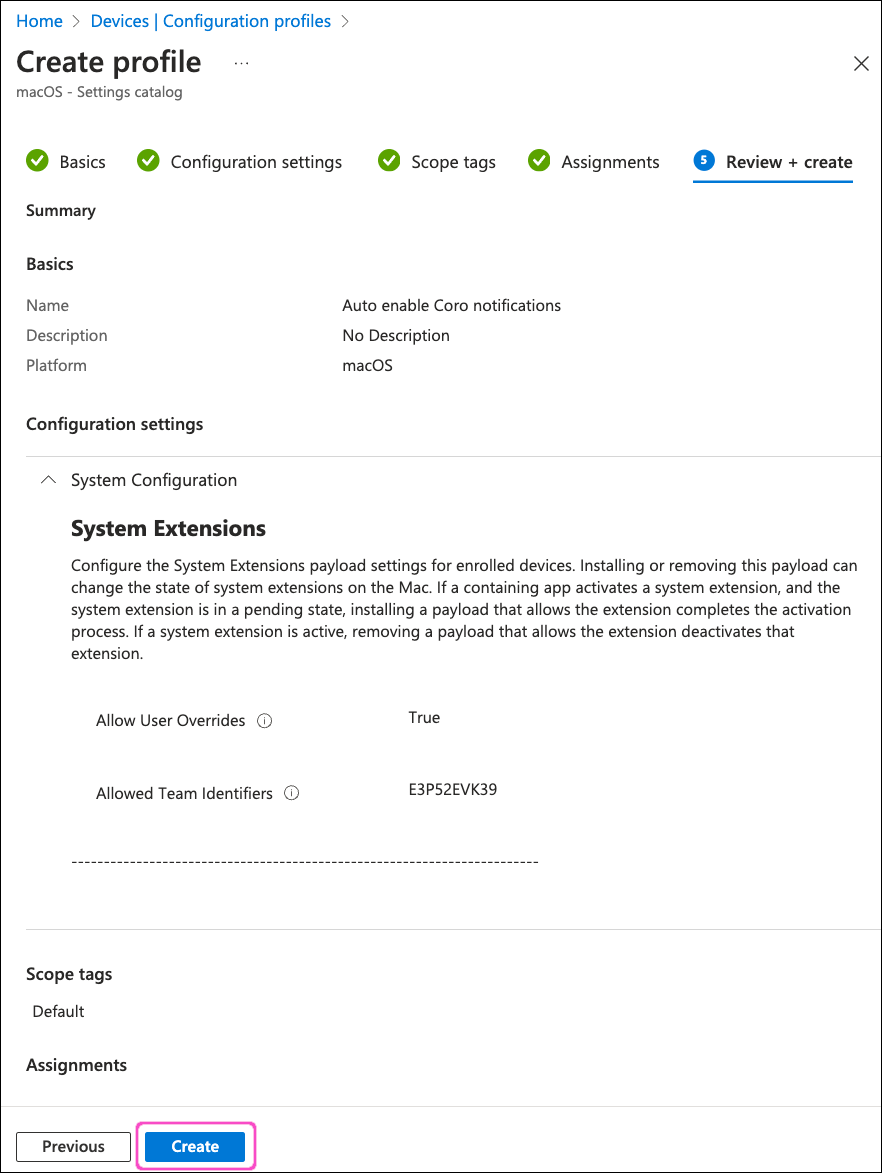
In the System Extensions section, enter "E3P52EVK39" in the textbox under Allowed Team Identifiers, then set Allow User Overrides to False:
Select Next to continue to the Scope tags step.
Leave all settings in this step as their default values.
Select Next to continue to the Assignments step:
Use the available options to select your required macOS devices.
Select Next to continue to the Review + create step.
Review your settings, then select Create:
Perform the following steps:
Sign in to the Microsoft Intune admin center at https://intune.microsoft.com.
Go to Devices > Configuration profiles:
In the Policies tab, select Create > New Policy:
Intune displays the Create a profile dialog:
In the Platform dropdown, select macOS. Then, for Profile type, select Settings catalog.
Select Create.
Intune displays the Create profile dialog, starting at the Basics step:
Enter the following details for the new profile:
- Name: Enter a name. For example, "Auto approve Coro network extension".
- Description: (Optional) Enter a short description.
Select Next to continue to the Configuration settings step:
Select + Add settings.
Intune displays the Settings picker dialog:
From the category list, select Web Content Filter. Then, select the folliowing settings:
- Filter Data Provider Bundle Identifier
- Filter Data Provider Designated Requirement
- Filter Grade
- Filter Packets
- Filter Sockets
- Plugin Bundle ID
- User Defined Name

Select X at the top-right to close the Settings picker dialog.
In the Web Content Filter section, enter the following settings:
Setting Value Filter Data Provider Bundle Identifier net.coro.endsec.TrafficService Filter Data Provider Designated Requirement anchor apple generic and identifier "net.coro.endsec.Coro" and (certificate leaf[field.1.2.840.113635.100.6.1.9] /* exists / or certificate 1[field.1.2.840.113635.100.6.2.6] / exists / and certificate leaf[field.1.2.840.113635.100.6.1.13] / exists */ and certificate leaf[subject.OU] = E3P52EVK39)Filter Grade firewall Filter Packets False Filter Sockets True Plugin Bundle ID net.coro.endsec.Coro User Defined Name Coro Network Protector 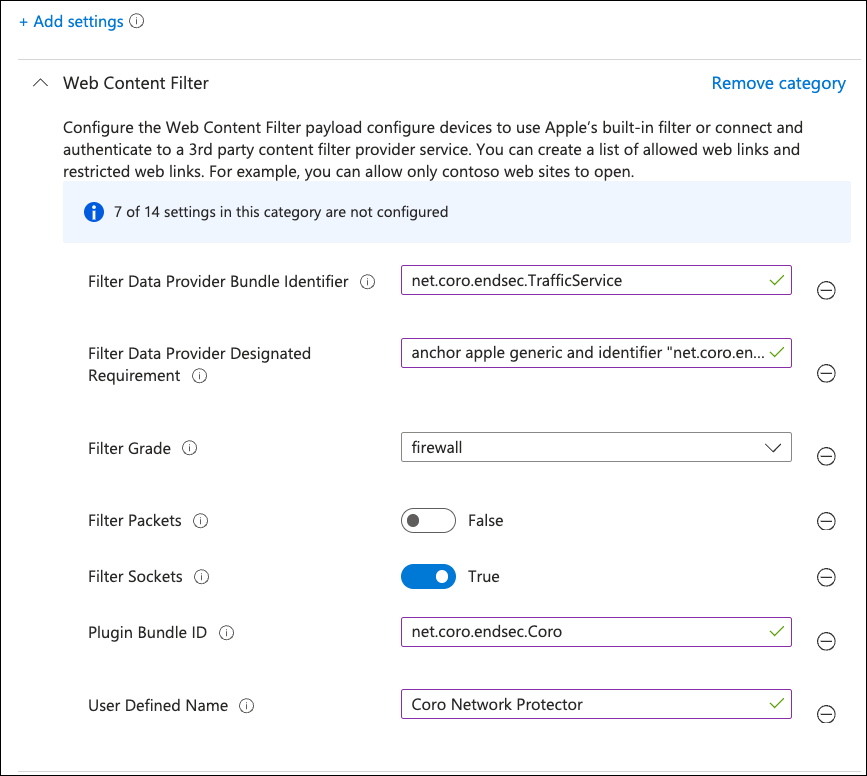
Select Next to continue to the Scope tags step.
Leave all settings in this step as their default values.
Select Next to continue to the Assignments step:
Use the available options to select your required macOS devices.
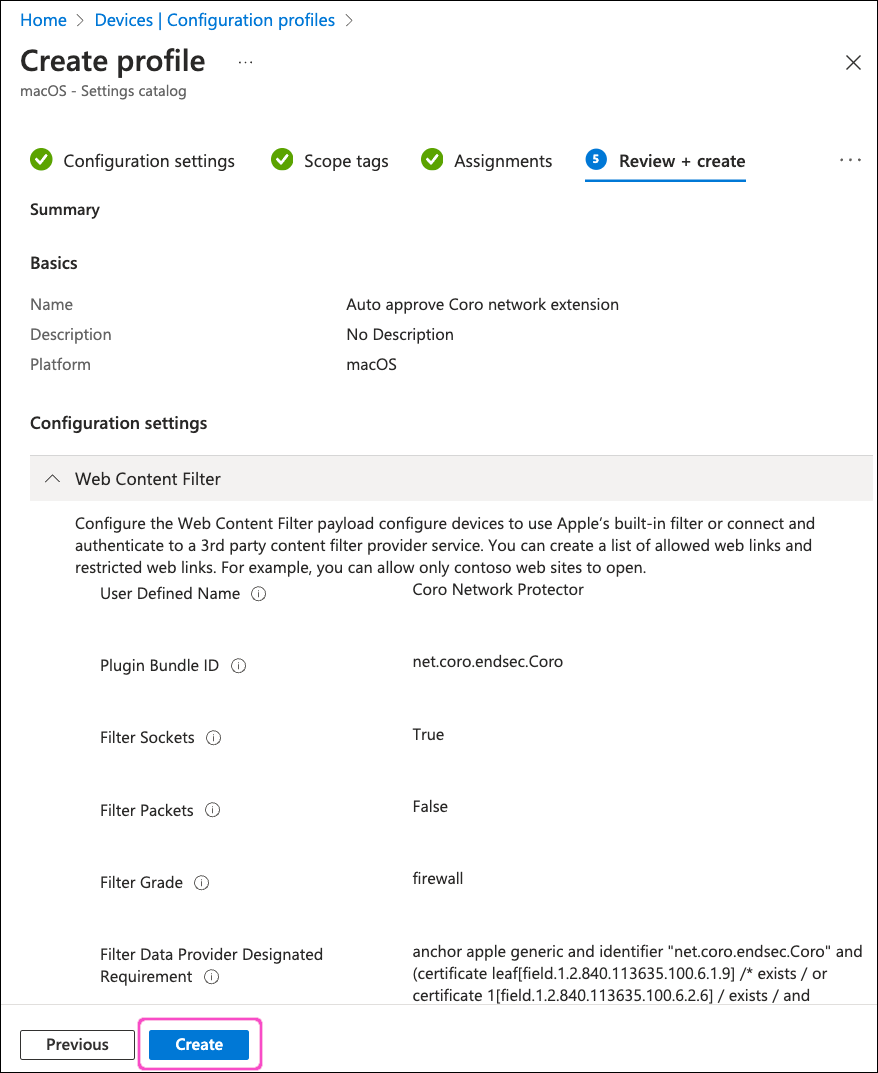
Select Next to continue to the Review + create step.
Review your settings, then select Create:
To silently deploy the Coro Agent to macOS devices via Intune, Coro recommends using a shell script rather than the native app deployment process. This is because Coro Agent installer filenames contain activation codes. Microsoft Intune modifies installer filenames during app deployment, causing macOS devices to fail to register with a Coro workspace.
Coro provides a predefined script template and guidance in this article: Using a shell script to deploy Coro to macOS devices.
Make sure you modify the template script with your workspace-specific Agent download URL and installer filename. Save the personalized script as a text file to your local workstation, then proceed to the next step.
Coro recommends testing the script first by manually running it against a single device prior to activating it for mass deployment.
Perform the following steps:
Sign in to the Microsoft Intune admin center at https://intune.microsoft.com.
Go to Devices > Scripts:
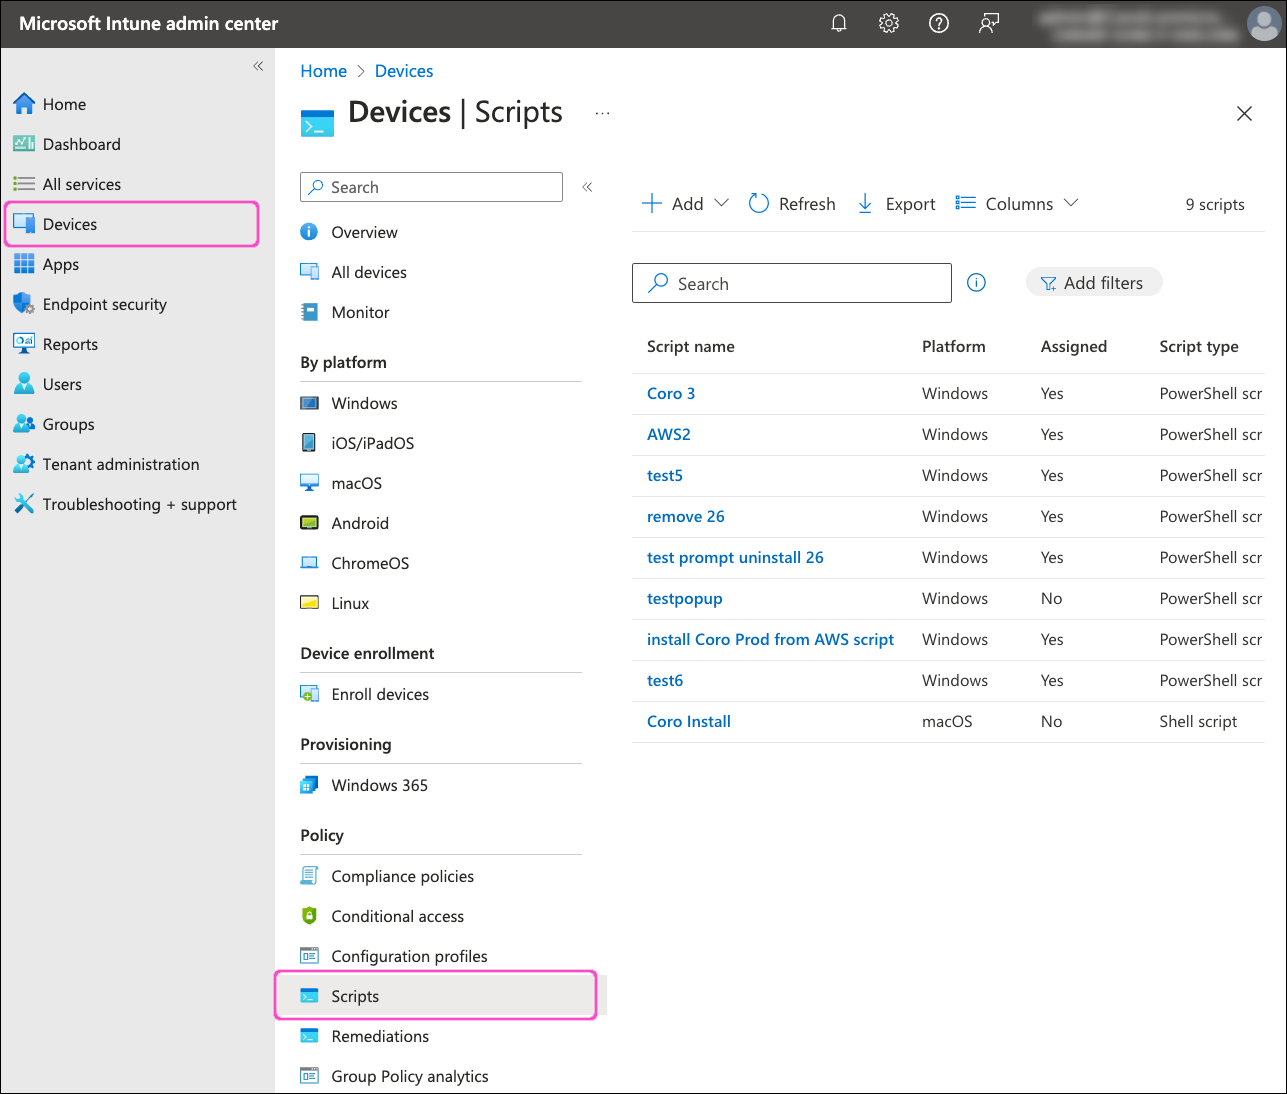
Select + Add > macOS:
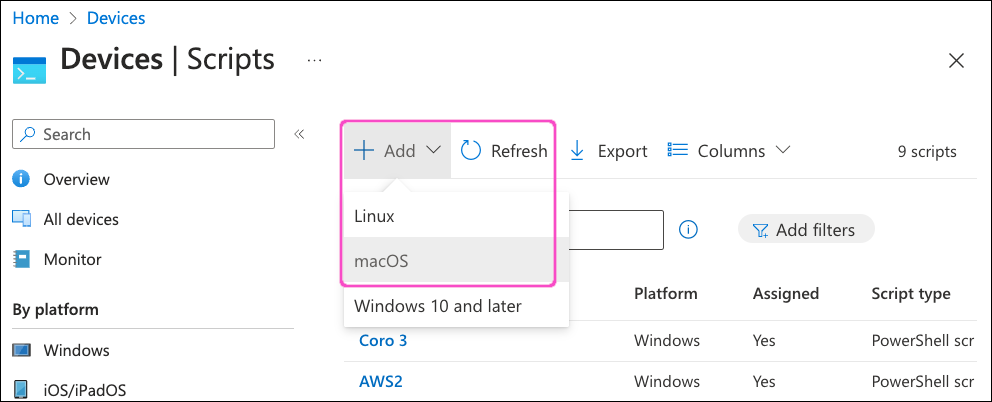
Intune displays the Add script dialog, on the Basics step:
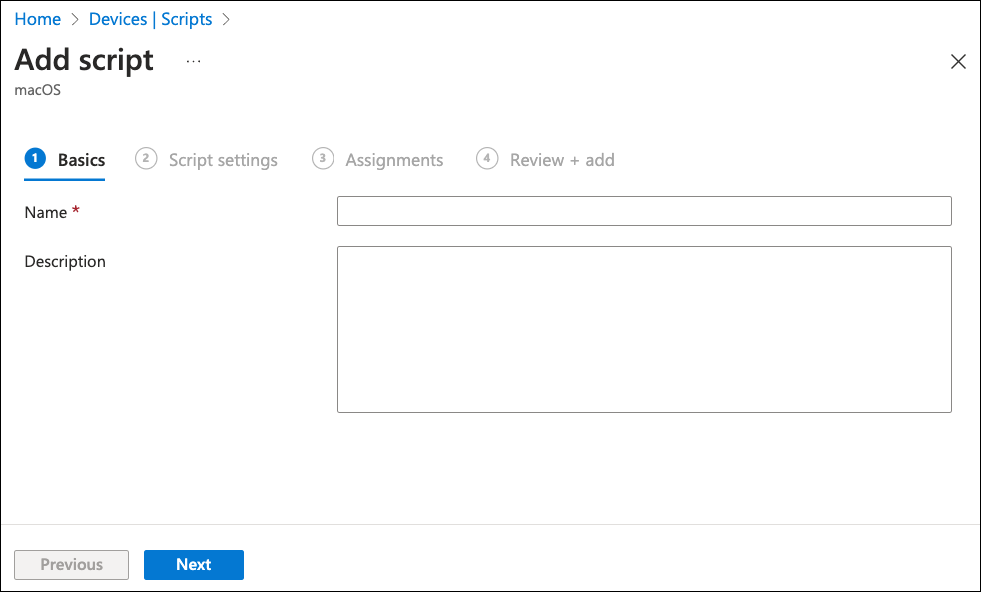
Enter the following details for the new script:
- Name: Enter a name. For example, "Coro Agent macOS deployment".
- Description: (Optional) Enter a short description.
Select Next to continue to the Script settings step.
Select Select a file:
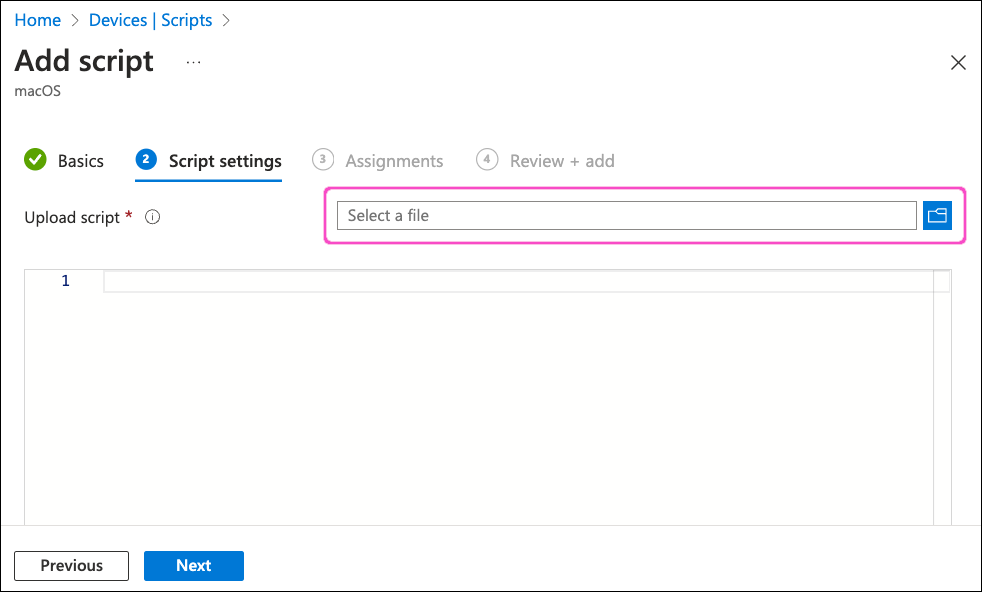
Browse to and select your prepared script (see Preparing a shell script for deploying the Coro Agent).
Intune displays the script contents in the read-only editor pane:
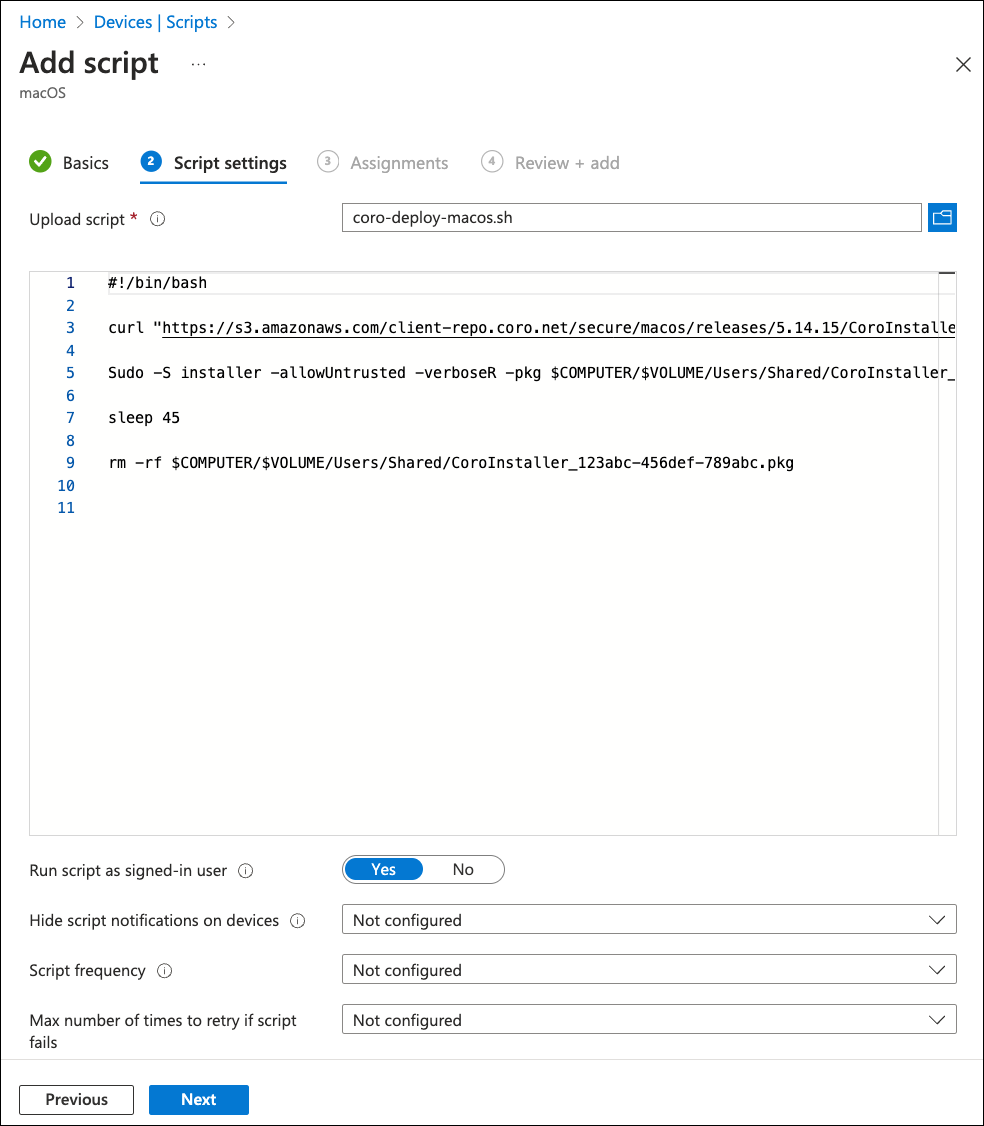
Configure the following settings:
Setting Value Run script as signed-in user No Hide script notifications on devices Yes Script frequency Every 15 minutes Max number of times to retry if script fails 2 times Script frequency and Max number of times to retry if script fails are optional settings. The values provided here are suggested by Coro, but should be adjusted to meet your organization's needs.
Select Next to continue to the Assignments step:
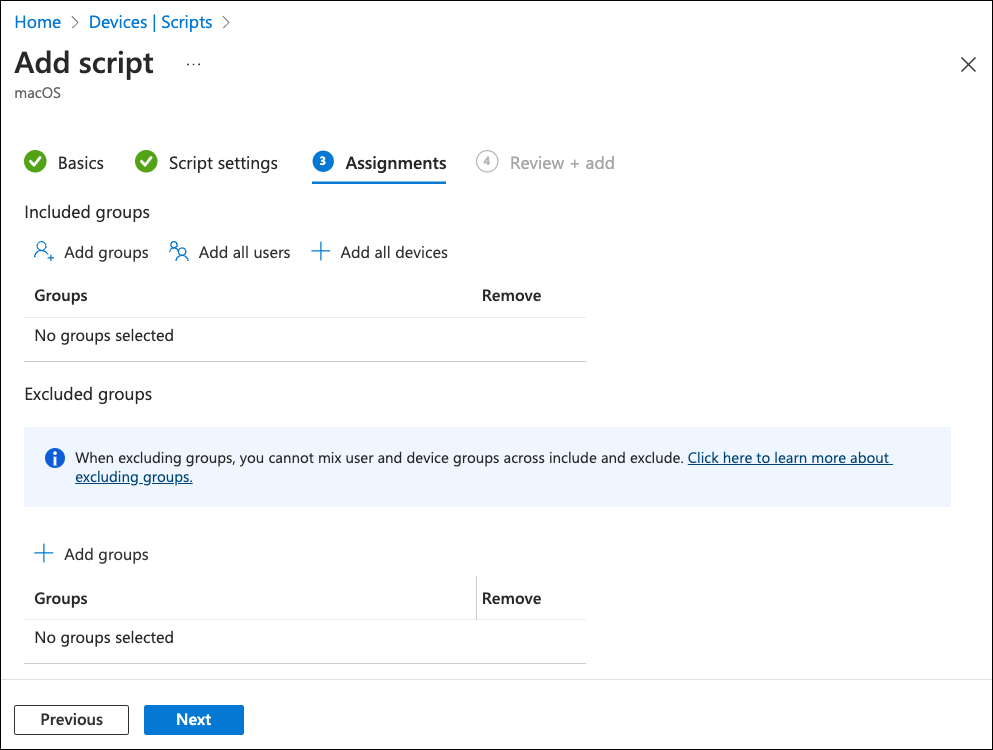
Use the available options to select your required macOS devices.
Select Next to continue to the Review + add step.
Review your settings, then select Add:
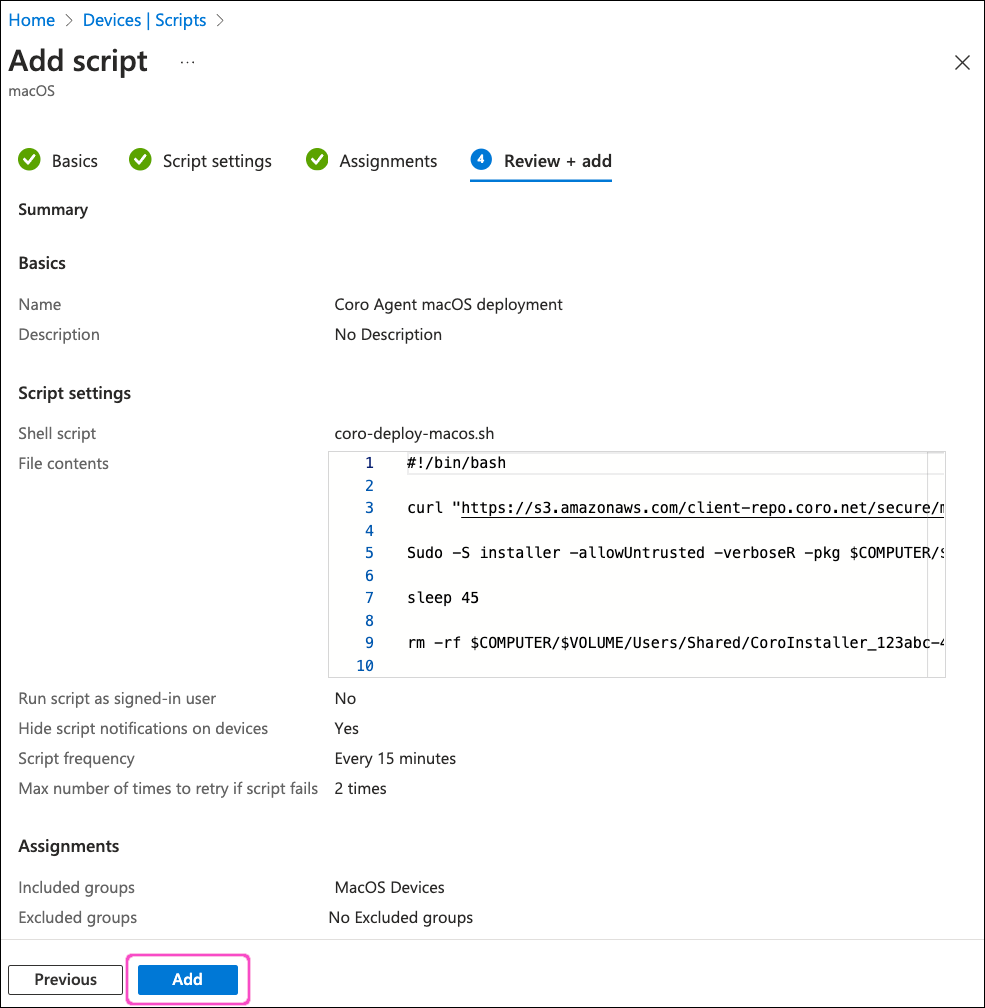
Intune adds the new deployment script. Your configuration is complete.