Using NinjaOne to check your managed endpoint devices for Coro Agent
This guide describes how to configure NinjaOne Remote Monitoring and Management (RMM) to check your managed endpoint devices for the presence of the Coro Agent. The automation configured through this process can test devices and return details of:
- Whether the Coro Agent is installed on a device
- Whether the Coro Agent is running
- Whether the Coro Agent is up-to-date, and the last update time
Prerequisites
Before you begin this guide, make sure you have:
- An active Coro subscription
- Devices running Coro Agent version 2.5.60.1 (3.1) or later
-
Coro's NinjaOne RMM PowerShell script, copied to your clipboard or saved to a file on your local workstation:
Expand for script contents
#Setting the environment $env:NINJARMMCLI = "C:\ProgramData\NinjaRMMAgent\ninjarmm-cli.exe" #Setting variables $softwareName = "*Coro" $uninstallPath32 = "HKLM:\Software\Wow6432Node\Microsoft\Windows\CurrentVersion\Uninstall\*" $registryResult32 = Get-ItemProperty -Path $uninstallPath32 | Where-Object { $_.DisplayName -like $softwareName } $uninstallPath64 = "HKLM:\Software\Microsoft\Windows\CurrentVersion\Uninstall\*" $registryResult64 = Get-ItemProperty -Path $uninstallPath64 | Where-Object { $_.DisplayName -like $softwareName } $valueReg64 = $registryResult64.UninstallString $match = [regex]::Match($valueReg64, '\{[^}]+\}') if ($match.Success) { $uninstallStringReg64 = $match.Value } else { } try { $packageResult = Get-Package | Where-Object { $_.Name -like $softwareName } } catch { } try { $wmiResult = Get-WmiObject -Class Win32_Product | Where-Object { $_.Name -like $softwareName } if ($wmiResult -ne $null) { $wmiIdentifyingNumber = $wmiResult.IdentifyingNumber $wmiValue = $true } else { } } catch { } #Check if Coro is installed function Check-Installed { $installed = $false if ($registryResult32 -or $registryResult64 -or $packageResult -or $wmiResult) { $installed = $true & $env:NINJARMMCLI set coroInstalled 1 } elseif (Test-Path "C:\Program Files\Coro Cyber Security Ltd\Coro\user_working_dir\Coro.exe") { $installed = $true & $env:NINJARMMCLI set coroInstalled 1 } else { & $env:NINJARMMCLI set coroInstalled 0 $installed = $false } return $installed } $installed = Check-Installed #Check if Coro is running if ($installed -eq "true") { $logFile = "C:\ProgramData\CoroAgent1SRV\p\status\antivirus.json" $json = Get-Content $logFile if($json -match '"running":(true|false)') { $runningStatus = $Matches[1] if($runningStatus -eq "true") { & $env:NINJARMMCLI set coroRunning 1 } else { & $env:NINJARMMCLI set coroRunning 0 } } } else { & $env:NINJARMMCLI set coroRunning 0 } #Check update status if ($installed -eq "true") { $logFileNew = "C:\ProgramData\CoroAgent1SRV\p\status\antivirus.json" $fileContent = Get-Content $logFileNew if($fileContent -match '"upToDate":(true|false)') { $runningStatusNew = $Matches[1] if($runningStatusNew -eq "true") { & $env:NINJARMMCLI set coroUpToDate 1 } else { & $env:NINJARMMCLI set coroUpToDate 0 } } } else { & $env:NINJARMMCLI set coroUpToDate 0 } #Check last update time $filePath = "C:\ProgramData\CoroAgent1SRV\p\status\malware_db_update_time.log" if (($installed -eq "true") -and (Test-Path $filePath)) { $timestamp = Get-Content $filePath $date = [DateTimeOffset]::FromUnixTimeSeconds($timestamp) $formattedDate = $date.ToString("dd/MM/yyyy") & $env:NINJARMMCLI set lastUpdateTime $formattedDate } elseif ($installed -ne "true") { & $env:NINJARMMCLI set lastUpdateTime N/A } else { & $env:NINJARMMCLI set lastUpdateTime Will be shown once virus definition files update } #Check Coro version number if ($installed -eq "true") { $registryPath = "HKLM:\SOFTWARE\Coro Cyber Security Ltd\Coro" $valueName = "Version" $value = Get-ItemProperty -Path $registryPath -Name $valueName | Select-Object -ExpandProperty $valueName & $env:NINJARMMCLI set coroVersionNumber $value } else { & $env:NINJARMMCLI set coroVersionNumber N/A } - An active NinjaOne RMM subscription and access to the console
- Your NinjaOne environment is populated with enrolled Windows-based devices
Setting up an automation in NinjaOne
Coro provides a PowerShell script through which NinjaOne can interrogate devices for the presence of the Coro Agent. This script references and populates variables matching the names of Global custom fields that you must add through the NinjaOne console.
The procedure described in this section covers adding Global Custom Fields and then adding the automation within which the script resides.
Adding Global Custom Fields
The following table lists fields required by the Coro Agent PowerShell script. For each entry, add a matching Global Custom Field using the procedure defined below.
Important
As you add these fields, it is essential to make sure the label and name match precisely those specified. Make sure you also add the correct field type as shown.
| Label | Name | Type | Purpose |
|---|---|---|---|
| Coro installed | coroInstalled | Checkbox | Identifies if the Coro Agent is installed on a device. |
| Coro running | coroRunning | Checkbox | Identifies if the Coro Agent is running on a device. |
| Coro up to date | coroUpToDate | Checkbox | Identifies if the Coro Agent is up to date. |
| Coro version number | coroVersionNumber | Text | Displays the installed Coro Agent version number. |
| Last update time | lastUpdateTime | Text | Declares when the Coro Agent was last updated. |
Perform the following steps:
- Sign in to the NinjaOne console .
-
From the navigation pane, select
Administration
:

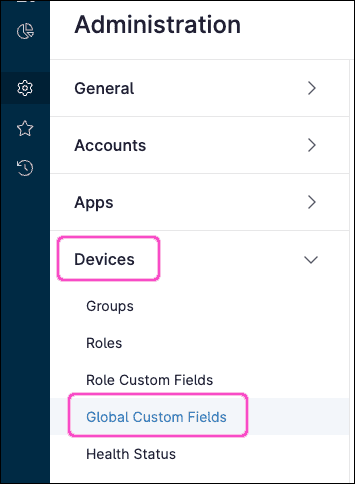
-
Select
Devices > Global Custom Fields
:
-
Select
Add > Field
:

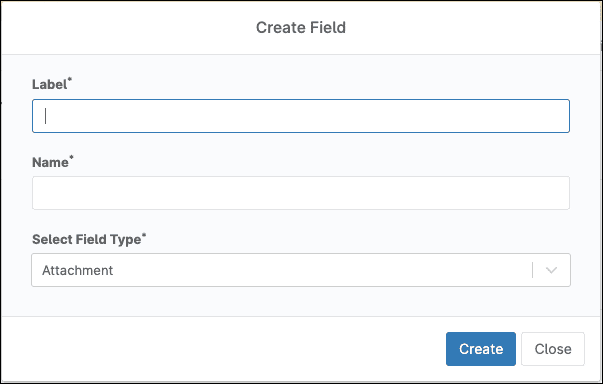
NinjaOne displays the Create Field dialog:
-
Enter the
Label
for your required field. For example,
Coro installed
.
NinjaOne auto-populates the Name field. For example, coroInstalled appears automatically.
-
For
Select Field Type
, choose the corresponding type from the dropdown. For example, select
Checkbox
.
Your Create Field dialog should match the following example:

-
Select
Create
.
NinjaOne displays a settings dialog:

-
Enter the following details:
- Technician : Select Editable .
- Automations : Select Read/Write .
- API : Select Read/Write .
- Definition Scope : Select Device , Location , and Organization .
- Label : Pre-populated from the previous step.
- Description : (Optional) Enter a short description.
- Tooltip Text : (Optional) Enter a tooltip for the field.
- Footer Text : (Optional) Enter help text to appear in the footer.
- Required : Leave this option disabled.
- Select Save to save your changes.
- Repeat these steps to add each of the remaining fields.
note
Global custom fields apply automatically to all devices in NinjaOne. To apply fields only to certain devices, create new fields instead in Role custom fields and assign them to the required individual devices.
Adding the automation
Follow this procedure to add a NinjaOne automation which, when run against one or more of your enrolled endpoint devices, returns the Coro Agent installation status in the global custom fields for the device.
To add the automation:
- Sign in to the NinjaOne console .
-
From the navigation pane, select
Administration
:
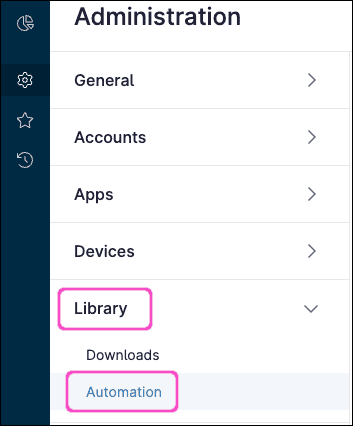
-
Select
Library > Automation
:
-
Select
Add > New script
:

NinjaOne displays the Create Script dialog:

- Paste the Coro PowerShell script provided earlier into the left editor pane of the Create Script dialog. Alternatively, drag and drop the saved script file into the editor pane to automatically load and populate the script contents.
-
Enter the following details in the right pane:
- Name : Enter a name for this automation. For example, Detect_Coro .
- Description : (Optional) Enter a suitable short description, if required. This automation is designed to run a Windows PowerShell script to identify if the Coro Agent is present on a device. The results are placed in the global custom fields defined earlier.
- Categories : Select one or more categories that meet your organization's requirements.
- Language : Select PowerShell .
- Operating System : Select Windows .
- Architecture : Select 64-bit .
- Script Variables : Leave as default.
- Parameters : Leave as default.
- Select Save to save your changes.
This completes the configuration process.
Running the automation against your endpoint devices
note
Make sure you have one or more Windows-based endpoint devices enrolled in NinjaOne before running the automation.
To check a device, perform the following steps:
- Sign in to the NinjaOne console .
-
From the navigation pane, select
Devices
:

-
From the
Devices
page, select the checkbox adjacent to each device against which you want to run the automation script (or select
all devices
through the checkbox at the top of the list):

-
Select
Run > Run Automation > Script
:

-
From the
Automation Library
dialog, select your previously created
Detect_Coro
automation:
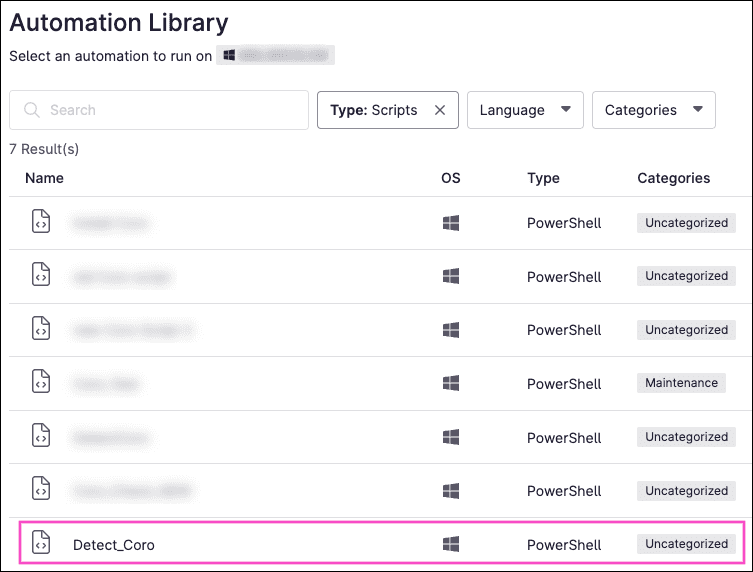
NinjaOne displays a dialog enabling you to confirm how to run the script:
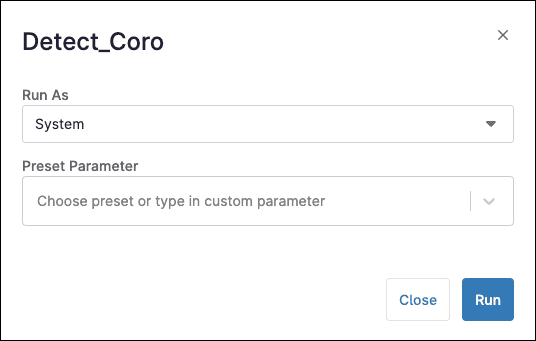
- Leave all options as their default values, then select Run to start the automation. Select Yes to confirm.
-
To check the progress of the automation, select a device, then select
Activities > All
:

-
In the activities log, locate the applicable
Start Requested
entry:

- When the script has completed, an activity entry is added marked as Completed , with a SUCCESS result indicator.
-
After a short wait, the results of the automation are presented in the
Custom Fields
tab:
