To deploy the Coro Agent to your macOS endpoints via JAMF Pro, complete the following processes:
- Meet the listed prerequisites
- Create and deploy a configuration profile
- Create a deployment package
- Create a deployment policy
The following prerequisites are required:
Functional JAMF Pro environment
You must have a working JAMF Pro environment configured for your devices that allows package and configuration profile deployment.
Coro Agent .pkg file
To download the Coro Agent .pkg file from the Coro console, perform the following actions:
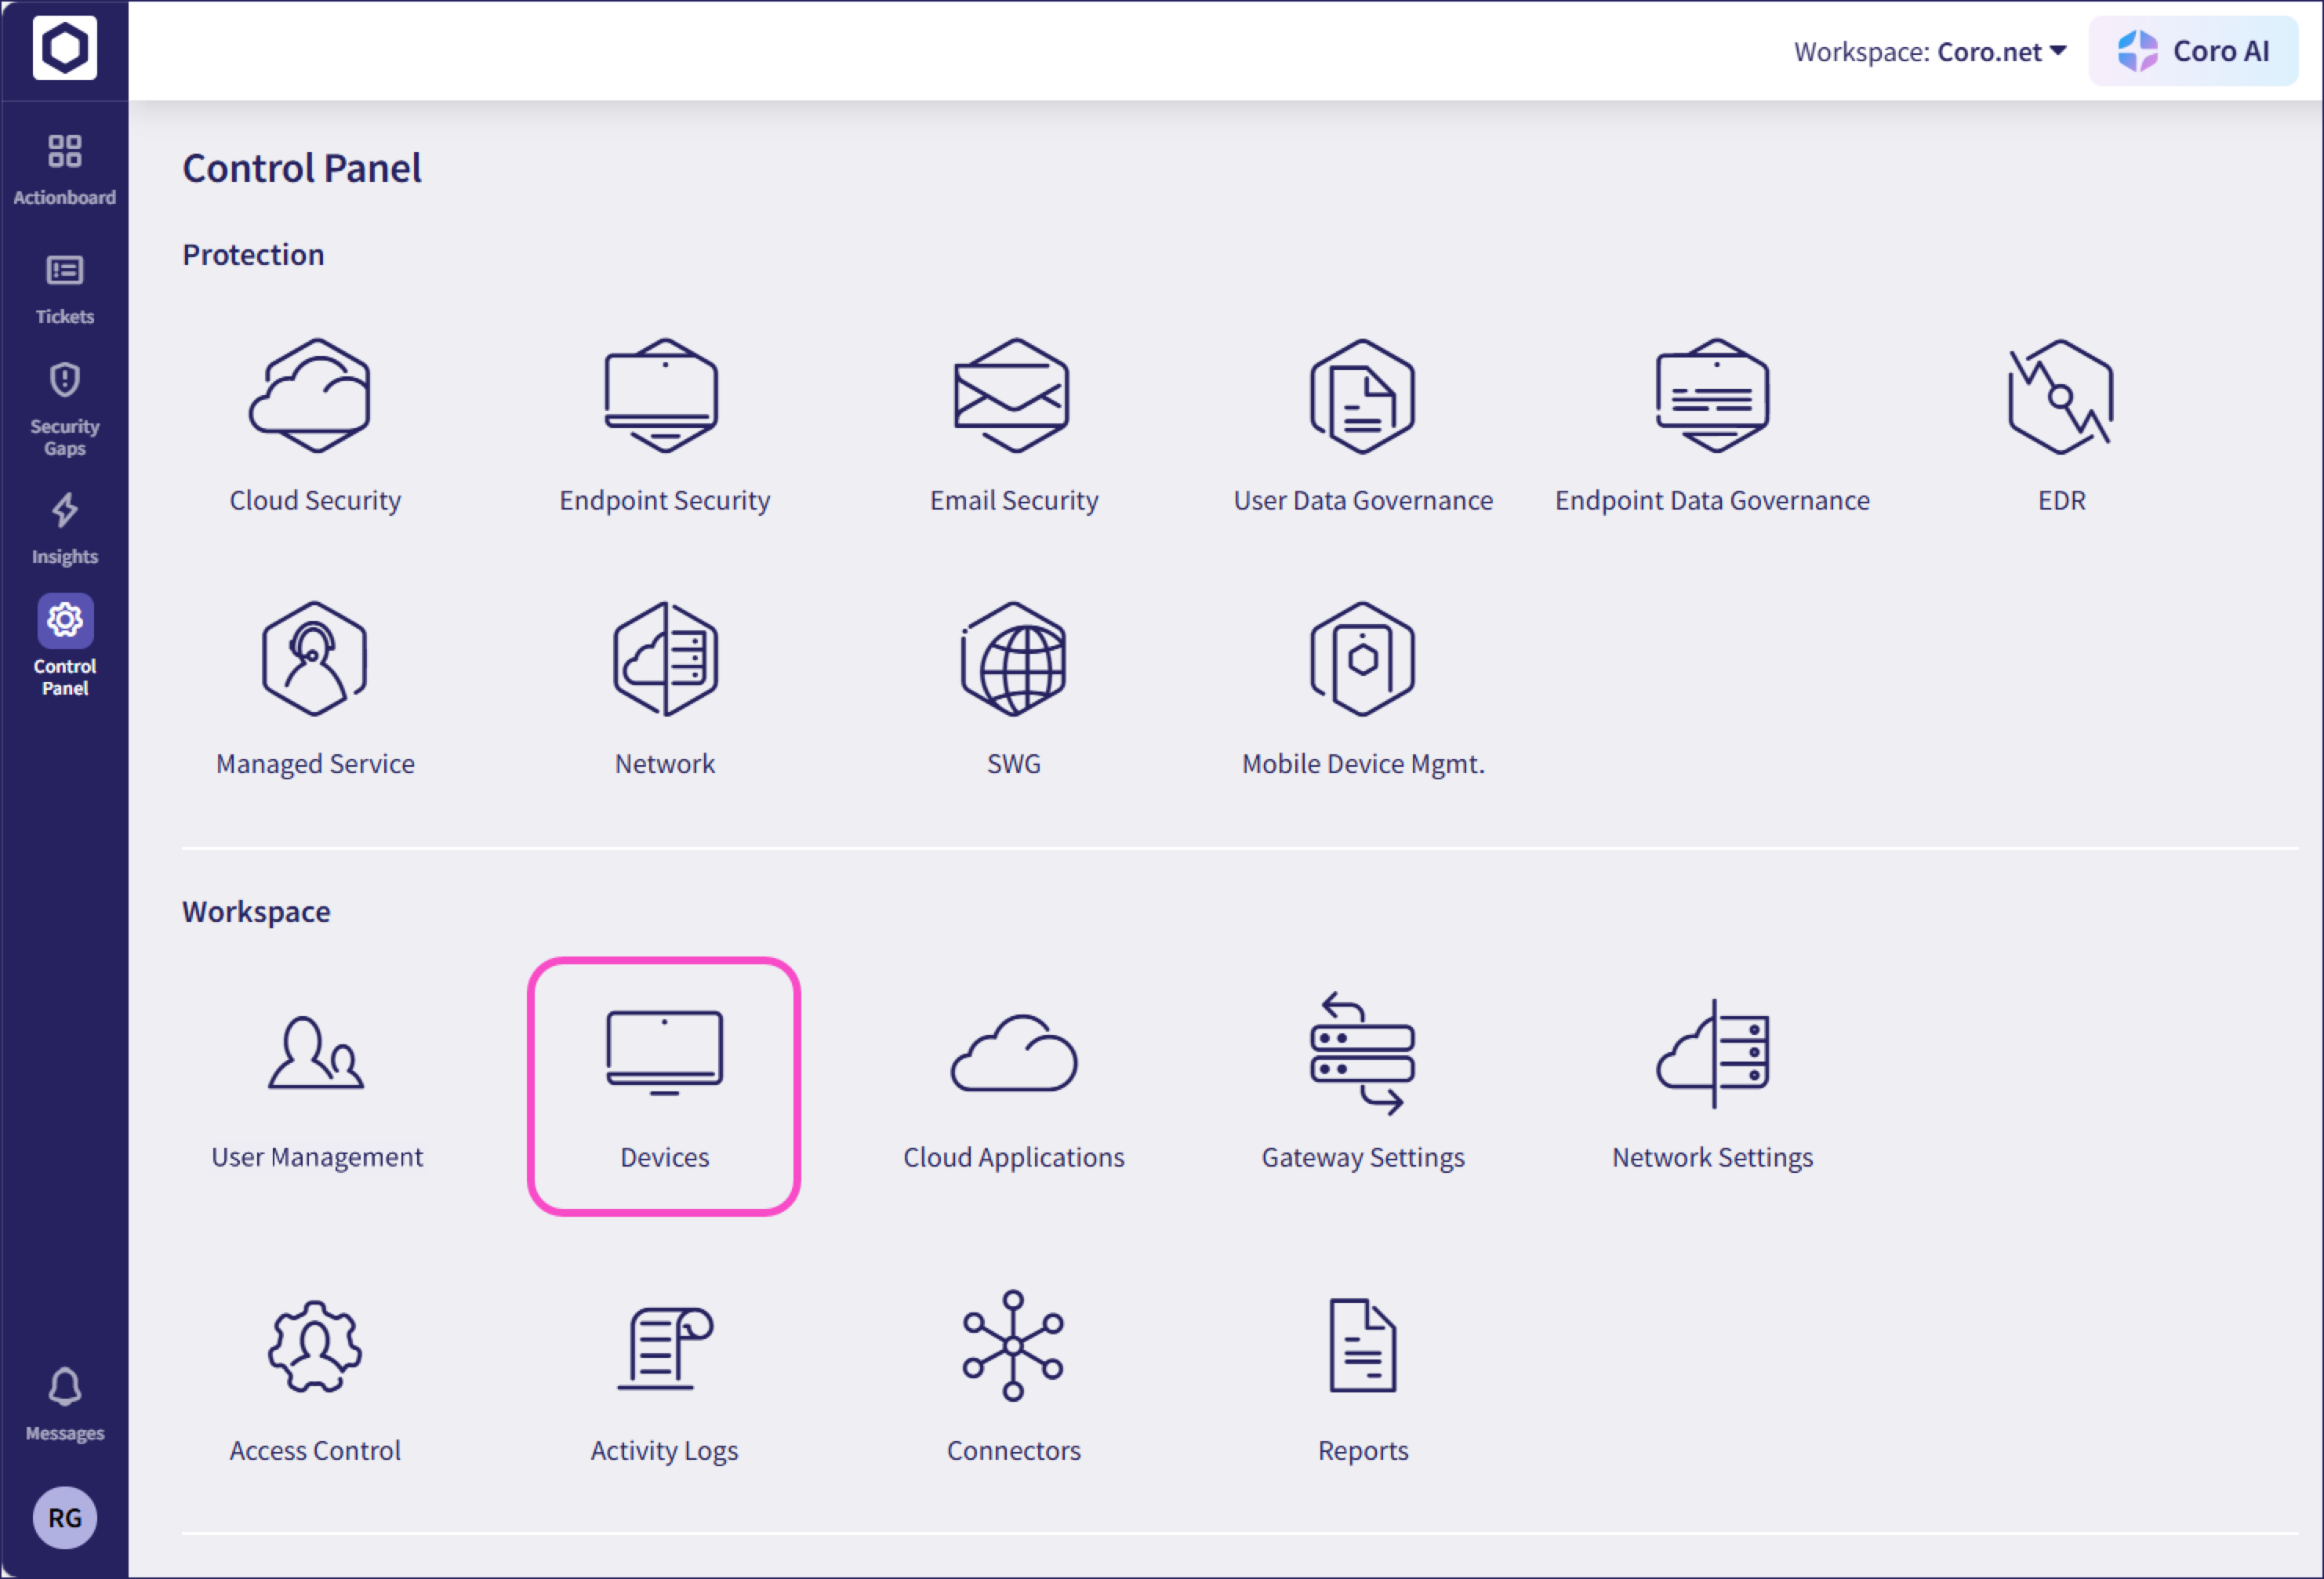
From the sidebar, select Control Panel.
Select Devices:
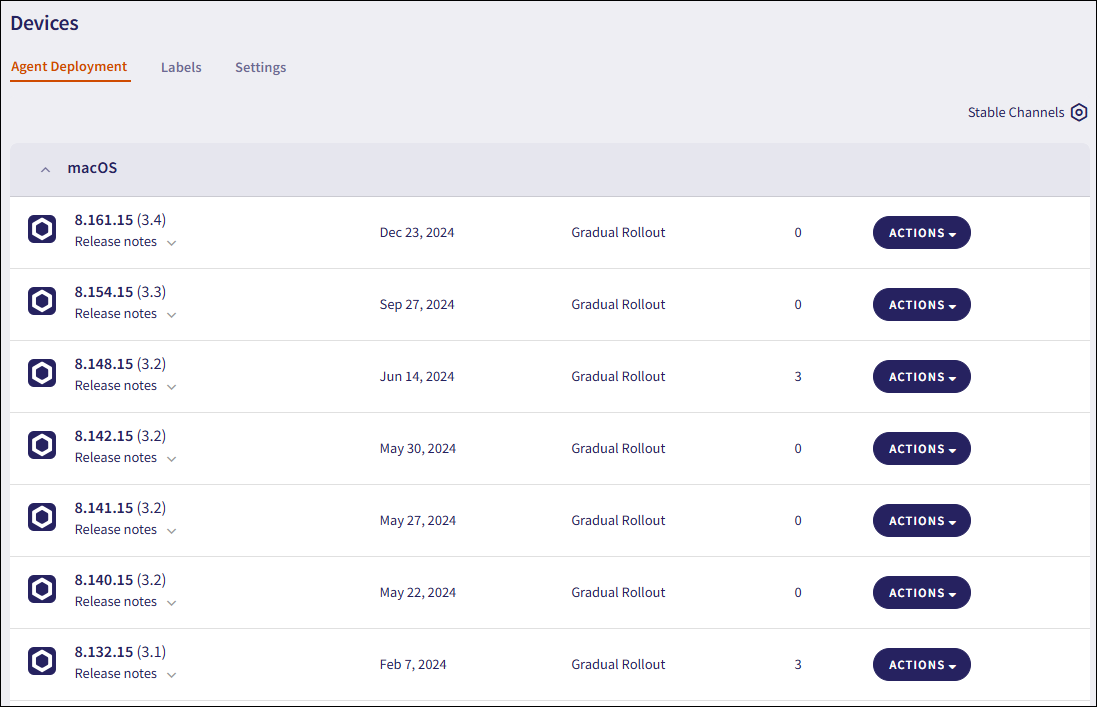
Select the Agent Deployment tab:
Select Actions > Download adjacent to the desired macOS Agent version:
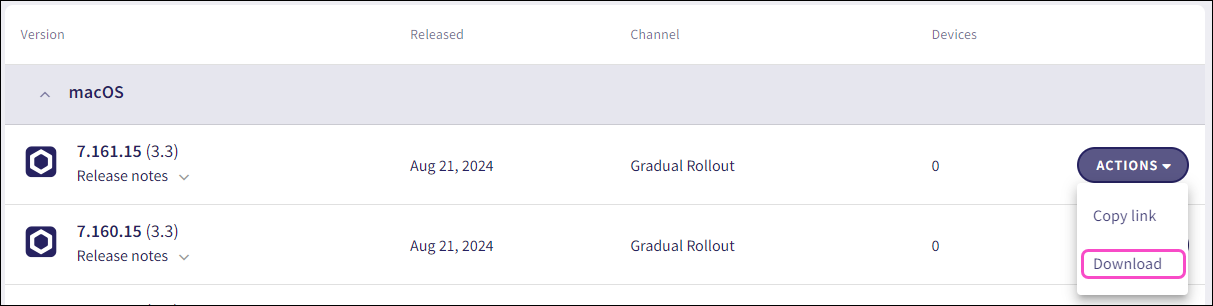
Coro downloads the Agent installer to your local device.
To create a new Privacy Preferences Policy Control (PPPC) profile, perform the following steps:
From JAMF Pro, go to Computers > Configuration Profiles.
Select + New to create a new profile.
Select Save.
JAMF Pro saves the profile and distributes it to the selected devices.
From the Privacy Preferences Policy Control section, select + to add a new App Access entry. Use the following field values:
Identifier: net.coro.endsec.Coro
Identifier Type: Bundle ID
Code Requirement:
anchor apple generic and identifier "net.coro.endsec.Coro" and (certificate leaf[field.1.2.840.113635.100.6.1.9] /* exists */ or certificate 1[field.1.2.840.113635.100.6.2.6] /* exists */ and certificate leaf[field.1.2.840.113635.100.6.1.13] /* exists */ and certificate leaf[subject.OU] = E3P52EVK39)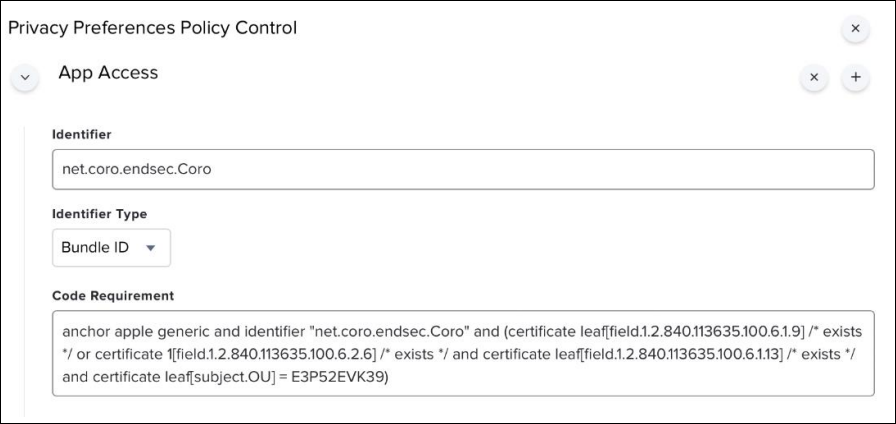
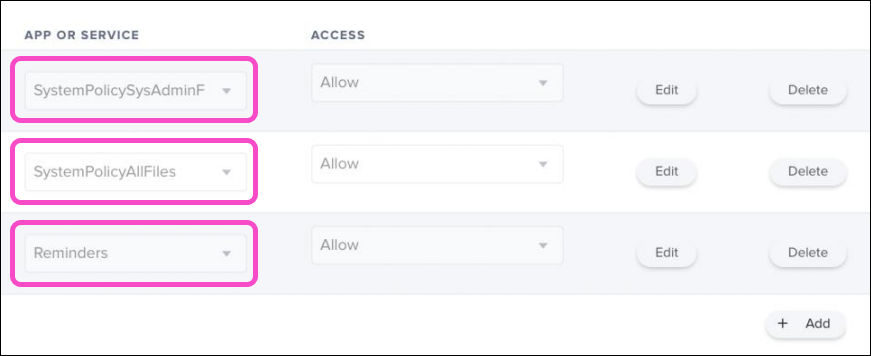
From the App or Service section, select + Add to add three separate entries for:
- SystemPolicySysAdminFiles
- SystemPolicyAllFiles
- Reminders
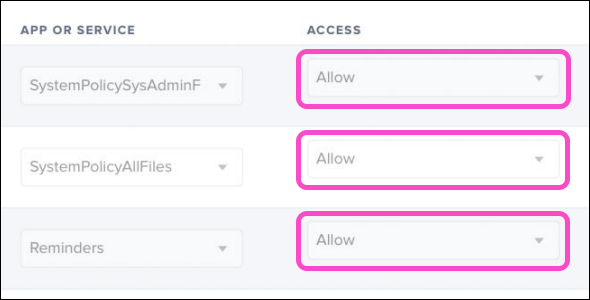
For each entry, set Access to Allow:
Add a second App Access policy by repeating steps 1 - 3 for the following settings:
Identifier: net.coro.endsec.CoroService
Identifier Type: Bundle ID
Code Requirement:
anchor apple generic and identifier "net.coro.endsec.CoroService" and (certificate leaf[field.1.2.840.113635.100.6.1.9] /* exists */ or certificate 1[field.1.2.840.113635.100.6.2.6] /* exists */ and certificate leaf[field.1.2.840.113635.100.6.1.13] /* exists */ and certificate leaf[subject.OU] = E3P52EVK39)
Add a third App Access policy by repeating steps 1 - 3 for the following settings:
Identifier: net.coro.endsec.TrafficService
Identifier Type: BundleID
Code Requirement:
anchor apple generic and identifier "net.coro.endsec.TrafficService" and (certificate leaf[field.1.2.840.113635.100.6.1.9] /* exists */ or certificate 1[field.1.2.840.113635.100.6.2.6] /* exists */ and certificate leaf[field.1.2.840.113635.100.6.1.13] /* exists */ and certificate leaf[subject.OU] = E3P52EVK39)
Add a fourth App Access policy by repeating steps 1 - 3 for the following settings:
Identifier: net.coro.endsec.CoroGuard
Identifier Type: BundleID
Code Requirement:
anchor apple generic and identifier "net.coro.endsec.CoroGuard" and (certificate leaf[field.1.2.840.113635.100.6.1.9] /* exists */ or certificate 1[field.1.2.840.113635.100.6.2.6] /* exists */ and certificate leaf[field.1.2.840.113635.100.6.1.13] /* exists */ and certificate leaf[subject.OU] = E3P52EVK39)
From the System Extension section, select + Add.
JAMF Pro displays the System Extension dialog.
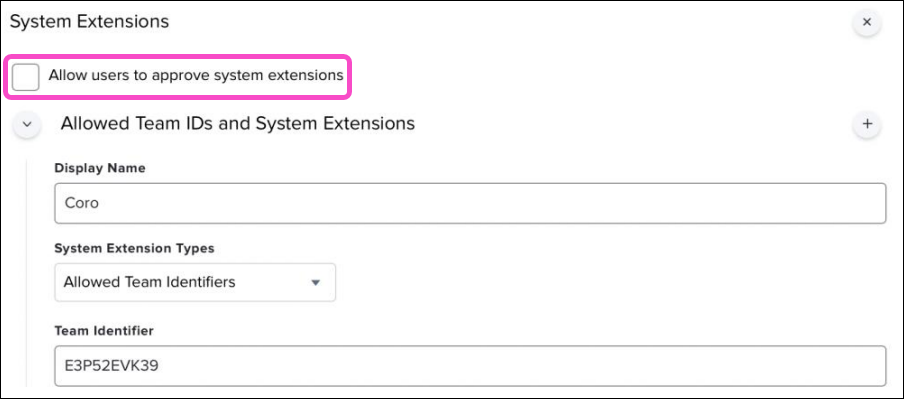
Enable or disable Allow Users to approve system extensions as required.
ImportantThis setting has no impact on deployment of the Coro Agent; however, this is a global setting in JAMF Pro and may affect the deployment or function of other applications.
Enable this setting to allow users to approve any system extensions for any application.
Disable this setting to restrict users from manually installing or approving any system extensions. Only extensions specifically added to this policy through the Allowed Team ID and System Extensions tab are installed and auto-approved (as shown in the next step).
In the Allowed Team ID and System Extensions tab, add the following system extension values for the Coro Agent:
Display Name: Coro
System Extension Type: Allowed Team Identifiers
Team Identifier: E3P52EVK39
To choose the devices or groups for installing the Coro Agent, select Scope:

To create a deployment package in JAMF Pro based on the Coro Agent .pkg file (see Prerequisites):
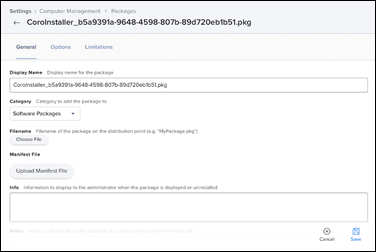
Go to Settings (gear icon) > Computer Management > Packages.
Select + New to configure the upload settings for a new .pkg.
Enter a Display Name and Category.
From Filename, select Choose File. Then select the Agent .pkg file.
The Agent .pkg file is uploaded. All other information is automatically populated:
If you already have a software distribution policy in place, add the Agent .pkg file you downloaded from the Coro console (see Prerequisites). Otherwise, create a new policy to deploy your .pkg file.
To create a new software distribution policy:
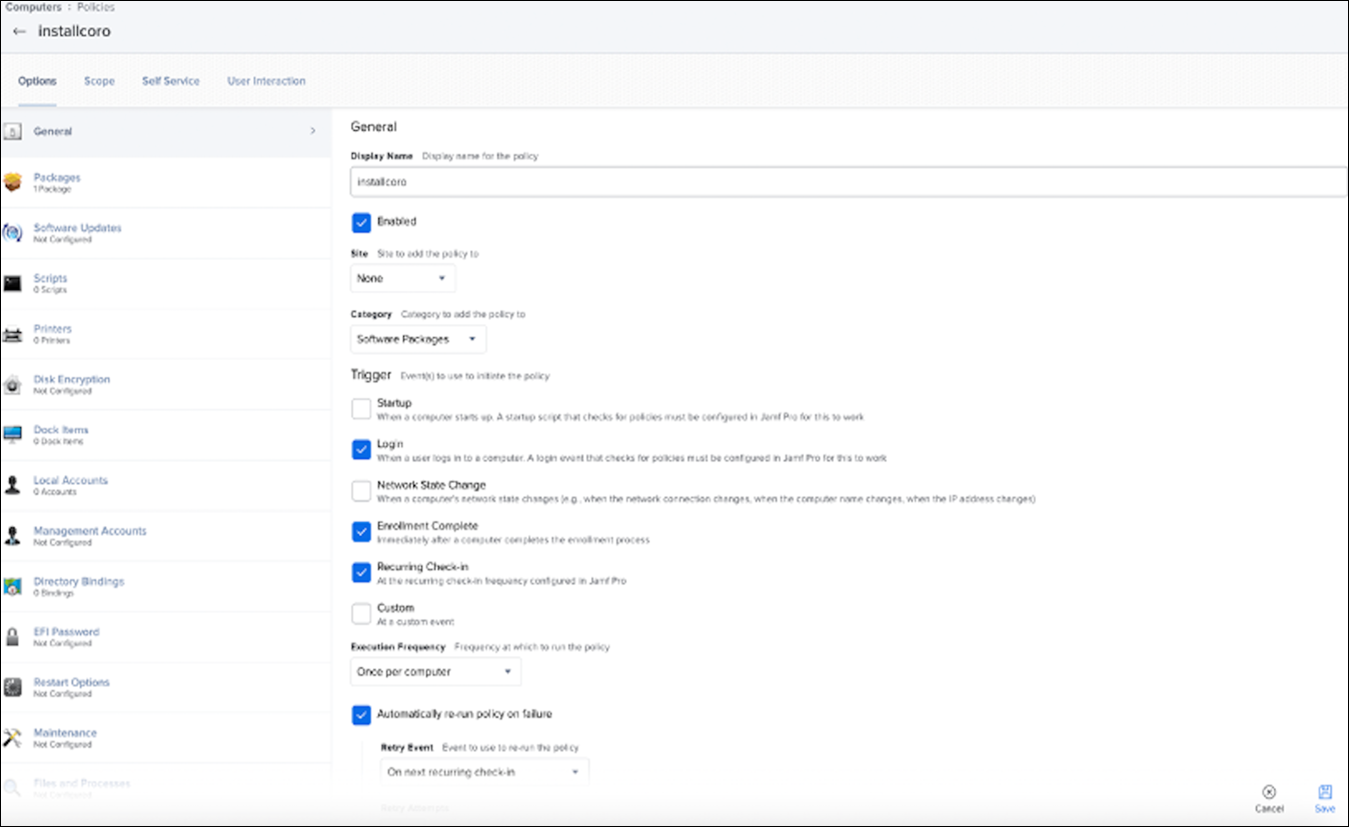
From JAMF Pro, go to Computers > Policies.
Select + New. JAMF Pro displays the Options tab.
Provide a name for the new policy, for example, InstallCoro.
Enable the following Triggers:
- Login
- Enrollment Complete
- Recurring Check-in
Set Execution Frequency to Once per Computer.
Enable Automatically re-run policy on Failure. Then, set Retry Event to 3 retry attempts:
From the left panel, select Packages > Configure:
Add the Agent .pkg file you downloaded from the Coro console in Downloading the Coro Agent .pkg file.
From the top, select Scope.
Add the devices and groups to which to distribute the Coro Agent.
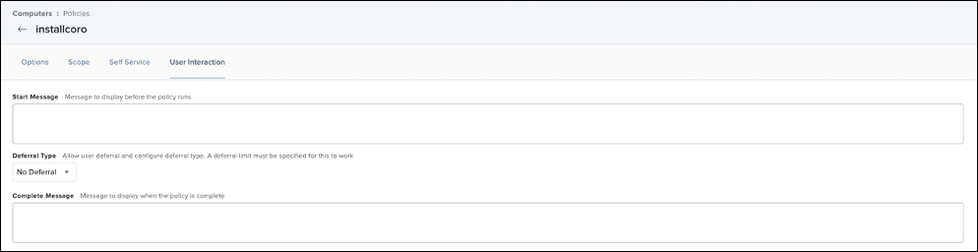
Select the User Interaction tab.
Set Deferral to No Deferral Type.
Set Example Policy to deploy Coro .PKG and force install:
JAMF Pro distributes the .pkg to the devices within the chosen scope, and the previously configured Configuration Profile enables all the necessary extensions and components without requiring an Administrator login.
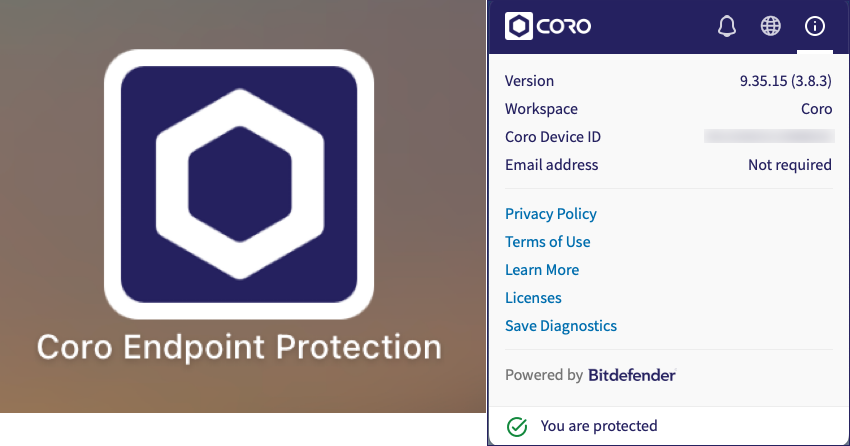
On the macOS device, the Coro Agent appears as an application in both the Launchpad and the system tray:
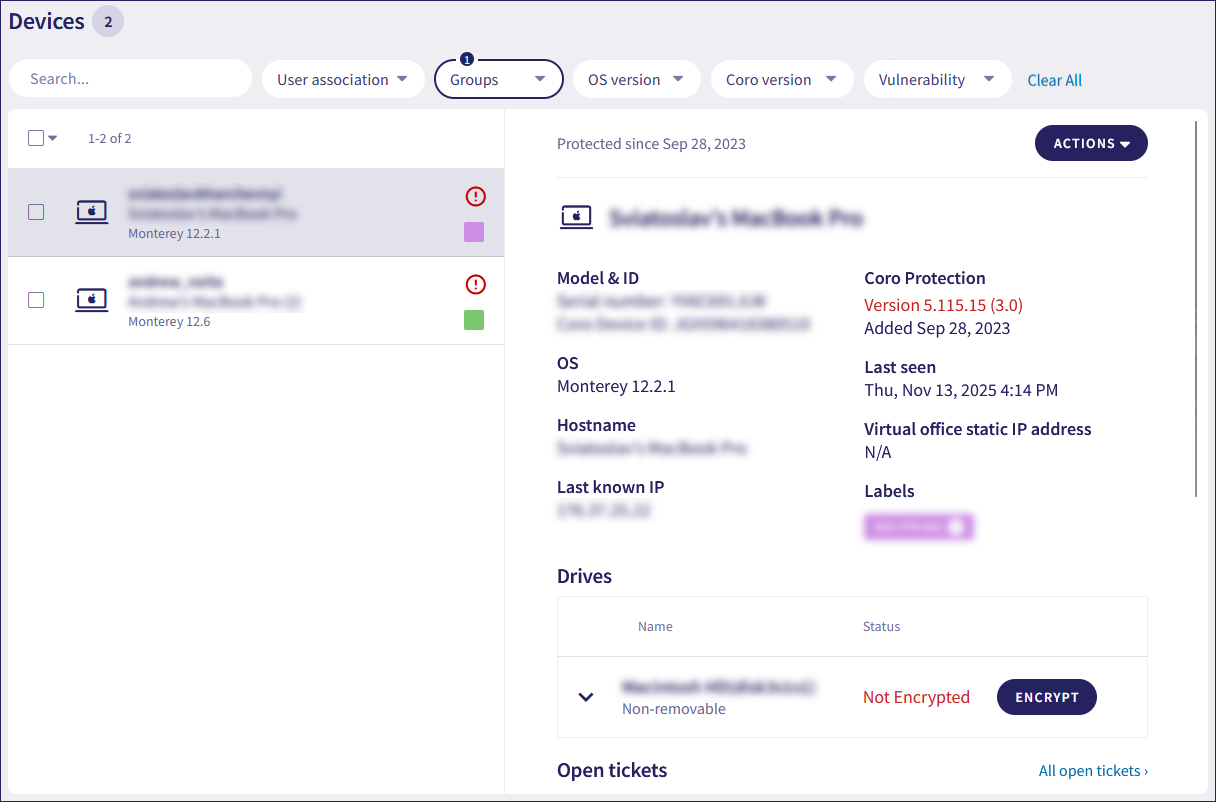
From the Coro console Actionboard, select the Protected Devices panel to view your device: