Site-to-site tunnels
From the Site-to-site tunnels page, admin users can add site-to-site tunnels. Site-to-site tunnels provide secure communication between the virtual office network and other physical and virtual networks of the customer, such as branch level local networks.
Site-to-site tunnels are available on macOS, Windows, iOS, and Android.
To access Site-to-site tunnels:
- Sign in to the Coro console .
-
From the sidebar, select
 to access the
Control Panel
.
to access the
Control Panel
.
-
Select
Network
:

-
Select
Site-to-site tunnels
:

Coro displays the site-to-site tunnels page.
Adding a site-to-site tunnel
To add a new site-to-site tunnel:
-
Select
+ ADD
:

-
In
Site details
, enter the site-to-site tunnel details:
note
Avoid using special characters or spaces in your site details.
- Site name : Create a name for the site-to-site tunnel. Example: Tunnel001.
- Site description : Add a short description of the tunnel. Example: Tunnel between HQ and remote branch A.
- Remote gateway public IP : The public IP address of the remote site’s VPN device. This is the IP address to which your devices connect. Example: 203.123.45.6.
- Preshared key : A shared password (secret) that both sites use to authenticate and secure the tunnel. The password must be at least 20 characters. Example: MySecurePresharedKey012. Select GENERATE KEY to generate a strong pre-shared key.
- Lifetime key : The duration for which the tunnel remains active, in seconds. The maximum duration is 100,000 seconds. Example: 50,000.
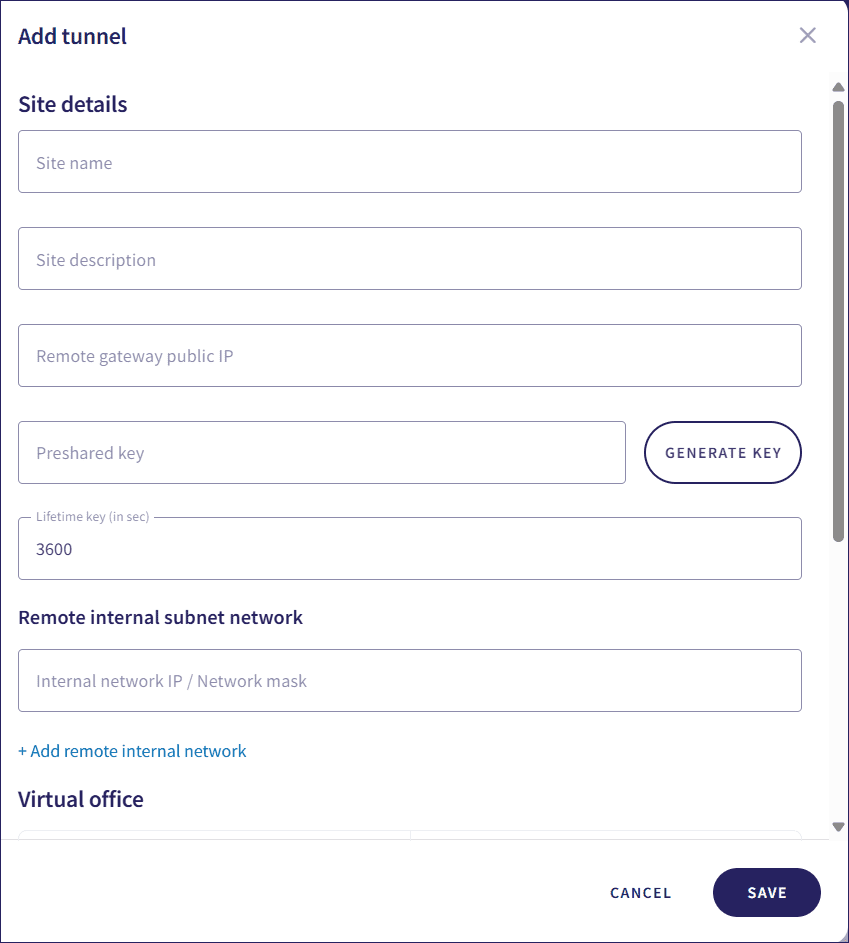
- Enter one or more remote internal subnet networks. These are the private IP address ranges used at the remote site. This defines the network at the other end of the tunnel. Example: 87.234.56.78.
-
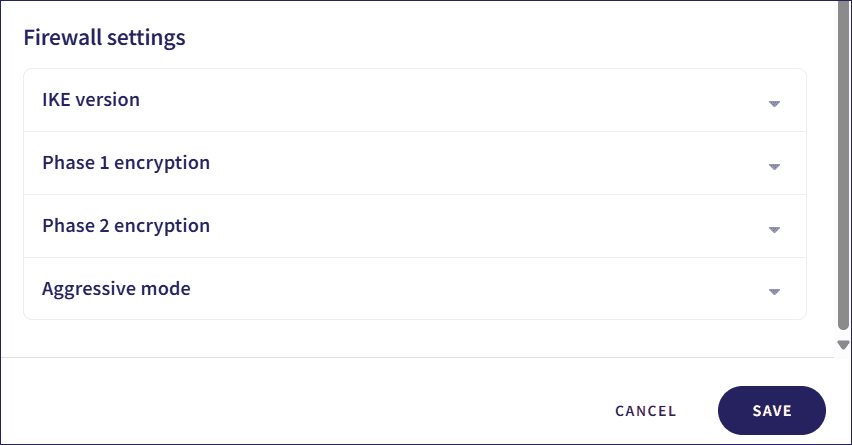
In the
Firewall settings
section, use the dropdown menus to set your firewall parameters:
- IKE (internet key exchange) version : The version of the IKE protocol to use for the VPN connection.
- Phase 1 encryption : The encryption algorithm used for the initial phase of negotiation.
- Phase 2 encryption : The encryption algorithm used for the subsequent phase of secure data transmission.
- Aggressive mode : A mode that simplifies the negotiation process, but may be less secure. Select whether to enable or disable this mode.
note
Coro provides selectable firewall parameters to ensure organizations can best match the requirements of differing hardware needs.
note
Coro displays the virtual office gateway IP address in the add tunnel dialog. Enter these details into the remote or hardware firewall you’re connecting to the virtual office.
-
Select
SAVE
.
The settings page reloads and the new site-to-site tunnel appears in the list of tunnels.
-
Select
Test
from the three-dot menu of the new tunnel to test the site-to-site tunnel:
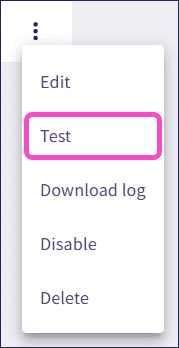
- If the test fails, select Edit to check the tunnel configuration.
Managing site-to-site tunnels
Use the three-dot menu of a tunnel to:
- Edit tunnel configurations.
- Test tunnels to verify they work correctly.
- Download logs to debug problems with tunnels.
- Disable tunnels without losing configuration data.
- Delete tunnels.
