This article is applicable to Managed Service Provider (MSP) customers only.
To add customer workspaces to your active Cloud Backup account, perform the following processes:
- Add the Cloud Backup module to the customer's workspace subscription
- Add the customer workspace to the Cloud Backup module in Coro
- Confirm the cloud app connections in Keepit
Make sure to enable the Cloud Backup module in your channel workspace subscription rules.
Before you can add a customer workspace for backups, add the Cloud Backup module to their subscription. See Editing workspace subscriptions.
To add a customer workspace for cloud backups:
Select Global view from the top of the console:

From the sidebar, select Global Settings > Cloud Backup:
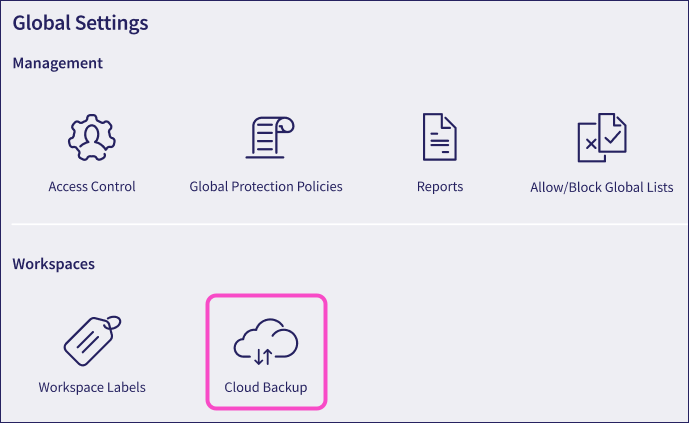
Coro presents the Cloud Backup page:
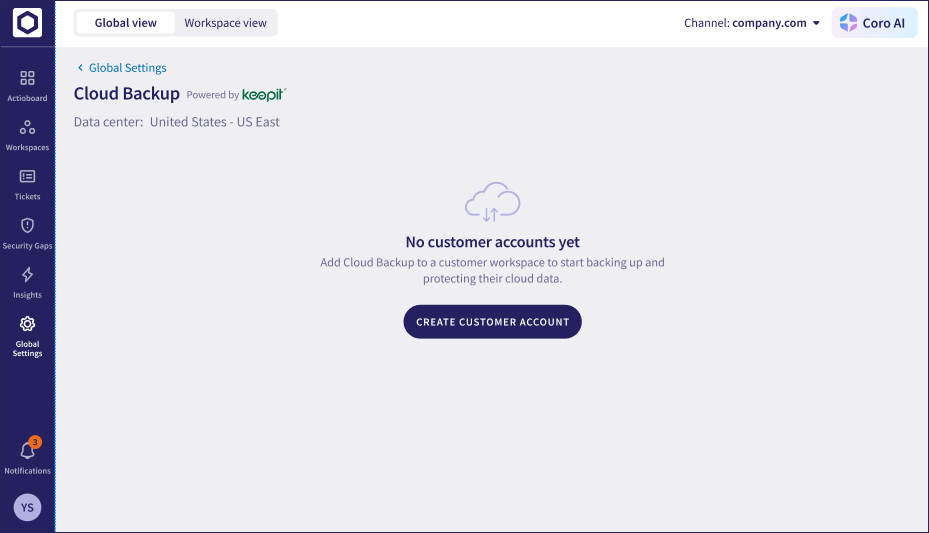
Select CREATE CUSTOMER ACCOUNT.
Coro displays the Create customer account dialog:
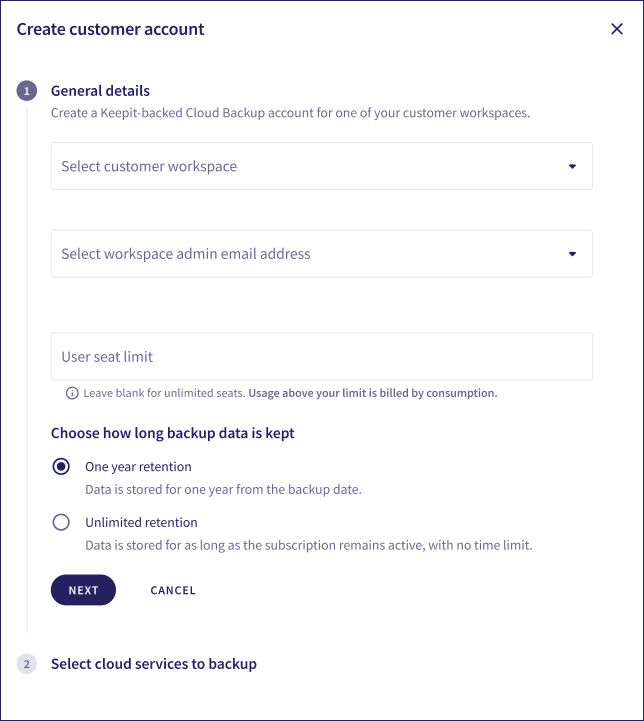
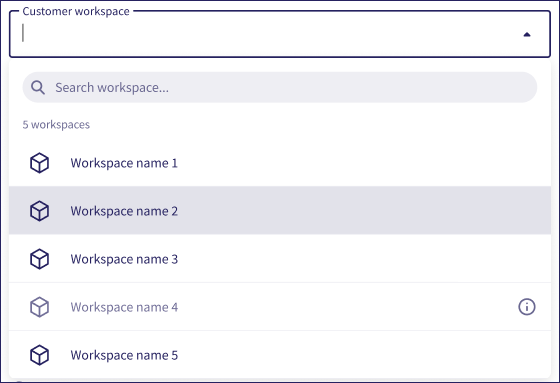
Use the Customer workspace to select a child workspace. Use Search or scroll the list to locate a specific workspace:
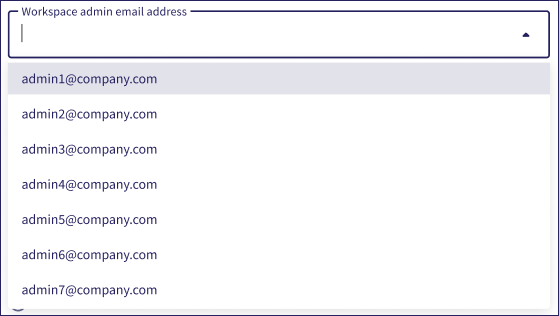
Use the Workspace admin email address dropdown to select the workspace admin user you want to register as the nominated admin for this customer account in the Keepit dashboard:
Enter a User seat limit that represents the maximum number of users this workspace can include in cloud backups.
ImportantCoro does not prevent customers from exceeding this limit, but does provide warnings in the console and via email to MSP admin contacts where this occurs. Above this limit, Coro bills per extra user added.
Select your data rentention period. Choose from:
- One year retention: Data is stored for one year from the backup date.
- Unlimited retention: Data is stored for as long as the subscription remains active, with no time limit.
Contact your Coro sales representative for more details of service costs.
Select Next to continue.
Select one or more of the available cloud apps to include in the backup:
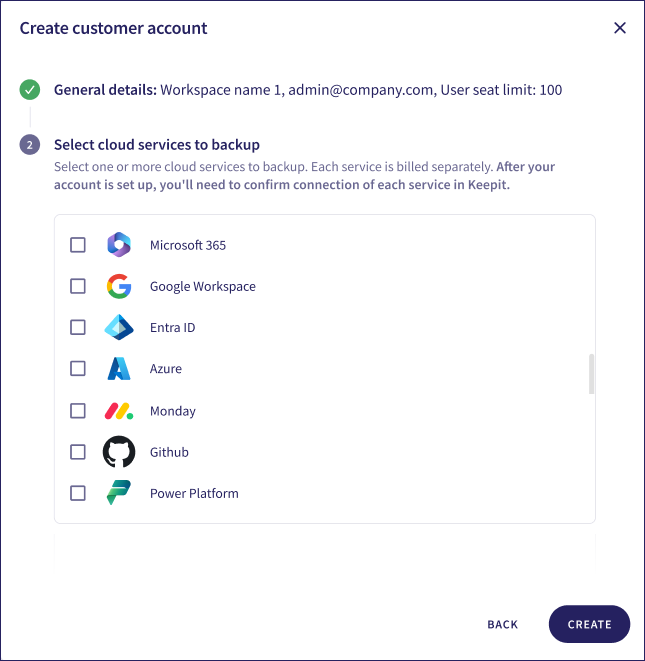
Each service is billed separately. If an individual user has accounts in multiple apps, Coro considers each account as being separate.
ImportantServices are not backed up until they have been confirmed as connected in the Keepit dashboard for the customer workspace.
Select CREATE to add the customer workspace.
Coro returns to the Cloud Backups page, showing the newly added customer workspace:
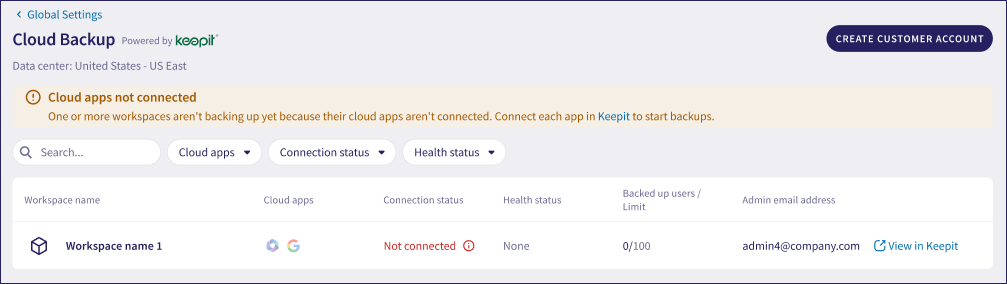
Before backups can start, you must confirm your cloud app connections in the Keepit dashbaord.
To enable Coro to start backing up user data in your cloud apps, confirm the cloud app connection in the Keepit dashboard:
Be aware that the initial backup starts immediately after a cloud app is confirmed as successfully connected.
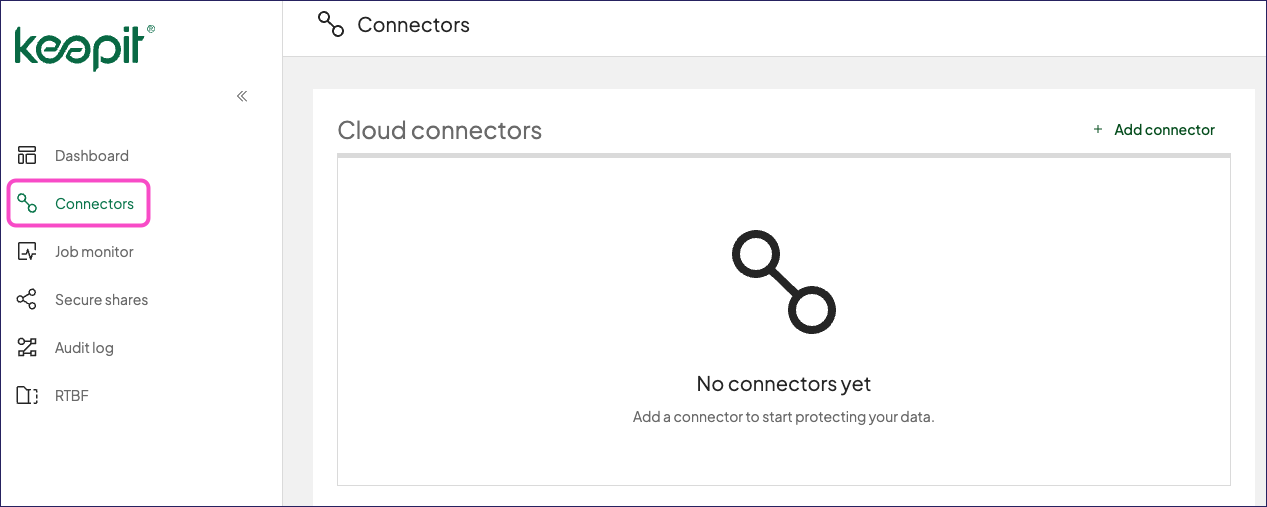
From the left-hand menu, select Connnectors.
Keepit displays the Connectors page where you can configure your cloud app connections:
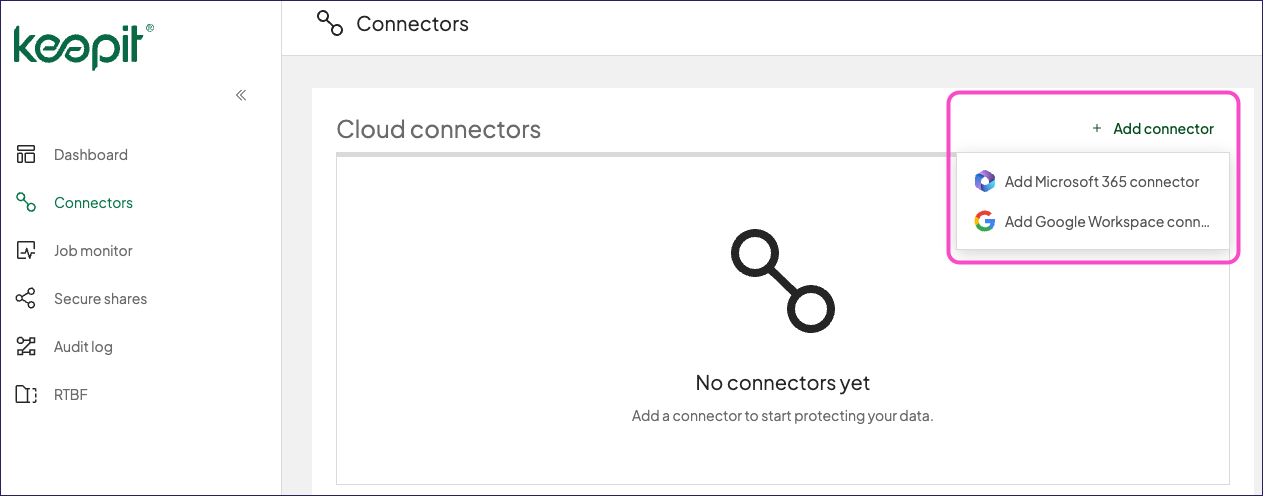
To configure a cloud app, select + Add connector. Keepit lists the cloud apps you selected for this workspace:
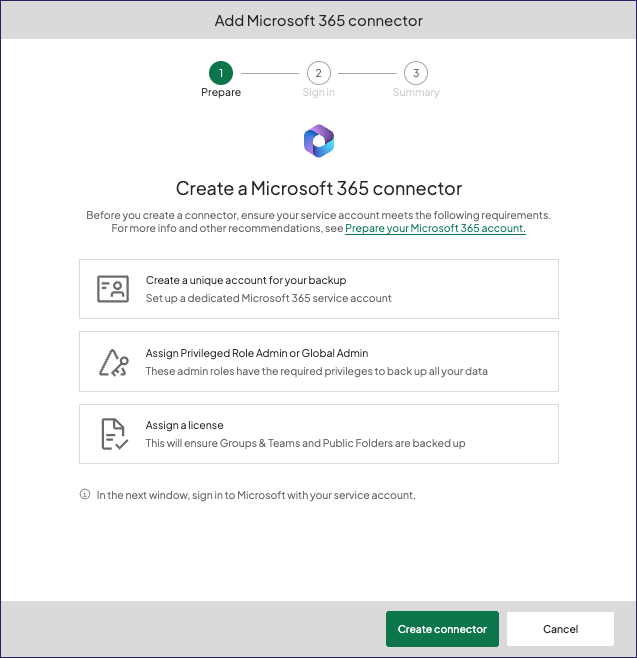
Keepit displays a dialog enabling you to connect your cloud app. Sign in to the cloud app and enable the required access permissions. For example, for Microsoft 365:
Follow the steps provided, including selecting the data items to include in your backup:
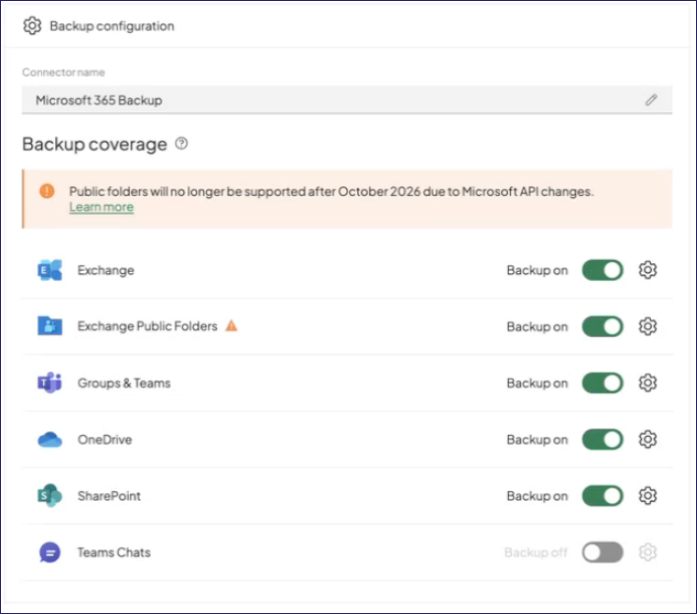
These steps vary based on the cloud app you are connecting. The screens shown here are Microsoft 365 examples only, and might be different for each organization.
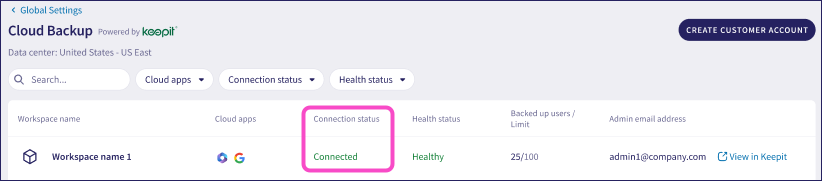
Return to the Cloud Backup page in the Coro console. Review the Connection Status column for your customer workspace. This should show as Connected:
Coro shows warning banners at the top of the page for any connection issues:
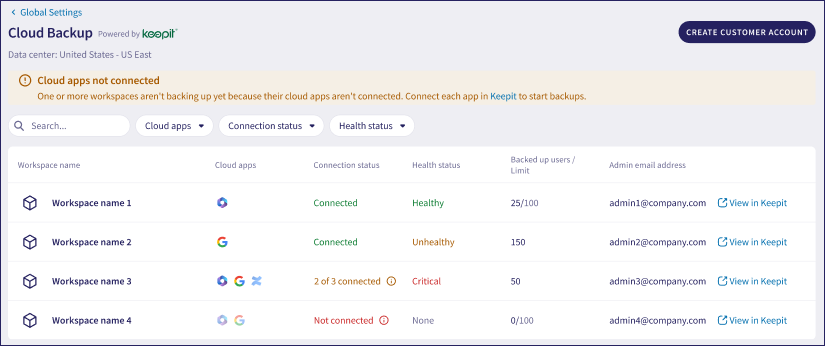
In this scenario, select View in Keepit to resolve your connection issues in the Keepit dashboard.
MSP admin users can manage their connected customer accounts through the Cloud Backup page.
To access the Cloud Backup page:
Select Global view from the top of the console:
From the sidebar, select Global Settings > Cloud Backup:
Coro displays the Cloud Backup page:
For each connected customer, Coro shows:
| Field | Description |
|---|---|
| Workspace name | The customer workspace display name. |
Cloud apps | Icons to represent cloud apps selected for backup Coro shows the icon as greyed out/disabled if the app is not yet connected in Keepit. |
| Connection status | Shows the connection status for your selected cloud apps. |
Health status | Shows the health status of the backup service:
|
| Backed up users/Limit | The number of user accounts backed up in connected cloud apps against the configured user seat limit. |
| View in Keepit | A link to the Keepit dashboard for this customer. |
Use the search at the top of the page to locate a specific workspace, or use the filters to view selected customer workspaces based on:
- Cloud apps: Show only workspaces that include one or more selected cloud apps.
- Connection status: Show only workspaces that include at least one connected cloud app, or only workspaces that include no connected cloud apps.
- Health status: Show only workspaces that are healthy, unhealthy, or critical.
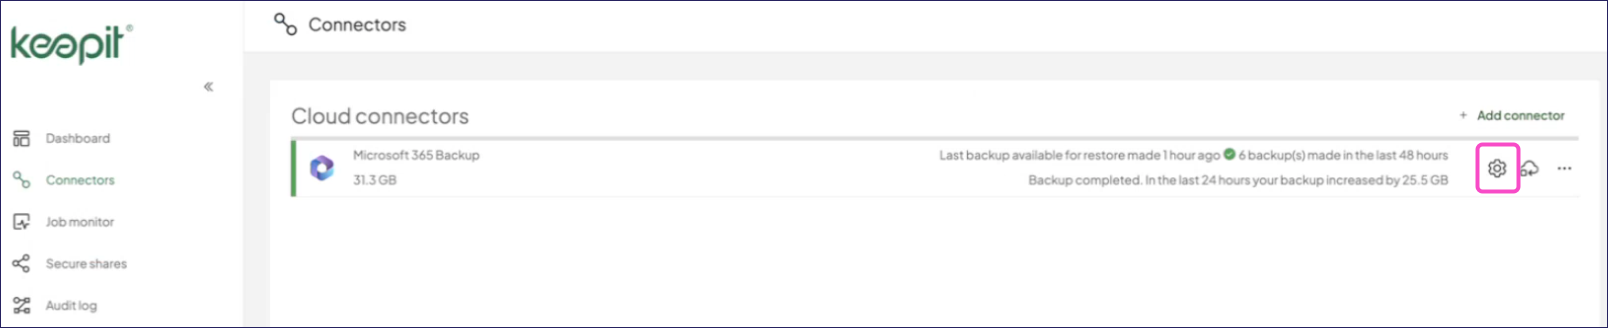
To edit the connector settings or adjust the backup coverage and scope for an existing cloud app connector, select the edit icon next to a cloud app in the Cloud connectors page: