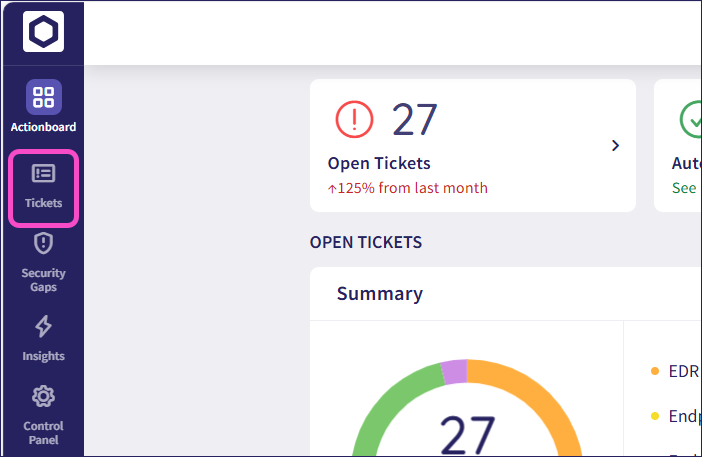
The Ticket Log in Coro provides a record of all tickets generated in the current workspace. These tickets are detailed records of all detected suspicious events or a series of suspicious events.
Managed Service Provider (MSP) admin users with sufficient permissions can also use the global ticket log page to view and manage tickets across parent (channel) and child workspaces.
To learn more about how Coro creates and uses tickets, see Tickets in Coro.
View the Ticket Log by signing in to the Coro console and selecting Tickets in the sidebar:
Coro raises tickets for all protected users, and also for protectable users. Protectable users are those user accounts that Coro is able to identify from your connected cloud applications, but that have not been explicitly added for protection. Tickets raised for protectable users are done so as information-only without any remediation options, in order to highlight events to admin users to inform how protection might be extended or reconfigured. Such tickets are automatically closed upon being raised.
The Ticket Log contains the following features:
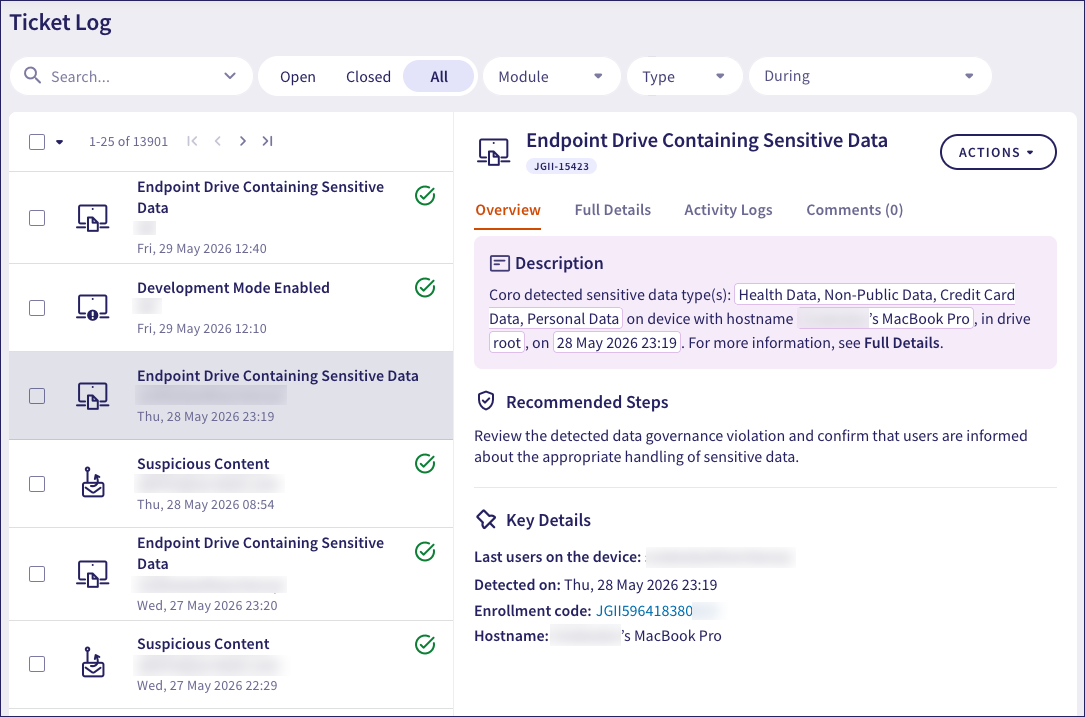
The left pane shows a summary of the ticket list, based on the selected filters. Indicators against each ticket in the list identify if the ticket is:
 Closed
 For a protectable user
Select a ticket to view details in the right pane. This pane includes four tabs to help you review and take action on the ticket:
| Tab | Description |
|---|---|
| Overview | A summary view that includes: •Ticket description •Recommended steps or Quick fix options: Recommended steps are actions recommended by Coro that admin users can manually take. Quick fixes are actions recommended by Coro that can be applied through the APPLY QUICK FIX button at the top of the right pane. •Key details with the main ticket details |
| Full details | Displays additional ticket details. |
| Activity logs | Shows time-stamped system logs related to the ticket. |
| Comments | View or add ticket comments. For more information, see Adding comments to tickets. |
At the top of the right pane, select the ACTIONS button to perform available actions for the ticket. Options vary by ticket type. For more information, see Actions.
When a quick fix is available, select APPLY QUICK FIX at the top of the right pane to apply the quick fix recommended by Coro.
Above the ticket summary list, you can choose to display all tickets, only open tickets, or only closed tickets. You can also filter the Ticket Log using the drop-down selectors.
Choose filters for:
- Module: The main component of protection as provided in the Actionboard. For example, Cloud Security.
- Type: A dynamic list of ticket types relevant to the selected module.
- During: A selected time period for the Ticket Log. Choose from a number of preset periods, or specify a date range by using the calendar.
For User Data Governance and Endpoint Data Governance tickets, Coro provides an additional Data Type filter to enable filtering results by specific sensitive data types. For more informations, see Ticket types for User Data Governance or Ticket types for Endpoint Data Governance.
You can also search the Ticket Log using free text.
Admin users can add comments to tickets for any reason. Comments can contain general information, observations concerning ticket findings, or for analysis and recommended actions when communicating with other admin users, or Coro support and SOC teams.
Comments in tickets can increase the efficiency of ticket resolution by eliminating the need to manually communicate ticket-related information via email or other messaging platforms.
To create a ticket comment:
Sign in to the Coro console and navigate to the Ticket Log.
Select the ticket.
Select Comments:
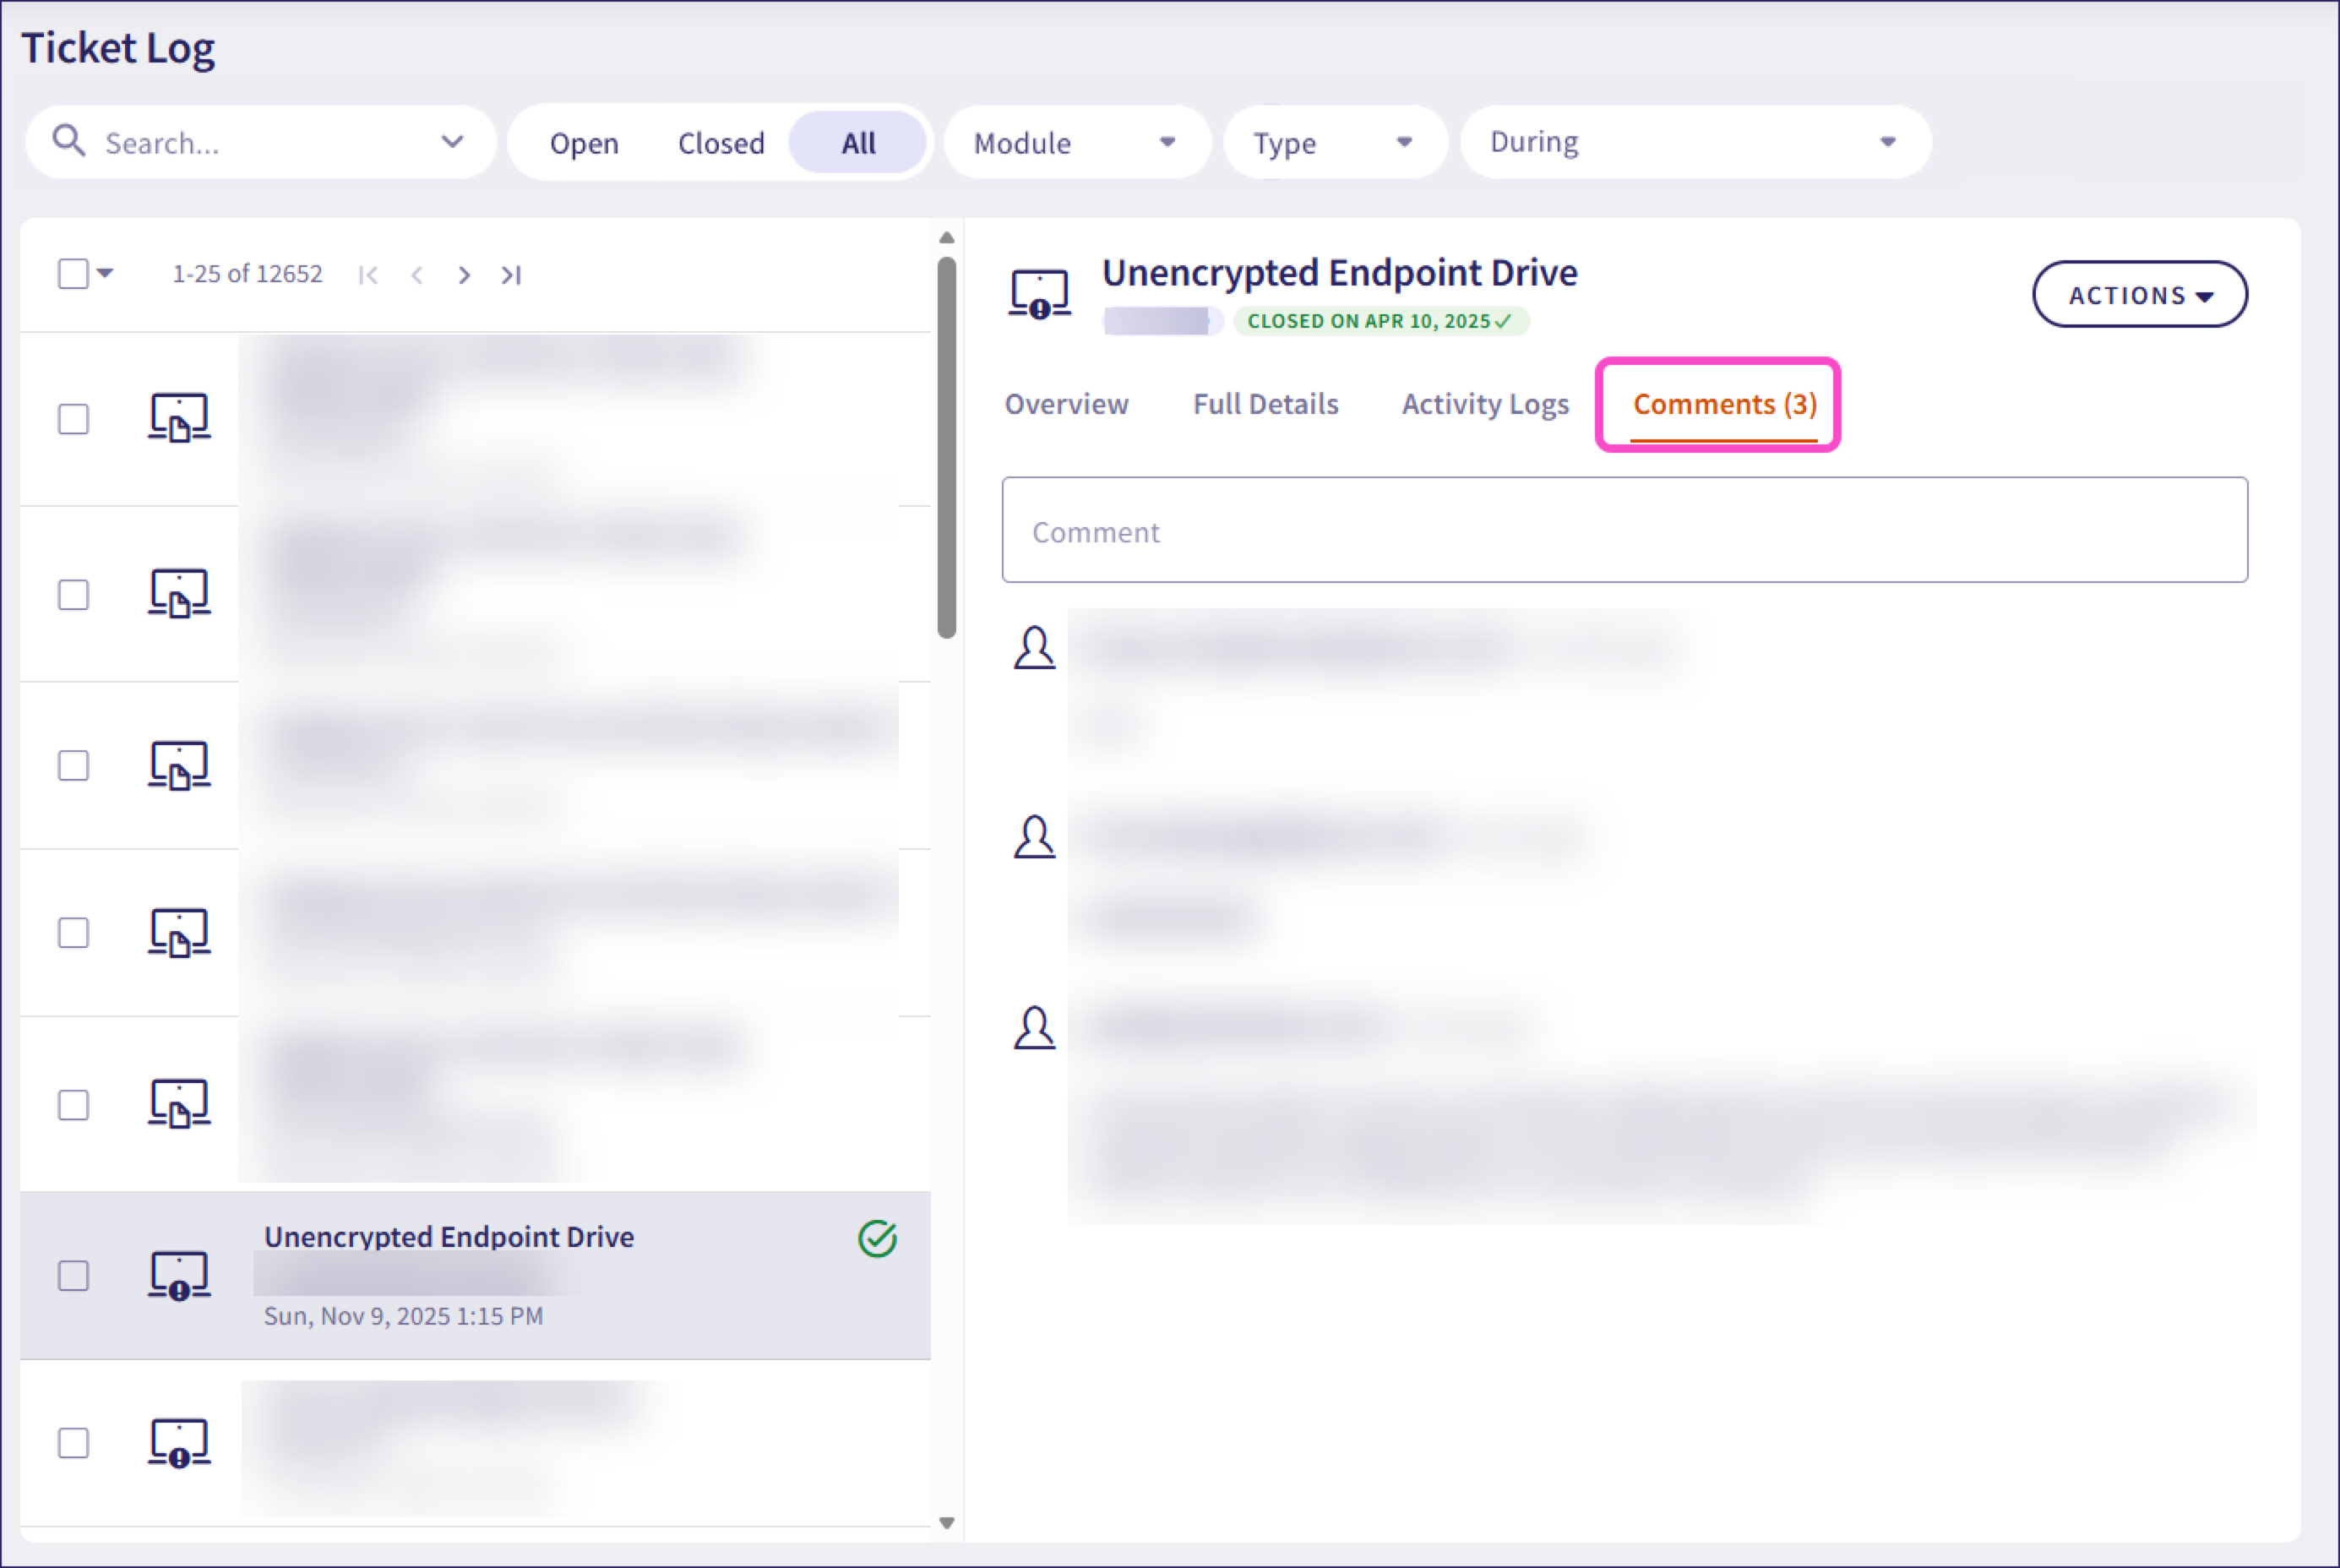
Enter your comment into the Comment field.
Select Notify and then select the recipients of the notification.
- Notify affected users: Notify all affected users. This option is available for tickets that include affected users' email addresses.
- Notify all workspace admins: Notify all the admin users of the workspace.
- Notify managed service contacts: Notify any managed service contacts. This option is available when managed service is enabled for the relevant module.
- Notify custom recipients: Notify named recipients. In the Recipients field, enter valid email addresses. If you enter more than one recipient, use a manual line break to separate them.
Select Comment.
The comment appears in the Comments section:
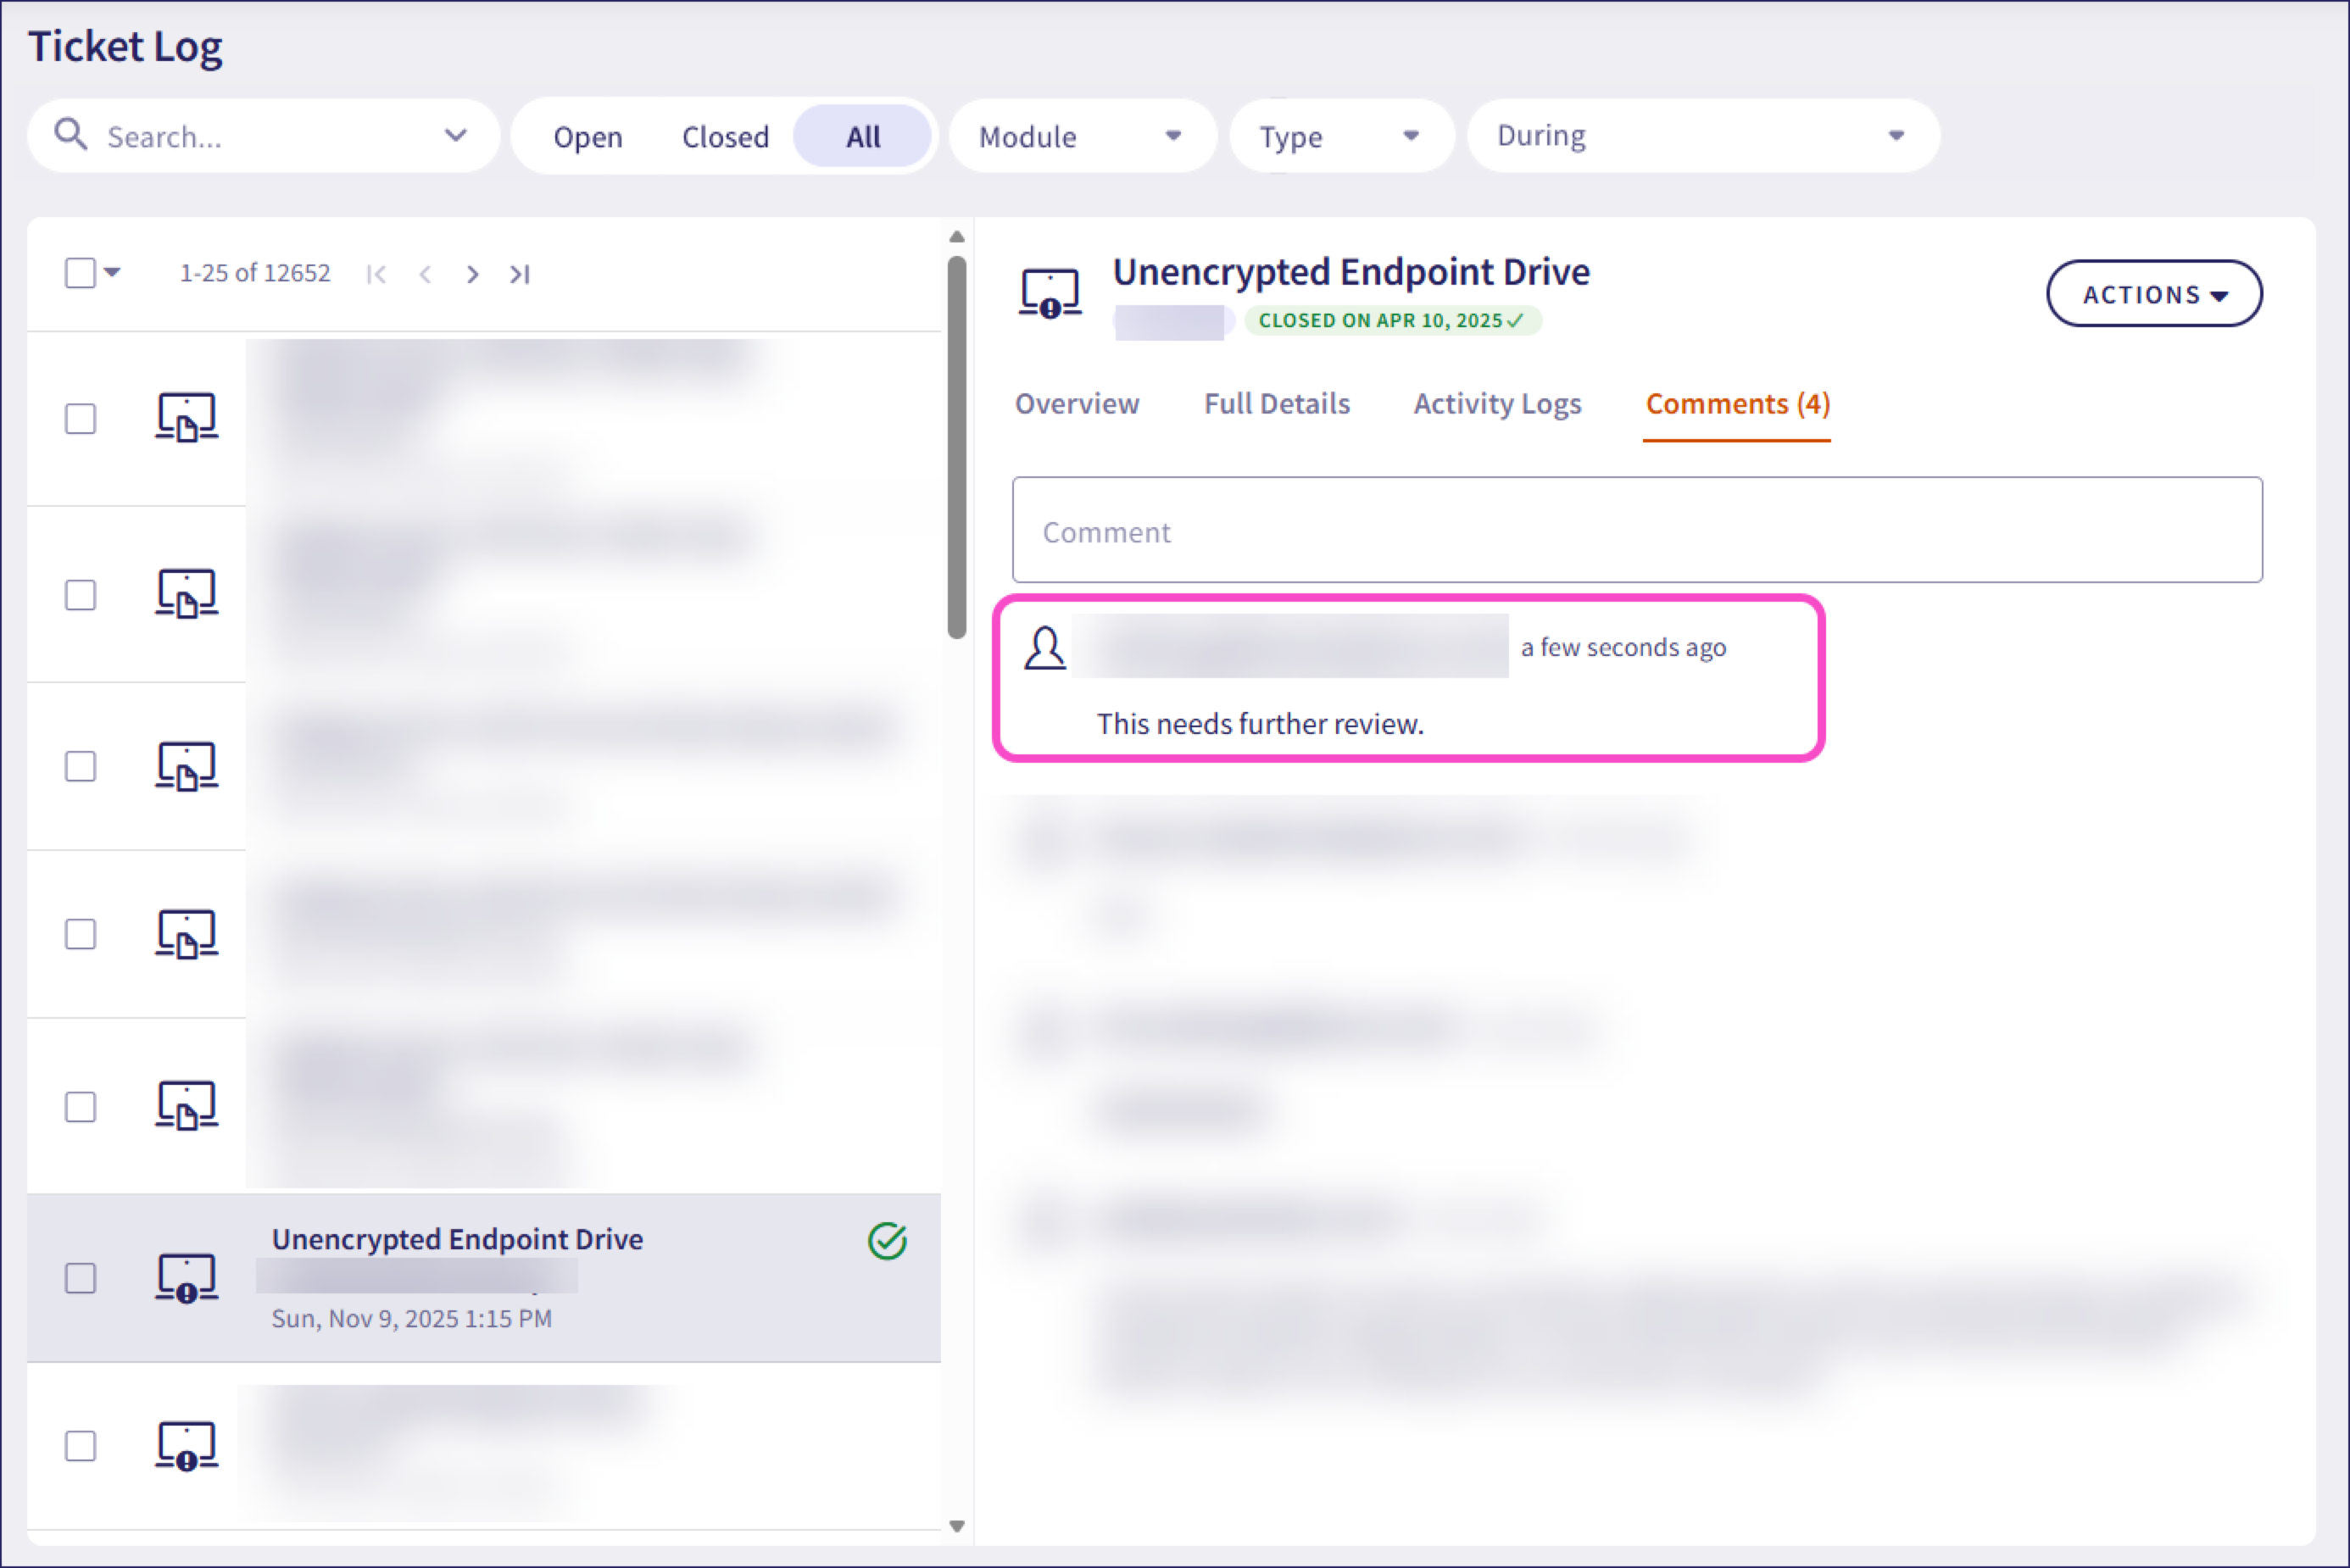
You cannot edit or delete a saved comment. Only the comments for highlighted or selected tickets appear on the screen.
All tickets in Coro include actions that you can perform. These actions vary by ticket type and status, and are available from the ACTIONS button at the top-right of the ticket details pane. For example, a ticket of type Suspicious Content shows the following actions:
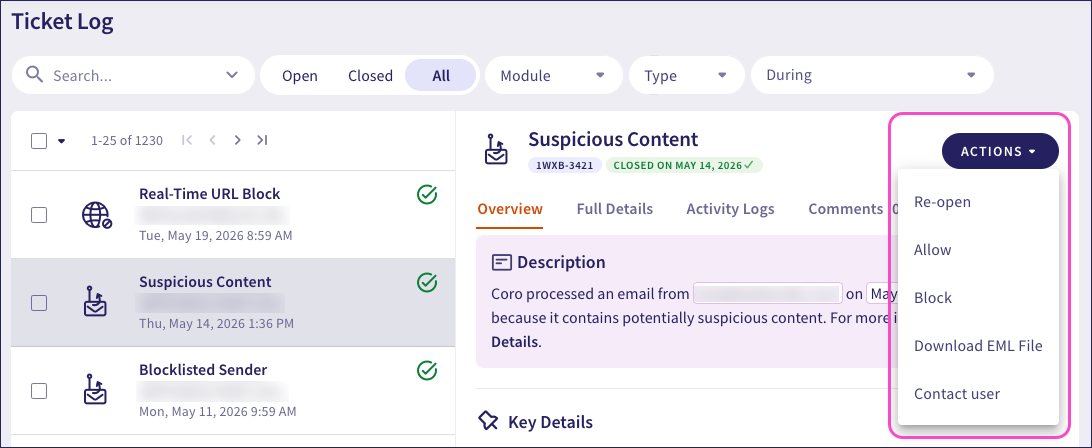
The following table describes the outcome for each action on a "Suspicious Content" ticket:
| Action | Outcomes |
|---|---|
| Close ticket | (Open tickets only) Close the ticket as considered remediated and take no further action. |
| Re-open | (Closed tickets only) Reopen this ticket for admin user intervention and manual remediation. |
| Allow | Coro presents a dialog enabling you to allow the suspicious email (return it from the quarantine folder back to the original recipients) and optionally add the sender's email address, domain, or IP address to the workspace allowlist. NOTE: If your Phishing security mode is set to Warn recipients, the email is already delivered so Allow is limited to adding the sender to the allowlist. |
| Block | Coro presents a dialog enabling you to permanently delete the suspicious email, and optionally add the sender's email address, domain, or IP address to the workspace blocklist. NOTE: If your Phishing security mode is set to Warn recipients, the email is already delivered so Block is limited to adding the sender to the workspace blocklist. |
| Download EML File | Downloads the suspicious email (in .eml format) to your local workstation for evaluation. This enables you to thoroughly examine potentially malicious emails before taking any further action. For further information, see Downloading suspicious emails for further inspection. |
| Contact user | Coro sends an email to the recipient containing a message and, optionally, the ticket details. The email includes a reply-to header with the email address of the requesting admin user, enabling recipients to respond directly to them. Coro adds a record of the action to the ticket and the activity log. |
- Actions vary depending on type and status of the ticket. For example, an open ticket of a particular type might contain more available actions than a ticket that has been closed.
- When a device is removed from protection, all open tickets associated with the device are automatically closed.
- Tickets raised for protectable users are automatically closed and have no remediation actions available.
- To perform actions against multiple tickets simultaneously, use the selection checkboxes in the ticket list pane. For more details, see Bulk ticket operations.
- To download a list of tickets, use the multiple ticket action Export CSV. For more details, see Exporting tickets as a CSV file.
- Some ticket types provide an UNDO option for actions undertaken on one or more tickets. For more details, see Undoing actions.
To learn more about the actions for each ticket type, see:
To perform actions against multiple tickets simultaneously, use the checkboxes in the ticket list:
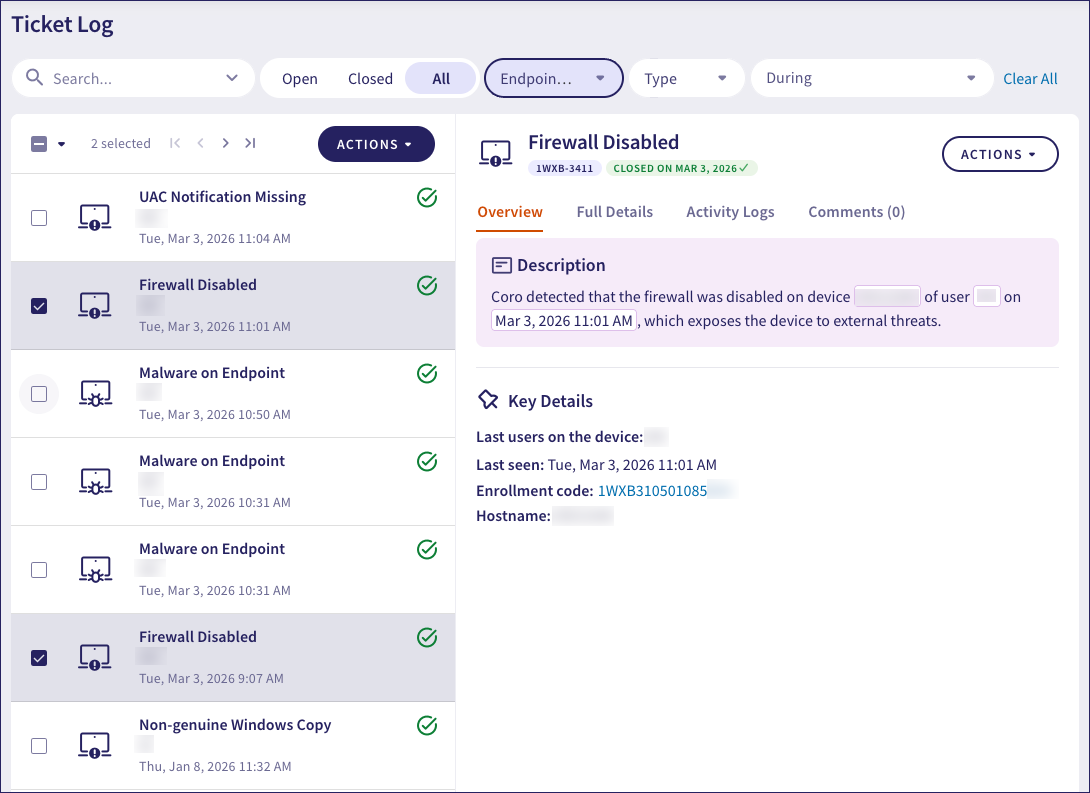
Select and deselect tickets individually, or use the checkbox at the top to select all tickets in the current list.
When you select tickets through this method, Coro displays an additional ACTIONS button above the ticket list. The available actions reflect what is applicable to the list you selected:
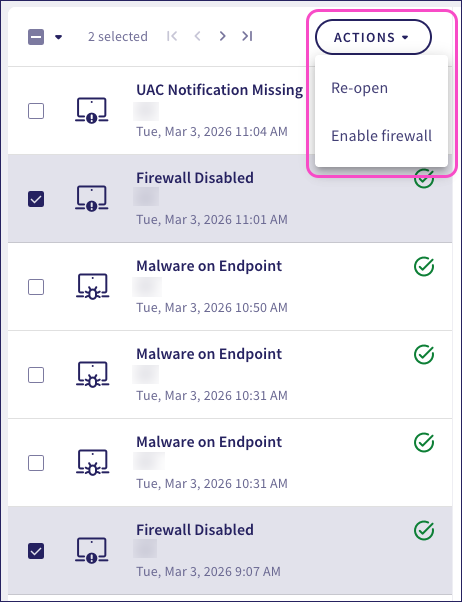
To close multiple open tickets without remediation, go to the Open tickets list. Select the checkboxes for all tickets you want to close, then select ACTIONS > Close tickets.
Make sure you have first reviewed all tickets that you intend to close.
Apply the same process if you want to reopen multiple closed tickets. Go to the Closed tickets list and select each closed ticket you want to reopen. Then, select ACTIONS > Reopen tickets. Coro reopens all selected tickets.
Coro enables you to export one or more selected tickets to set of a comma-separated value (CSV) files.
Use the checkboxes to select all required tickets for the export. Then, from the top-left ACTIONS button, select Export CSV:
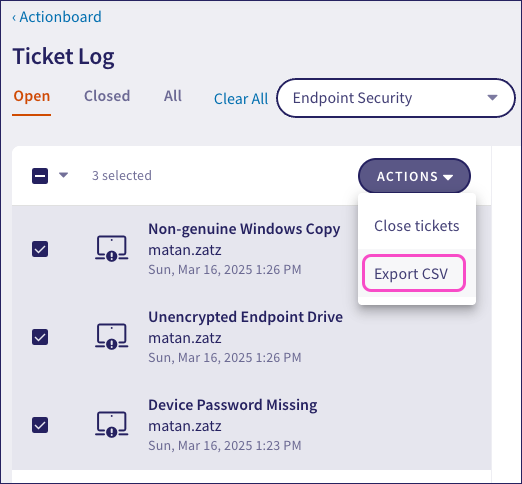
Coro shows a message confirming that the export is in progress and will be available at the Activity Log page later.
The download is packaged as a ZIP archive containing folders representing the protection components your selected tickets fall under. For example, Cloud Security, Email Security, and so on. Each folder contains a collection of CSV files, one per ticket type, containing all relevant tickets.
Each CSV file has the following fields:
- Date: The date when the Ticket Log record was created
- Admin: The user who performed the activity
- Event: The Ticket Log record message
Ticket log CSV exports are limited to the last 90 days.
Coro provides the ability to reverse, or undo, certain ticket actions through the console. This functionality is not available for all actions and applies only where an action supports reversal.
For example, Cloud Security and User Data Governance tickets include actions to suspend a user's access to their account on one or all connected cloud applications. To reverse the suspension and reinstate the user's access, use the UNDO function in the ticket where the suspension was enacted.
Perform the following steps:
Locate the ticket in which the user was suspended. If you know only the user's identity, search for them in the Protected users list. Then, use their Open tickets or Activity log lists to find the relevant ticket.
In the ticket details pane, go to the Activity Logs.
Find the log entry connected to the suspension.
Select UNDO.
The user's access to the cloud application is restored, and the activity log in the ticket is updated accordingly.