Use this guide to integrate Coro with Microsoft Sentinel (www.microsoft.com/en-us/security/business/siem-and-xdr/microsoft-sentinel) for collection of ticket data related to an event.
Coro connects to Microsoft Sentinel through the Logs Ingestion API. This uses Microsoft Entra ID OAuth-based authentication and utilizes DCEs (Data Collection Endpoints) and DCRs (Data Collection Rules) to filter, transform, and map incoming connections.
This guide assumes you have access to the Microsoft Azure portal with admin permissions.
Before you start this procedure, make sure you have a previously-configured Log Analytics workspace in Microsoft Azure. For further information, see the Azure portal documentation.
If you have an existing Sentinel integration in Coro, be aware that Microsoft retired the previous ingestion method (from September 2026). To continue using Sentinel with Coro, you must recreate the connector using the new method described in this guide.
Coro displays a warning banner where it identifies an existing connector using the previous method:
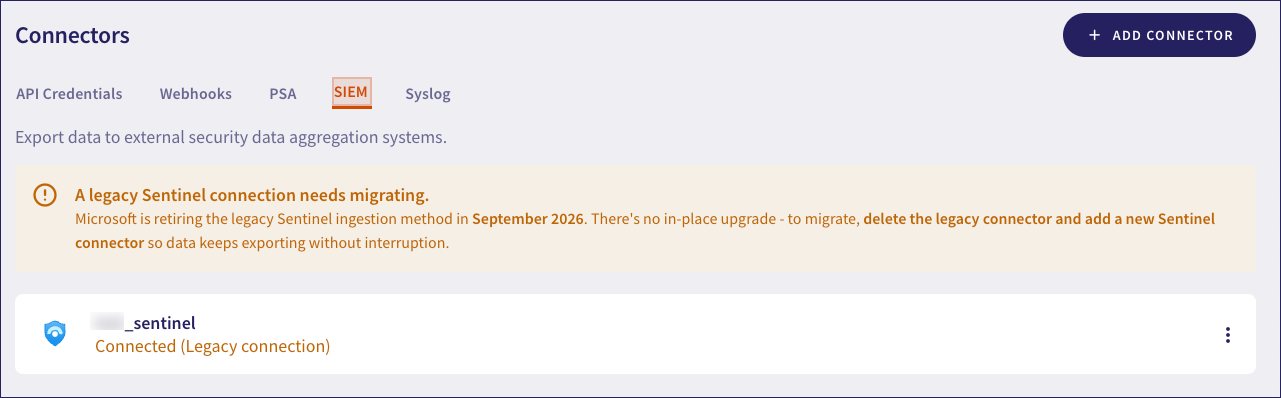
Coro does not disable Existing Sentinel connectors, but you can no longer edit the settings. Coro advises recreating the connector at the earliest opportunity to avoid service disruption.
To configure Coro's Sentinel connector, you need to:
Create a Data Collection Endpoint (DCE)
Create a Data Collection Rule (DCR) and custom log table.
Register Coro as an approved application for sending logs.
Configure the Sentinel connector in Coro.
The Coro connector configuration relies on several identifiers gathered during the previous steps in the Microsoft Azure portal. This guide advises when to keep a note of the required data items.
To create a DCE:
Sign in to the Microsoft Azure portal (portal.azure.com) with adminstrative permissions.
Use the search bar at the top to search for "DCE". Azure should recommend "Data collection endpoints" within the "Services" category. Select this link.
Azure displays the Data collection endpoints page:

Select + Create to create a new DCE.
Azure displays the Create data collection endpoint dialog:
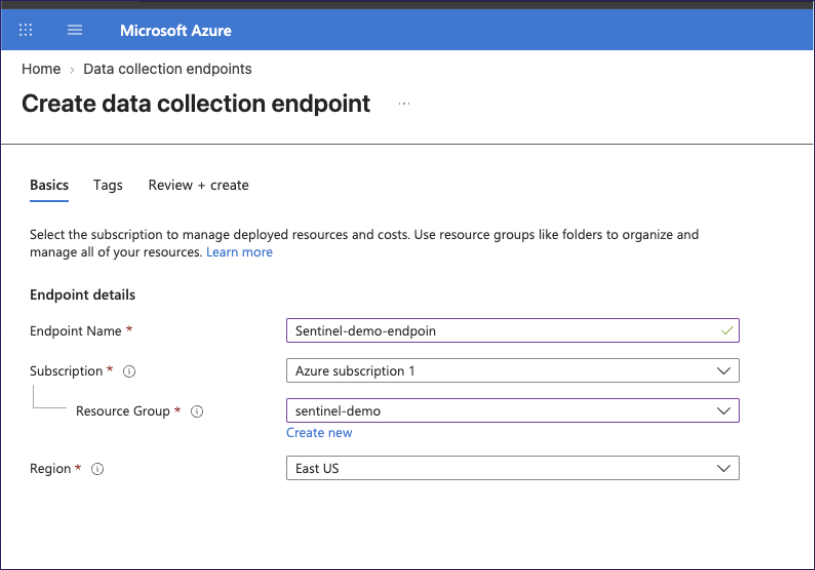
Enter the following details:
- Endpoint name: Enter a name for the endpoint.
- Subscription: Select your Azure subscription.
- Resource group: Select the resource group used in your Log Analytics workspace.
- Region: Select the region used in your Log Analytics workspace.
Skip the Tags page and proceed to Review + create to create your new DCE.
Azure creates the DCE and shows it on the Data collection endpoints page:

Select your new DCE and make a note of the Logs Ingestion URL for later:

To create a DCR and custom log table:
Sign in to the Microsoft Azure portal (portal.azure.com) with adminstrative permissions.
Use the search bar at the top to search for and select your Logs Analytics workspace.
Select Settings > Tables.
Azure displays the workspace Tables list:
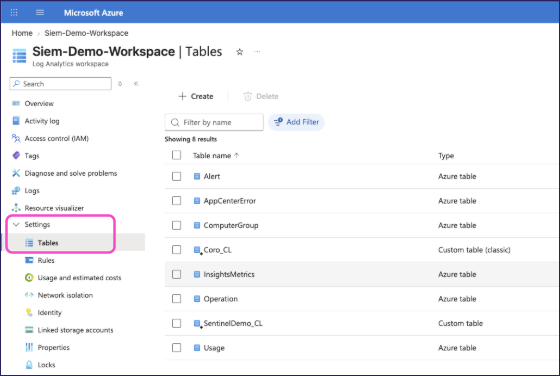
Select + Create.
Azure displays the Create a custom log page:
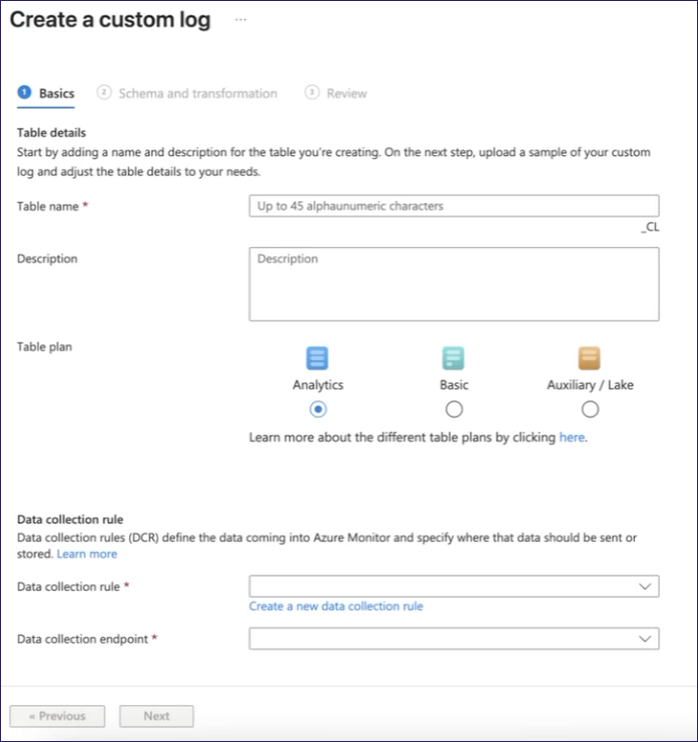
Enter a Table name.
Under Data collection rule, select Create a new data collection rule.
Azure displays the Create a new data collection rule pane:
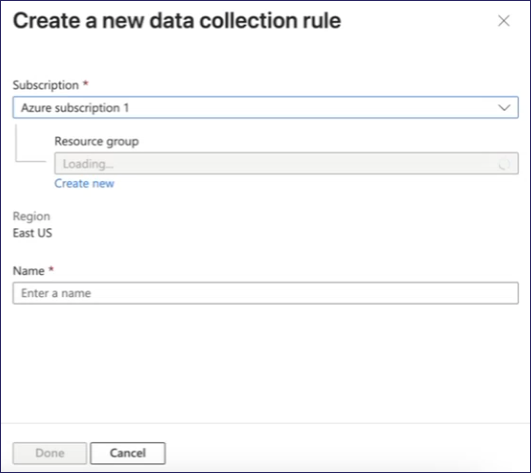
For the new DCR, select the same Azure subscription and resource group you used when creating your Logs Analytics workspace (and specified when creating your DCE).
Enter a Name for your new DCR. Make a note of this for later.
Select Done to create the DCR and automatically add it to the custom log table Data collection rule setting.
For Data collection endpoint, select your DCE.
Select Next.
Azure displays the Schema and transformation step:
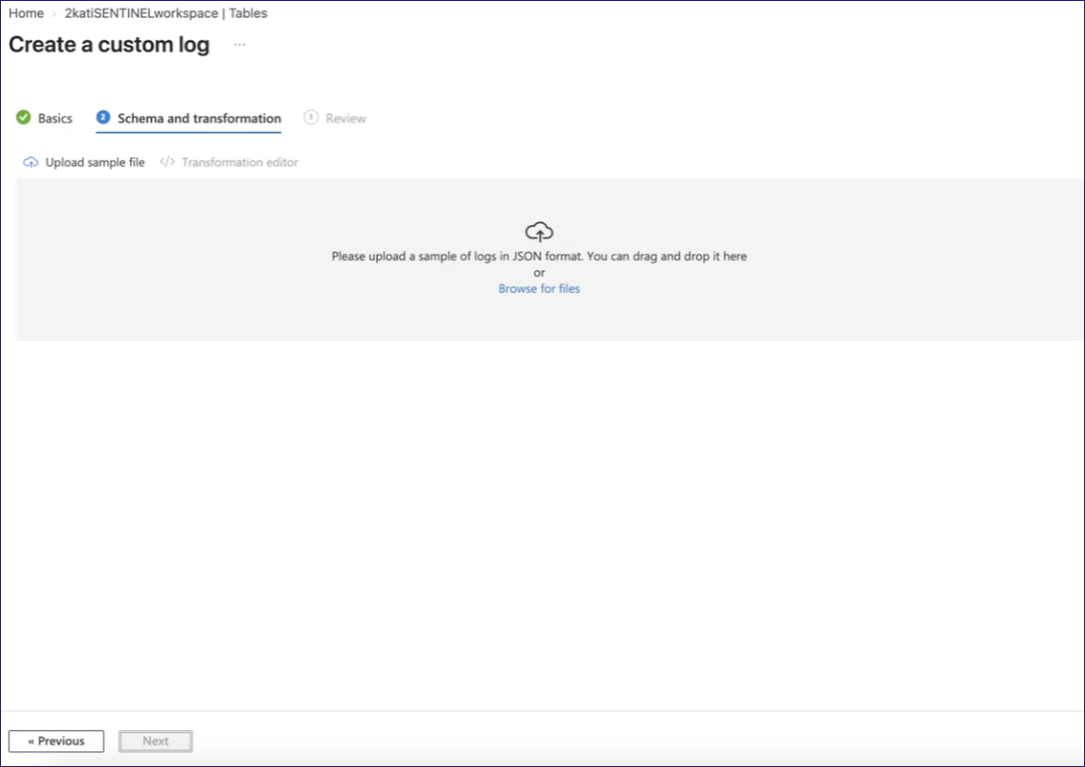
Download this sample schema and upload to Azure.
Select Next.
On the Review step, make a note of the full table name for later.
Select Create.
After you have created the DCR and custom log table, make a note of the Immutable ID:
Use the search bar at the top to search for "DCR". Azure should recommend "Data collection rules" within the "Services" category. Select this link.
Azure displays the Data collection rules page:
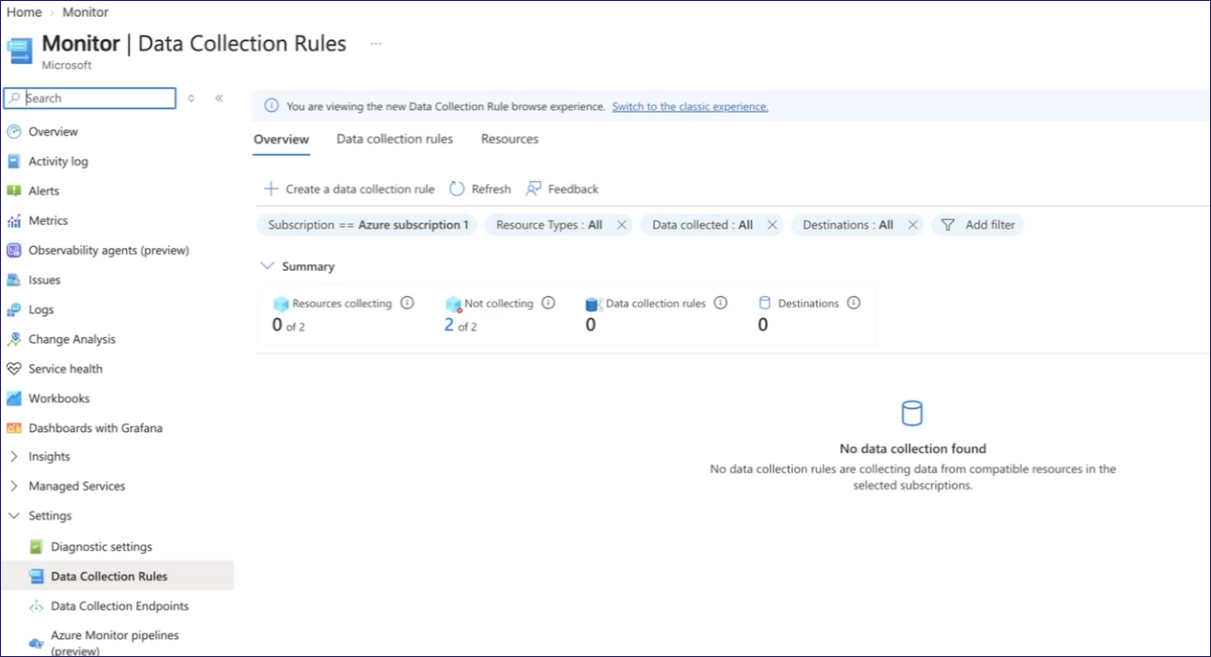
Select the Data collection rules tab:
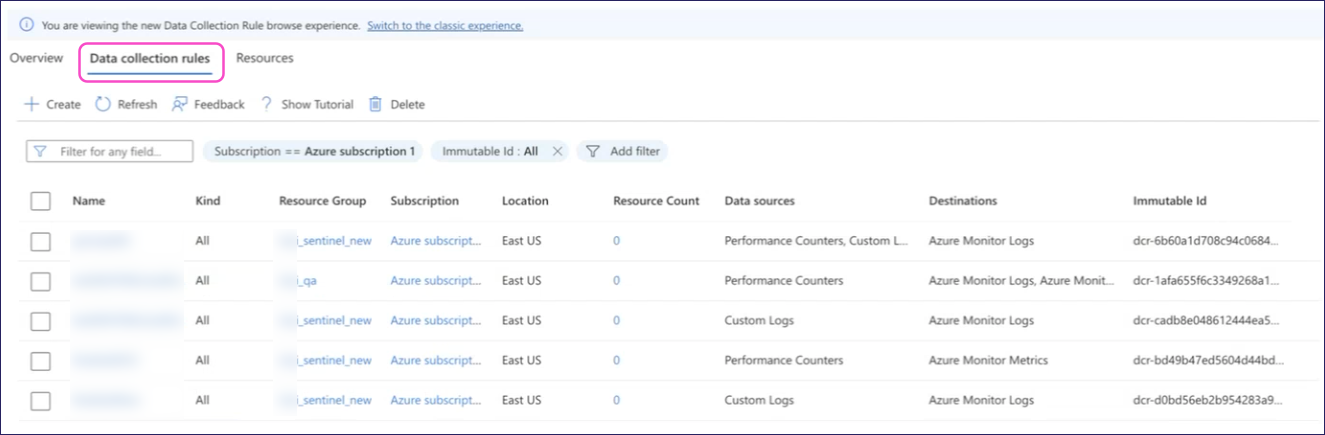
Locate and select the DCR you created earlier.
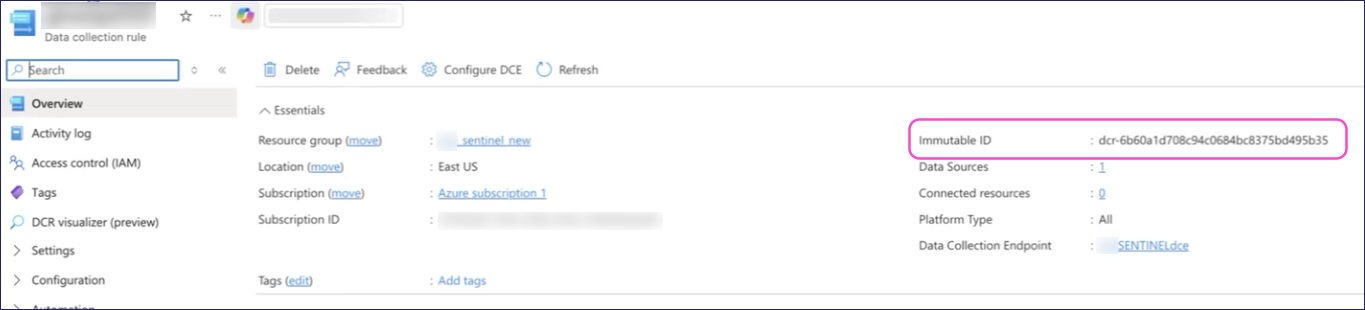
Make a note of the Immutable ID for later:
To register Coro as an approved app, use Microsoft Entra ID:
Sign in to the Microsoft Azure portal (portal.azure.com) with adminstrative permissions.
Use the search bar at the top to search for "Entra ID". Azure should recommend "Microsoft Entra ID" within the "Services" category. Select this link.
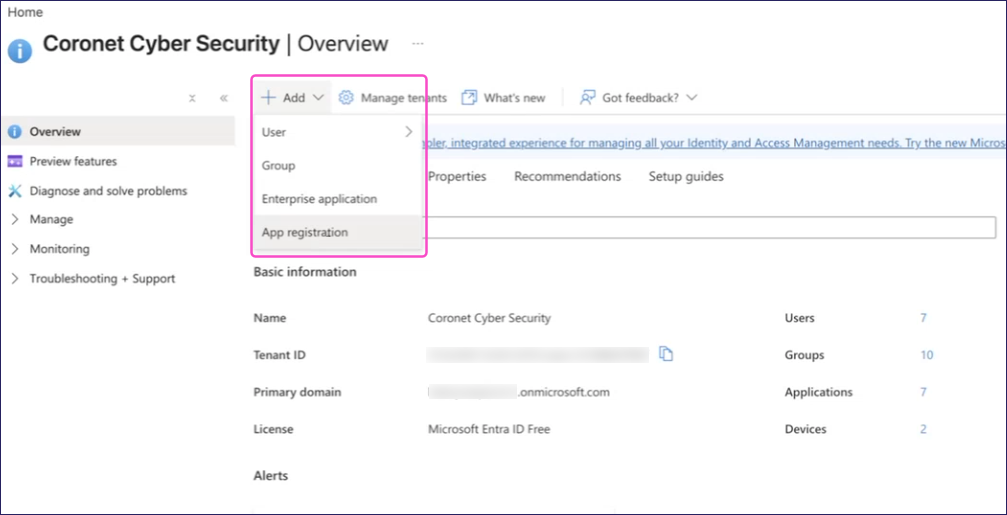
On the Overview page, select + Add > App registration:
Azure displays the Register an application dialog:
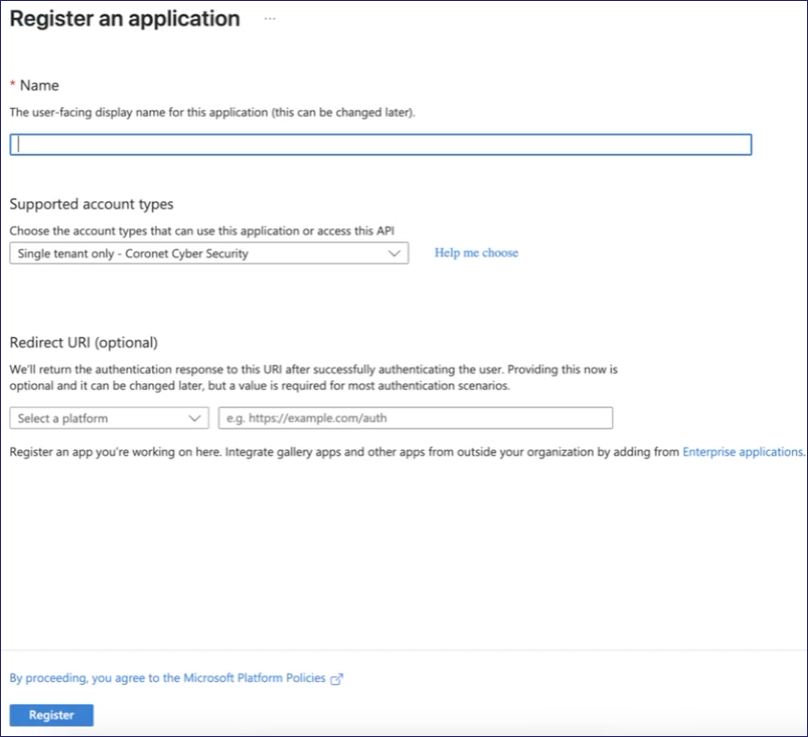
Enter a Name for your app.
Select the account you want to use with this app.
Select Register.
After creating the app, Azure displays the app overview:
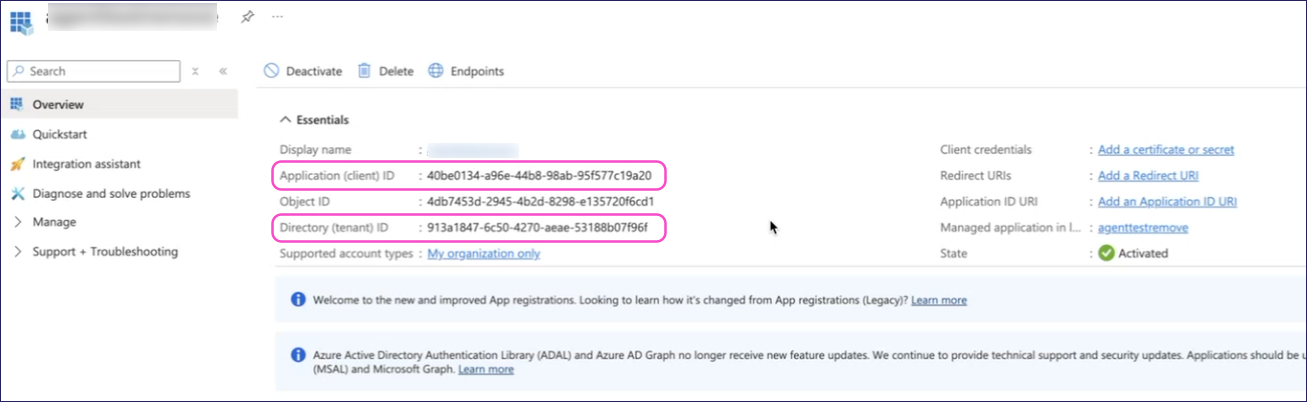
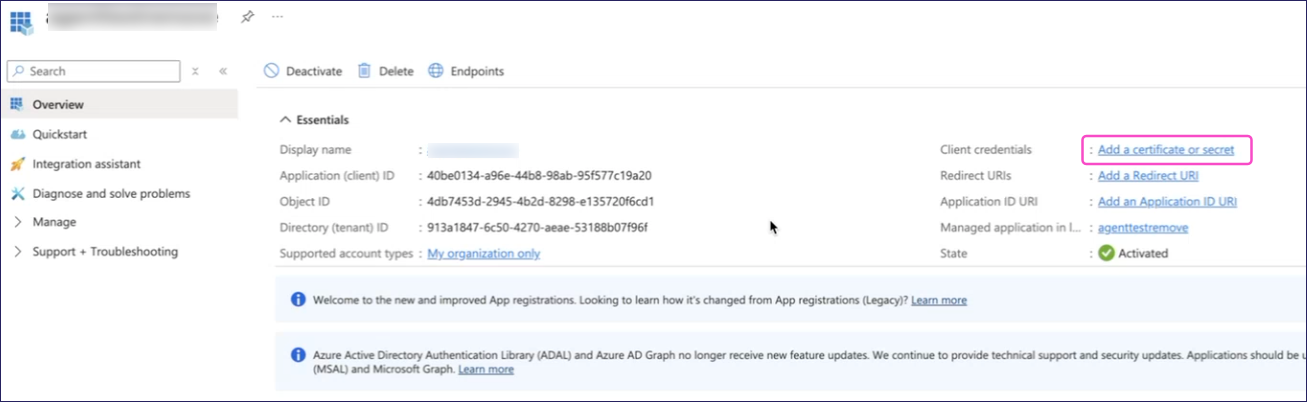
Make a note of the Application (client) ID and Directory (tenant) ID for later.
Locate Client credentials and select Add a certificate or secret:
Azure displays the Certificates & secrets page, on the Client secrets tab:
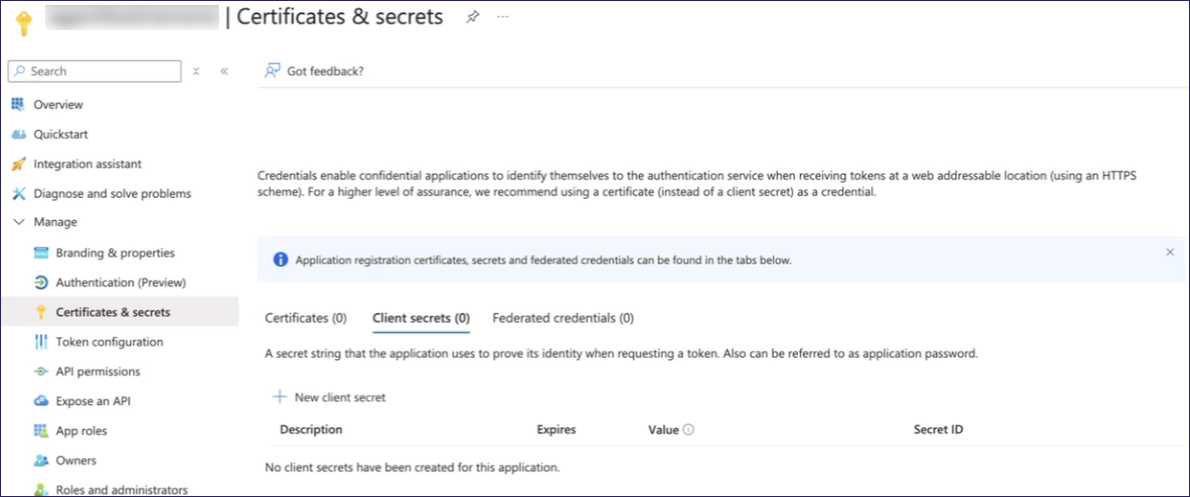
Select + New client secret.
Azure displays the Add a client secret dialog:
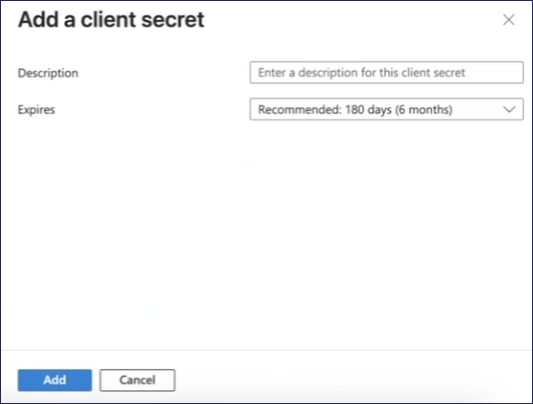
Enter a Description and Expires period that meets your requirements.
Select Add.
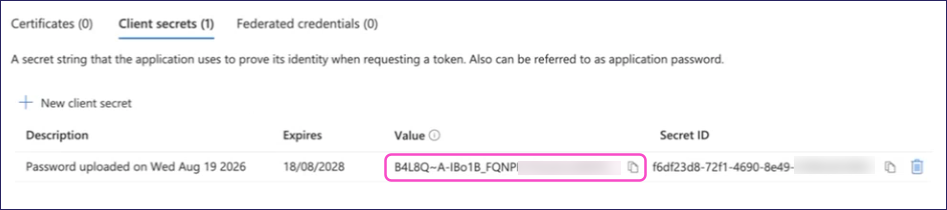
Azure adds the new secret to the Client secrets list.
Copy the Value field for later:
 Important
You must complete this step now as the Value may not be visible after you navigate away from this page. If you need to see the value later, remove the old secret and add a new one.
After you have registered the new app, grant the app access control permission to send logs:
Use the search bar at the top to search for "DCR". Azure should recommend "Data collection rules" within the "Services" category. Select this link.
Azure displays the Data collection rules page:
Select the Data collection rules tab:
Locate and select the DCR you created earlier.
Select Access control (IAM):
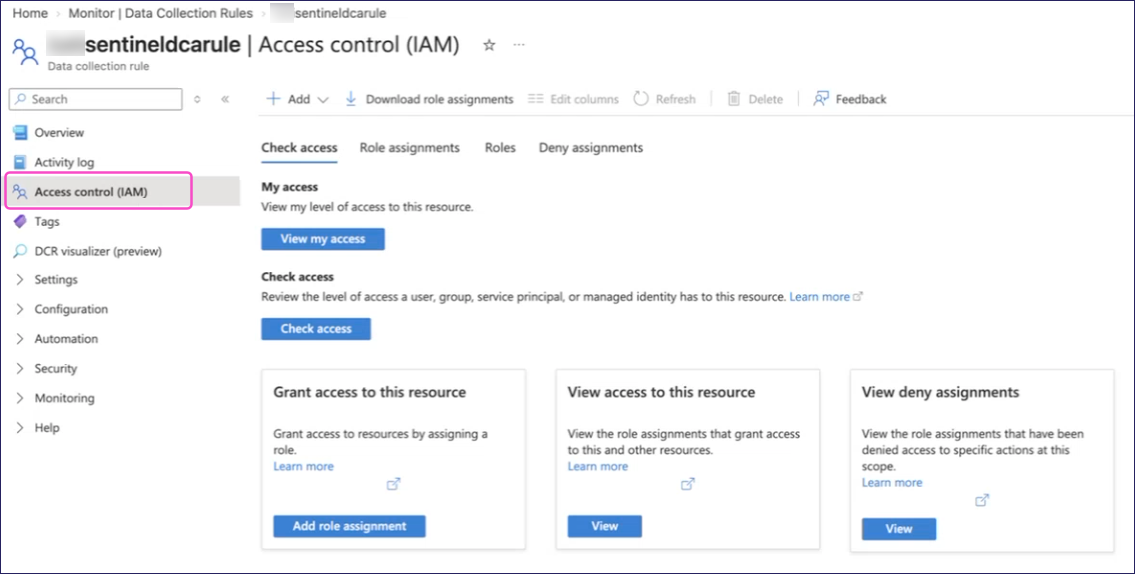
Azure displays the Access control (IAM) page.
Select + Add > Add role assignment:
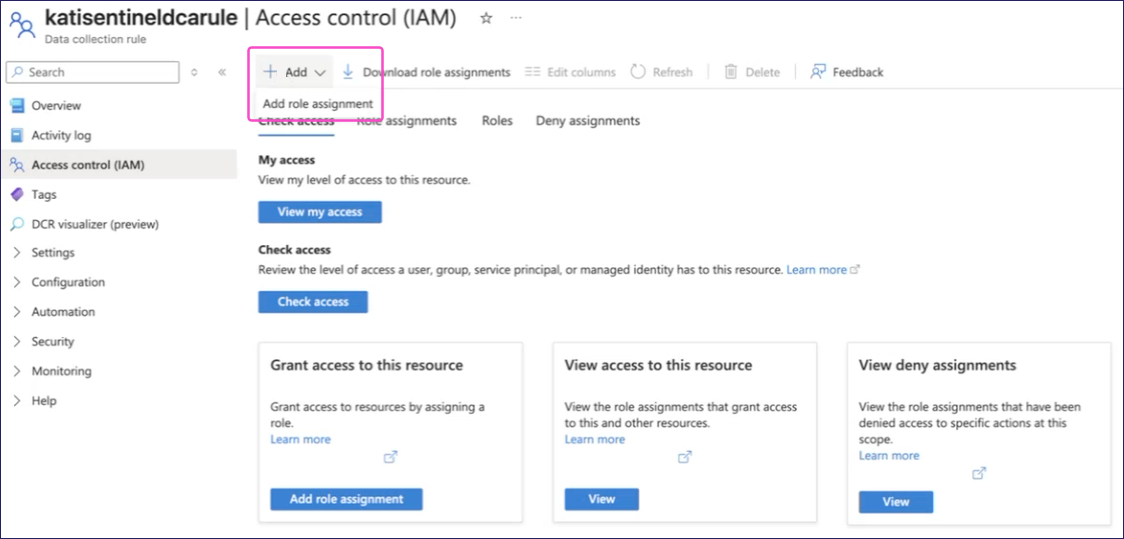
Azure displays the Add role assignment page.
From the Role tab, use the Job function roles search bar to locate the role "Monitoring Metrics Publisher":
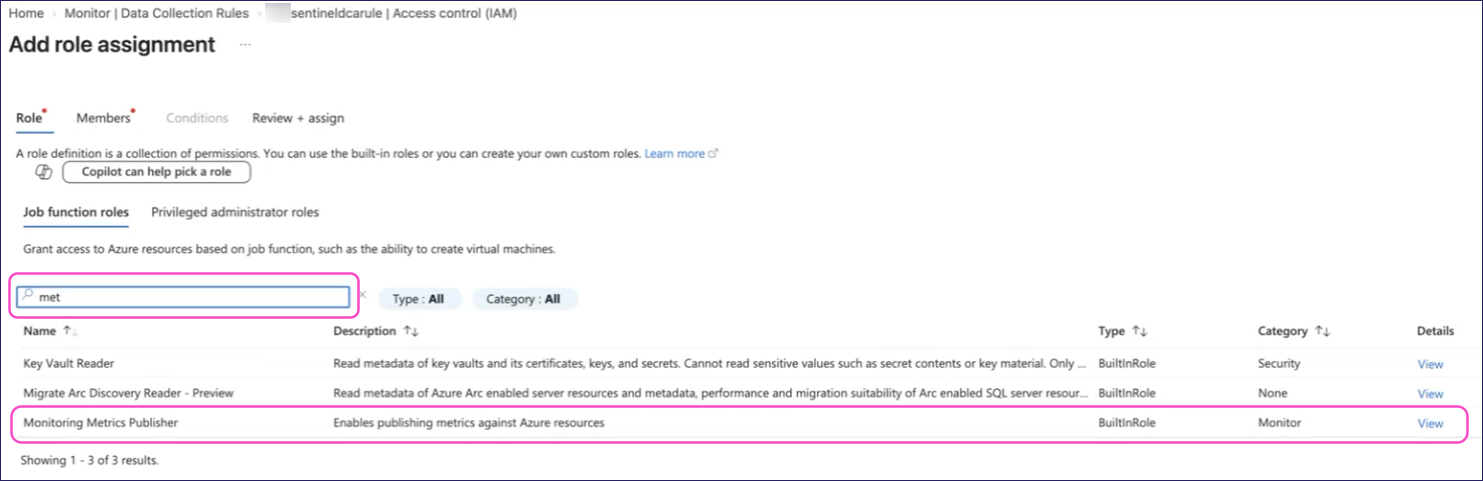
Select this role, then select Next.
Azure displays the Members tab:
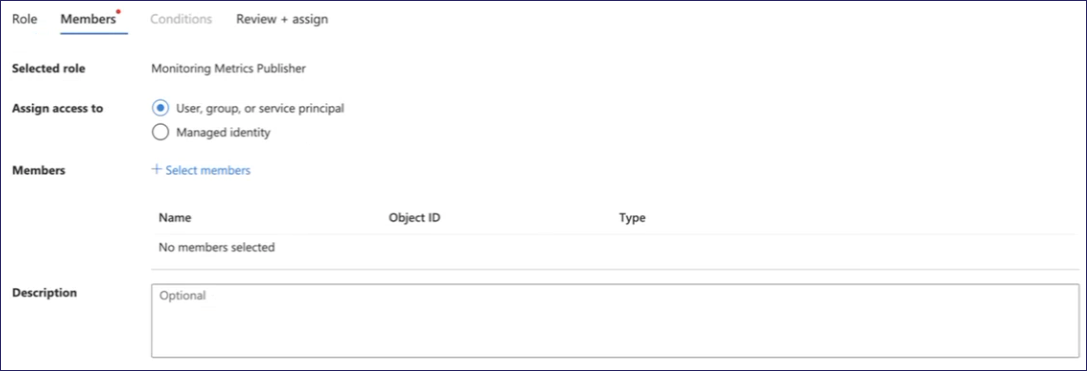
For Assign access to, select User, group, or service principal.
Select + Select members.
Azure displays the Select members dialog.
Search for and select the app you registered earlier:
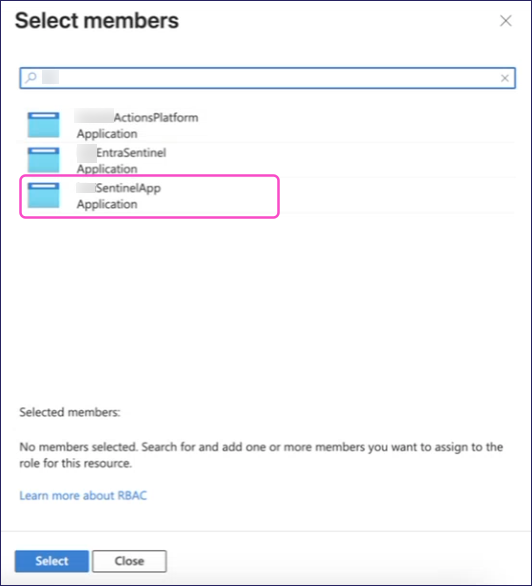
Select Select.
Select Next to continue to the Review + assign tab.
Select Review + assign.
Next, configure your Resource Group with the same access control permissions:
Use the search bar at the top to search for "resource group". Azure should recommend "Resource groups" within the "Services" category. Select this link.
Select your resource group.
In the resource group overview, select Access control (IAM):
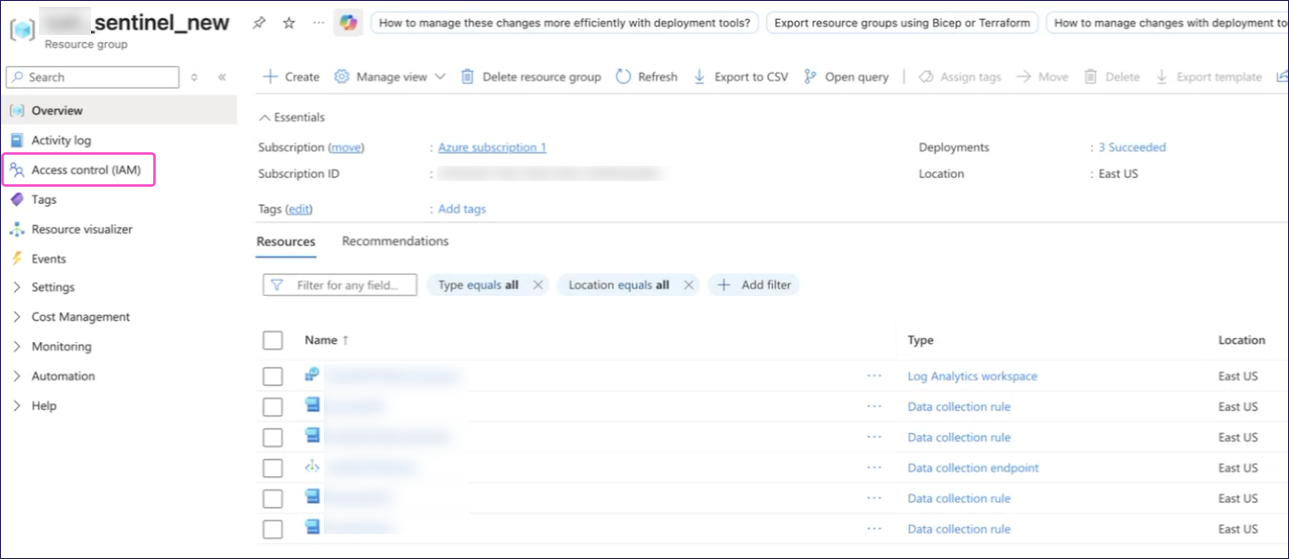
Repeat the previous procedure to add the same role assignment here as already completed for your DCR.
Before you start this procedure, make sure you followed the steps in all previous sections of this guide.
To configure a Microsoft Sentinel connector in Coro:
From the sidebar, select Control Panel.
Under Workspace, select Connectors:
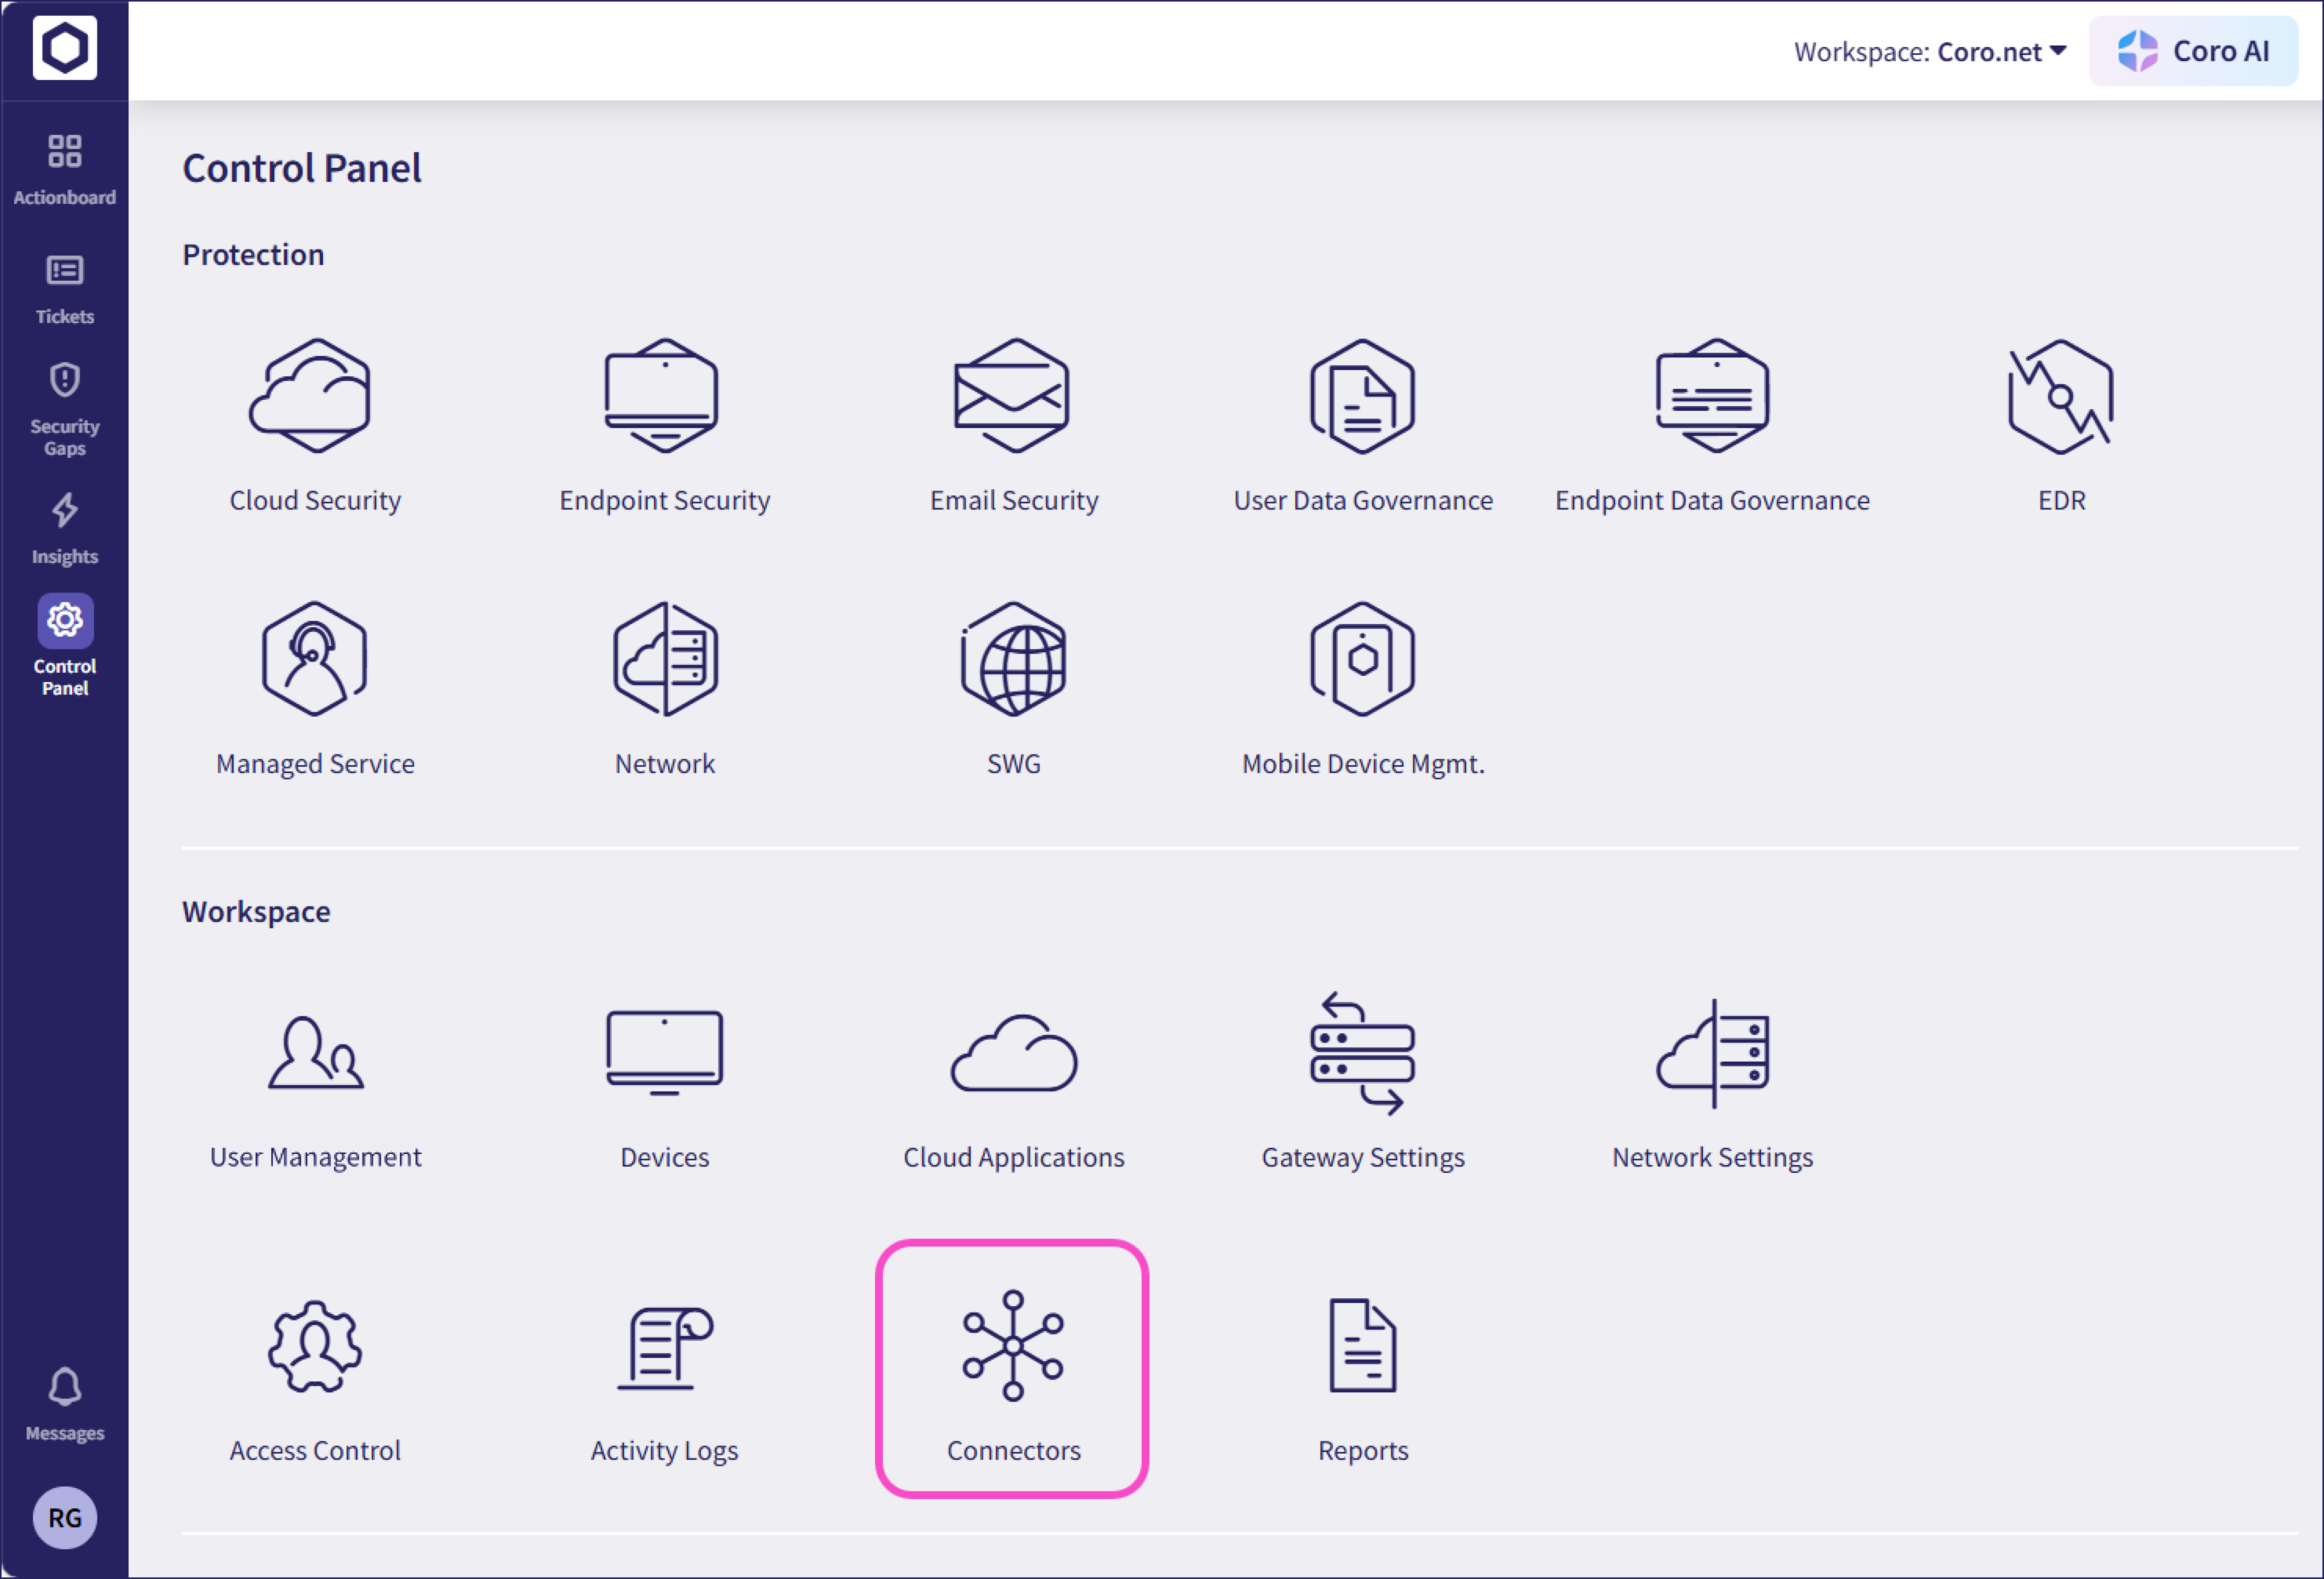
Coro displays the Connectors page.
Select SIEM:
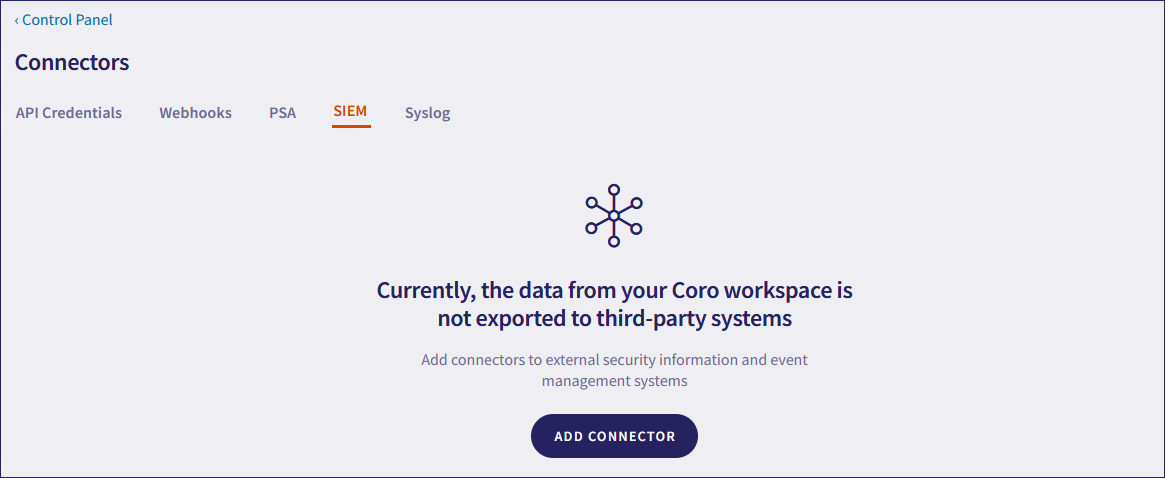
Select ADD CONNECTOR.
Coro displays the Add connector dialog:
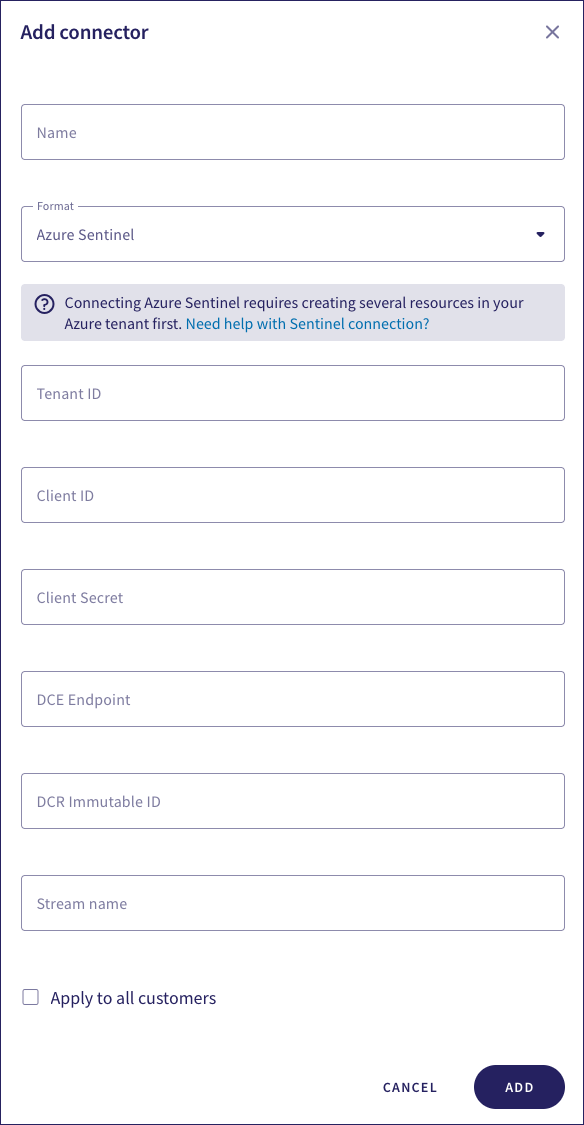
Configure the following connection settings:
Name: Enter a suitable connector name.
Format: Select Azure Sentinel.
Tenant ID: The Directory (tenant) ID field from your registered app. See Register Coro as an approved app in Azure.
Client ID: The Application (tenant) ID field from your registered app. See Register Coro as an approved app in Azure.
Client Secret: The Value field from the client secret. See Register Coro as an approved app in Azure.
DCE Endpoint: The Logs Ingestion identifer from your DCE. See Creating a DCE in Azure
DCR Immutable ID: The Immutable ID field from your DCR. See Creating a DCR and custom log table in Azure.
Stream name: The custom log table name you created, prefixed with "Custom-". See Creating a DCR and custom log table in Azure.
For example, if your table name is "Sentinel_CL" ("_CL" is added automatically by Azure to indicate a custom table), your full stream name is "Custom-Sentinel_CL".
If you are familiar with the Azure CLI, you can optionally execute the following command to see the stream name:
az monitor data-collection rule list -g %RESOURCE_GROUP_NAME% -o json
\  --query "[?immutableId=='%DCR_IMMUTABLE_ID%'].{name:name, dataFlowStreams:dataFlows[].streams, declaredStreams:keys(streamDeclarations)}" )
Apply to all customers: (MSP admin users only) Enable this option to automatically create the connector in all descendant workspaces linked to the channel workspace. Each descendant workspace then forwards events to the configured SIEM provider.
Select ADD.
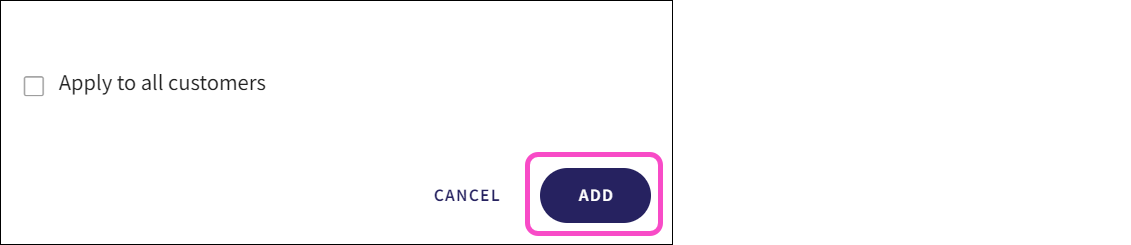
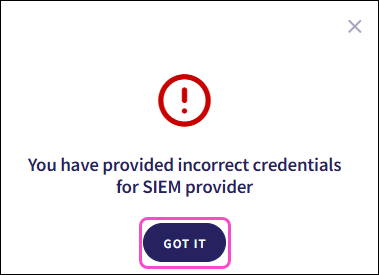
Coro sends a test event to verify your configuration. If the configuration is incorrect, Coro displays an error dialog. Select GOT IT to return to the Connectors page. Coro does not save the configuration:
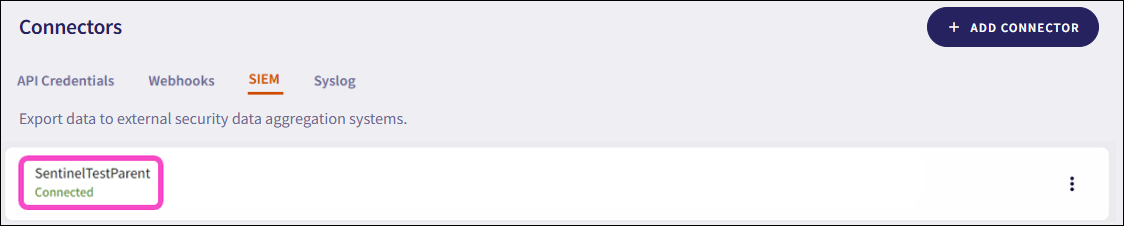
If the configuration is correct, Coro creates the connector with a status of Connected:
For MSP channel workspaces, Coro adds the connector to the channel workspace and, if Apply to all customers is enabled, to all connected descendant workspaces.
Coro sends event data and metadata to the configured SIEM in real time. If the SIEM is unavailable, Coro cannot collect or send event data.