When you connect a cloud application, Coro automatically synchronizes user accounts across to your workspace from user and group lists held in the application (where permissions allow it). Admin users can also manually add users to Coro either individually or in bulk to address scenarios where users cannot be automatically identified.
User accounts are identified by an email address and marked as protected or unprotected. The protection status can be affected by subscription limits, limitations within the cloud application that impact protection, or explicitly set by an admin user.
For more information on how Coro classifies users, see Users and user types.
To view and manage your users and groups, use the User Management page:
From the sidebar, select Control Panel:
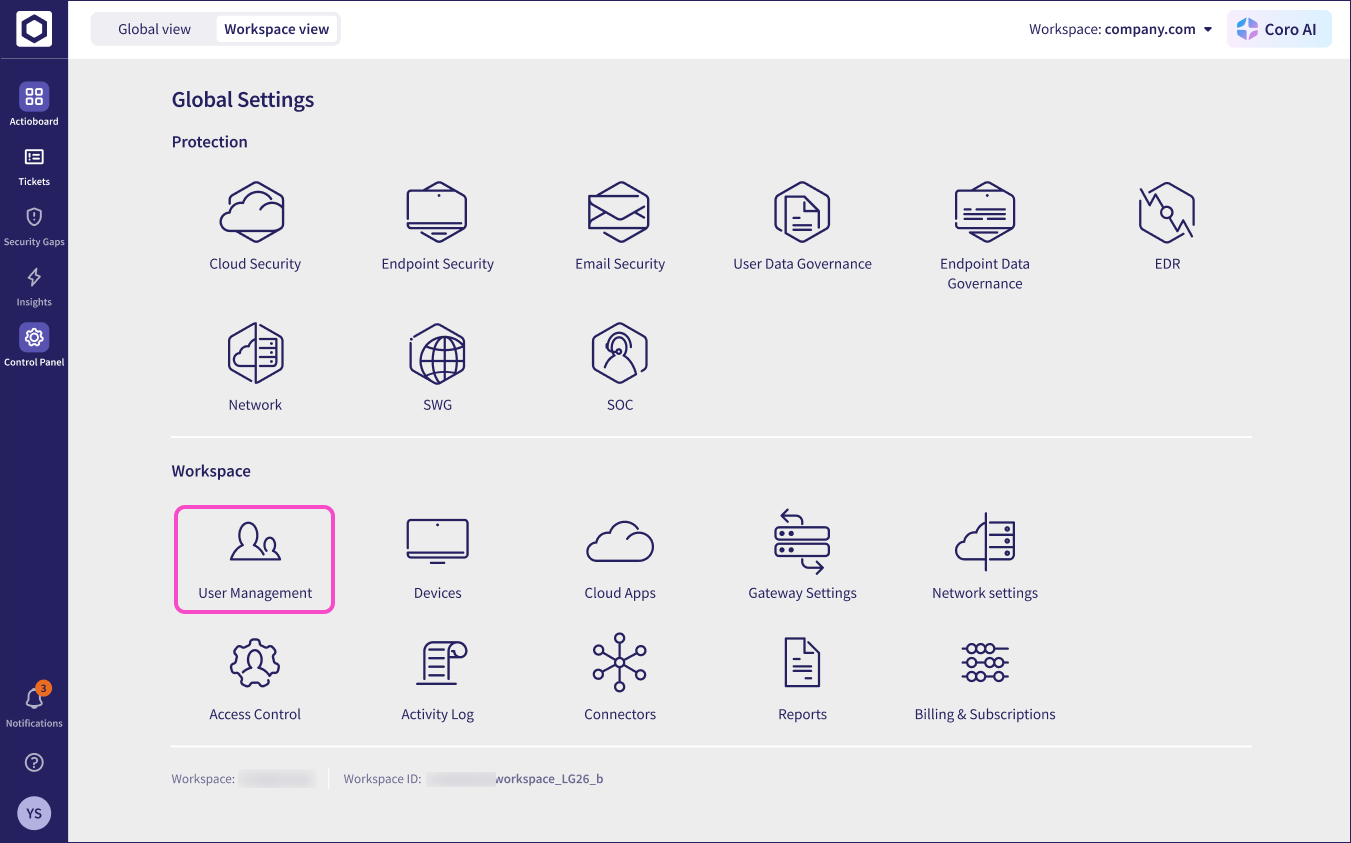
Select User Management:
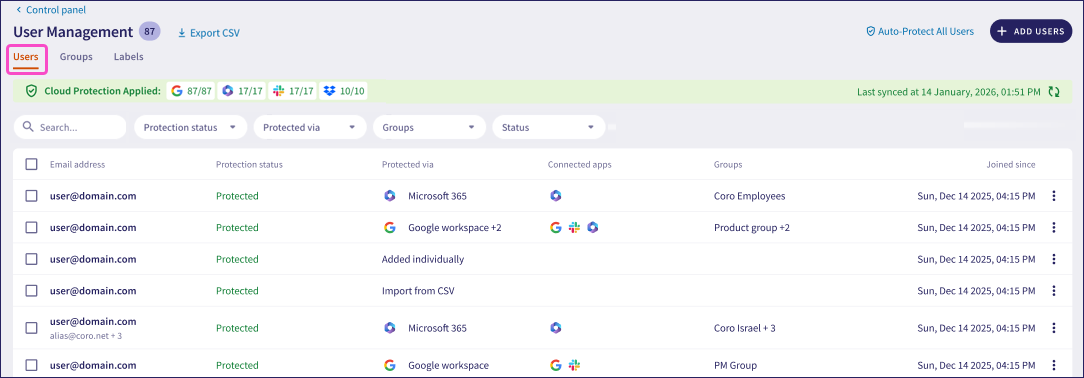
Coro displays the User management page:

This page enables you to manage all of the users and user groups identified and synchronized from your connected cloud applications, or added manually.
The banner message at the top shows:
The number of protected users in each connected cloud application:

The counters represent the number of protected users against the total synchronized users in each application.
The most recent synchronization time:

Coro synchronizes protected users and groups automatically at 4:00 AM (UTC) each day. Admin users with sufficient permissions can manually trigger synchronization by selecting the synchronize icon:

Navigate between views using the following tabs:
Users: Your protected and unprotected users
Groups: Your protected and unprotected user groups
Labels: Your user labels
Use this tab to manage protection for your workspace's users. Users listed here are either:
- Synchronized automatically from a connected cloud application
- Added manually where synchronization is not possible
In a Coro workspace, users identified from connected cloud applications remain listed in your Coro workspace in protected or unprotected state while they continue to be sychronized from the application. If you remove the user from your cloud application, Coro removes the user record from your workspace at the next synchronization.
For manually-added users, you can enable/disable protection in the same way, or completely remove them from your Coro workspace.
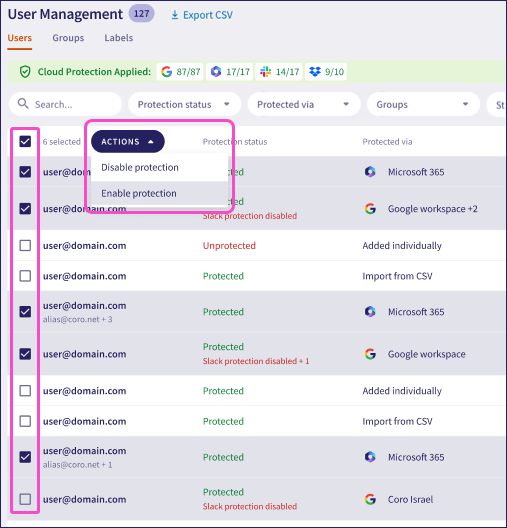
To access the user list, select Users:
On this tab, you can:
View a list of your users
Set users to Protected or Unprotected.
Filter the list to show only users meeting specific criteria.
Add new users individually or in bulk.
Remove manually-added users.
Coro lists each user with the following details:
| Field | Description |
|---|---|
| Email address | The user's email address. This is a distinct identifier for the user account, and represents a single user. |
Protection status | The overall protection status of this user. One of:
The status can also show where specific application protection has been disabled by an admin user. |
Protected via | The cloud applications through which this user account is connected and protected by Coro. Where this contains more than one application, hover your pointer over the field to view a tooltip showing the full list. This column might contain one of the following additional values:
|
| Connected apps | The full list of cloud applications through which this user account is connected. This might include applications where protection is not enabled. |
Groups | The list of groups in which this user account is present. The user might have been added as a part of a wider group when added to protection. Where this contains more than one group, hover your pointer over the field to view a tooltip showing the full list. For more information, see Groups. |
| Joined since | The date and time this user was added or synchronized to Coro. |
Select the three-dot menu in each row to view the following options for that user:
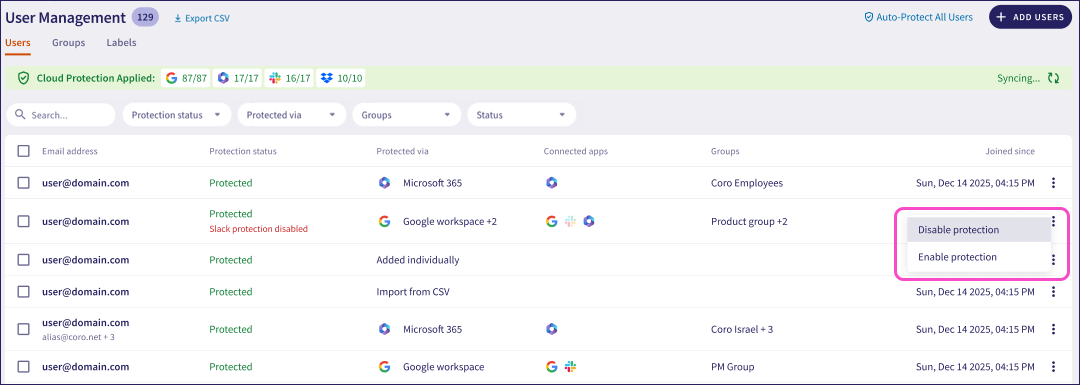
Enable protection: Enable protection for this user. Your workspace subscription might include a limit on user protection which can dictate the number of users allowed protection at any one time. If you exceed this limit, Coro can restrict enabling protection for further users. To learn more, see Adding users and user groups for protection.
Disable protection: Disable protection for this user. To learn more, see Removing users from protection.
Remove user: (For manually-added users) Disable protection and delete their record from Coro. To learn more, see Removing users from protection.
Coro enables you to perform actions on multiple users by selecting the checkboxes adjacent to each user. From here, use the ACTIONS menu to perform operations on the selected users:
Coro provides filters and search to enable admin users to view only users that match specified criteria.
Filter the users list using the following parameters:
Protection status: Filters by user status (protected or unprotected).
Protected via: Filters by the protected cloud application or method through which a user was added. Select one or more connected cloud applications, added via a CSV bulk import, or added individually.
Groups: Filters by the named groups a user appears in.
Joined since: Applies a time period to filter users by when they were added to Coro. Choose from Today, Yesterday, Last 3 days, Last 7 days, Last 30 days, or This month.
If you select more than one application in the Joined via filter, the list shows users who match any of the selected applications.
This filter also includes an option to show users protected through the Coro Inbound Gateway email security add-on.
Use the Search to locate a named user:

A search matches leading characters of the user name, and does not match searches on the domain.
A user's status is Active or Inactive.
The status changes in the following circumstances:
A user becomes Inactive if they have not been actively using their cloud application account for the configured inactivity period in your workspace (default: 30 days). Coro still protects users who are Inactive.
An Inactive user becomes Active when they next sign in or if they perform 35 activities within three days. Examples of an activity include downloading files, deleting files, signing in, and adding someone as an admin.
When a user is disconnected from a cloud application, they are unprotected for that cloud application.
When a user reconnects to a cloud application, they are considered protected, and their status becomes Active.
New users added to protection are automatically given a status of Active, and this remains in place until the configured inactivity period is reached. At that point, if the user has not yet accessed their cloud application account, Coro marks them Inactive.
When you connect an application such as Microsoft 365 or Google Workspace to your Coro workspace, you give Coro permission to access user information in that application. This includes defined user groups.
Upon connection, Coro offers an option to protect all protectable users, including within designated groups. Coro shows all user groups under the Groups tab, and lists group members under the Users tab.
To access the groups list, select Groups:

On this tab, you can:
View a list of groups added from your connected cloud applications.
Filter the list to show only groups meeting specific criteria.
Coro lists each group with the following details:
| Field | Description |
|---|---|
| Group name | The group name, together with an icon representing the connected cloud application through which it was identified. |
| Users | The number of users in the group. |
| Protection status | The protection status of this group. One of:
|
| Joined since | The date and time this group was added or synchronized to Coro. |
Select the three-dot menu in each row to view the following options for that group:
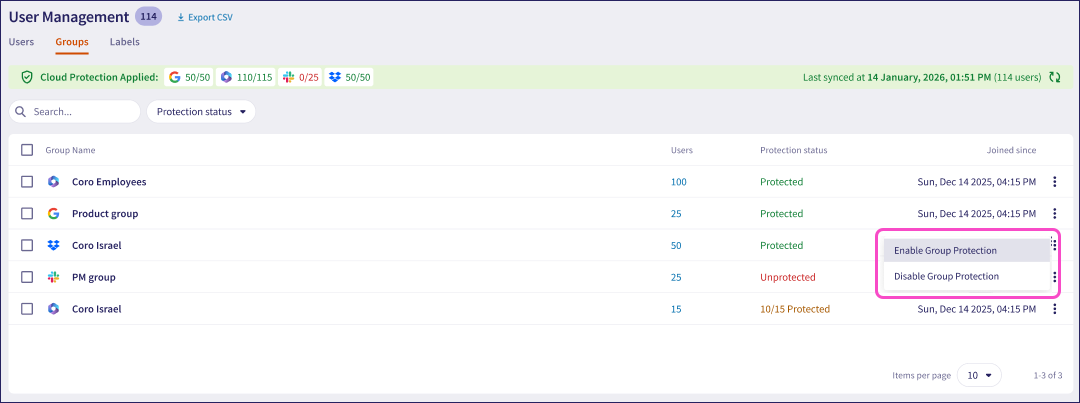
Enable protection: Enable protection for all users in this group. To learn more, see Adding users and user groups for protection.
Disable protection: Disable protection for all users in this group.
When you disable protection for a group, users in that group have protection disabled only if there are no other protected groups that the user belongs to.
Coro enables you to perform actions on multiple groups by selecting the checkboxes adjacent to each group name. Use the ACTIONS menu to perform operations on all selected groups.
Coro provides filters and search to enable admin users to view only groups that match specified criteria.
Filter the groups list using the following parameters:
- Protection status: Filters by group protection status (protected or unprotected).
Use the Search to locate a named group:

A search matches leading characters of the group name.
Coro protects licensed users within nested groups in Google Workspace and Microsoft 365. If you add a group for protection and that group contains other groups, Coro automatically adds all licensed users in the nested groups to protection alongside the users in the parent group.
For each user added through this mechanism, Coro does not identify the nested group of which the user is a member. Instead, Coro shows all licensed users from nested groups as being members of the parent group you selected for protection.
To save the users list to a CSV file, select Export CSV.
Coro presents a message confirming that the export to CSV file is in progress and that it will be available at the Activity Logs page later.
The CSV file has the following fields:
- Alias
- IsAdmin
- CloudApplication
- JoinedVia (as admin, individually, or via a group)
- Group
- ProtectionDate