v1.9.2
Version 1.9.2 provides new features, existing feature enhancements, and fixes.
New features
This section describes the new features that we’re releasing with version 1.9.2.
1 - Device labels
Coro now supports the creation of custom device labels. Device labels can be used to group related devices. Once devices are assigned labels they can be used as filter criteria to search for related devices. Device labels are displayed for each device in the Devices list and in the Device details pane:

1.1 - Create and manage labels
note
Only administrators can create and manage labels.
From the Coro Console, administrators can create labels. From the Control Panel, navigate to Endpoint Devices under Protection Coverage. Select Device Labels > Add Label:

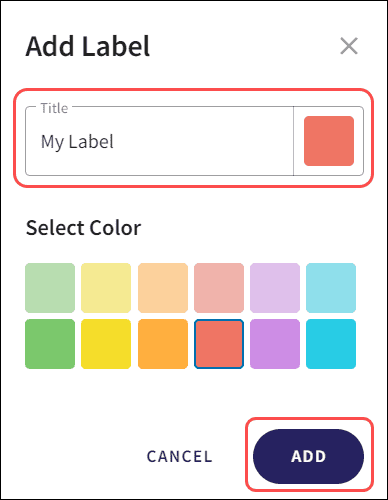
The Add Label dialogue is displayed. Provide a label Title, choose a color from Select Color, and click the Add button:
The new label is created and listed on the Device Labels page:

note
Label names must be unique. Duplicate label names are not supported.
From the Device Labels page, you can view and manage labels assigned to devices. You can also edit or remove labels from devices.
To view all devices to which a label has been added, click on the number listed under No. of devices. The filtered Devices page opens which displays the devices:

See Add Label to Devices for additional functionality you can perform on the Devices page.
note
A label must be added to at least one device before you can view and manage the device(s) assigned to it.
From the Device Labels page, click the ellipsis on the far right of any label to display the Edit label and Delete label options:

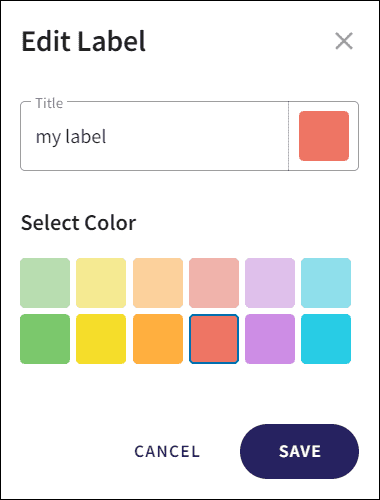
Click Edit label to display the Edit label where you can edit the Title and Color of an existing label. Click the Save button to save your changes:
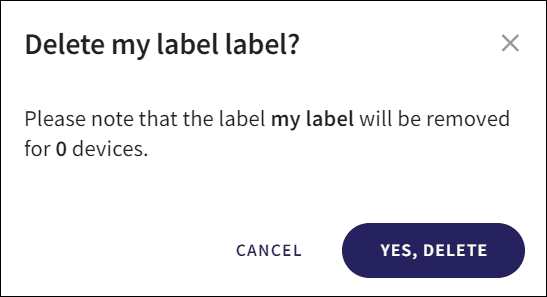
Click Delete label to delete an existing label. A confirmation dialog is displayed which includes the number of devices the label is assigned to. Click Yes, Delete to delete the label. The label is deleted and removed from all devices in the Devices list and Device details pane:
1.2 - Add label to devices
From the Coro Console, you can add existing labels to devices. Labels can be added to:
- A single device
- Multiple devices simultaneously
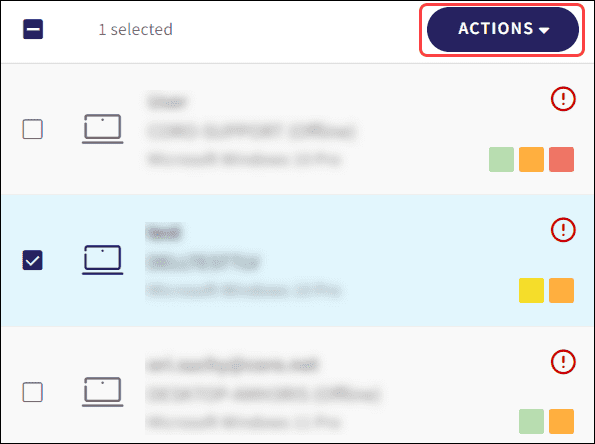
From the Devices page, select the device from the Devices list and select Actions from the Device details pane:

Alternatively, select the checkbox next to the device(s) in the Devices list and select Actions > Add label:

note
To bulk add a label to multiple devices, select multiple device checkboxes from the Devices list.
Click Manage labels to navigate to Endpoint Devices > Device Labels. From here, administrators can create and manage labels.
note
This option is only visible to administrators.
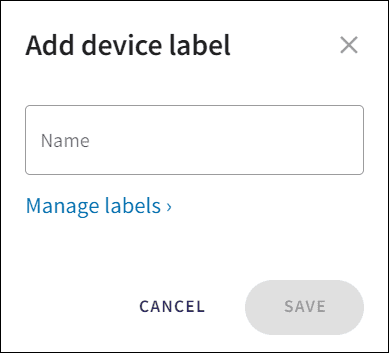
You can select a label from the device label list by clicking the Name field. You can also start typing a name to automatically find the label in the device label list:
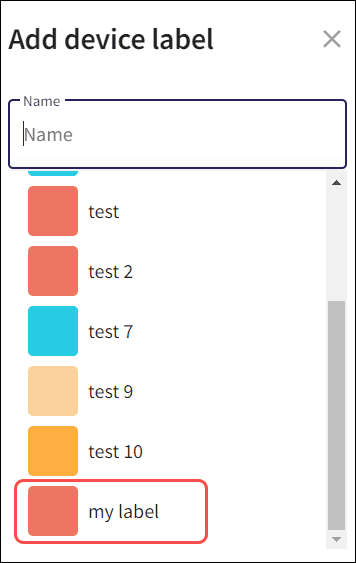
Once you have selected the label, click Save.
The label is added to the device, and a confirmation message is displayed:

1.3 - Remove label from devices
You can remove existing labels from devices. Labels can be removed from:
- A single device.
- Multiple devices simultaneously.
From the Devices page, select the device from the Devices list and select the cross icon in the label you want to remove:

The label is removed from the device, and a confirmation message is displayed:

Alternatively, Select the checkbox next to the device(s) in the Devices list and select Actions > Remove label:
note
To bulk remove a label from multiple devices, select multiple device checkboxes from the Devices list.
Click Manage labels to navigate to Endpoint Devices > Device Labels. From here, administrators can create and manage labels.
note
This option is only visible to administrators.
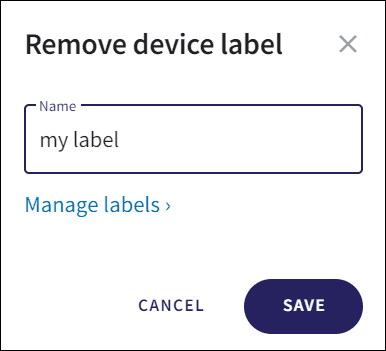
You can select a label from the device label list by clicking the Name field. You can also start typing a name to automatically find the label in the device label list:
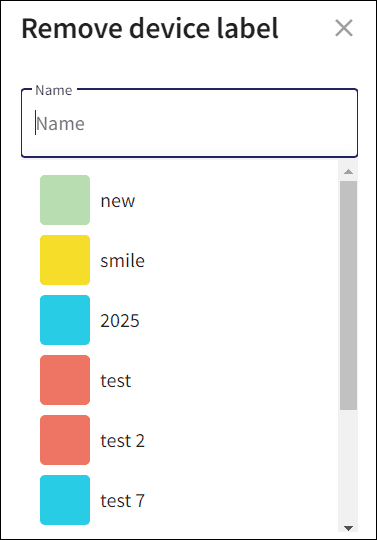
Once you have selected the label, click Save.
The label is removed from the device, and a confirmation message is displayed:

1.4 - Using the label filter
Once you have added labels to devices, you can use the Label filter to filter for devices by label names:

Select the checkbox(s) next to each label name to automatically filter the Devices list:

1.5 - Activity log
All label-related actions (create, delete, add, remove) are displayed in the Activity Log:

Enhancements
Following are enhancements to existing features that we’re releasing with version 1.9.2.
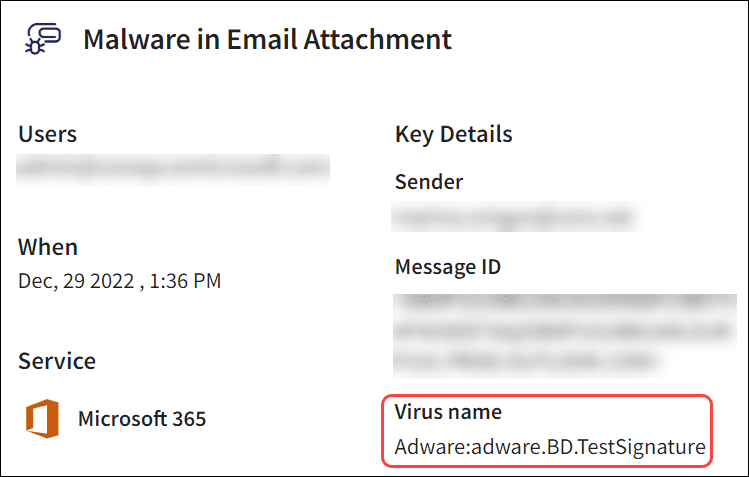
1 - Malware in email attachment tickets
Virus names are now displayed in Malware in Email Attachment tickets as well as in the ticket creation notification:
2 - Exempt from protection users
Tickets are no longer generated for users who are exempt from protection. This excludes administrators.
3 - Additional DLP file type support
Email attachments, file sharing, and remote drive scans now support the following archive file types:
- zip
- rar
- 7z
- tar
- gz
The size limit for files remains the following:
- 200MB for non-image files.
- 1MB for image files.
note
This applies to both the entire archive file and each file within the archive.
Tickets are now created for each archive or email file per DLP type (NPI, PII, PHI, PCI):

note
Only the first layer of an archive file is included in a scan. Nested archives are ignored.
4 - Contact user
The email which is sent using the Contact user action now includes the following opening line:
Sent on behalf of ADMINUSEREMAIL (ADMINUSERNAME).
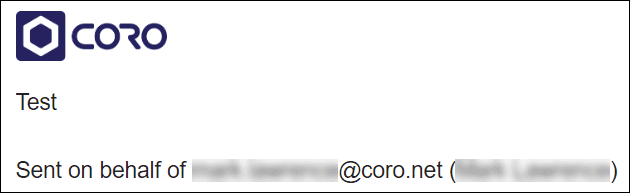
note
If the ADMINUSERNAME is missing (both first name and last name are missing), the opening line will read:
Sent on behalf of ADMINUSEREMAIL
Fixed items
- Updated the Allowlist under Access Permissions .
- Fixed the issue of user aliases not displaying in the Protected Users list and Users widget when a Google group (containing protected users) is added.
-
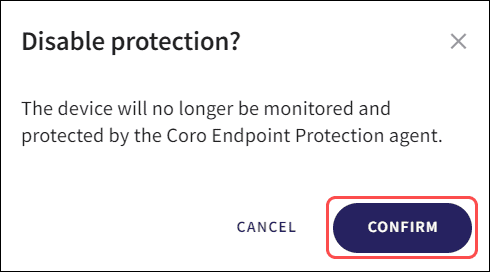
The
Remove from protection
action under
Devices
has been changed to
Disable protection
:

-
The
Disable protection
modal confirmation button has been changed from
Remove
to
Confirm
:
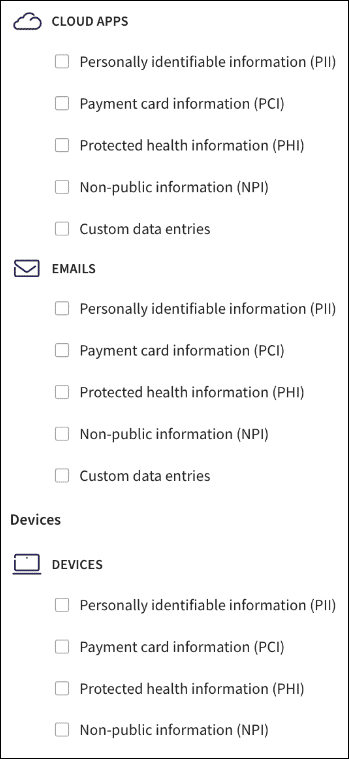
-
When a new workspace is created, all DLP options (Cloud Apps, Email, and Devices) under
Data Governance > Monitoring
are now disabled by default:
- Removed warning icons next to the Add sender to blocklist and Add sender's domain to blocklist actions for Email Phishing tickets on the Ticket Log .
- Removed warning modals when attempting to execute the Add sender to blocklist and Add sender's domain to blocklist actions for Email Phishing tickets on the Ticket Log .
- Minor UI updates.
Additional updates
This section describes the additional updates that we're releasing with version 1.9.2
1 - Windows agent 1.10
Windows Agent 1.10 releases at the end of February 2023 and includes the following:
New additions:
- .NET 4.8 runtime is now required for Windows installations.
- Quarantine files are now kept for 30 days.
Bug fixes:
- Internal bug fixes.
Options for Coro agent updates
Agents and their versioning can be found and downloaded from your workspace at Control Panel > Endpoint Devices > Agent Deployment:
