Enrolling iOS and iPadOS devices
Coro enables you to enroll iOS and iPadOS devices:
- Manually, as a Company Owned Device (Supervised) or Bring Your Own Device (BYOD) .
- Automatically, through Coro being designated as a MDM for your Apple Device Enrollment Program (DEP)-deployed devices.
- Automatically, through identity-led enrollment by a Managed Apple ID (MAID) user.
For more details about each type, see Overview.
Read the following procedure for instructions on enrolling your device type:
- Manually enrolling a supervised iOS or iPadOS device
- Manually enrolling a BYOD iOS or iPadOS device
- Enrolling devices through a DEP
- Enrolling devices through MAID
note
You cannot enroll an iOS or iPadOS device until you have configured a APNs certificate. For details, see Configuring certificates and account access.
Manually enrolling a supervised iOS or iPadOS device
Important
For supervised iOS and iPadOS devices, you must have the device physically present. This procedure fully factory-resets the iOS device - make sure you have backed-up any important data before you start.
Follow the steps in each of these sections to enroll a supervised device:
- Prerequisites
- Get the enrollment link from your Coro workspace
- Set up Apple Configurator with server and organization details
- Prepare a device
Prerequisites for supervised devices
For supervised iOS or iPadOS devices, make sure you have the following before you begin:
- Your device, running iOS or iPadOS version 15 or later, unlocked and powered up, and with access to a Wi-Fi network. A factory reset of the device is required.
- A macOS computer running version 10.12.5 or later, with Apple Configurator 2 or later installed.
- A charging cable to physically connect the device to the macOS computer.
- Standard Apple ID and password credentials.
- Access to the Coro console.
Getting the enrollment link from your Coro workspace
Before you can proceed to prepare a device, first obtain the MDM server enrollment link:
- Sign in to the Coro console and navigate to the Mobile Device Management module.
-
On the
Mobile Device Management
page, select the
Devices
tab:

-
Select
+ ENROLL DEVICE
, then select
iOS Device
:

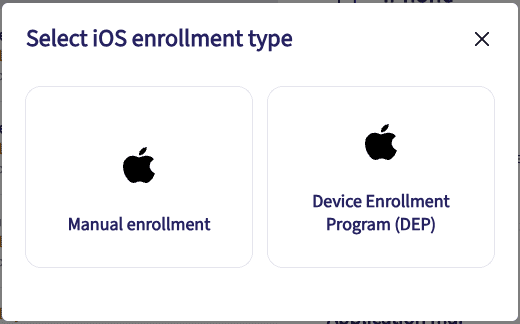
-
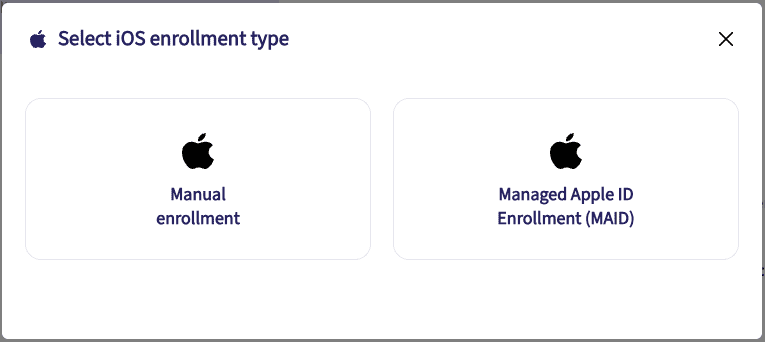
From the
Select iOS enrollment type
dialog, select
Manual enrollment
:
Coro displays the Enroll iOS devices dialog:

-
Select
Company Owned Device (Supervised)
, then select
NEXT
.
Coro displays the Choose enrollment method step:
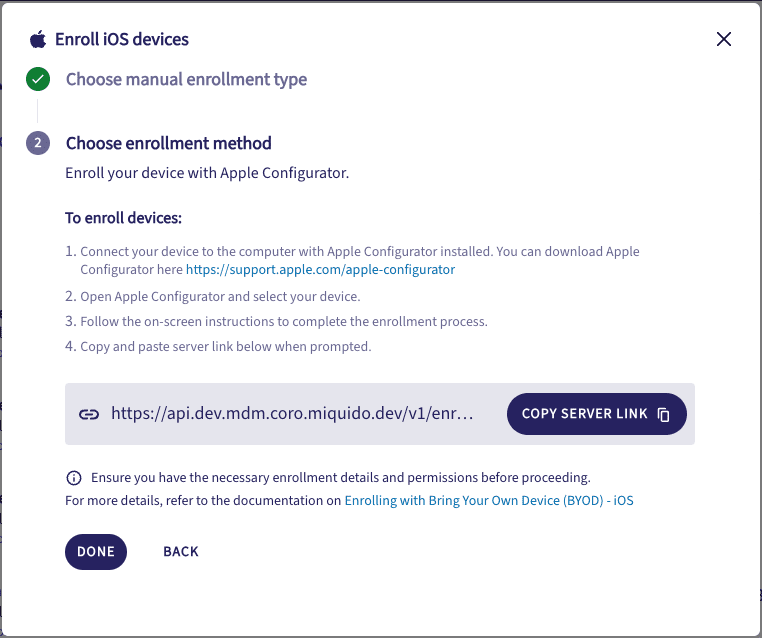
-
Select
COPY SERVER LINK
to copy the provided server link to your clipboard. Keep this information for later.
note
The Apple Configurator steps described in this dialog are covered later in this guide.
- Select DONE to close the dialog.
Setting up Apple Configurator with server and organization details
In this section, you set up a macOS computer with all required software and settings to function as a platform for preparing iOS and iPadOS devices for Coro MDM.
This is a one-time procedure designed to set up your macOS computer with the Apple Configurator tool, details of Coro's MDM server, and information about your organization. These details are applied to each device on which you run the preparation procedure.
On your macOS computer, perform the following steps:
- Install and run the Apple Configurator app. Download the configurator from this link: https://support.apple.com/apple-configurator .
- Select Settings... from the Apple Configurator menu.
-
Select
Servers
:
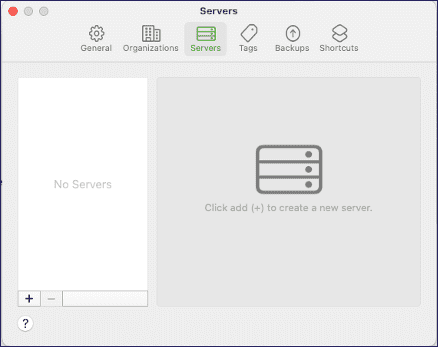
-
Select the
plus
icon to add a new server. This starts the
Define an MDM Server
wizard:
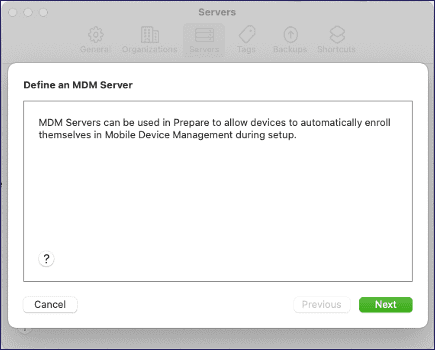
-
Select
Next
to add the MDM server details:
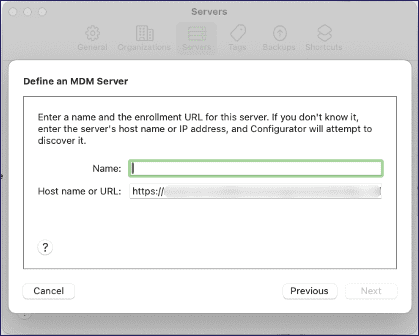
-
Enter the following details:
- Name : Enter a name for the server. Coro recommends "Coro MDM".
- Host name or URL : Paste the MDM enrollment server link, see Getting the enrollment link from your Coro workspace .
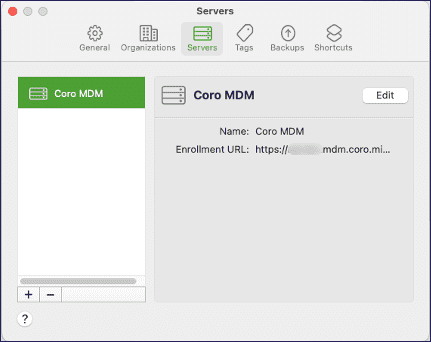
-
Select
Next
to continue.
Apple identifies the server and adds it to your Servers list:
-
Add an organization and supervision identity. Select
Organizations
:
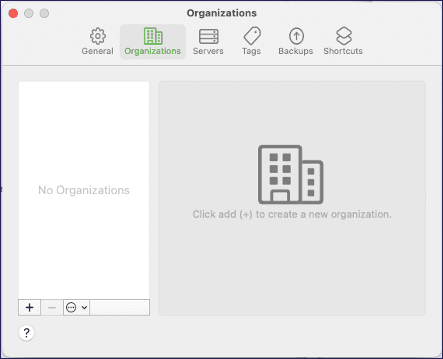
-
Select the
plus
icon to add a new organization. This starts the
Create an organization
wizard:
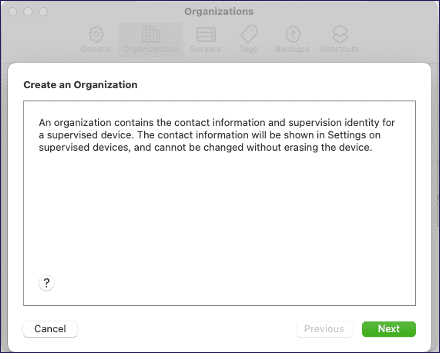
-
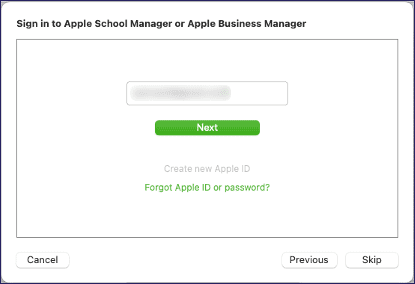
Select
Next
to continue. Then, when prompted to login, select
Skip
:
-
Enter details for your organization into the fields provided:
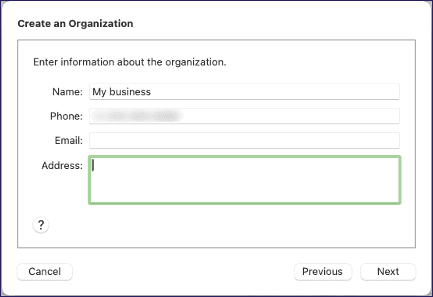
-
Select
Next
to continue. Apple adds your organization to your
Organizations
list:
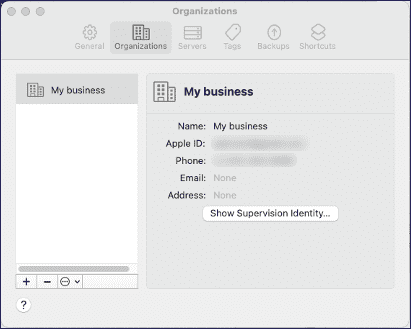
-
To view your organization's supervision identity, select
Show Supervision Identity...
:
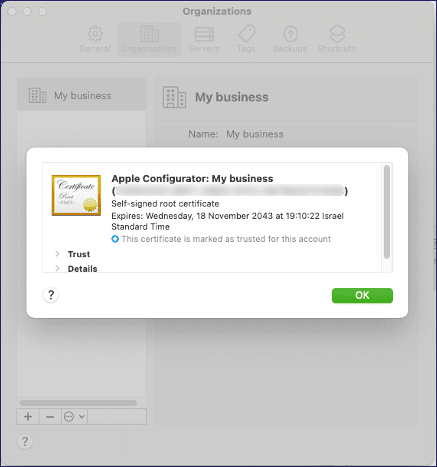
- Expand the Details section to make sure your Apple Push Notification Services certification is visible in the list, then select OK to close the dialog.
- Close the Settings dialog.
Preparing a device
The following steps describe how to prepare an iOS or iPadOS device for Coro MDM management using the MDM server and organization details previously configured in Apple Configurator:
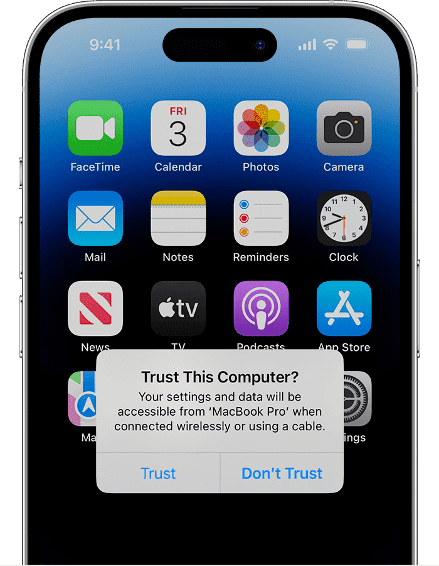
-
Connect your device physically via a charging cable to the macOS computer and, on the device, agree to "Trust this computer":
-
Open the Apple Configurator app and select your mobile device:

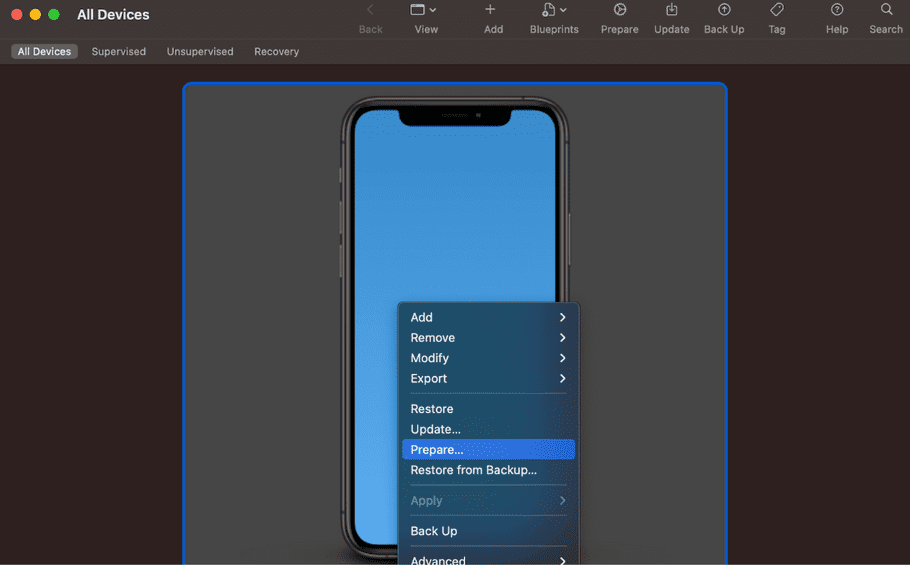
-
Right-click on the displayed device and select
Prepare...
:
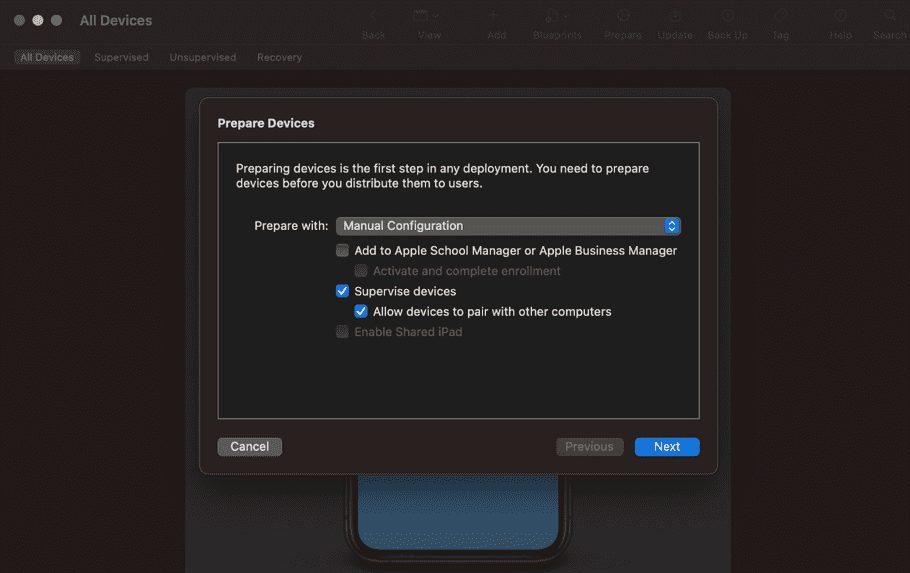
-
In the
Prepare Devices
dialog, select
Manual Configuration
and enable
Supervise devices
. Then, select
Next
to continue:
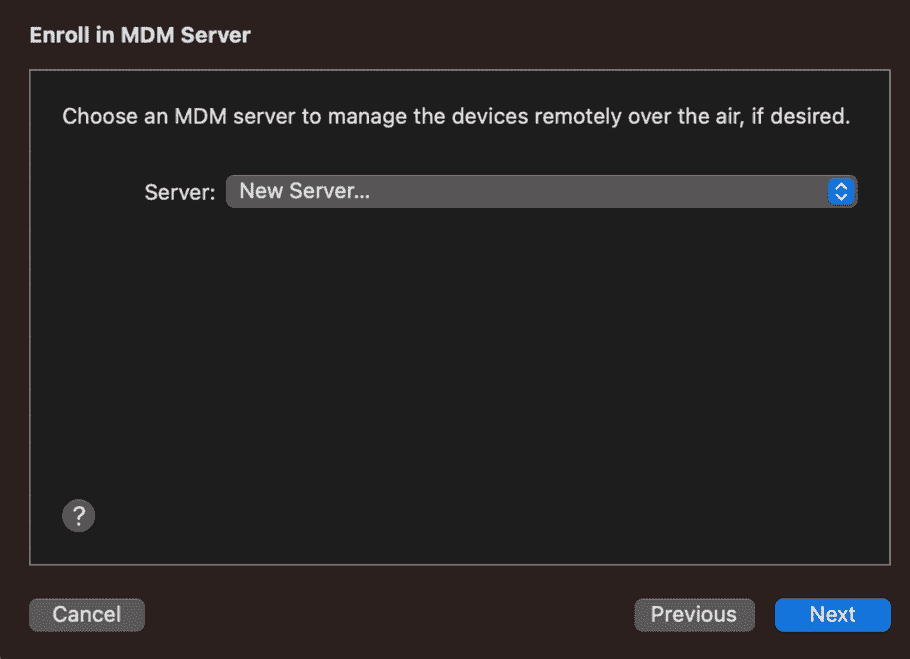
-
In the
Enroll in MDM Server
dialog, choose your Coro MDM server from the drop-down list. Then, select
Next
to continue:
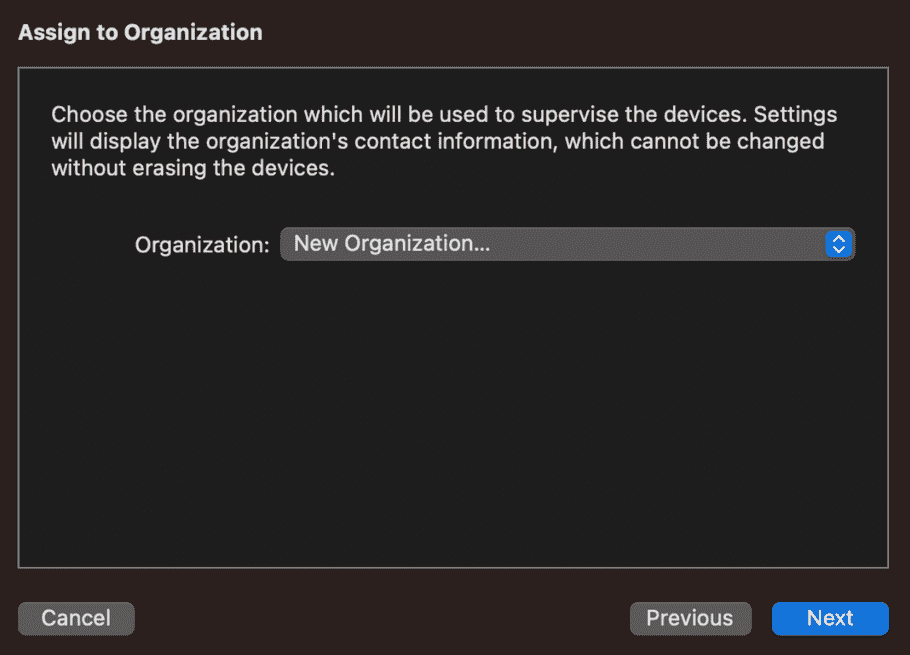
-
In the
Assign to Organization
dialog, choose your organization from the drop-down list. Then, select
Next
to continue:
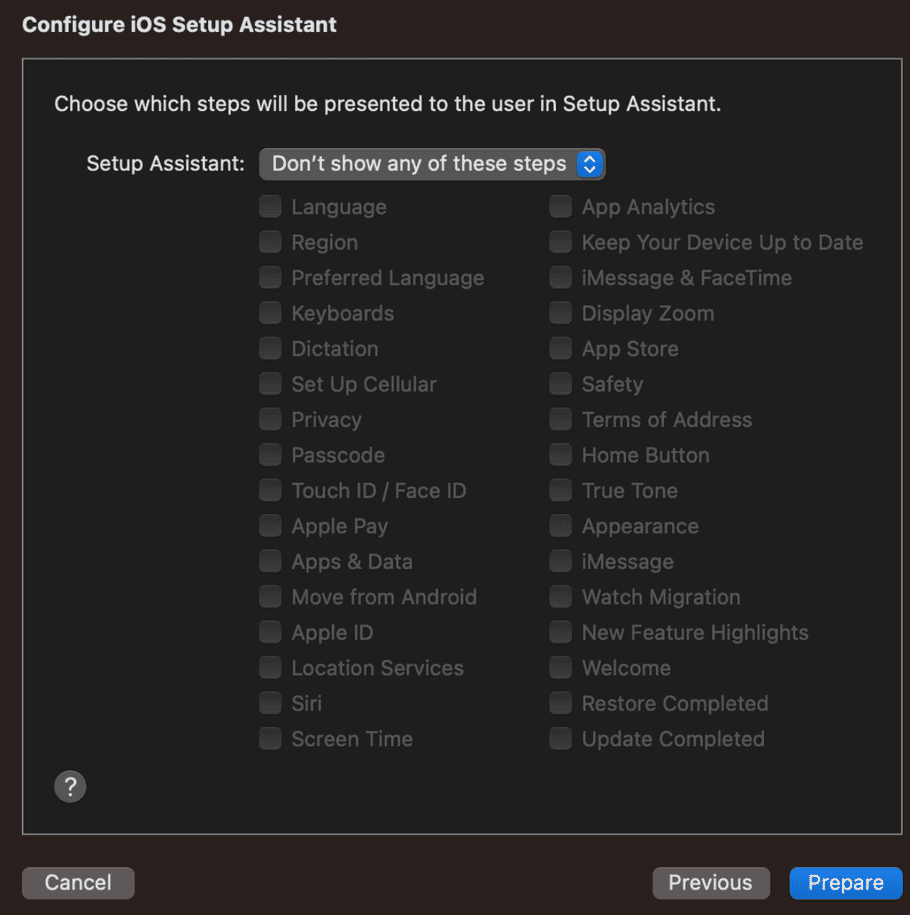
-
In the
Configure iOS Setup Assistant
dialog, enable the steps you want to appear during the device setup procedure. Then, select
Prepare
to complete the process:
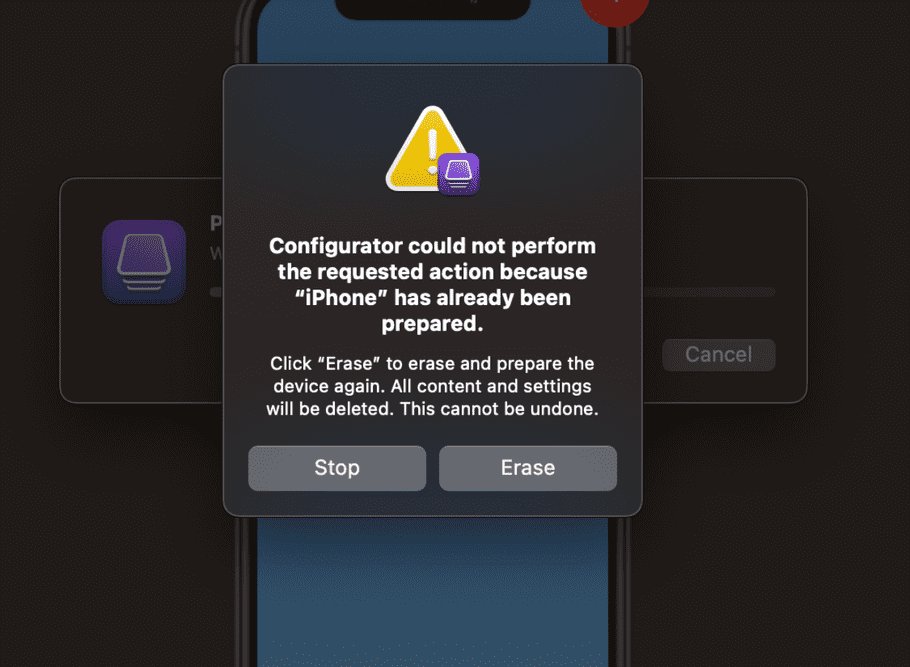
-
The Apple Configurator app warns that the device was previously prepared. Select
Erase
to erase the device's current state, apply your settings, and prepare in
Remote Management
mode:
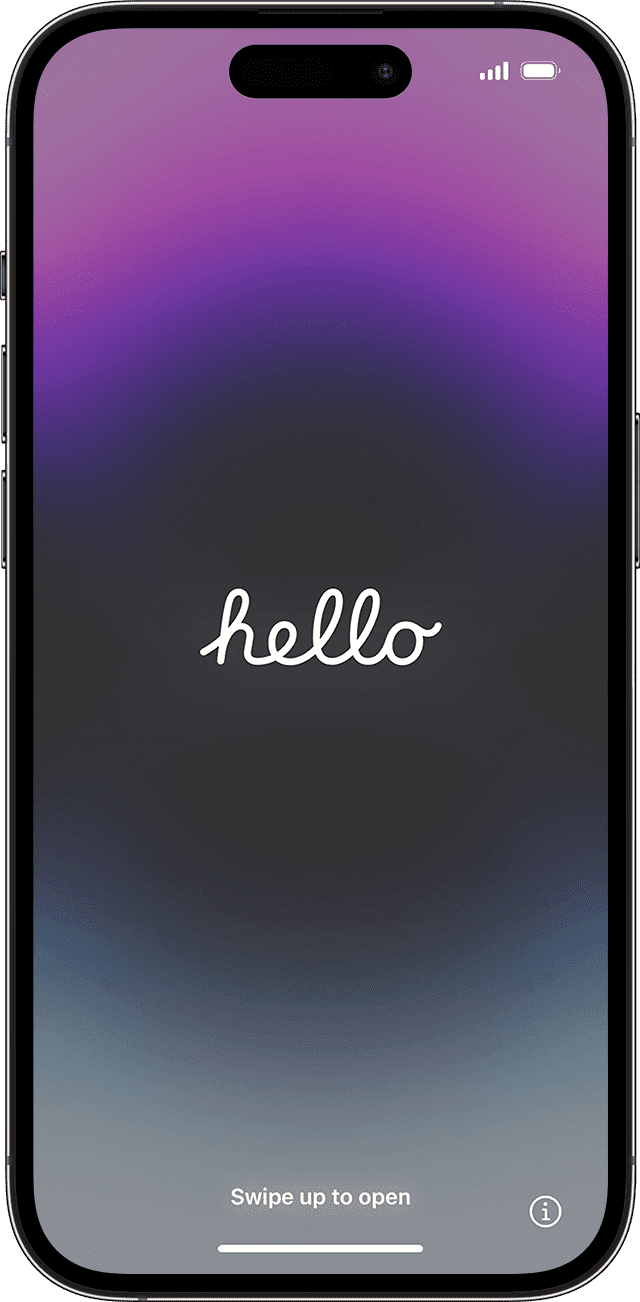
-
Wait for the device to reset and restart. When your device reaches the Apple
Hello
prompt, it is safe to disconnect:
Final steps
After you complete the device preparation process, you can proceed to distribute the device to your end user.
When your user signs into the device and sets up the Wi-Fi connection, it downloads the enrollment profile and connects to your Coro MDM service.
Your Coro MDM device list is automatically populated with the connected device.
Manually enrolling a BYOD iOS or iPadOS device
note
For BYOD enrollments, device activation can be performed remotely by the end user if required. No factory reset is needed - the device retains all current data.
Follow these steps to enroll a BYOD iOS device:
Prerequisites for BYOD devices
For BYOD devices, you need:
- Your device, running iOS or iPadOS version 15 or later, unlocked and powered up, with access to a Wi-Fi network.
- Access to the Coro console.
Sending enrollment links to your users
Before you can enroll a device as BYOD, you first need to obtain the enrollment link and send it to the device's user. Coro enables you to bulk email an enrollment link to one or more users. Alternatively, you can copy the link and paste it directly into a browser on the device.
To access the enrollment link, perform the following steps:
- Sign in to the Coro console and navigate to the Mobile Device Management module.
-
On the
Mobile Device Management
page, select the
Devices
tab:
-
Select
+ ENROLL DEVICE
, then select
iOS Device
:
-
From the
Select iOS enrollment type
dialog, select
Manual enrollment
:
Coro displays the Enroll iOS devices dialog enabling you to select a manual enrollment type:
-
Select
Bring Your Own Device (BYOD)
, then select
NEXT
.
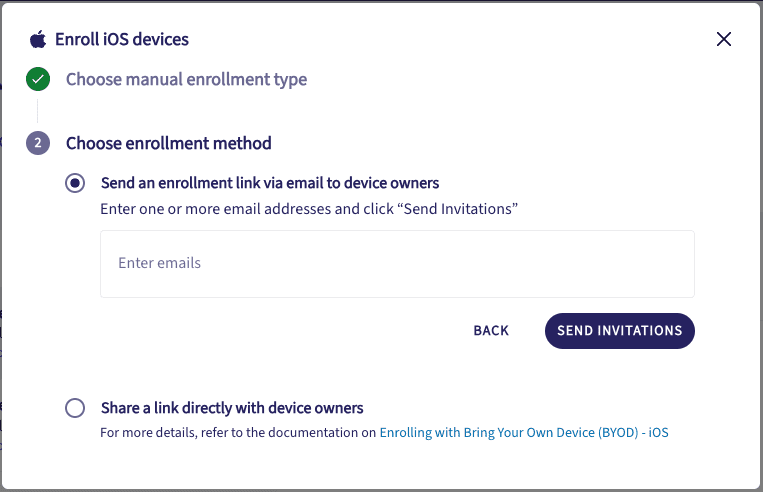
Coro displays the Choose enrollment method step:
-
Choose one of the following methods:
-
Send an enrollment link via email to device owners
:
Enter one or more email addresses in the box provided, then select SEND INVITATIONS to request Coro to send a preformed email template to each address in the list containing instructions and a link to begin the enrollment process.
note
Type an email address, then press space or enter to validate it. Or, use commas to separate a list of addresses.
-
Share a link directly with device owners
:
Use the COPY TOKEN button to copy the unique enrollment link to your clipboard:
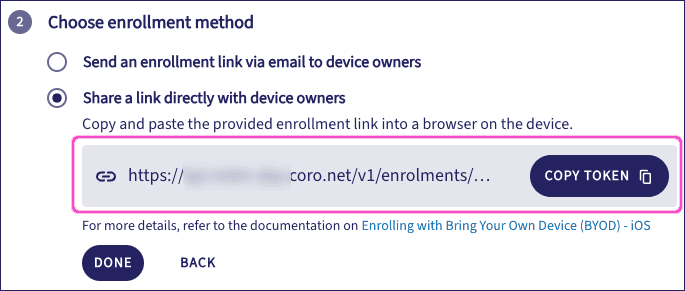
Send this to your device owners with instructions to paste it into a web browser on the device.
-
Send an enrollment link via email to device owners
:
- Select DONE to close the dialog.
Activating enrollment on a device
On the device, perform these steps to enroll:
- Access the invitation email through your device's mail app, and tap the included device enrollment link.
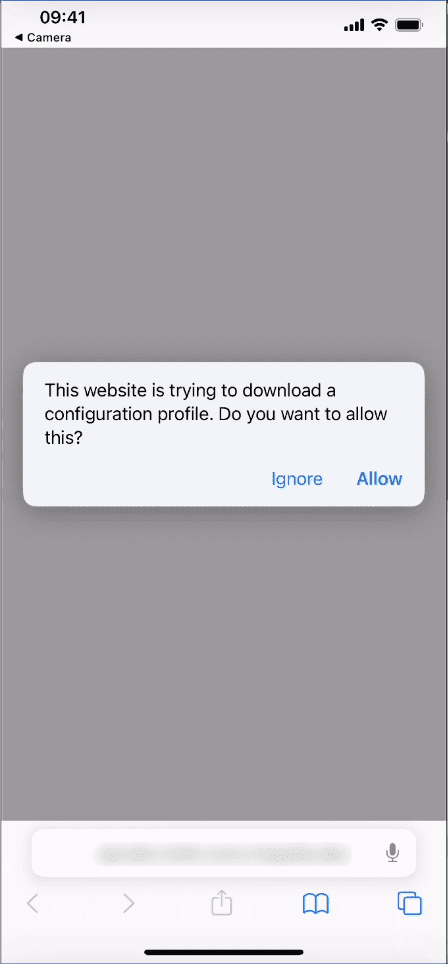
-
When prompted, tap
Allow
to start downloading a new configuration profile:
-
When complete, tap
Close
:

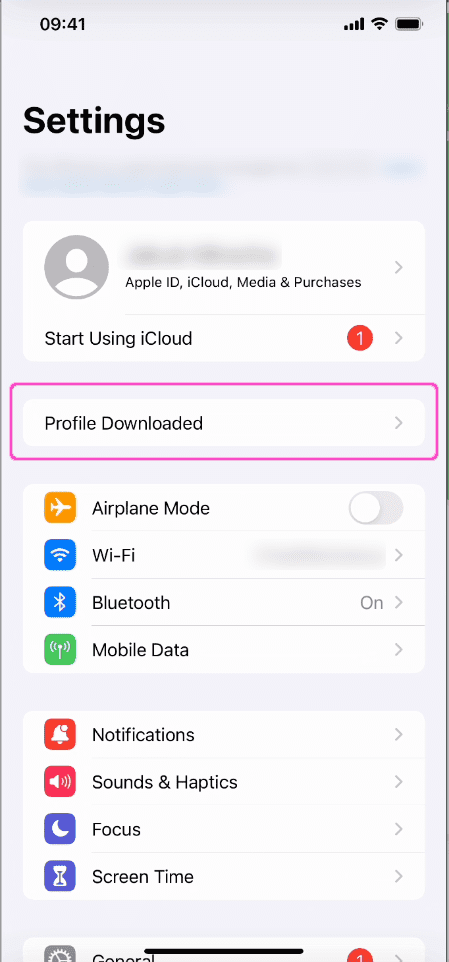
-
Now go to your device
Settings
app, then tap the
Profile Downloaded
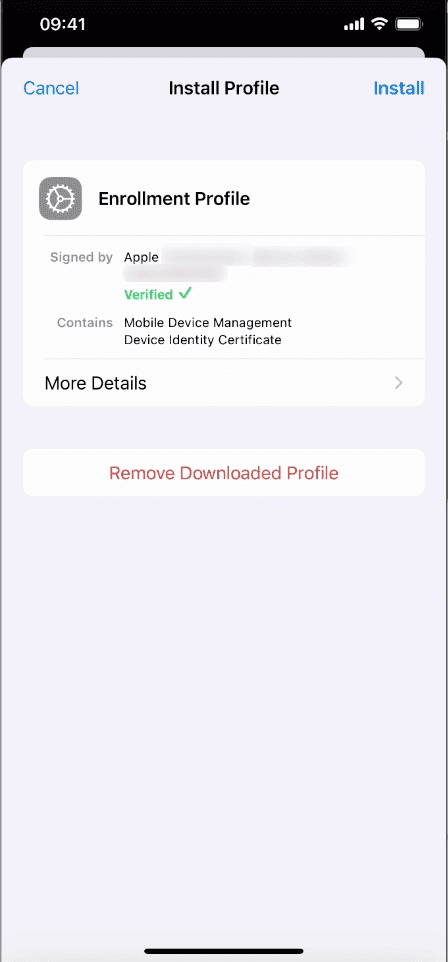
link to access the downloaded enrollment profile:
-
Tap
Install
on the top right-hand side:
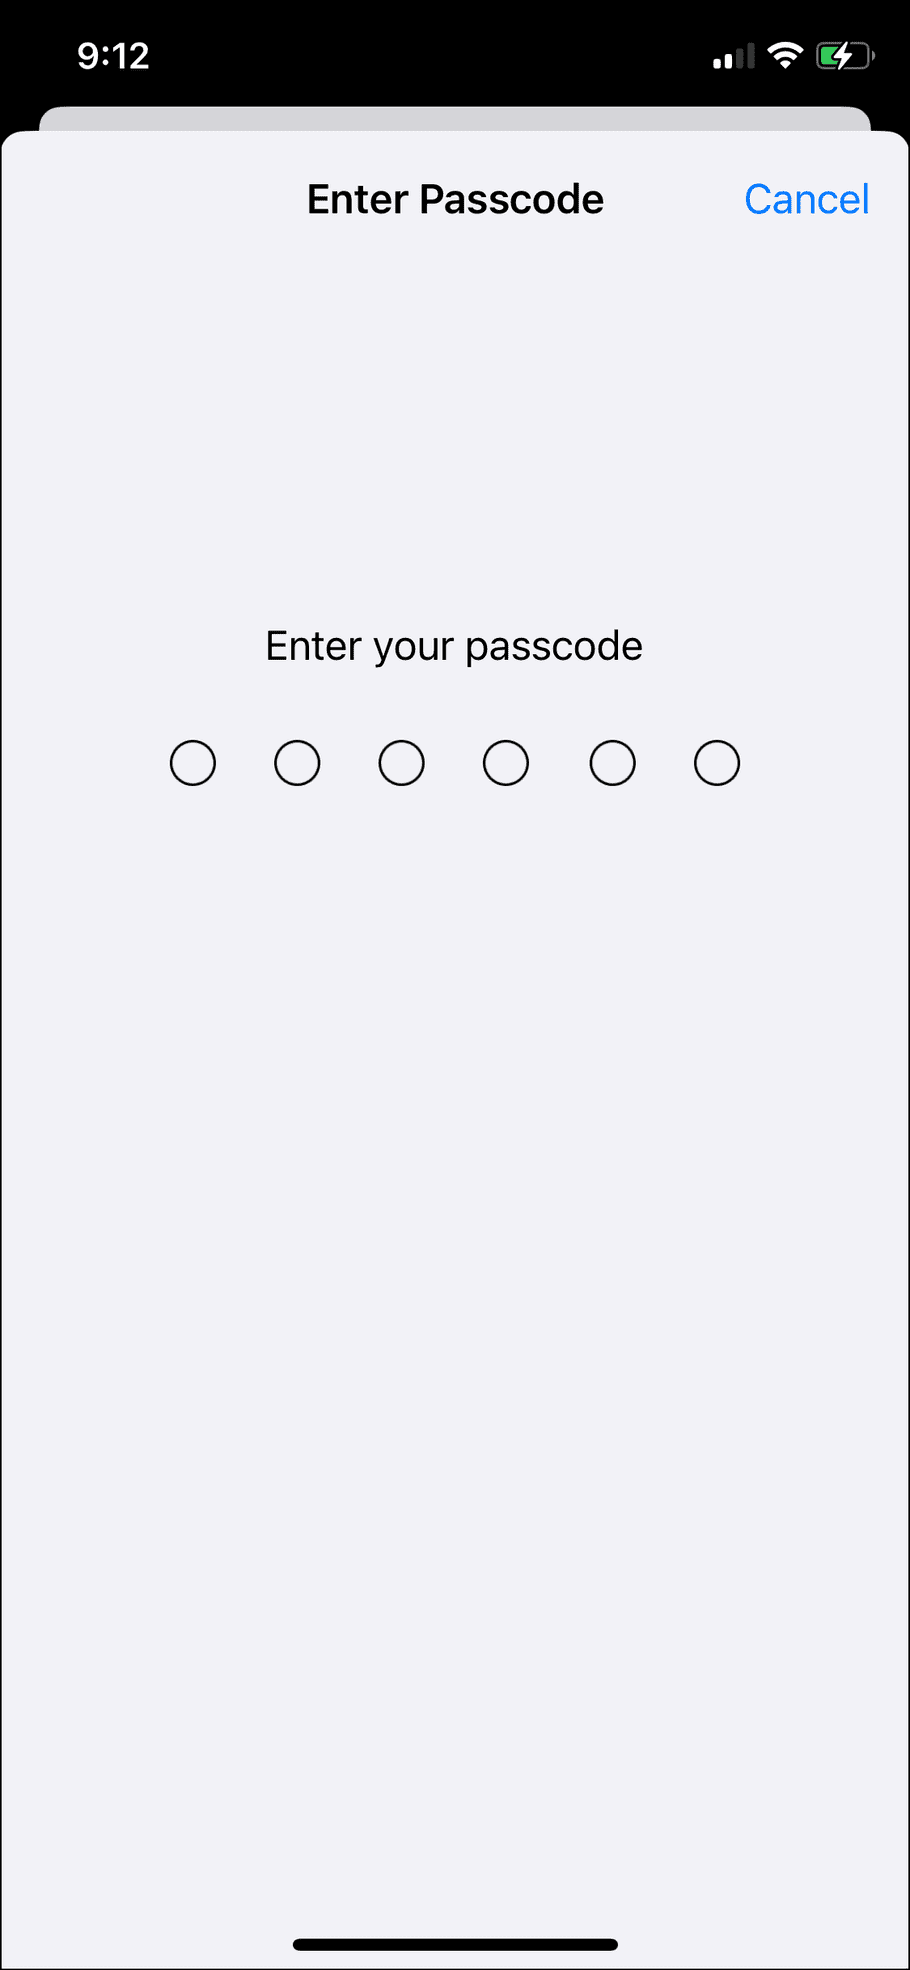
-
Your device may ask you to confirm your passcode or identity in order to continue.
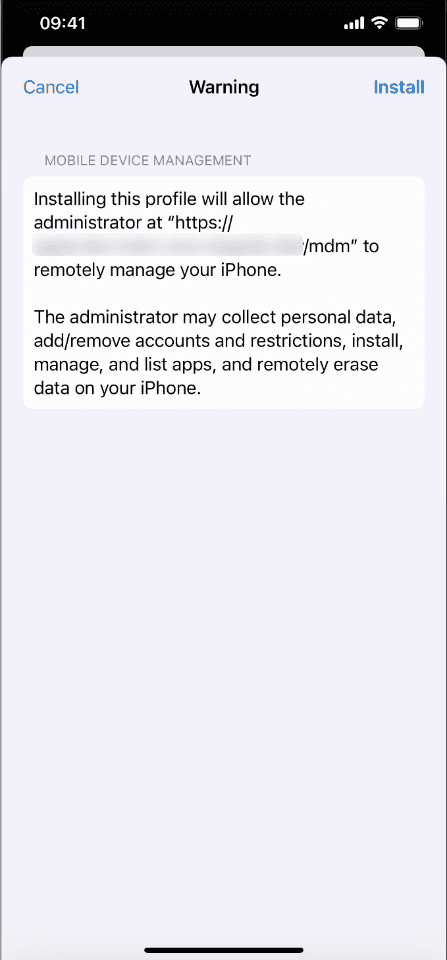
-
A warning page is triggered explaining next steps. Tap
Install
again:
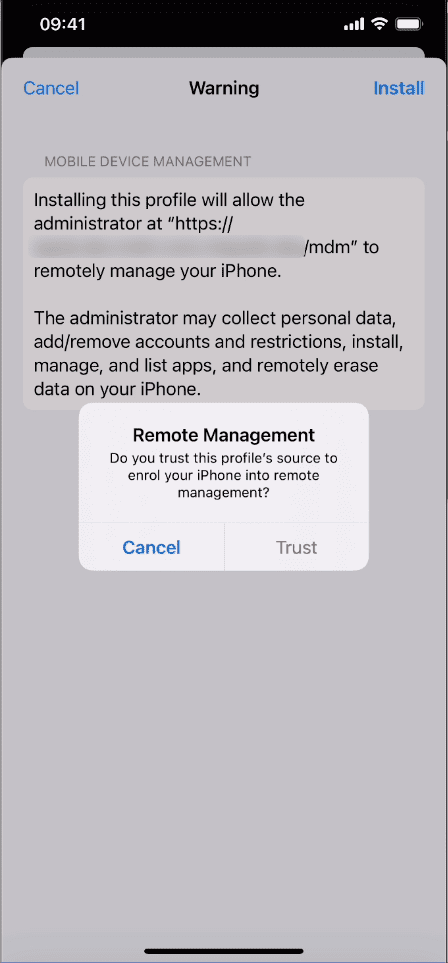
-
Tap
Trust
, then wait for the profile to be installed and the device to register with Coro MDM:
-
When this is complete, tap
Done
:
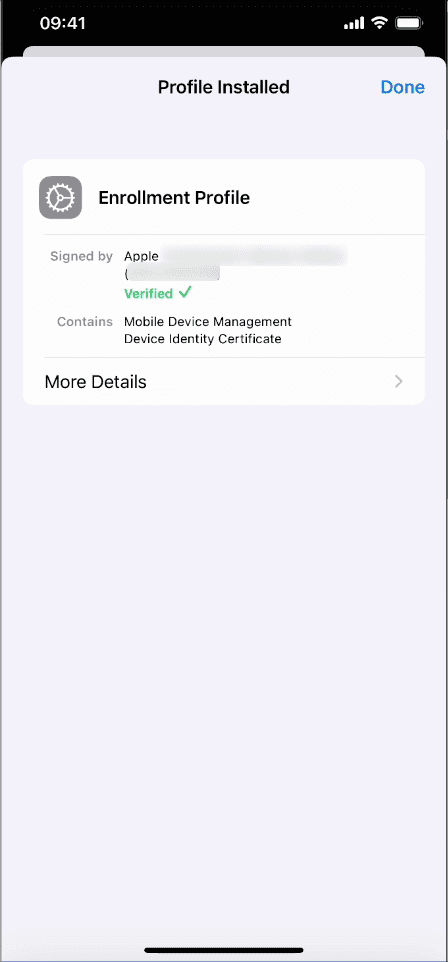
After the enrollment process has completed, your Coro MDM device list is automatically populated with the connected device.
Enrolling devices through a DEP
Coro can connect to an Apple Device Enrollment Program (DEP) to enable organizations to configure Coro as a designated MDM for their organization-owned centrally provisioned and deployed iOS and iPadOS devices. Such devices are typically configured and enrolled in the program prior to shipping to the end-user.
Where Coro is assigned to devices as the designated MDM solution, such devices are automatically synchronized to the Coro console, and can be monitored and managed in the normal way. Upon receiving the device, the user completes the remote management setup procedure and the device is marked as active in Coro.
Follow these steps to enroll devices through a DEP:
- Prerequisites
- Assign Coro as the MDM for your devices
- Synchronize DEP devices to Coro MDM
- Prepare a DEP-deployed device for use
Prerequisites for DEP devices
For enrolling a DEP-deployed device, you need:
- Coro configured with a valid DEP connection .
- Access to an ABM or ASM admin account.
- Access to the Coro console.
- A device running iOS or iPadOS version 15 or later, enrolled in an Apple DEP.
Important
Coro is not responsible for adding devices to an organization's DEP. This is typically done by the vendor or provider of the device prior to being shipped to the end user.
Assigning Coro as the MDM for devices
note
This section uses screenshots of Apple Business Manager. Steps for Apple School Manager may vary.
Before Coro can manage a device, you must first configure your DEP-deployed devices to use Coro as the designated MDM server. This will enable Coro to access the devices and provide management capabilities through the Coro MDM console.
To assign Coro as the MDM server for a device in your DEP service, perform these steps:
- Sign in to your Apple DEP service.
-
In the
Devices
section, locate and select the device to which you want to assign Coro as the MDM:

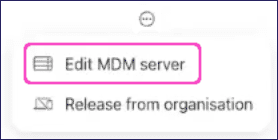
-
Select the three-dot actions menu in the device details pane, then select
Edit MDM server
:
-
In the
Edit MDM server assignment
dialog, select your Coro MDM server from the drop-down list:
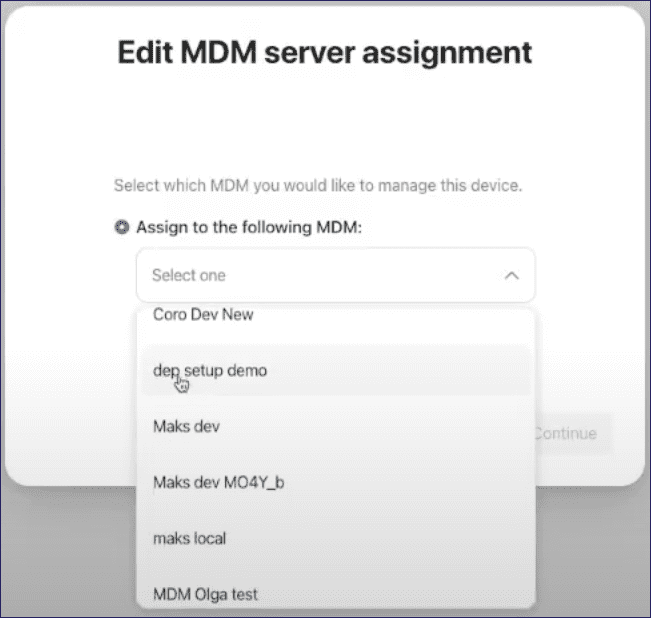
-
Select
Continue
followed by
Confirm
to confirm your MDM assignment.
After a short wait, your device has Coro MDM assigned to it.
Repeat this process for each device you want to add to Coro MDM.
note
You can optionally set Coro as the default MDM server for new devices added to the program. See the Apple documentation for your DEP for details.
Synchronizing DEP devices to Coro MDM
After you have assigned Coro as the MDM server for one or more devices in your DEP service, Coro receives details of the devices through an automatic synchronization process. This process occurs after approximately one hour.
To instead force an immediate synchronization, perform these steps:
- Sign in to the Coro console and navigate to the Mobile Device Management module.
-
On the
Mobile Device Management
page, select the
Devices
tab:
-
Select
+ ENROLL DEVICE
, then select
iOS Device
:
-
From the
Select iOS enrollment type
dialog, select
Device Enrollment Program (DEP)
:
Coro displays the Device Enrollment Program (DEP) dialog:
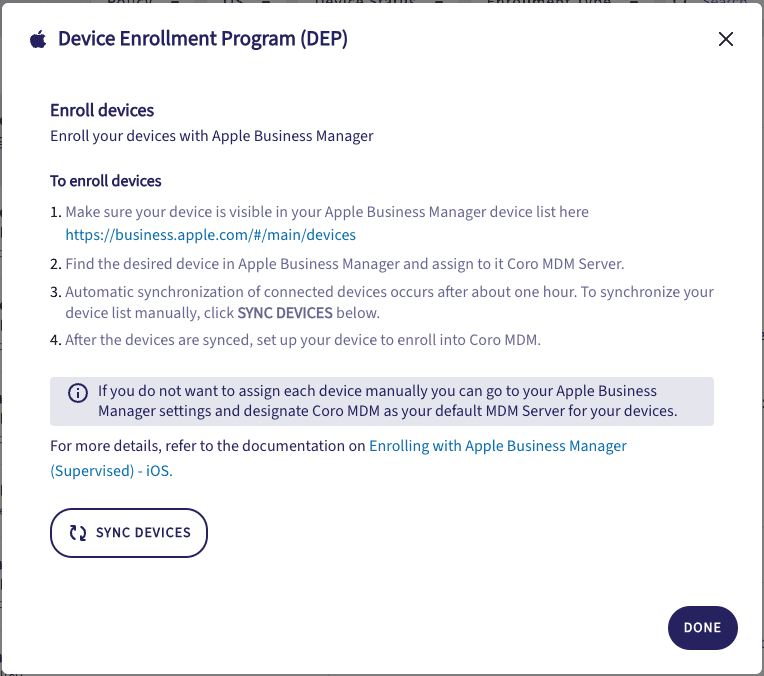
note
This example shows the dialog for Apple Business Manager. The dialog you see will reference your connected DEP service.
- Select SYNC DEVICES .
- Select DONE to close the dialog.
Devices become active in Coro MDM after the end user completes the setup assistant on the device. See Preparing a DEP-deployed device for use for details.
Preparing a DEP-deployed device for use
When a DEP-deployed device is ready to be used, you must first run through the setup assistant. This operation might be performed by an organization's IT team prior to despatch or by the end user, depending on your organization's device policy. Devices must be factory-reset prior to setup.
Important
If the factory-reset and setup is completed before the device has synchronized with Coro MDM, enrollment can fail. Make sure to leave at least one hour after assigning Coro as the device's MDM server before starting setup to avoid this scenario. If this does occur, factory reset the device to restart the enrollment.
During this process, the operator is requested to enroll the device for remote management:
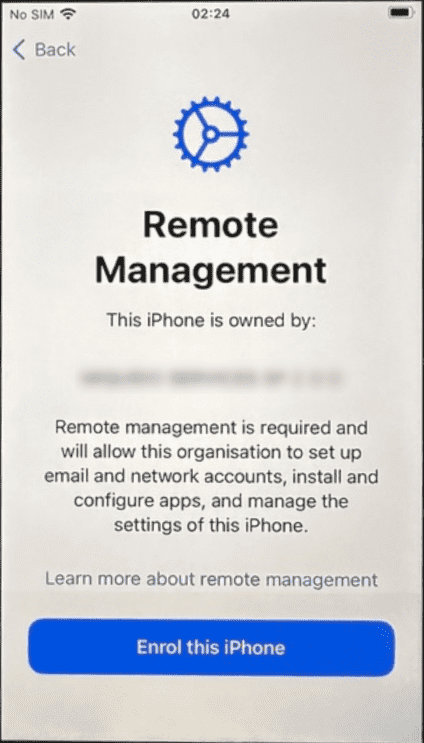
After the setup assistant is completed, the device appears as active in the Coro MDM device list.
Enrolling devices through MAID
Coro can enroll devices into MDM when a user with a Managed Apple ID (MAID) signs into a work or school account on that device.
Such devices can be organization-owned or BYOD (Bring Your Own Device), and the type of MAID enrollment service configured within your Coro workspace determines which of these device types you can enroll:
- device-led for organization-owned devices
- user-led for BYOD and personal devices.
Follow these steps to enroll devices with MAID user identities:
Prerequisites for MAID enrollment
To enroll devices signed into by MAID users:
- Coro configured with a validated MAID enrollment service
- Access to the Coro console.
- A device running iOS or iPadOS version 15 or later (if you configured MAID for user enrollment ), or version 17 or later (if you configured MAID for device enrollment ).
- Users with assigned Managed Apple IDs through Apple Business Manager (ABM) or Apple School Manager (ASM).
note
Coro is not responsible for assigning MAID identities to your end-users. Contact your ABM or ASM administrator for assistance.
Validating MAID user identities
To enroll a new device, Coro needs to verify the identity of the enrolling MAID user. When you add a user identity using the process described here, Coro creates a unique password that your device user can use when signing into a work or school account on the device to be enrolled. This password can be emailed directly to the end-user if required, as described later in this guide.
The MAID user email address you add here must be based in the domain you used when you set up the MAID service.
To validate a MAID user:
- Sign in to the Coro console and navigate to the Mobile Device Management module.
-
On the
Mobile Device Management
page, select the
Devices
tab:
-
Select
+ ENROLL DEVICE
, then select
iOS Device
:
-
From the
Select iOS enrollment type
dialog, select
Managed Apple ID Enrollment (MAID)
:
Coro displays the Managed Apple ID Enrollment (MAID) dialog, showing a list of all previously added MAID user identities:
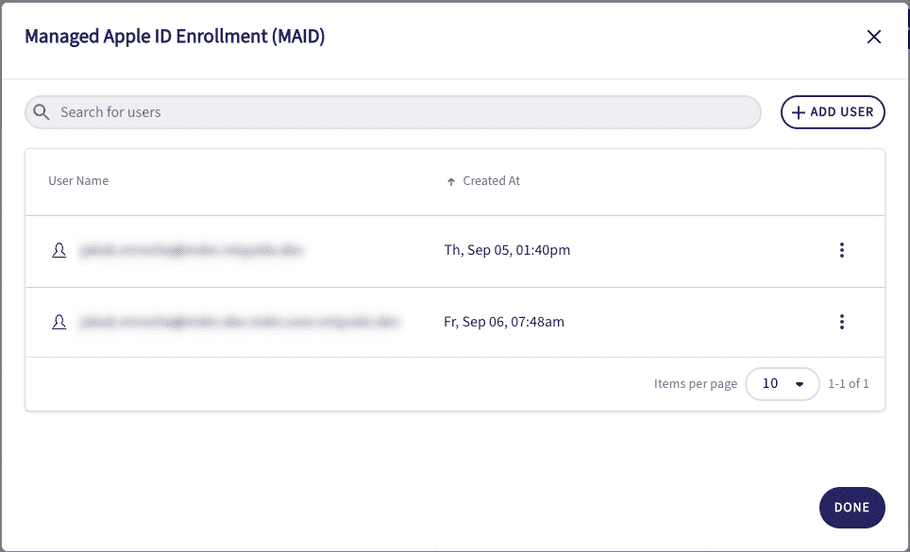
note
To re-use an existing user identity to enroll a device, request a new password by selecting the three-dot menu adjacent to the user. Then select Reset password:

Alternatively, to remove an existing user identity, select Remove.
-
To add a new user, select
+ ADD USER
:

The Add new MDM account for MAID user dialog appears:
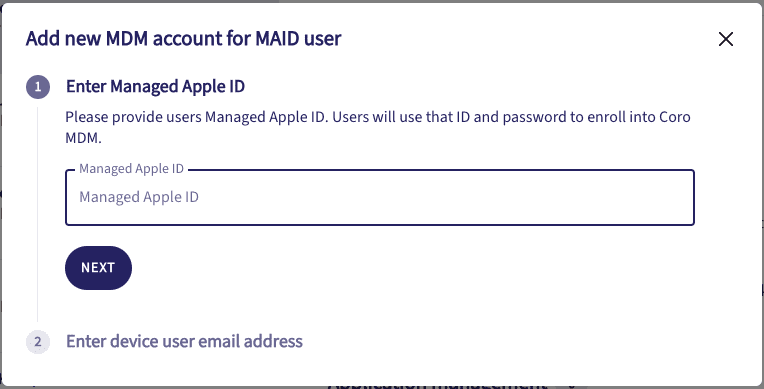
-
Enter your MAID user email address in the box provided, then select
NEXT
.
Important
The email domain must match the domain configured during MAID service setup.
If the email domain validates successfully, Coro displays step 2:
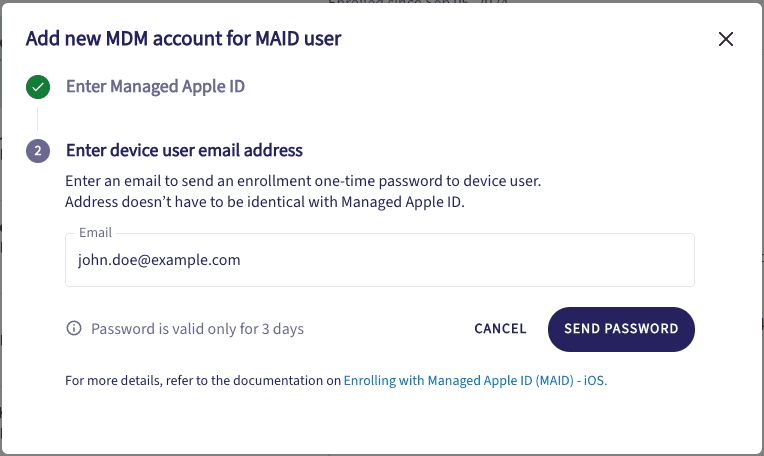
-
Enter an email address at which you want to receive a device enrollment password, then select
SEND PASSWORD
.
note
Enter any suitable email address at which the end user can receive the required MAID credentials. It does not need to be the same email address as the MAID user identity.
The password is valid for three days. If this time limit expires, Coro provides the ability to request a new password.
- Repeat this procedure for each MAID user identity you want to allow to enroll devices.
Enrolling devices with a MAID identity
note
This procedure is designed for the user enrolling the device. This is typically the user assigned the MAID identity, and requires the password generated when validating user identities in the Coro console.
To enroll a device for remote management with Coro MDM, perform the following steps to register the device:
-
On your device, go to
Settings
:

-
Select
General > VPN & Device Management
:
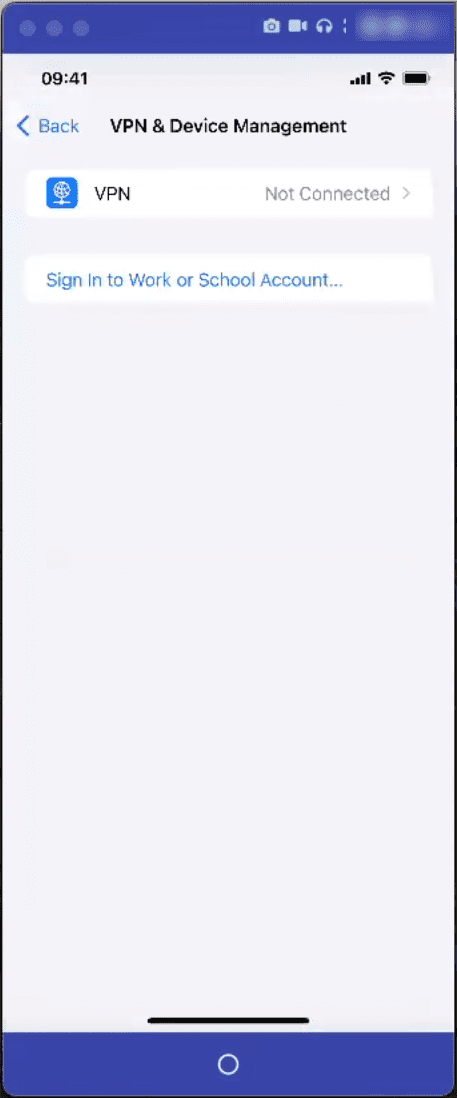
-
Select
Sign in to Work or School Account...
.
The device shows a Work or School account sign-in page:
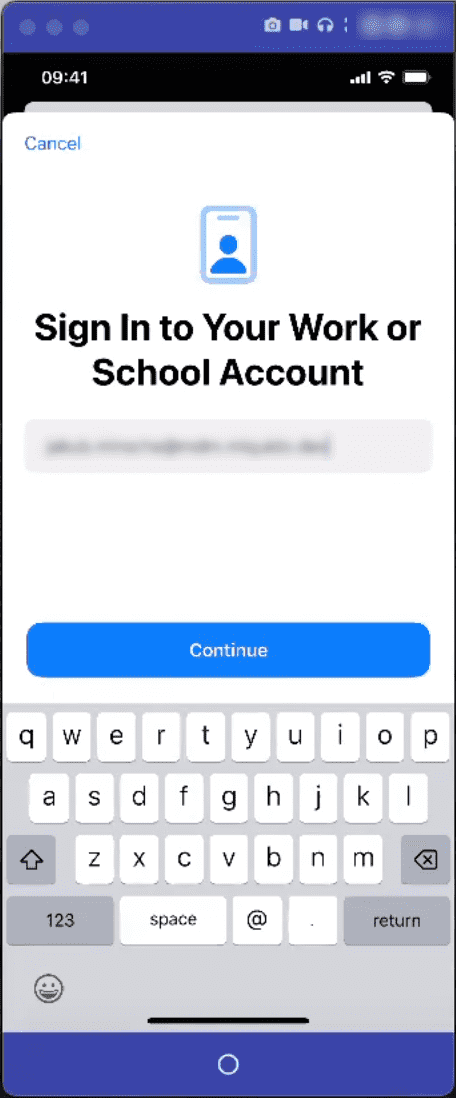
-
Enter your MAID user email address, then select
Continue
.
The device connects to the domain in the email address, which in turn uses the MDM enrollment data hosted there to redirect to Coro MDM for registration:
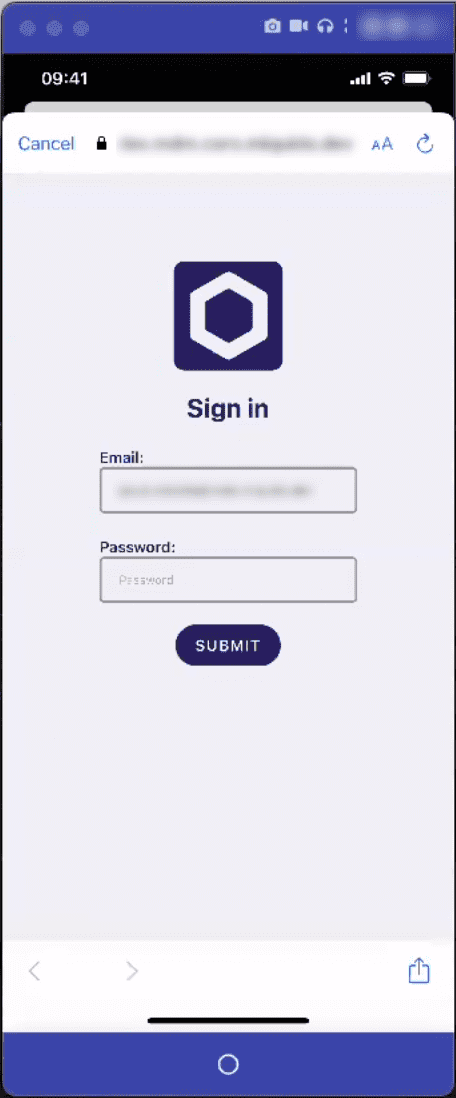
-
Sign in with the same MAID user identity, using the password provided during the
user identity validation
stage.
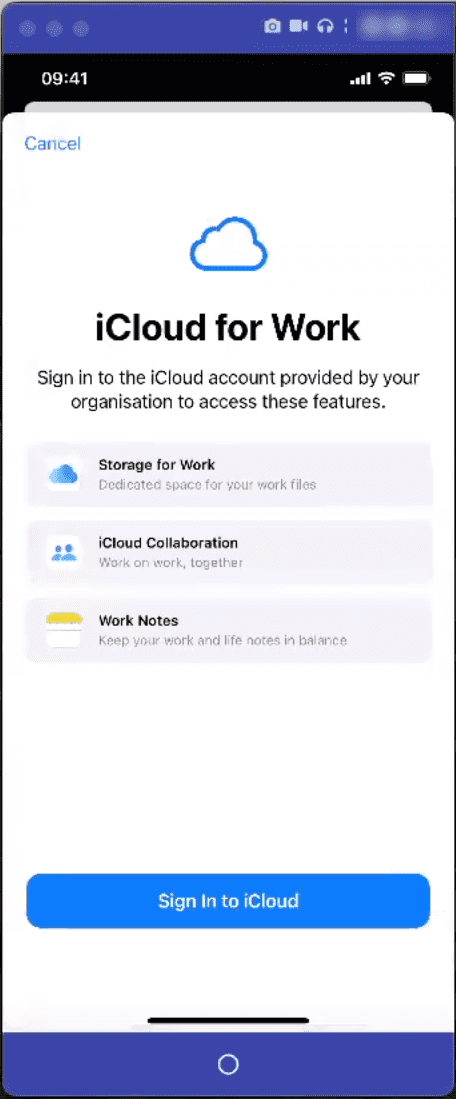
The device presents your organization's iCloud for Work/School page:
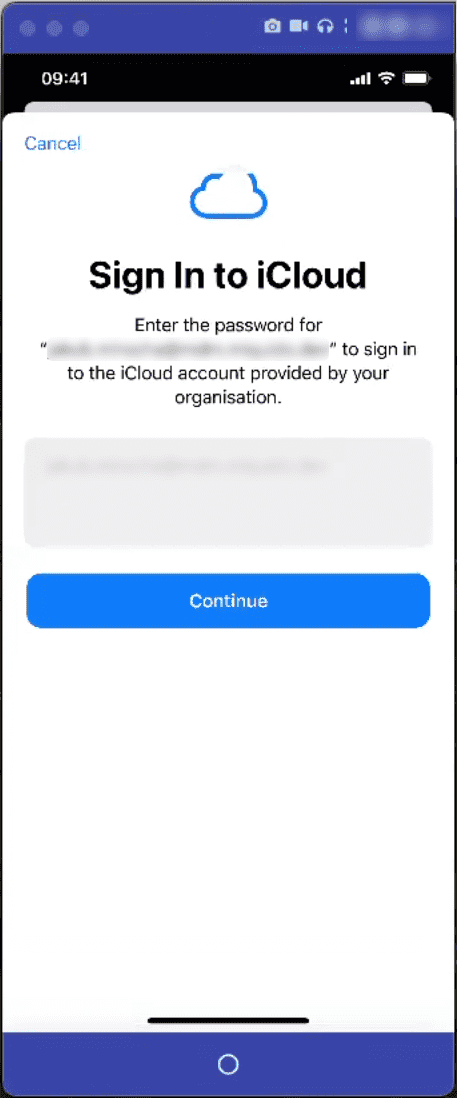
-
Select
Sign in to iCloud
, then enter your iCloud credentials:
note
This is typically your MAID email address and iCloud-specific password. Do not use the password from the previous step.
-
If authentication is successful, your device prompts you to allow remote management:
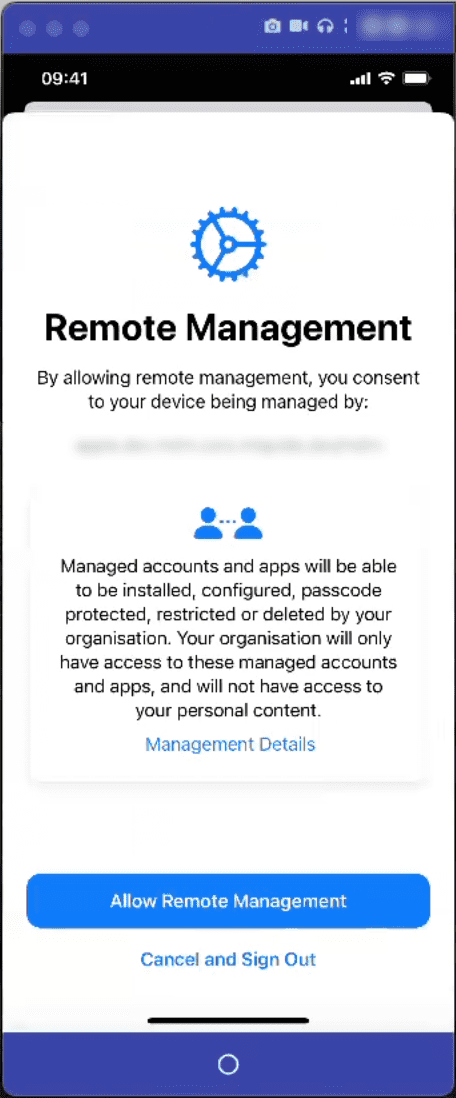
-
Select
Allow remote management
.
Your device is configured for remote management. This might involve a short wait.
note
If you have previously performed this operation, you might receive a prompt that a backup of your apps and data exists. You can choose to restore this backup or start with a clean profile install.
After the process is complete, your device presents details of your managed profile:
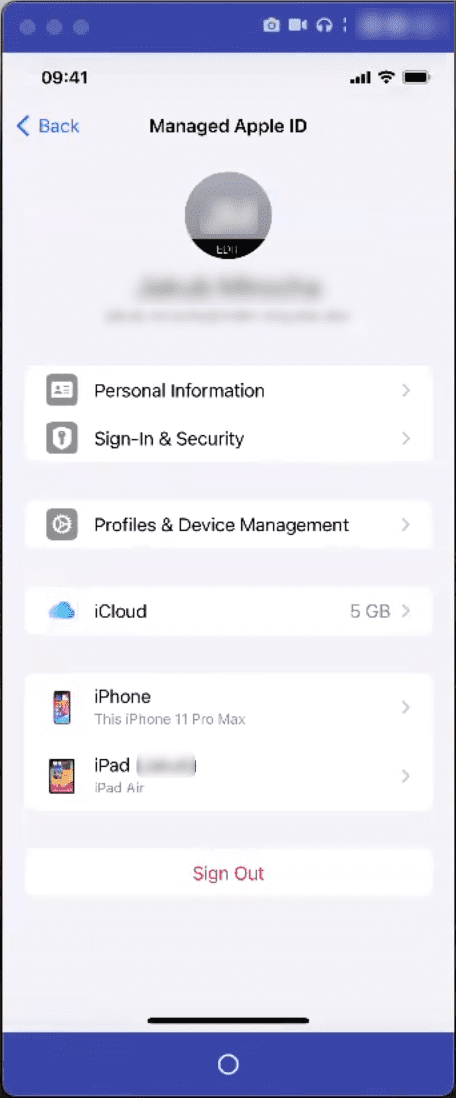
Upon completion, the device appears as active in the Coro MDM device list.