Enrolling Android devices
Before you begin, determine if the device is to be enrolled as a Company Owned Device (COD) or Bring Your Own Device (BYOD). For more details about each type, see Overview.
In both cases, device preparation can be performed remotely by the end user, unless your organizational security policies prohibit this.
Read the following procedure for instructions on enrolling your device type:
note
You cannot enroll an Android device until you have configured Coro with a connection to your authorized Google Enterprise account. For details, see Configuring connected services.
Enrolling a company-owned device
Important
This process fully factory-resets the device - make sure you have backed-up any important data before you start.
Follow the steps in each of these sections to enroll a company-owned Android device:
Prerequisites for company-owned devices
For company-owned Android device enrollments, make sure you have the following before you begin:
- An Android device, running Google-certified Android version 9 and later, unlocked and powered up. The device must have access to a Wi-Fi network.
- Access to the Coro console.
Getting the enrollment link from your Coro workspace
Before you can proceed to prepare a device, first obtain the MDM server enrollment link:
- Sign in to the Coro console and go to the Mobile Device Management module.
-
On the
Mobile Device Management
page, select the
Devices
tab:

-
Select
+ ENROLL DEVICE
, then select
Android Device
:

Coro displays the Enroll Android devices dialog:
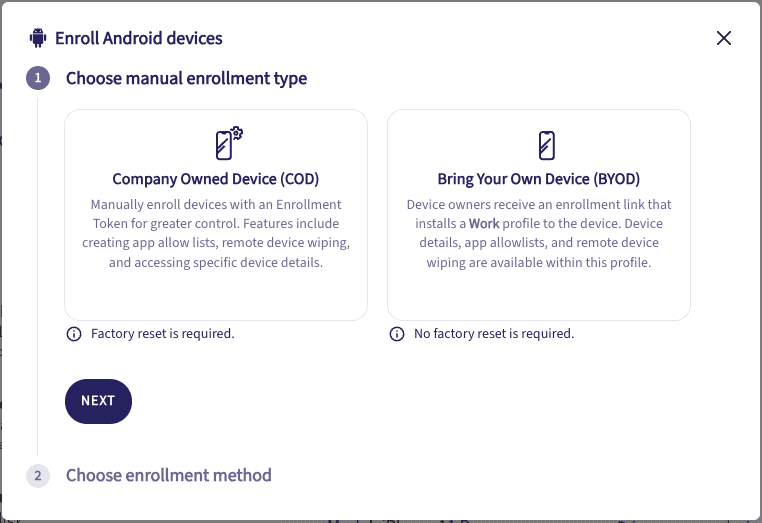
-
Choose
Company Owned Device (COD)
, then select
NEXT
.
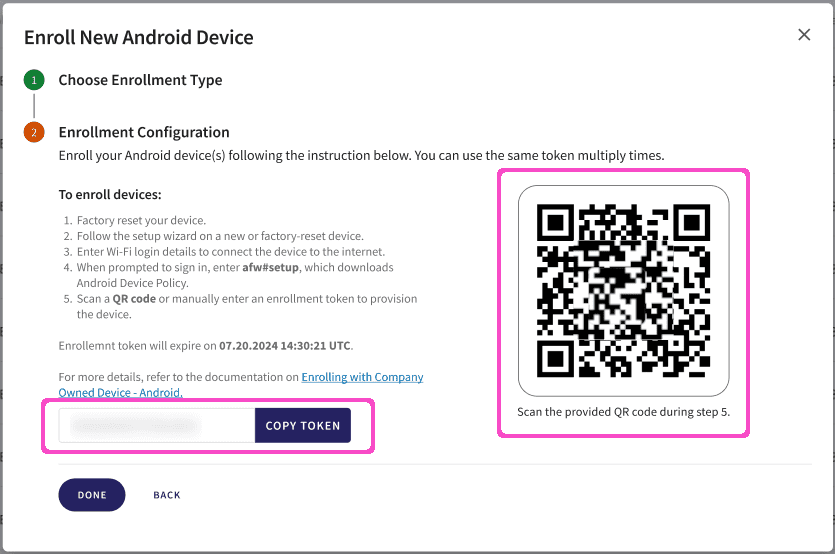
Coro displays the Choose enrollment method step:
- This page includes a scanable QR code, for devices in-hand, and a token that you can send to device users where the enrollment is taking place remotely.
- Select DONE to close the dialog.
Preparing a device
The following steps describe how to prepare an Android device for Coro MDM management:
-
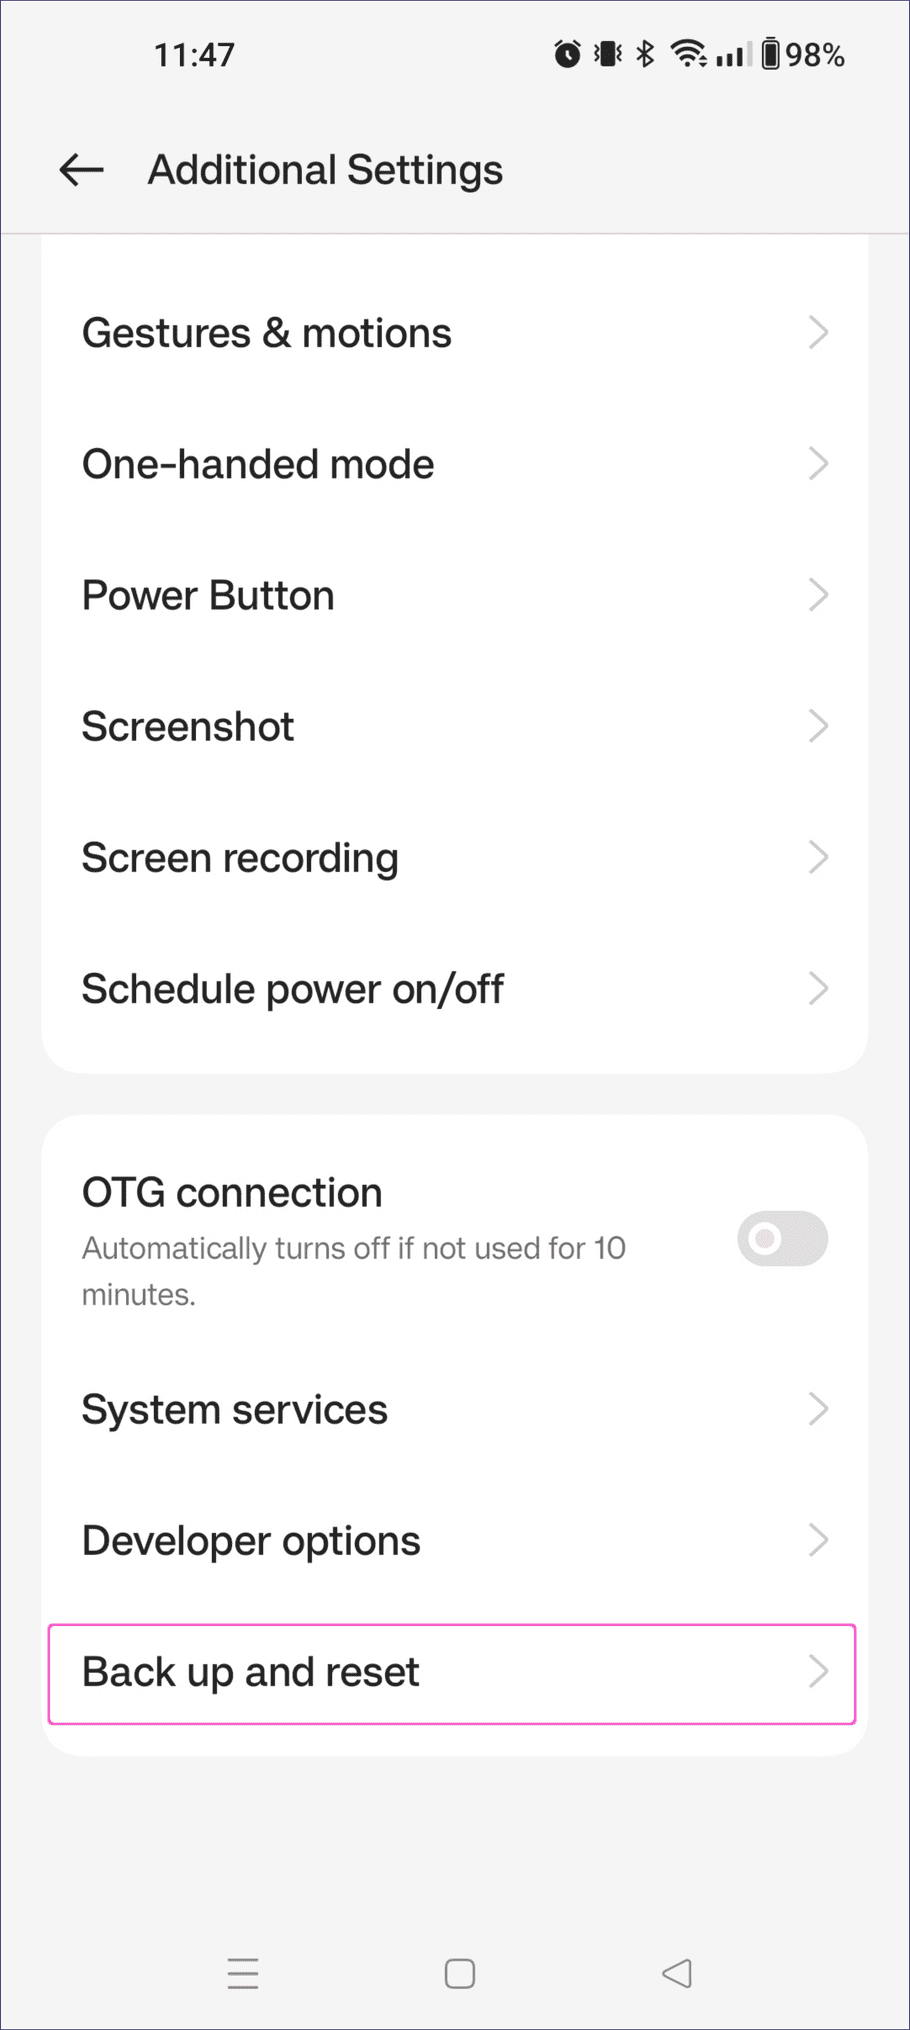
Perform a factory reset of the device. This is typically achieved through your device
Settings
app:
note
Your experience may vary depending on the installed variant of Android.
- When the device restarts, follow the new device setup wizard. During this process, make sure to connect to a working Wi-Fi network.
- Skip any steps that ask you to copy or download apps or data from another device.
-
When asked to
sign in
with your Google account, enter
afw#setupinto the Email or phone field: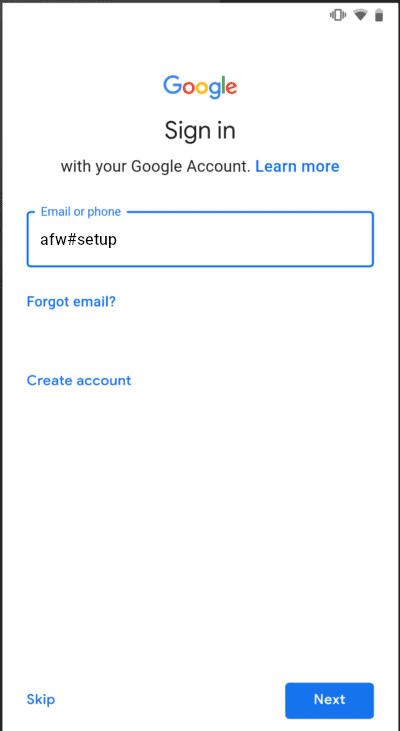
- Tap Next to continue.
- Your device enters fully-managed setup. When you are asked to confirm, tap Accept & continue .
-
Android performs various checks and requests confirmation that you understand you are configuring a work device. When prompted, tap
Next
.
After a short wait, Android installs the Device Policy app and begins enrollment.
- Device Policy requires an enrollment code to continue. For this purpose, the app requests access to the device camera. Tap While using the app or Only this time as required.
-
Choose to:
- Use the camera to scan the QR code generated in the Coro console.
- Or, tap Enter code manually and type in the token code, also from the Coro console. If your device is already with the end-user, direct them to use this option and provide the token to them.
-
Your device validates the token and continues through managed setup. During this process, You may get asked to confirm items such as:
- Google Chrome terms and conditions and functionality options
- Managed work app installation
- Identity and credentials
- Follow all on-screen instructions to continue.
At completion, the device is ready to use and enrolled with Coro MDM.
Your Coro MDM device list is automatically populated with the connected device.
Enrolling a BYOD Android device
note
For BYOD enrollments, no factory reset is necessary and the enrollment process configures a separate selectable work profile on the device for Coro MDM device monitoring and application control. The original personal device profile remains unaffected.
Follow these steps to enroll a BYOD Android device:
Prerequisites for BYOD devices
For BYOD Android device enrollments, make sure you have the following before you begin:
- An Android device, running Google-certified Android version 9 and later, unlocked and powered up. The device must have access to a Wi-Fi network.
- Access to the Coro console.
Sending enrollment links to your users
Before you can enroll a device as BYOD, obtain the enrollment link and send it via email to the device's user. Coro enables you to send the enrollment email to selected users directly from the console. Alternatively, you can copy the link and paste it into a browser on the device.
To access the enrollment link, perform the following steps:
- Sign in to the Coro console and go to the Mobile Device Management module.
-
On the
Mobile Device Management
page, select the
Devices
tab:
-
Select
+ ENROLL DEVICE
, then select
Android Device
:
Coro displays the Enroll Android devices dialog:
-
Choose
Bring Your Own Device (BYOD)
, then select
NEXT
.
Coro displays the Choose enrollment method step:
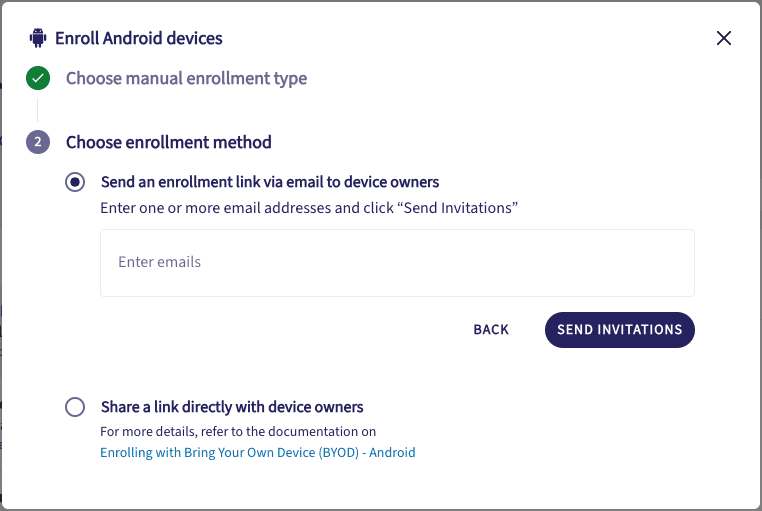
-
Choose one of the following methods:
-
Send an enrollment link via email to device owners
:
Enter one or more email addresses in the box provided, then select SEND INVITATIONS to request Coro to send a preformed email template to each address in the list containing instructions and a link to begin the enrollment process.
note
Type an email address, then press space or enter to validate it. Or, use commas to separate a list of addresses.
-
Share a link directly with device owners
:
Use the COPY TOKEN button to copy the unique enrollment link to your clipboard:
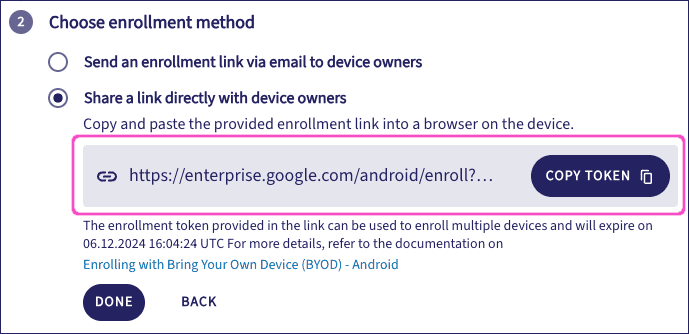
Send this to your device owners with instructions to paste it into a web browser on the device.
-
Send an enrollment link via email to device owners
:
- Select DONE to close the dialog.
Activating enrollment on a device
On the Android device, perform these steps to enroll:
- Access the invitation email through your device's mail app, and tap the included device enrollment link.
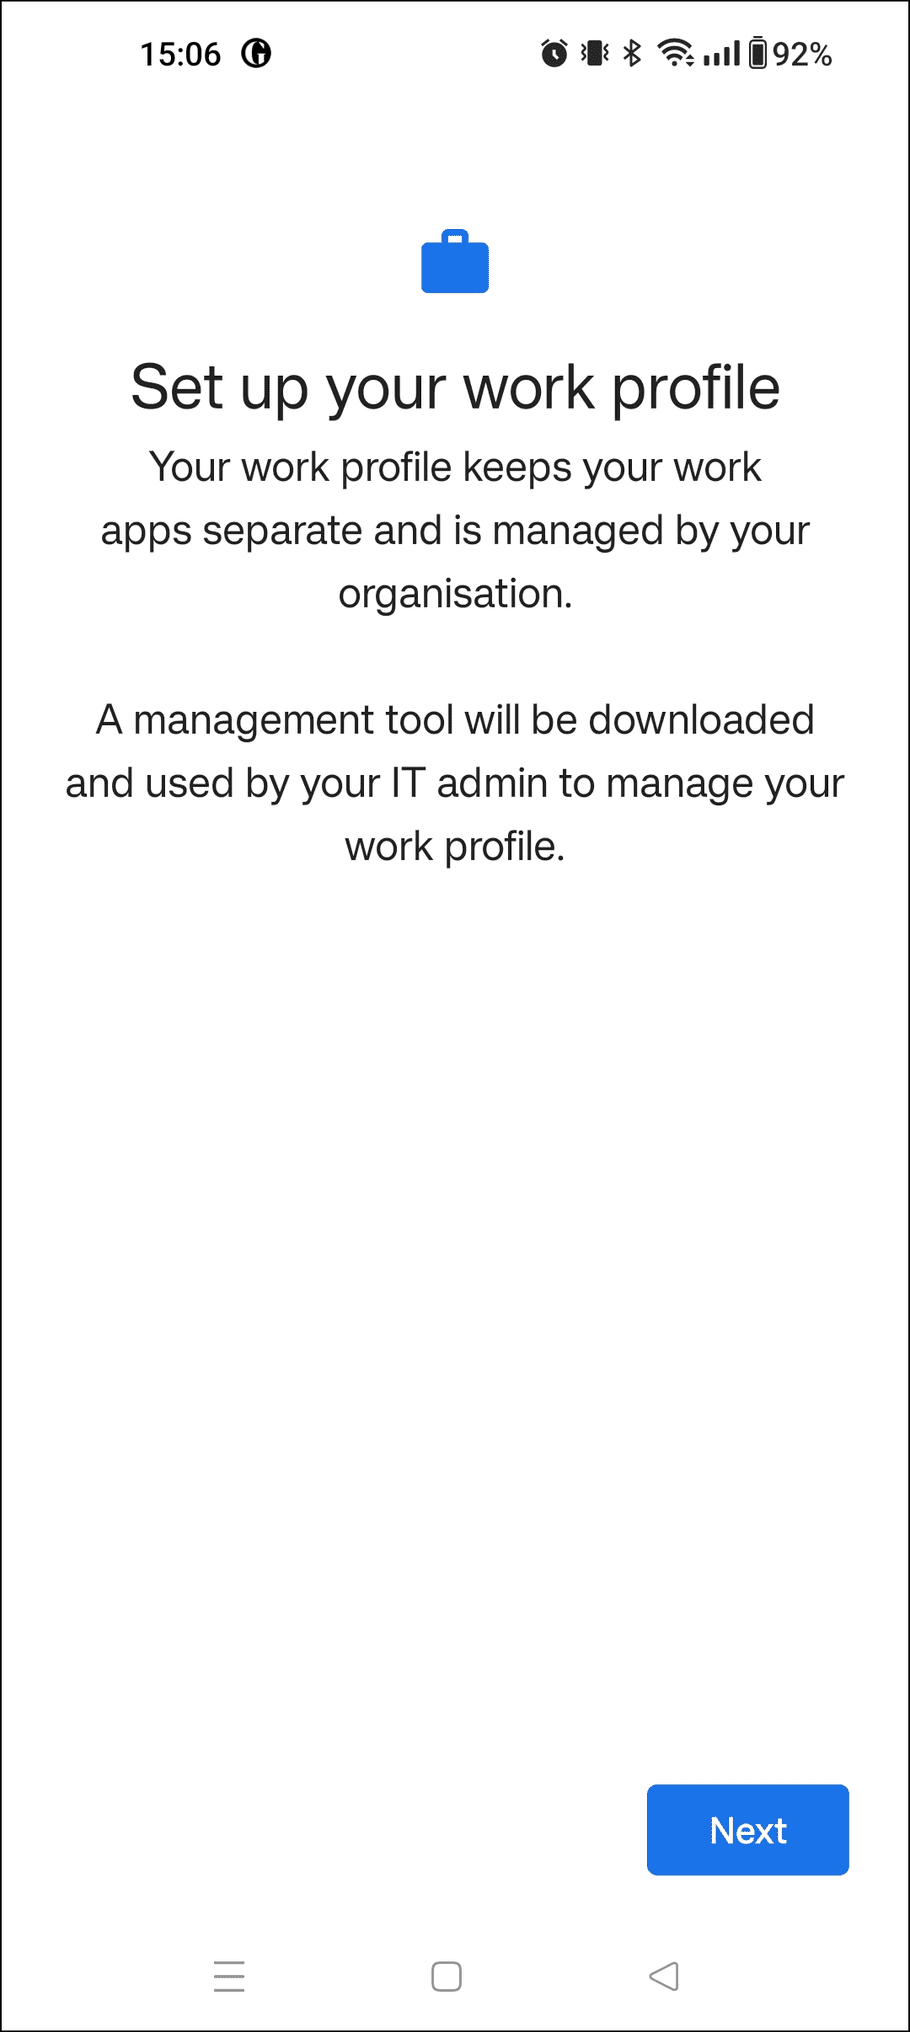
-
Your device prompts you to set up a work profile. To continue, tap
Next
:
-
After a short wait, your device prompts you to confirm acceptance of the terms of use:
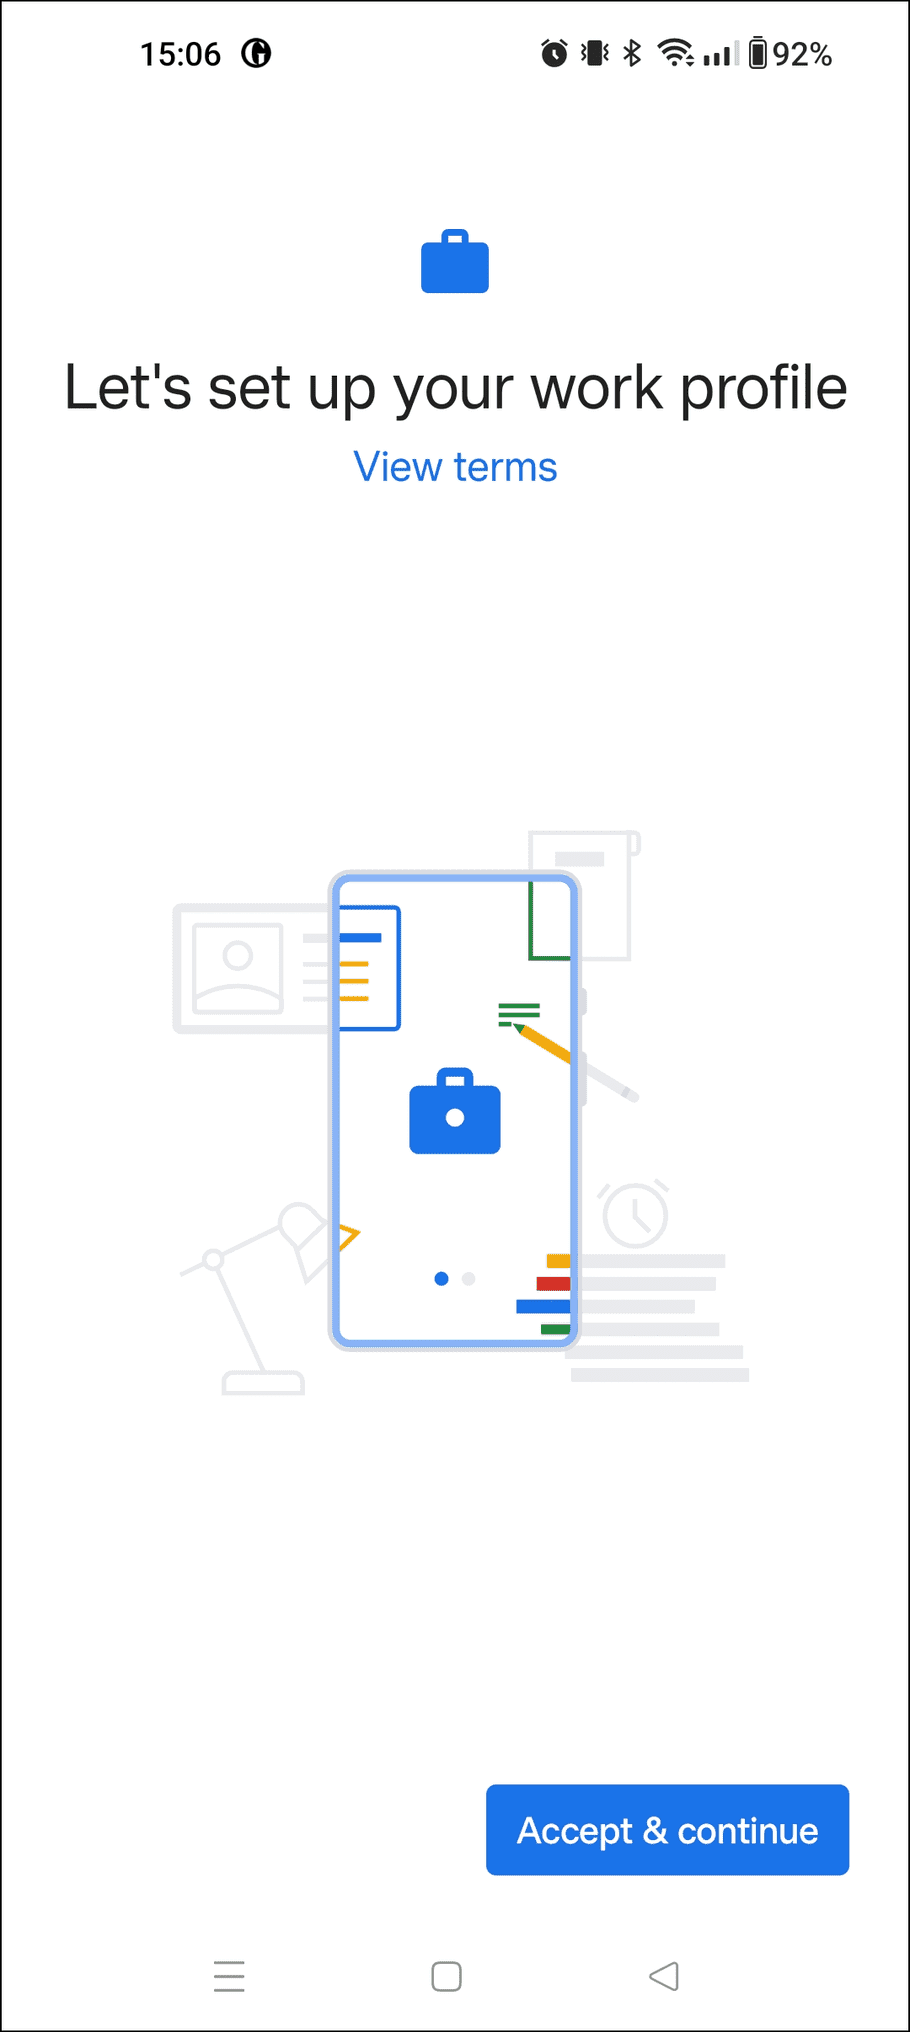
note
To read the terms of use, tap View terms.
Tap Accept & continue to agree.
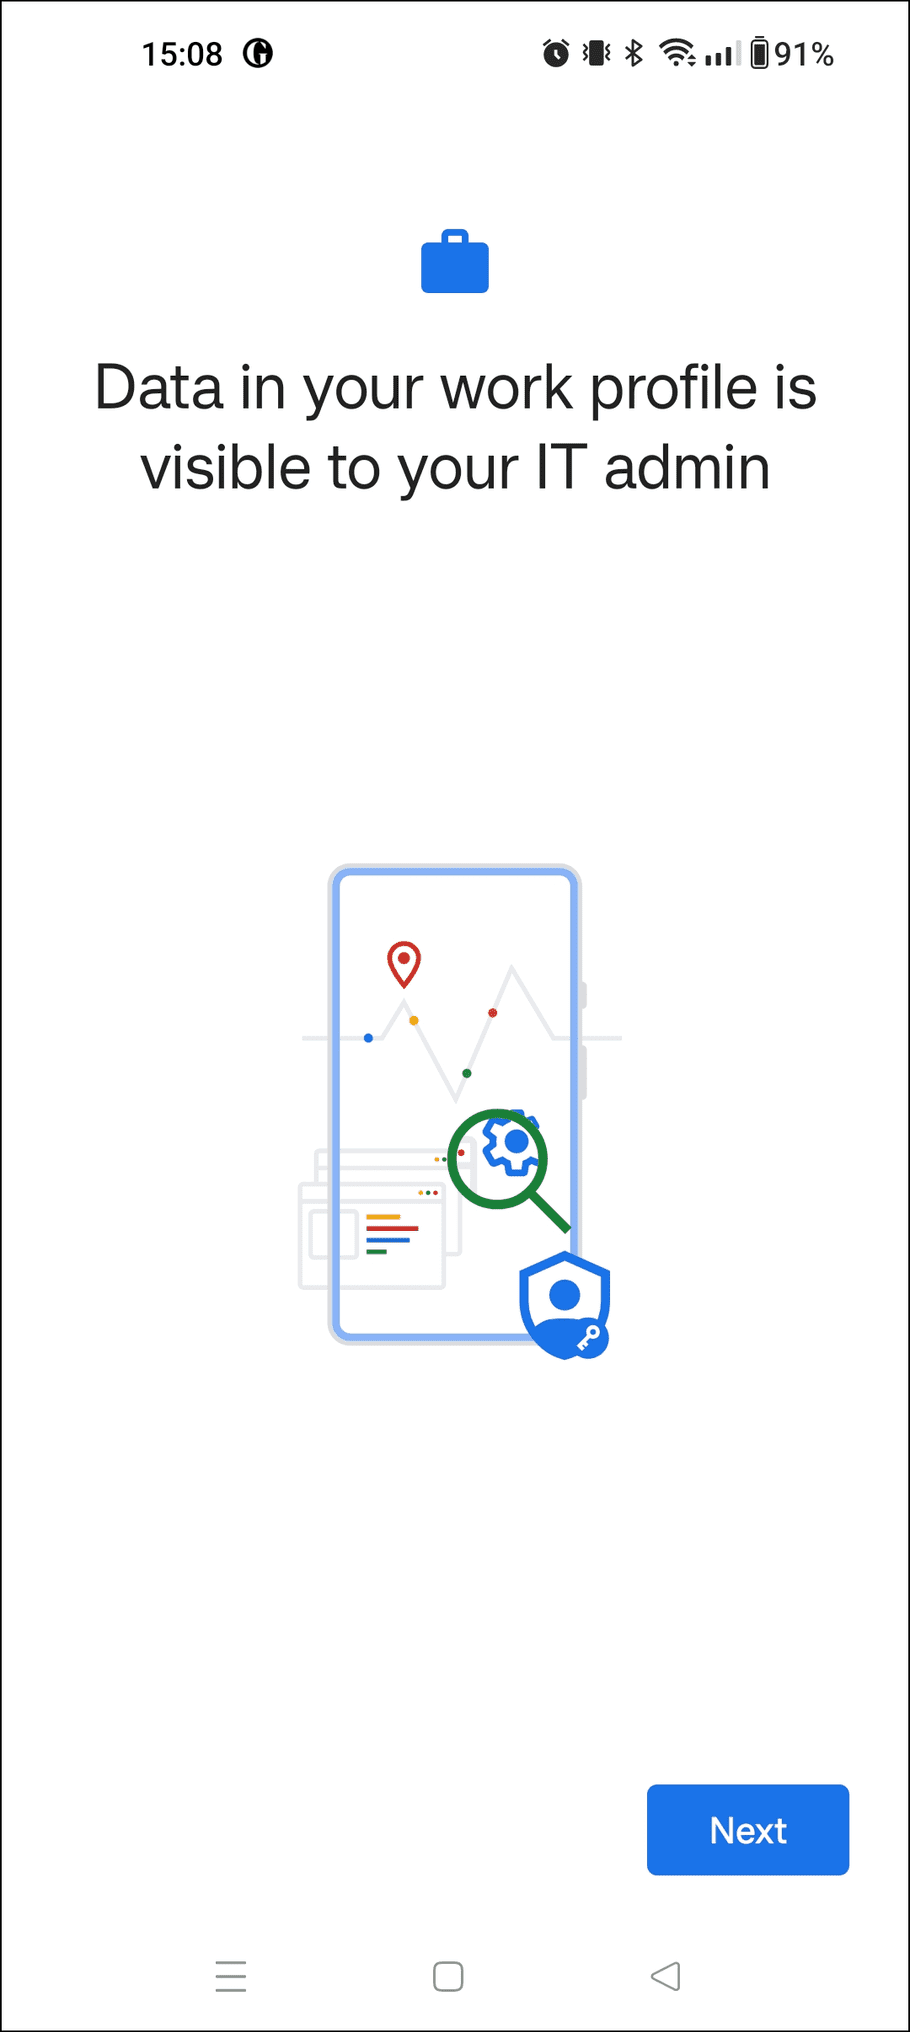
-
Your device now downloads required software and configures the work profile. After this process completes, tap
Next
to continue:
- Your device performs a series of final updates and registers itself with Coro MDM. The installer closes automatically when finished.
After the enrollment process has completed, your Coro MDM device list is automatically populated with the connected device.
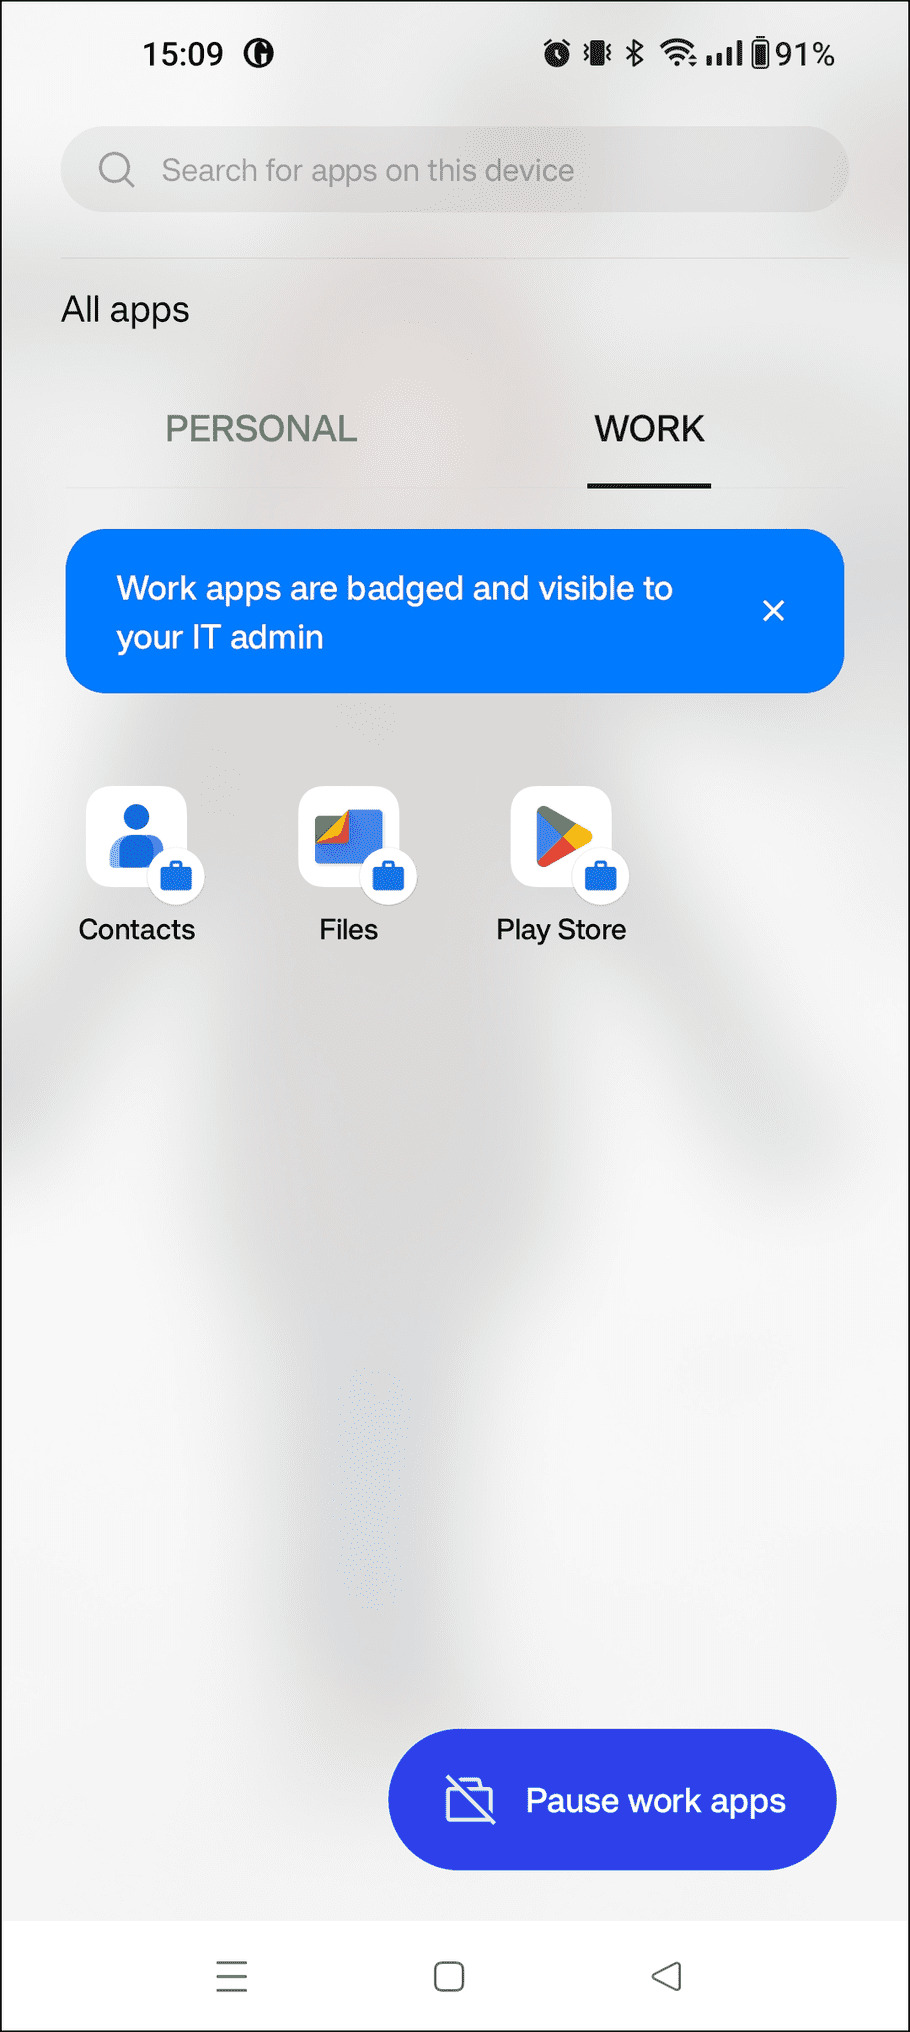
Switching profiles on your device
To access your work profile, swipe up on the home screen to view all installed apps.
Then, swipe left or right to switch between personal and work profiles, each containing its own app list: