Coro implements device management through policies. In a policy, you can implement restrictions on a device or enforce certain operating conditions.
Device policies in Coro work with labels. When you create a policy, you assign one or more labels to it. Then, by assigning labels to devices you determine the policies that should apply.
To view device policies:
From the Mobile Device Management page, select the Policies tab:
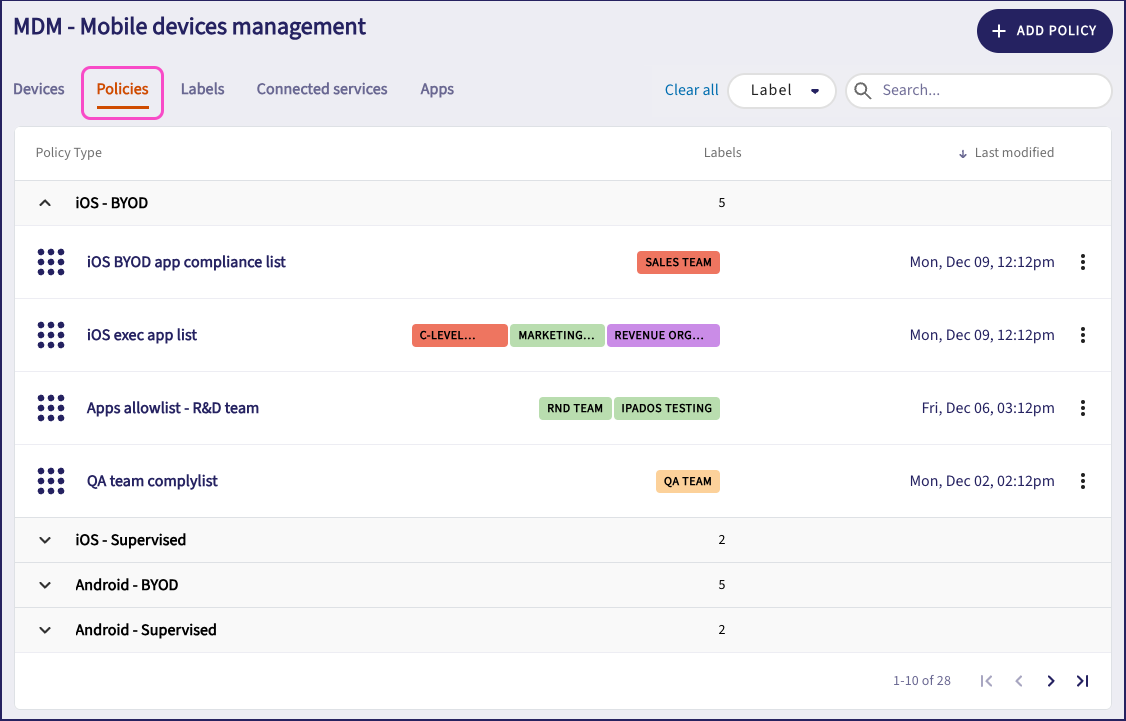
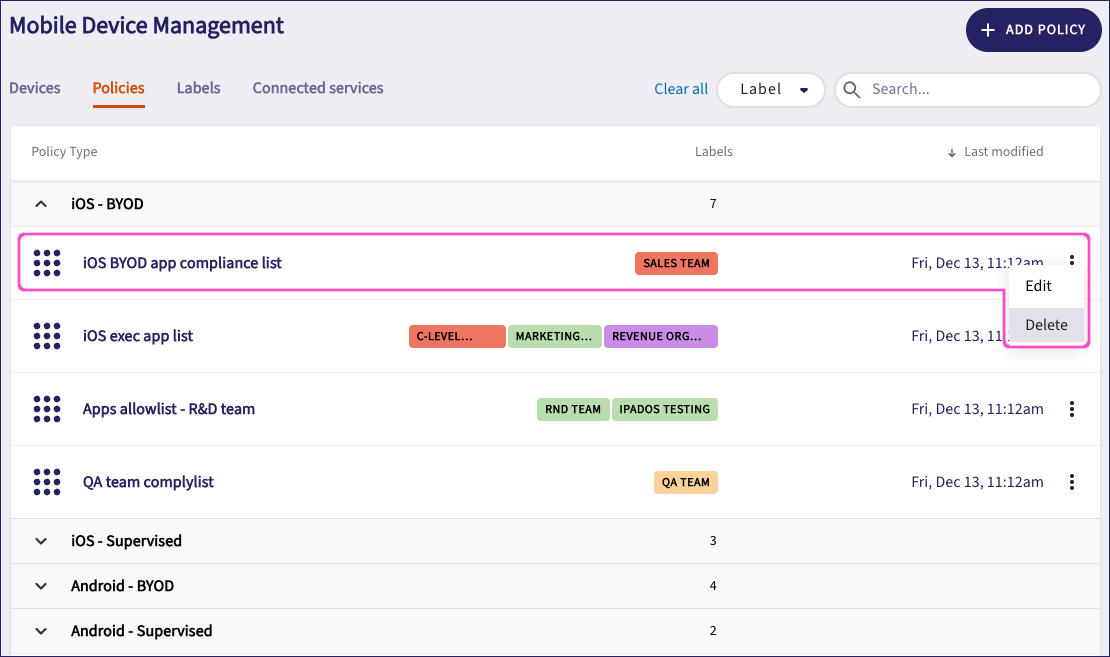
Coro presents all currently defined policies grouped by device type. Expand or collapse device type sections to view associated policies, including the labels applied in each case and the last modified timestamp.
On this tab, you can:
- Add a new policy; see Creating a device policy.
- Filter the page to view policies with selected labels. Choose to filter on policies that contain Any labels in the list, or policies that contain Combined labels that you select.
- Sort the policy list in ascending or descending order of last modified date, as indicated by the arrow next to the column heading.
- Search for a policy by name.
Use the three-dot menu adjacent to each policy to edit or delete that policy.
Coro includes the following policy types:
For reference, the following table shows policy availability across device types in Coro MDM:
| Device type | Allowed Apps | Compliant Apps | Passcode Restrictions | Security | Network | App Restrictions |
|---|---|---|---|---|---|---|
| iOS - BYOD | No | Yes | Yes | Yes | Yes | No |
| iOS - Supervised | Yes | No | Yes | Yes | Yes | Yes |
| iOS - MAID Device | No | Yes | Yes | Yes | Yes | No |
| iOS - MAID User | No | No | Yes | Yes | Yes | No |
| Android - BYOD | Yes | No | Yes | Yes | Yes | No |
| Android - Supervised | Yes | No | Yes | Yes | Yes | No |
Make sure your application policies allow app installation from the Managed apps list. Policies defined here always take precedence and can override remote installation of managed apps.
In an application policy, you define and assign application lists to enrolled devices that, depending on the device type, can either:
Actively enforce application installation and usage restrictions (Allowed Apps)
Report usage non-compliance (Compliant Apps)
For supervised iOS and iPadOS devices, a policy does not prevent excluded applications from being seen in the Apple App Store, nor does it prevent installation. However, a policy does prevent the user from being able to run an installed application that is not part of the policy Allowlist. For BYOD iOS/iPadOS and iOS MAID Device enrollments, a policy cannot be enforced at all. However, Coro can retrieve an installed application list from the device and report where policy contraventions occur on the Devices page.
For company-owned Android devices, an applied policy completely prevents the user from viewing excluded applications in the Google Play Store or installing anything not on the policy Allowlist. This is also true for BYOD Android devices, although this is limited to the installed Work profile.
The Personal profile on a BYOD Android device is completely unaffected and continues with normal unrestricted access to apps in the Google Play Store.
Coro MDM enables admin users to set a passcode policy on iOS/iPadOS devices, or a password policy on Android devices.
Passcodes and passwords lock a device from unauthorized access and keep an organization's data secure. Security unlock features such as fingerprint or face-recognition are typically supported by association with an underlying passcode; however, only the passcode/password is affected by this policy.
Passcode/password policy settings include:
Enforcing strength and complexity rules.
Setting the maximum number of failed attempts before which a device wipe occurs.
Setting the maximum inactivity timeout period, after which the device screen is locked (iOS/iPadOS devices only).
Enforcing password unlock once per 24 hour period (Android devices only).
Setting the maximum passcode/password age, after which a new value must be set.
Disabling the use of biometrics when unlocking the device, forcing the use of a passcode (iOS/iPadOS supervised devices only).
Disabling a user's ability to change their passcode (iOS/iPadOS supervised devices only).
Admin users can remotely set passwords on Android devices, and remotely clear passcodes on iOS devices enrolled in Coro MDM. For more information, see Managing devices.
Use this policy type to set security and access restrictions on enrolled devices. This can help prevent unauthorized access and restrict opportunities for attackers to obtain or view sensitive data.
For iOS/iPadOS devices, security policy settings include:
Enforcing encryption on all device backups.
Preventing a user from performing a factory reset.
Disabling automatic unlock.
Disabling access to the control center from the lock screen.
Disabling control center notifications on the lock screen.
Enforcing authentication when the user attempts to use autofill from keychain data.
Disabling access to Siri from the lock screen.
Disabling access to Siri.
Disabling camera access.
Disabling the ability to take screenshots.
Disabling near-field communications (NFC) to prevent contactless transactions and unauthorized data transfer.
For Android devices, security policy settings include:
Preventing installation of applications not verified by Google Play Protect.
Disabling developer mode.
Preventing unauthorized access to sensitive data.
Disabling camera access.
Disabling microphone access to prevent audio recording.
Disabling screen capture to prevent screenshots and screen recordings.
Disabling near-field communications (NFC) to prevent contactless transactions and unauthorized data transfer.
Disabling Bluetooth to prevent unauthorized data sharing and wireless vulnerabilities.
Disabling the ability to mount or use external storage devices such as SD cards and flash drives.
Preventing a user from performing a factory reset.
Use this policy type to add prepopulated Wi-Fi network endpoints to your enrolled devices before they are shipped to end users. This helps to prevent insecure sharing of Wi-Fi network passwords or other details to new device owners. This can also mean the device is preconfigured with hidden networks not normally discoverable.
This policy does not restrict end users from joining other networks.
Coro MDM allows you to add up to ten network endpoints in a policy.
Make sure your application restrictions policies allow app installation from the Managed apps list. The policies you define here take precedence and can override remote installation or removal of managed apps.
Use this policy type to set app usage restrictions on enrolled Supervised/DEP iOS and iPadOS devices.
Policy settings include:
Preventing the user from installing or uninstalling apps.
Preventing the user from installing enterprise apps outside of the AppStore.
Disabling in-app purchases.
Preventing the user from installing non-AppStore marketplaces.
Preventing the user from changing the default browser app.
Disabling Safari and web clips.
Before you set up a device policy, make sure you know the Bundle IDs (iOS/iPadOS) or Package names (Android) of the applications to add.
To create a device policy:
From the Policies tab, select + ADD POLICY.
Use the dropdown to select the device type for your new policy:

Coro displays the Create policy dialog, starting at the Enter Policy Name step:
The screenshots used in this procedure represent creating a policy for iOS BYOD devices. Other device types use the same or similar steps, with differences noted.
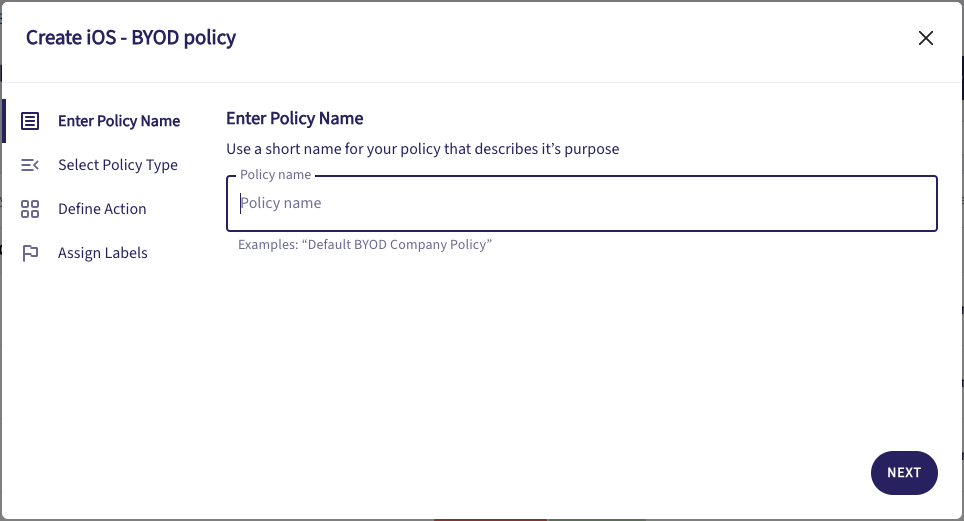
Enter a name for the policy, then select NEXT to continue.
In the Select Policy Type step, use the dropdown to view and select from the available policy types:
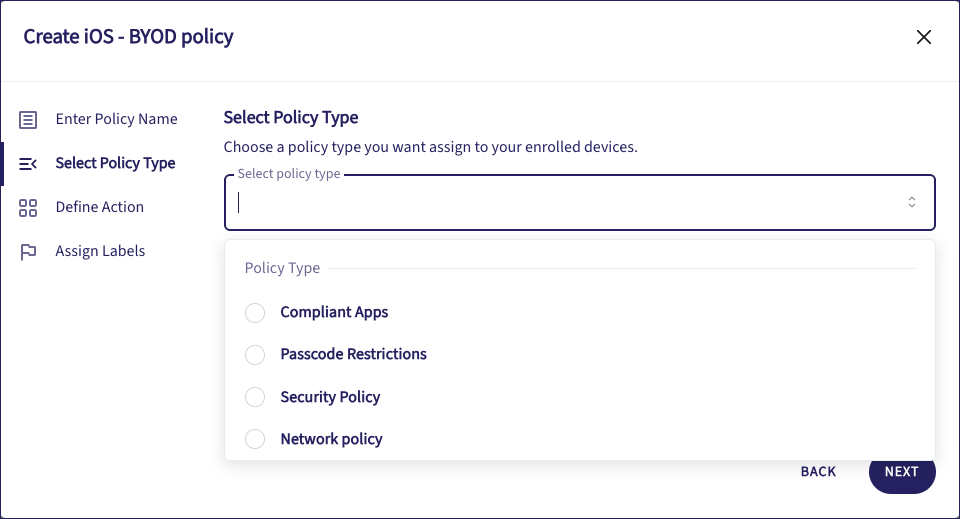
Select from:
- Allowed Apps: For enrolled device types where application installation and usage is enforceable.
- Compliant Apps: For enrolled devices types where application usage is not enforceable but can be reported on.
- Passcode/password restrictions: For enforcing a passcode policy on the enrolled device.
- Security Policy: For enforcing or restricting features on the device that could be compromised.
- Network Policy: For prepopulating Wi-Fi network endpoints on enrolled devices.
For more details, see Policy types.
Select NEXT to continue.
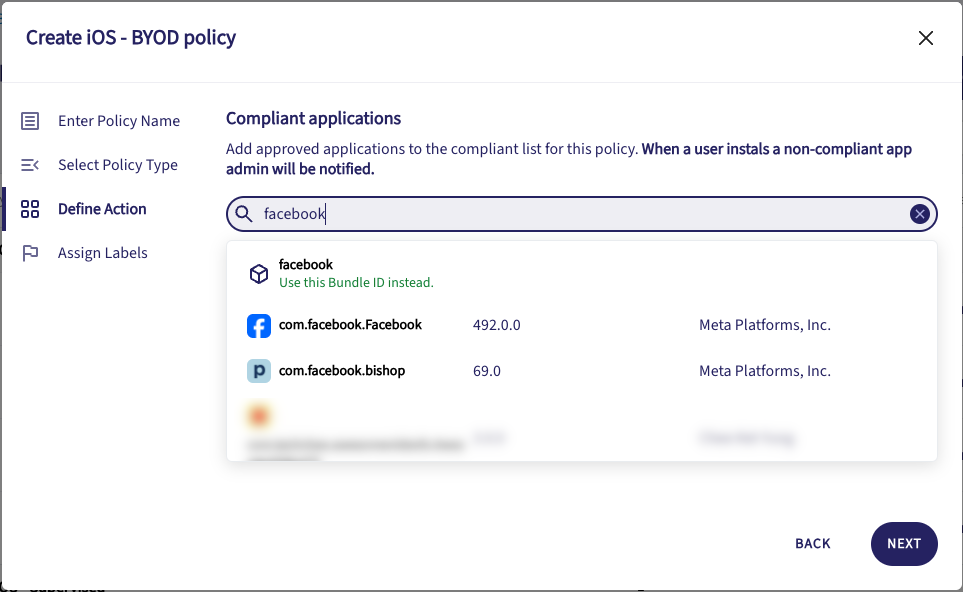
In the Define Action step, Coro shows settings according to the selected policy type.
To view configuration details for each policy type, expand the relevant section below:
Allowed Apps and Compliant Apps
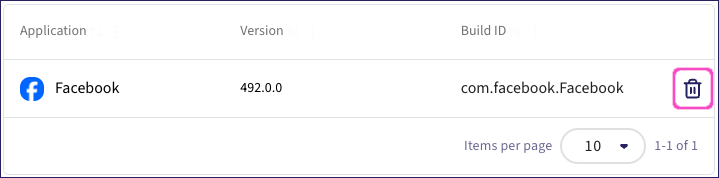
Enter one or more application Bundle IDs (iOS/iPadOS) or Package names (Android). Coro searches for and displays a list of matching applications. Select a matching application or choose to add the bundle ID/package name as entered:
To remove an entry, select
 :
:
Passcode Restrictions (iOS/iPadOS devices)
Enable or disable each setting as required. For enabled settings, configure the associated sub-settings:
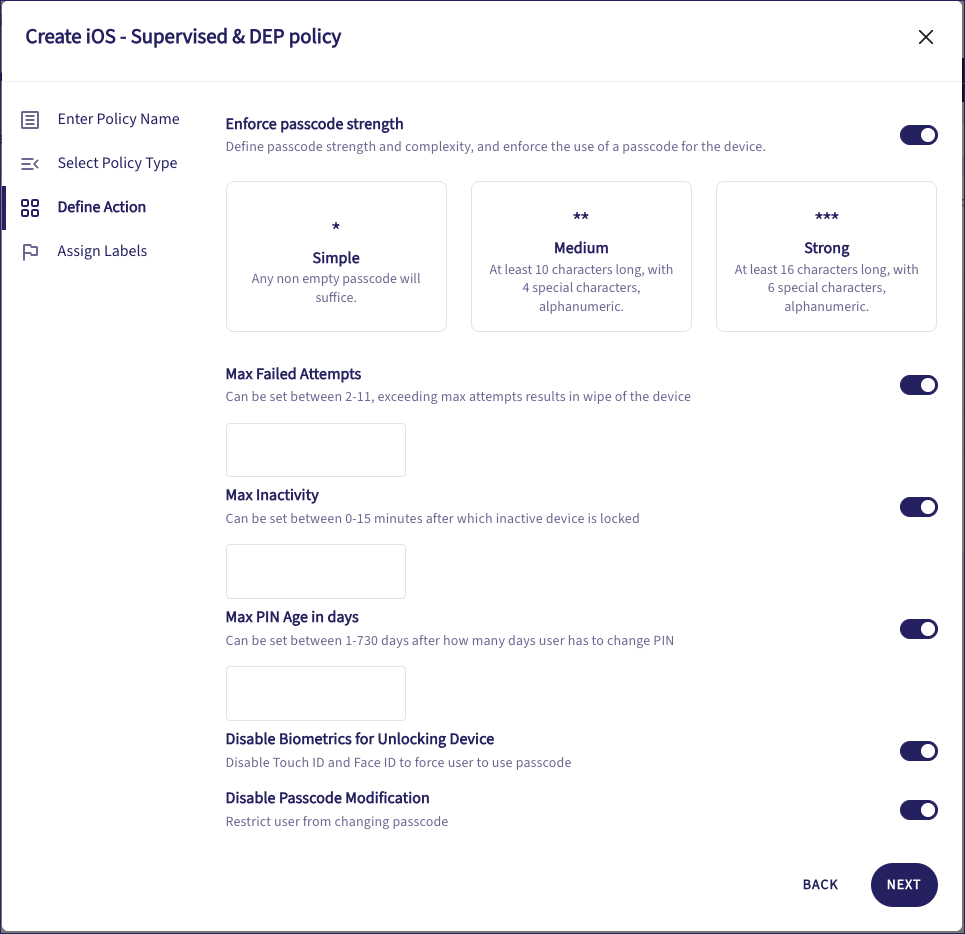
Settings include:
Enforce passcode strength. Select a predefined level:
Strong: Alphanumeric, at least 16 characters long, and including six special characters.
Medium: Alphanumeric, at least ten characters long, and including four special characters.
Simple: Any non-empty passcode.
Max Failed Attempts: The maximum number of failed attempts before a device wipe occurs. Enter a number in the range 2 to 11.
Max Inactivity: The maximum inactivity timeout period, after which the device screen is locked. Enter a number of minutes in the range 0 to 15.
Max PIN Age in days: The maximum passcode age, after which a new passcode must be set. Enter a number of days in the range 1 to 730.
Disable Biometrics for Unlocking Device: Disable biometrics such as Touch ID and Face ID when unlocking the device. The user must use their passcode to unlock the device.
Disable Passcode Modification: Disallow the user from changing their passcode.
Password Restrictions (Android devices)
Enable or disable each setting as required. For enabled settings, configure the associated sub-settings:
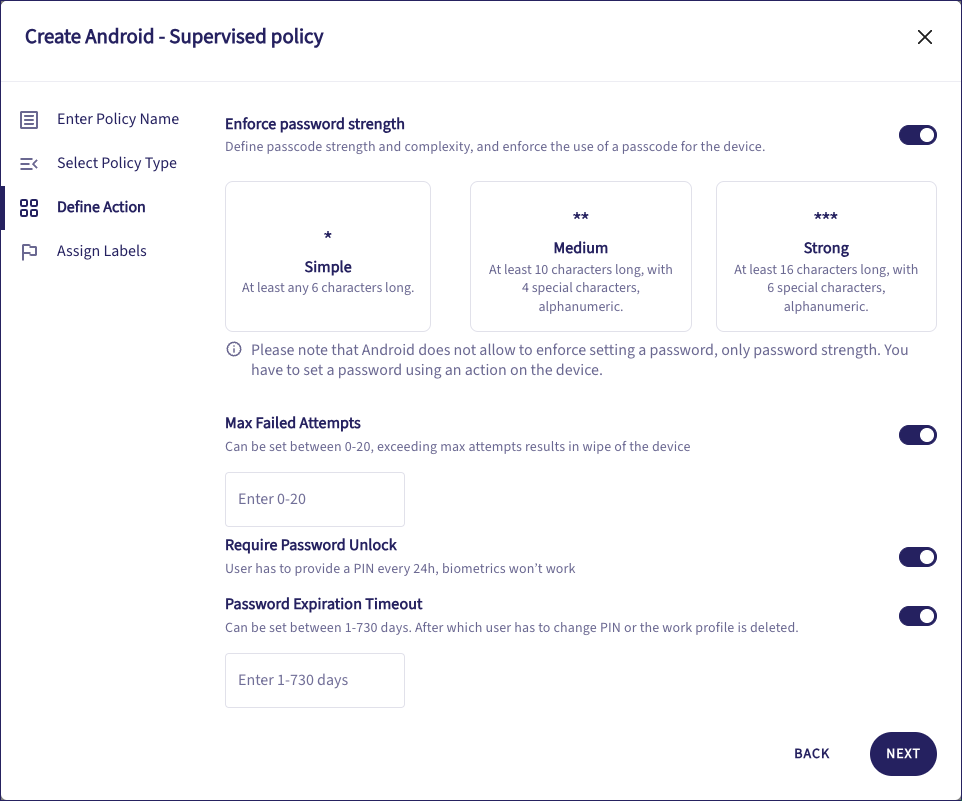
Settings include:
Enforce password strength. Select a predefined level:
Strong: Alphanumeric, at least 16 characters long, and including six special characters.
Medium: Alphanumeric, at least ten characters long, and including four special characters.
Simple: Alphanumeric, at least six characters long.
Max Failed Attempts: The maximum number of failed attempts before a device wipe occurs. Enter a number in the range 0 to 20 (0 means the setting has no effect).
Require Password Unlock: Once every 24 hours, the device user must enter a password to unlock the device (rather than using biometric or pattern unlocking).
Password Expiration Timeout: The maximum password age, after which a new value must be set. Enter a number of days in the range 1 to 730. If the user fails to set the password inside the timeout period, Coro deletes the work profile from the device.
Security Policy (iOS/iPadOS devices)
Enable or disable each setting as required:

Settings include:
Enforce Encrypted Backup: Enforce encryption for all device backups.
Disable Erasing Content and Settings: Prevent a user from performing a factory reset through the device settings.
Disable Auto Unlock: Disable automatic screen unlock.
Disable Lock Screen Control Center: Disable access to the control center from the lock screen.
Disable Lock Screen Notification: Disable control center notifications on the lock screen.
Enforce Authentication Before Autofill: Force the user to authenticate every time they attempt to use autofill from keychain data.
Disable Siri While Locked: Disable access to Siri from the lock screen.
Disable Siri: Disable access to Siri whether the device is locked or not.
Disable Camera: Disable camera access.
Disable Screen Shot: Disable the ability to take screenshots.
Disable NFC: Disable near-field communications (NFC) to prevent contactless transactions and unauthorized data transfer.
This list represents settings available for supervised and DEP enrolled devices. Settings available for BYOD devices might represent a subset of the list here.
Security Policy (Android devices)
Enable or disable each setting as required: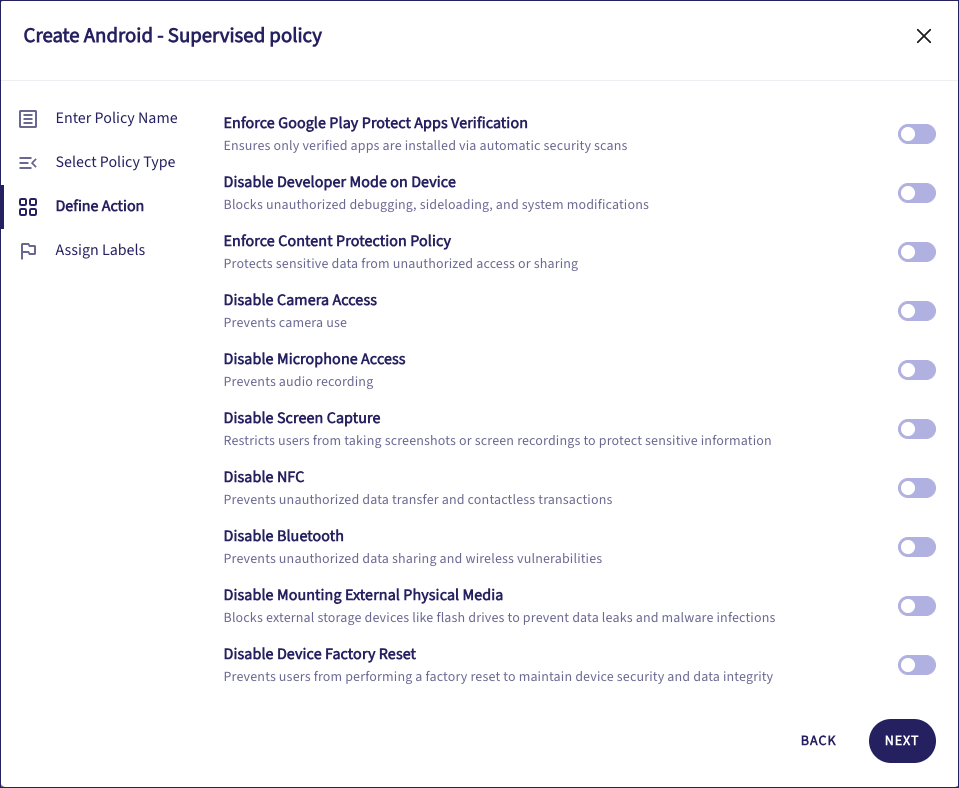
Settings include:
Enforce Google Play Protect Apps Verification: Prevent installation of applications not verified by Google Play Protect.
Disable Developer Mode on Device: Prevent the user from activating or using Developer Mode.
Enforce Content Protection Policy: Enforce content protection, which scans for deceptive apps. This setting is supported for devices running Android 15 and later.
Disable Camera Access: Disable camera access.
Disable Microphone Access: Disable microphone access.
Disable Screen Capture: Disable the ability to take screenshots or capture screen recordings.
Disable NFC: Disable near-field communications (NFC) to prevent contactless transactions and unauthorized data transfer.
Disable Bluetooth: Disable Bluetooth.
Disable Mounting External Physical Media: Disable the ability to mount or use external storage devices such as SD cards and flash drives.
Disable Device Factory Reset: Prevent a user from performing a factory reset through the device settings.
This list represents settings available for supervised devices. Settings available for BYOD devices might represent a subset of the list here.
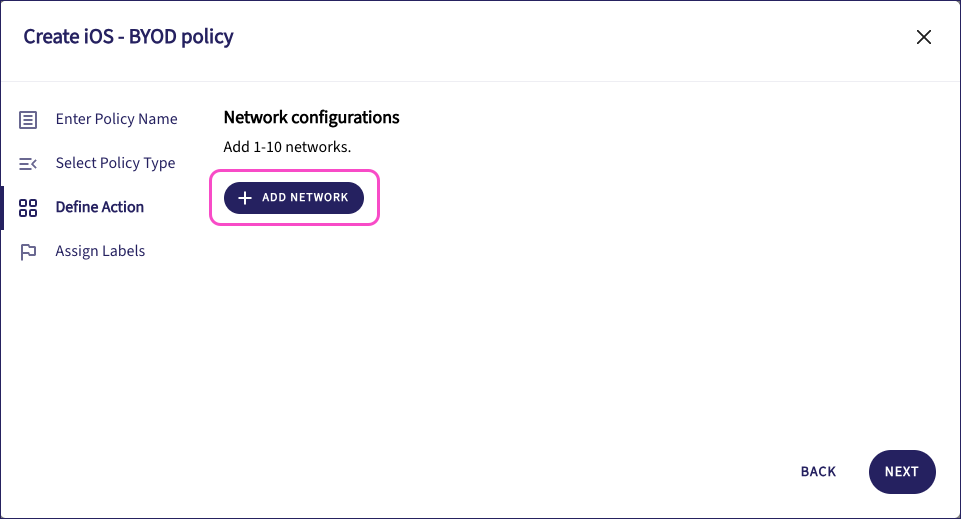
Network Policy
Add the details for one or more Wi-Fi network endpoints that you want enrolled devices to store.In Network configurations, select ADD NETWORK:
Coro displays the Add network dialog:
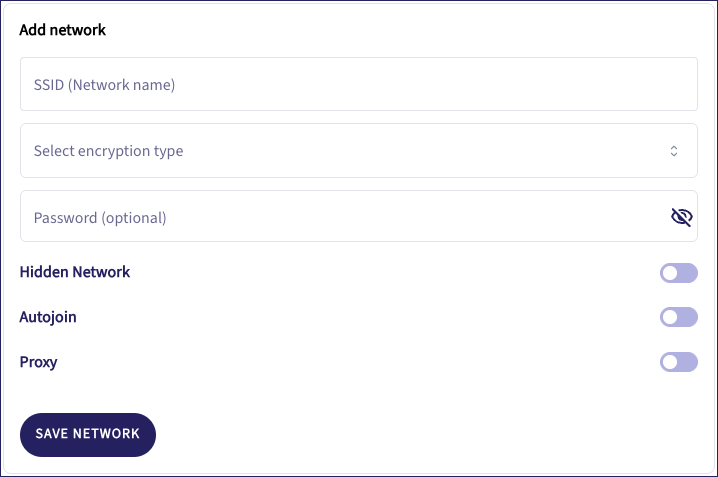
Enter the following details:
SSID (Network name): The Wi-Fi network name.
Select encryption type: Select an encryption type from the dropdown.
Password (Optional): Enter a password for the network.
Hidden Network: Enable if this network is hidden/not discoverable.
Autojoin: Enable if you want to automatically join this network when it becomes available.
Proxy: Enable to use a proxy. Choose from:
Manual: Enter the proxy details - server, port, and optional username and password.
Automatic: Enter the URL for the location of the Proxy Auto-Configuration (PAC) file.
Select SAVE NETWORK to save your network configuration. Repeat this process for each network you want to add to the policy, up to a maximum of ten networks.
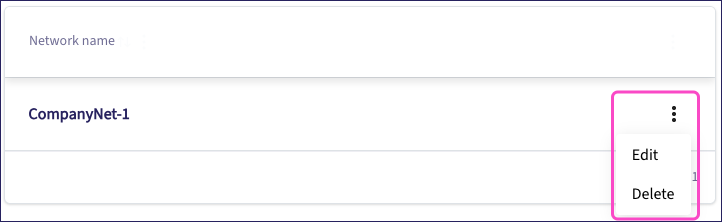
To modify added networks, select the three-dot menu adjacent to the network you want to change. Choose from Edit or Delete as needed:
App Restrictions (iOS/iPadOS devices)
Enable or disable each setting as required: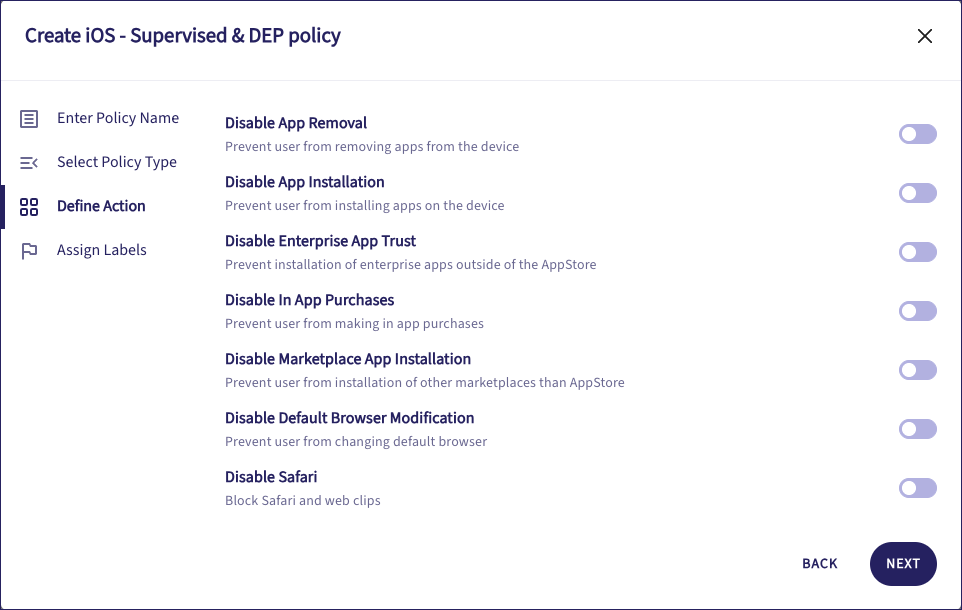
Settings include:
Disable App Removal: Prevent the user from removing apps from the device.
Disable App Installation: Prevent the user from installing apps on the device. App installation is entirely managed through Coro MDM.
Disable Enterprise App Trust: Prevent the user from installing enterprise apps originating outside the Apple AppStore.
Disable In App Purchases: Prevent the user from activating in-app purchases.
Disable Marketplace App Installation: Prevent the user from installing and configuring non-AppStore marketplaces.
Disable Default Browser Modification: Prevent the user from changing the default browser app on their device.
Disable Safari: Block use of Safari and web clips on the device.
Select NEXT to continue.
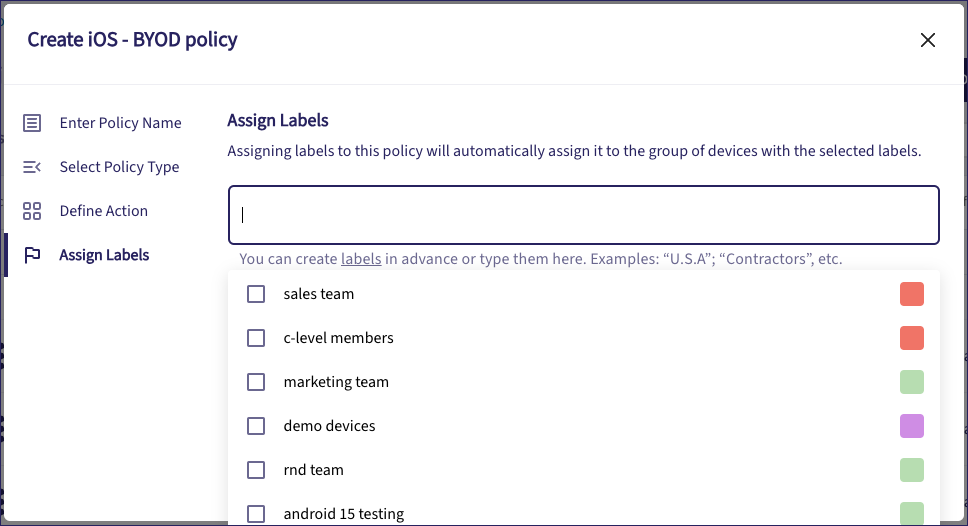
In the Assign Labels step, use the dropdown to select one or more device group labels to apply to this policy:
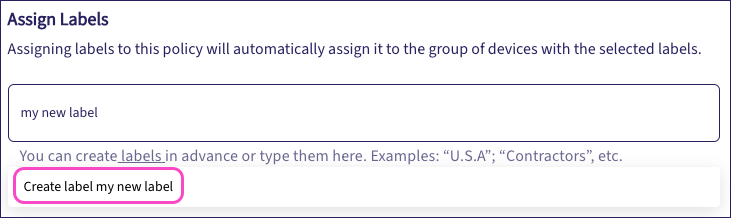
Alternatively, create a label by typing it directly into the field and selecting Create label <new label>:
 Important
You must select at least one label for your policy. This is the mechanism through which policies are applied to devices.
To save your policy, select SAVE.
After you have defined a device policy, apply it to your mobile devices through adding the corresponding label to your devices. For more details, see Adding and removing device labels.
Policies associated with a label are assigned immediately to connected devices, although Coro recommends allowing a short time for all affected devices to be fully updated. Devices must be connected to the internet for the policy to take effect.
For Android devices only: If you subsequently edit an assigned policy by removing or replacing allowed applications, devices affected by the change are updated automatically without notice to the user when next online. That is, installed applications no longer allowed after the policy update are automatically uninstalled and cease to be visible in the Google Play Store.
You can permanently delete a device policy through the Policies tab.
Perform the following steps:
Locate the policy to delete from the list.
Select the adjacent three-dot menu. Then, select Delete:
Coro presents a confirmation dialog. If you proceed, the policy is deleted and unnassigned from devices.
To delete the policy, select DELETE.