Endpoint Security allowlist and blocklist
The Coro Endpoint Security allowlist and blocklist enable admin users with sufficient permissions to manage the access of files and folders deemed safe and block the execution of unsafe processes on a device. This allows admin users more control over what Coro monitors by:
- Suppressing possible false positive detections of files and folders considered safe by your organization.
- Excluding folders from being scanned by the Coro Agent to improve the Agent's performance.
- Blocking identified malicious processes from executing.
This article discusses the following topics:
- Managing allowlists and blocklists for Endpoint Security and EDR
- Accessing the Endpoint Security allowlist and blocklist
- Adding allowlist and blocklist records
- Deleting allowlist and blocklist records
- Searching and filtering allowlist and blocklist records
Managing allowlists and blocklists for Endpoint Security and EDR
Coro Endpoint Security and Endpoint Detection and Response (EDR) use separate allowlists and blocklists. The EDR allowlist prevents EDR tickets from triggering by marking non-system processes and folders as safe, stopping process and telemetry collection for them. The Endpoint Security allowlist excludes specific files or folders from Coro Agent scanning to prevent Endpoint Security ticket triggers. Both EDR and Endpoint Security blocklists actively block the execution of unsafe or non-trusted processes.
The following table outlines the differences between adding records to the Endpoint Security allowlist and blocklist, and adding records to the Endpoint Detection and Response (EDR) allowlist and blocklist:
| Record type | Add to Endpoint Security allowlist | Add to Endpoint Security blocklist | Add to EDR allowlist | Add to EDR blocklist |
|---|---|---|---|---|
| File | Prevents Endpoint Security tickets from triggering by excluding the file from Coro Agent scanning | N/A | N/A | N/A |
| Folder | Prevents Endpoint Security tickets from triggering by excluding the folder from Coro Agent scanning | N/A | Prevents process execution and telemetry collection for the folder | N/A |
| Process | N/A | Blocks unsafe process execution | Prevents EDR tickets from triggering by marking the non-system process as safe. Related process information is not collected in the EDR Telemetry and Process tabs | Blocks unsafe process execution |
You can add records to the allowlist and blocklist individually, or as a list contained in a CSV file.
Accessing the Endpoint Security allowlist and blocklist
- Sign in to the Coro console .
-
From the
Actionboard
, select
Control Panel
from the top of the
Endpoint Security
dashboard panel:

-
Alternatively, from the sidebar, select
 to access the
Control Panel
.
to access the
Control Panel
.
-
Select
Endpoint Security
:

-
Select the
Allow/Block
tab:

Coro displays the Allow/Block page:

The Allow/Block page displays a list of allowed file and folder records and blocked process records. The list contains the following columns:
-
Symbol
: Specifies the record type:
-
 : Process image file path record.
-
 : Process image folder record.
-
 : Process hash record.
-
-
Value
: The value of the record, based on the record type. This value must be:
- File path
- Folder path
- Process file hash
note
A process file hash is a fixed-size alphanumeric string representing file content, generated using cryptographic functions. Coro supports:
- SHA-256 : A cryptographic hash function that generates a 256-bit hash from any input, commonly used for data integrity, digital signatures, and encryption.
- CDHash : A cryptographic hash function specific to Apple's code signing, derived from an application's code directory, often using SHA-256. It ensures executable files haven't been altered.
- List : Specifies whether the record is displayed on the allowlist or blocklist.
- Description : (Optional) A short description of the record. When no value is specified, Coro displays N/A .
-
Symbol
: Specifies the record type:
Adding allowlist and blocklist records
You can add allowlist or blocklist records individually or import them in bulk from a CSV file.
Using environment variables
The Coro Agent enables admin users to use environment variables when they add file and folder records to the allowlist or blocklist, either individually or through CSV import.
Environment variables act as placeholders for user or system-specific directories, automatically resolving to the correct paths. By using these variables, admin users can avoid manually entering file paths, reducing manual input, and ensuring accurate path application across different users and devices.
note
The Coro Agent supports environment variables on Windows and macOS devices.
Coro supports the following environment variables:
-
USERPROFILE
: The profile folder of the current user.
-
Example without environment variable
:
C:\Users\JohnDoe\Documents\Projects -
Example with environment variable
:
__USERPROFILE__\Documents\Projects
__USERPROFILE__\Documents\Projectsdynamically references each user's profile folder, eliminating the need to create separate entries for different users. -
Example without environment variable
:
-
TEMP
: The temporary files directory for the current user.
-
Example without environment variable
:
C:\Users\JohnDoe\AppData\Local\Temp\TestFolder -
Example with environment variable
:
__TEMP__\TestFolder
__TEMP__\TestFolderdynamically references the current user's temporary folder on the device, eliminating the need to create separate entries for different users. -
Example without environment variable
:
Adding records individually
To add an allowlist or blocklist record to the list:
- Select + ADD from the Allow/Block page.
-
Select the type of record to add:

-
After adding records, enable the following options to apply the rules to all child workspaces:
- Apply allow/block rules for files and folders to all child workspaces : Applicable to file and folder records.
- Apply allow/block rules for processes to all child workspaces : Applicable to process records.

note
The Apply allow/block rules for files and folders to all child workspaces and Apply allow/block rules for processes to all child workspaces options apply to channel workspaces only.
Adding a file record
To add a file record to the allowlist or blocklist:
-
Select
+ ADD
>
Add file record
:

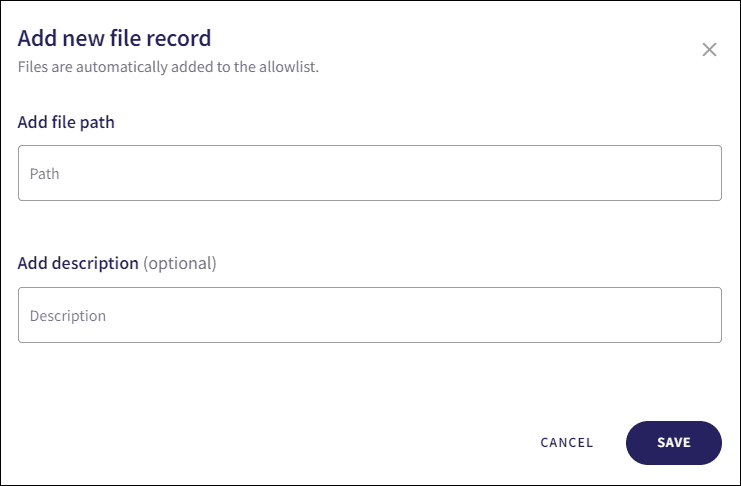
Coro displays the Add new file record dialog:
-
Enter a file path value into
Add file path
.
note
Coro supports the use of environment variables in file paths on Windows and macOS devices.
Important
The file path value must:
- Be a valid file path.
- Not contain ' , ? , // , or | .
- Not contain : if it contains / .
- (Optional) Enter a description for the file record into Add description .
-
Select
SAVE
.
Coro creates the file record, adds it to the allowlist, and attaches a timestamp indicating when the file was allowed:

After a file is added to the allowlist, Coro stops creating tickets related to that file.
note
Admin users can add file and folder records to the allowlist.
note
Admin users can also add a file to the allowlist directly from Malware on Endpoint tickets using the Approve this file action. For further information, see Malware on endpoint
Adding a folder record
To add a folder record to the allowlist:
-
Select
+ ADD
>
Add folder record
:

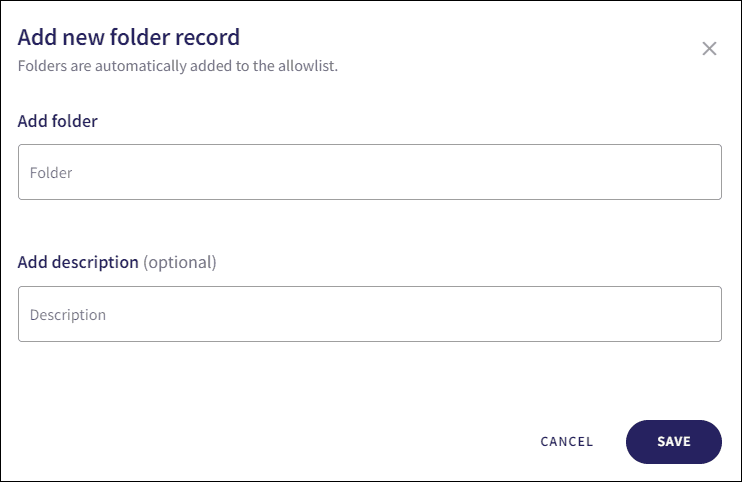
Coro displays the Add new folder record dialog:
-
Enter a folder path value into
Add folder
.
note
Coro supports the use of environment variables in folder paths on Windows and macOS devices.
Important
The folder path value must:
- Be a valid folder path.
- Not contain ' , ? , // , or | .
- Not contain : if it contains / .
- (Optional) Enter a description for the folder record into Add description .
-
Select
SAVE
.
Coro creates the folder record, adds it to the allowlist, and attaches a timestamp indicating when the folder was allowed:

After an admin user adds the folder to the allowlist, Coro stops creating tickets for the folder.
note
Folder records cannot be added to the blocklist. Admin users can only add folder records to the allowlist.
Adding a process record
To add a process record to the blocklist:
-
Select
+ ADD
>
Add process record
:

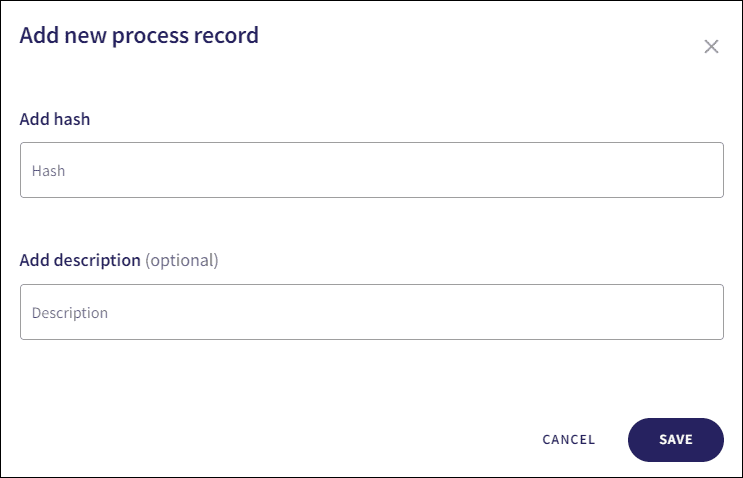
Coro displays the Add new process record dialog:
-
Enter a valid SHA-256 hash or CDHash.
Important
CDHash values have a maximum string length of 40 characters.
SHA-256 hash values have a maximum string length of 64 characters.
- (Optional) Enter a description for the process record into Add description .
-
Select
SAVE
.
Coro creates the process record, adds it to the blocklist, and attaches a timestamp indicating when the process was blocked:

After an admin user adds the process to the blocklist, Coro blocks the execution of the process.
note
Process records cannot be added to the allowlist. Admin users can only add process records to the blocklist.
Important
When you add records to the Endpoint Security allowlist, the action only prevents Malware on endpoint tickets from triggering.
info
If you have the EDR module enabled, you can also block a process from the EDR Processes page using the Block Process action. Process entries are shared between the blocklists of EDR and Endpoint Security.
Importing records from a csv file
Admin users can add records to the allowlist or blocklist by importing a CSV file containing a list of records.
To import records to the Endpoint Security allowlist or blocklist from a CSV file:
-
Select
+ ADD
:

-
Select
Import from CSV
:

Coro displays the Import CSV to allow / block list dialog:

-
(Optional) If you haven't created a valid CSV file, select
Download our template to avoid invalid entries
:

Use the downloaded template to ensure all required columns are completed.
-
Select
Click to upload
:

Alternatively, drag and drop the selected CSV file into the Import CSV to allow / block list dialog.
-
Select a valid CSV file:

After you select the CSV file, Coro displays the filename in the file area of the Import CSV to allow / block list dialog:

-
(Optional) Select
Remove
to discard the selected CSV file and choose an alternative file:

-
(Optional) Select
Remove
to discard the selected CSV file and choose an alternative file:
-
Select
IMPORT
:

Coro processes the CSV file.
After completing the import process, Coro displays a summary of successfully imported records.

If any records fail to import, the summary displays the number of invalid records out of the total number of records in the CSV file:

-
Select
Try again
to restart the import process, or select
CLOSE
.
Coro adds the imported records to the Endpoint Security allowlist/blocklist:

CSV file validation
Coro validates CSV import files.
Entries in your CSV file must follow the pattern:
<Type>,<Value>,<List>,<Description>
Each entry must be on a separate line, with the following possible values in each field:
| Field | Description | Allowed values |
|---|---|---|
| <Type> | The item type. | File or Folder or Process |
| <Value> | A file/folder path or a process hash. | Examples: c:\users\downloads\test.txt, c:\dev\ or 986e27a1e6a4cbae373d28337ac3759325163ffb |
| <List> | Specifies whether to allow or block the item. | Allowed or Blocked |
| <Description> | (Optional) A short description of the record. When no value is provided, a default value of N/A is applied during file upload. |
A test file or An allowed process |
note
Coro supports the use of environment variables in file and folder path records on Windows and macOS devices.
Files must abide by the following rules:
- You must specify valid values in all four columns. Coro ignores entries with extra columns or invalid values.
- The maximum file size is 10 MB.
- The CSV import filename must be in lowercase.
- A single CSV import file can contain a maximum of 500 records.
-
When
Type
is
Process
:
- Value must be a valid SHA-256 hash or CDHash.
note
CDHash values have a maximum string length of 40 characters.
SHA-256 hash values have a maximum string length of 64 characters.
-
When
Type
is
File
or
Folder
,
Value
must:
- Be a valid file or folder path.
- Not contain ' , ? , // , or | .
- Not contain : if it contains / .
- Apply Allowed when Type is Folder or File .
- Apply Blocked when Type is Process .
Deleting allowlist and blocklist records
To delete a record from the allowlist or blocklist:
- Select the three-dot menu to the right of the record.
-
Select
Delete record
:

Coro deletes the record from the allowlist or blocklist.
Searching and filtering allowlist and blocklist records
Filter and search the EDR allowlist and blocklist to find specific entries. The Type filter enables you to filter allowlist and blocklist records by:
- Folder
- Process
- File

Perform a free text search across the Value and Description columns:
