Configuring the Inbound Gateway
note
Given the potential for service disruption during this process, Coro recommends scheduling these changes at a time of least impact.
Configuring the Inbound Gateway requires changes to an organization's own DNS and email infrastructure, as well as enabling the Gateway inside your Coro workspace. This section describes the steps required.
Summary of steps required
To set up the Coro Inbound Gateway to protect your incoming emails, you must perform some configuration steps in your email and DNS services before you can configure your Coro workspace. You need to:
- Obtain all prerequisites
- Set up your original email provider to recognize Coro as the gateway for inbound email
- Update your email domain DNS settings
Prerequisites
Before you begin, make sure you have the following information:
- IP address(es) of Coro’s Inbound Gateway email proxy service. Contact Coro Support for details.
- Mail Exchange (MX) record details for Coro’s Inbound Gateway email proxy service. Contact Coro Support for details.
- The identity of your email service provider
- Your email domain
Setting Coro as an inbound gateway with the original email provider
Coro can be configured with the following email providers:
Gmail
- Sign into Google Workspace Admin with your administrator credentials.
- In the Admin console, go to Menu > Apps > Google Workspace > Gmail > Spam, Phishing and Malware .
- In the left pane, select your top-level organization.
- Locate the Inbound gateway setting and select Edit . The Inbound gateway dialog appears.
- Specify the IP address(es) of the Coro Inbound Gateway and select Save .
note
By specifying Coro Inbound Gateway IP addresses in the Inbound gateway setting, Gmail does not then perform Sender Policy Framework (SPF) or Domain-based Message Authentication, Reporting, and Conformance (DMARC) checks on incoming messages.
Microsoft 365
To configure Microsoft 365 (M365) with Coro, perform the following operations:
- Add Coro's Inbound Gateway IP addresses to your M365 email connection filter allowlist
- Create an inbound email connector based on Coro
- Enable enhanced filtering for the new connector
Adding the Inbound Gateway to your M365 email allowlist
To add Coro's Inbound Gateway IP addresses to your M365 email allowlist:
- Sign into Microsoft Security admin center with your administrator credentials.
- Go to Email & Collaboration > Policies & Rules > Threat policies .
-
Select
Anti-spam
:

Security admin center displays the Anti-spam policies screen.
-
Select
Connection filter policy (Default)
. Then, in the policy dialog, select
Edit connection filter policy
:

-
For
Always allow messages from the following IP addresses or address range
, enter the IP addresses of Coro's Inbound Gateway as provided by Coro Support. Then, enable
Turn on safe list
:

- Select Save .
- Microsoft recommends disabling SPF Hard fail when an email solution such as Coro's Inbound Gateway is placed in front of it. Return to Email & Collaboration > Policies & Rules > Threat policies > Anti-spam .
-
Select
Anti-spam inbound policy (Default)
, then locate and select
Edit spam threshold and properties
:

-
In the
Spam threshold and properties
dialog, locate and set
SPF record: hard fail
to
Off
:

- Select Save .
Creating an inbound email connector in M365
To create an inbound email connector for Coro in Microsoft Exchange admin center:
- Sign into Microsoft Exchange admin center with your administrator credentials.
- Go to Mail flow > Connectors .
-
In the
Connectors
page, select
+ Add a connector
:

Exchange admin center displays the Add a connector dialog, starting at the New connector step.
-
For
Connection from
, select
Partner organization
.
Select Next to continue.
-
In the
Name
step: Add a name describing the incoming mail connection. For example, “Coro email security inbound connection".
Select Next to continue.
-
In the
Authenticating sent email
step: select
By verifying that the IP address of the sending server matches one of the following IP addresses, which belongs to your partner organization
, then enter the IP addresses of Coro's Inbound Gateway as provided by Coro Support:
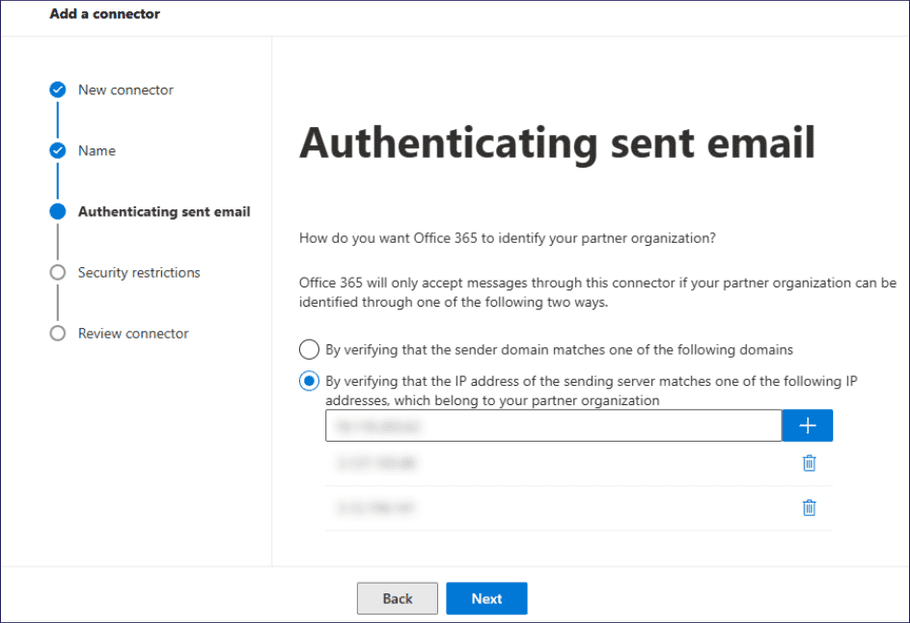
Select Next to continue.
-
In the
Security restrictions
step: select
Reject email messages if they aren't sent over TLS
.
Select Next to continue.
- In the Review connector step: Review your settings, then select Create connector .
M365 creates Your new connector based on the settings you provided.
Enabling enhanced filtering for your Coro email connector
To enable the enhanced filtering configuration of the new Coro connector in the Microsoft Defender admin center:
- Sign into Microsoft Security admin center with your administrator credentials.
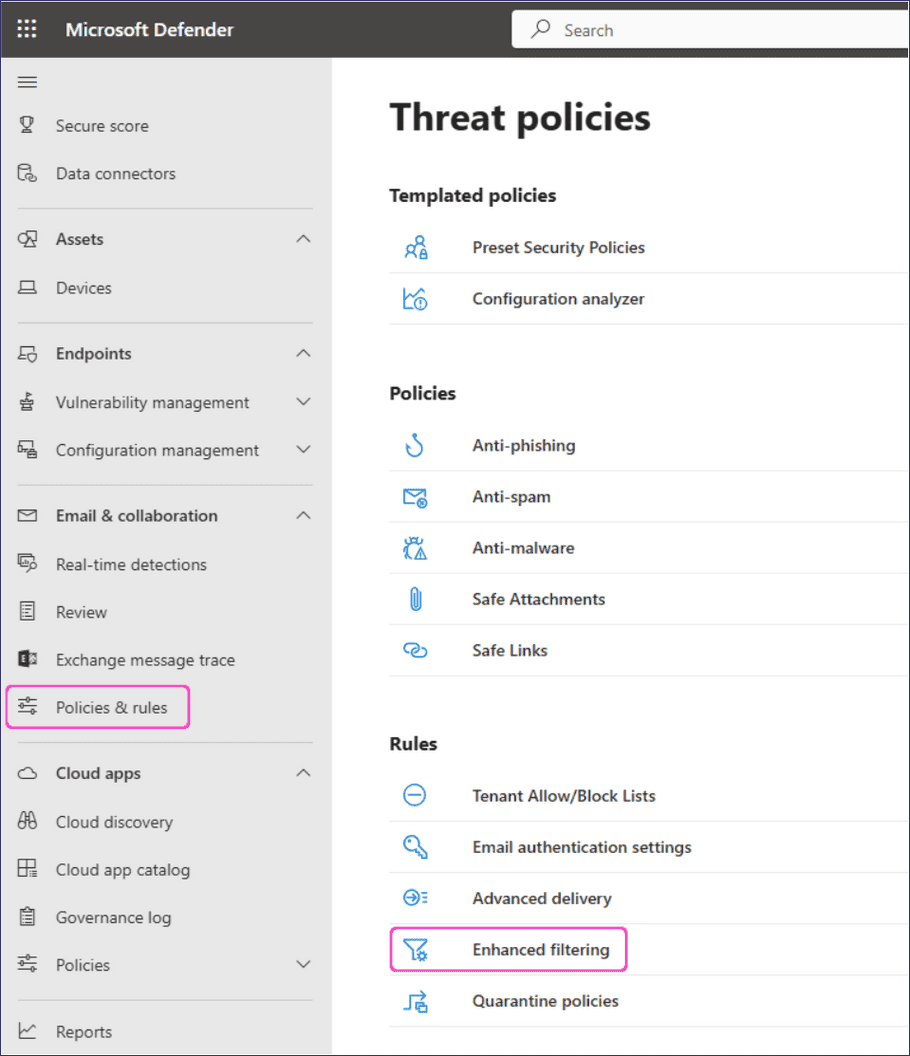
- Go to Email & Collaboration > Policies & Rules > Threat policies .
-
Select
Enhanced filtering
:
- Select the Coro inbound connector you configured in the previous section .
-
In the detail pane for your connector, select
Automatically detect and skip the last IP address
and
Apply to entire organization
:

- Select Save .
Important
Due to the way Microsoft verifies third party servers configured in your mail flow connectors, you might see Sender Policy Framework (SPF) authentication failures in the headers of your email messages relating to the Coro email proxy. This is to be expected and does not affect processing or delivery of your emails. For more details, contact Coro Support.
Other third party Mail Transport Agents (MTAs)
Coro can support other third party MTAs that are capable of receiving emails from an inbound email proxy gateway, skipping SPF/DMARC and similar checks. Coro recommends contacting the support team for your MTA to clarify what settings should be applied. For further assistance, contact Coro Support.
Updating your email domain DNS settings
To enable Coro to analyze incoming emails, add Coro’s Inbound Gateway server address as a highest-priority Mail Exchange (MX) record in your DNS settings.
This section provides general configuration advice for most scenarios, and specific guides for:
General configuration and failover protection
To enhance service stability and provide a level of failover, Coro recommends retaining your organization's original MX records in your DNS but configured as lower priority than the Coro Inbound Gateway MX record. By keeping your original DNS records, any interruptions to the availability of the Coro service mean that emails are sent instead to servers defined in lower-priority MX records (the default behavior of SMTP).
MX record priority is determined by the lowest number applied. In other words, an MX record priority value of 10 is treated as higher priority than a value of 20.
Keep a note of your original MX records as these are required for configuration in the Coro console later.
note
Updates to DNS records can take up to 24 hours to take effect.
Coro continuously monitors your DNS settings to ensure that your Inbound Gateway MX records are correctly configured. Any identified issues are reported in the Coro console and emailed to admin users. For more information, see Continuous monitoring.
Microsoft 365 MX records
To configure MX records in Microsoft 365:
- Sign into the Exchange Admin console with administrator credentials.
- Go to Home > Settings > Domains > [YOUR EMAIL DOMAIN] .
- Select the DNS records tab.
-
In the
Microsoft Exchange
section, locate the
MX record
entry:

- Select the record to view the MX record dialog.
- Make a note of the current MX record. For example, “mycompany-mail.protection.outlook.com”. Retain this for later configuration.
-
Add a new entry for the Coro Inbound Gateway MX record:
note
Exchange Admin might give validation warnings or errors regarding the new MX record not matching expected values. You can safely ignore this.
- Select Done to close the dialog.
Google Domains Service
To configure MX records in Google Domains Service (for organizations who registered their domains using Google DNS):
- Sign into Google Domains Service ( https://domains.google.com/ ) with your administrator credentials.
-
Select your domain, then select
Manage
:

- Select DNS .
- Make a note of the current MX records for later configuration.
- (Recommended) Back up the current DNS settings as a precaution by selecting Export DNS records .
- Set Type as “MX” and add a Data entry corresponding to the Coro Inbound Gateway MX record address.
-
Add the Coro Inbound Gateway address with the lowest priority number (giving it highest priority in the list). Other servers in the list should be the original Google servers:

- Select Save .
- If Google asks for confirmation for overriding the existing configuration, select Yes .
-
Verify and re-add missing records such as SPF if you find this was overridden by these changes. To do this, select
Create new record > SPF
, add the required data, then select
Save
:

Changes required within your Coro workspace
After you have configured your DNS and email services, enable the Inbound Gateway in your Coro workspace. This process takes place inside the Coro console.
Before you begin this procedure, make sure you have the following information:
- Your email domain name
- The list of Mail Exchange (MX) records associated with the domain
To enable the Coro Inbound Gateway:
- Sign into the Coro console .
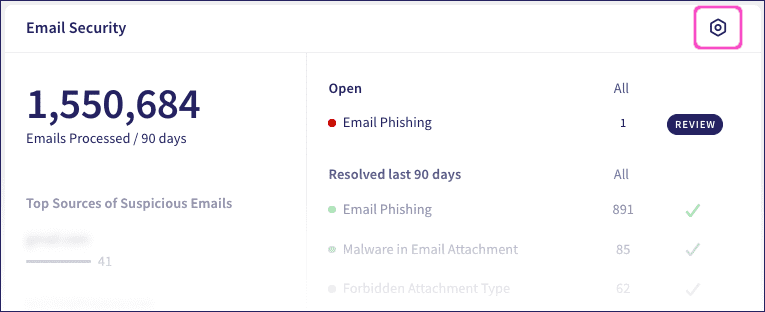
-
From the
Actionboard
, select
Control Panel
at the top of the
Email Security
dashboard panel:
Alternatively, select Email Security from the main Control Panel:

Coro displays the Email Security configuration page:

-
Select the
Inbound Gateway
tab:

-
Select
ADD DOMAIN
:
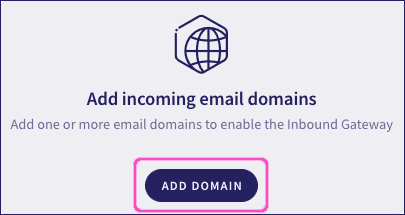
Coro displays the Add an email domain dialog:

-
Enter the following settings:
- Enter domain name : Specify the domain for your email service.
- SMTP relays : Enter the list of MX domains to which emails are forwarded by the Coro Proxy. For each entry, select port 25 (or the port number relevant to your settings) from the dropdown list.
- Custom header : (Optional) Enter a header name and value for one or more additional custom headers you want to attach to emails handled by the Inbound Gateway. Use this feature where the Inbound Gateway is acting as a relay and you want to identify incoming emails for additional processing or archiving within your organization.
-
Select
ADD
to save your settings and close the dialog.
On the Inbound Gateway tab, your new email domain is shown in the table with a status of Not tested:

-
Verify the domain connection by selecting
Test
from the 3-dot menu adjacent to your new domain entry:

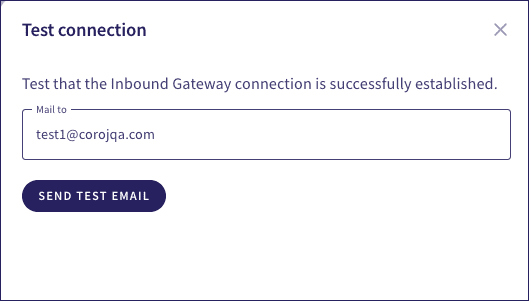
-
In the
Test connection
dialog, specify a valid email address at your domain in
Mail to
, then select
SEND TEST EMAIL
:
-
Locate and open the received test email, then select the enclosed link to confirm delivery. If the email was not received, check your spam folder. Also, double-check the
SMTP relays
settings or
contact Coro Support
for further assistance.
If the test is successful, the domain's Test Status field is updated to reflect this.
Configuration of the Inbound Gateway is now complete.
Continuous monitoring
Coro continually monitors the operation of the Inbound Gateway in connection with your defined email domains and DNS settings.
If Coro identifies any configuration issues related to your MX records that affect service operation, Coro notifies admin users through the console and via email.
For example, if you change the MX record order in your DNS settings so Coro is no longer the highest priority, emails might not be routed through the Inbound Gateway. This means your incoming emails are not checked or protected by Coro.
View test failure information in the Test status column against your domain:
