As part of a virtual office, Coro includes the ability for customers to configure VPNs together with site-to-site tunnels.
This guide describes how to configure Coro to integrate with a UniFi Security Gateway (USG) firewall, and how to configure UniFi USG to allow traffic for your VPN from both inside and outside the network.
Before you start, make sure you have the following:
- Access as an admin user with sufficient permissions to the Coro console for your workspace.
- An active subscription (or trial) for the Coro Network module.
- Access to the USG configuration interface.
Verify that your USG firewall allows inbound and outbound traffic for the following Coro Network subnets:
- 10.8.0.0/16
- 10.9.0.0/16
- 10.10.0.0/16
Alternatively, configure firewall policies to permit only the specific ports and protocols used by the VPN tunnel.
Configure your USG firewall to allow traffic from inside and outside the network:
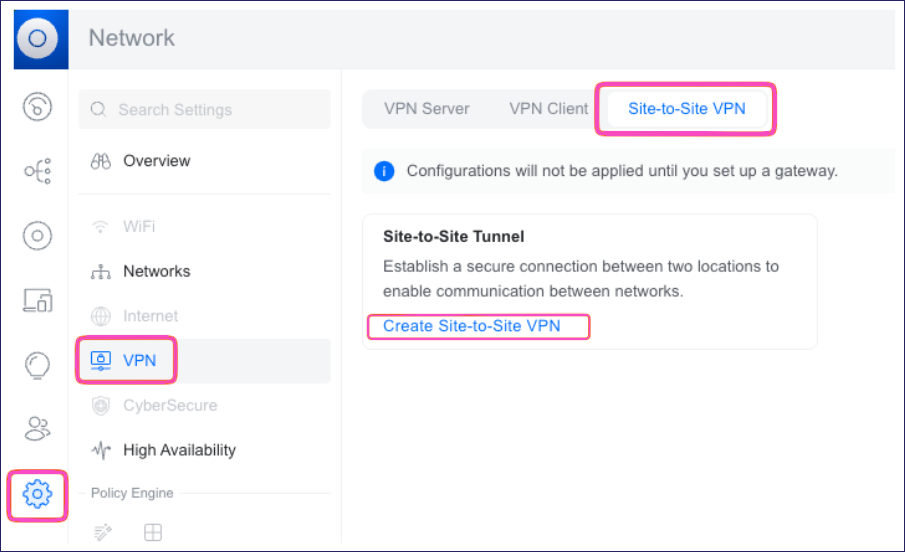
Sign in to your USG configuration interface.
Go to Settings > VPN > Site-to-Site VPN.
Select Create Site-to-Site VPN:
USG displays the Site-to-Site VPN dialog:
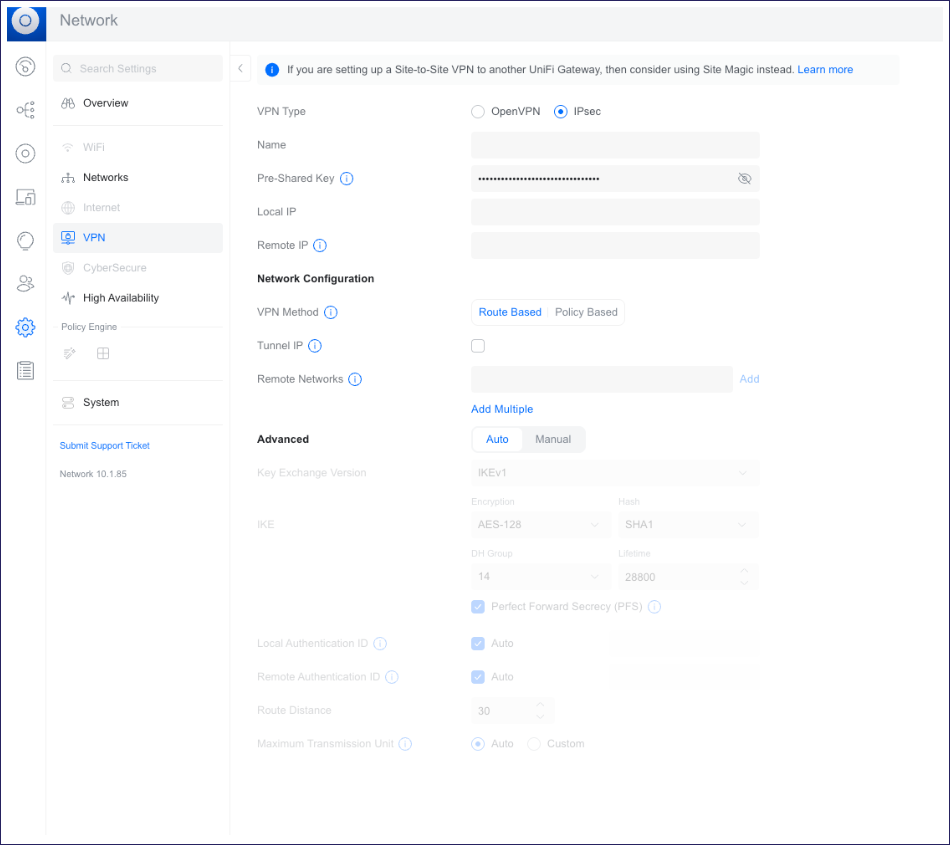
Configure your VPN Settings:
VPN Type: Select IPsec.
Name: Enter a name for your site-to-site tunnel.
- Pre-Shared Key: Enter a shared password (secret) that both sites use to authenticate and secure the tunnel. Use a minimum of 20 characters, and keep a note of the key for configuration in Coro.
Local IP: Enter the public IP address of your USG.
Remote IP: Enter the Coro public IP address. The Coro public IP address is retrieved from the Network module in the Coro console.
To retrieve the Coro public IP address:
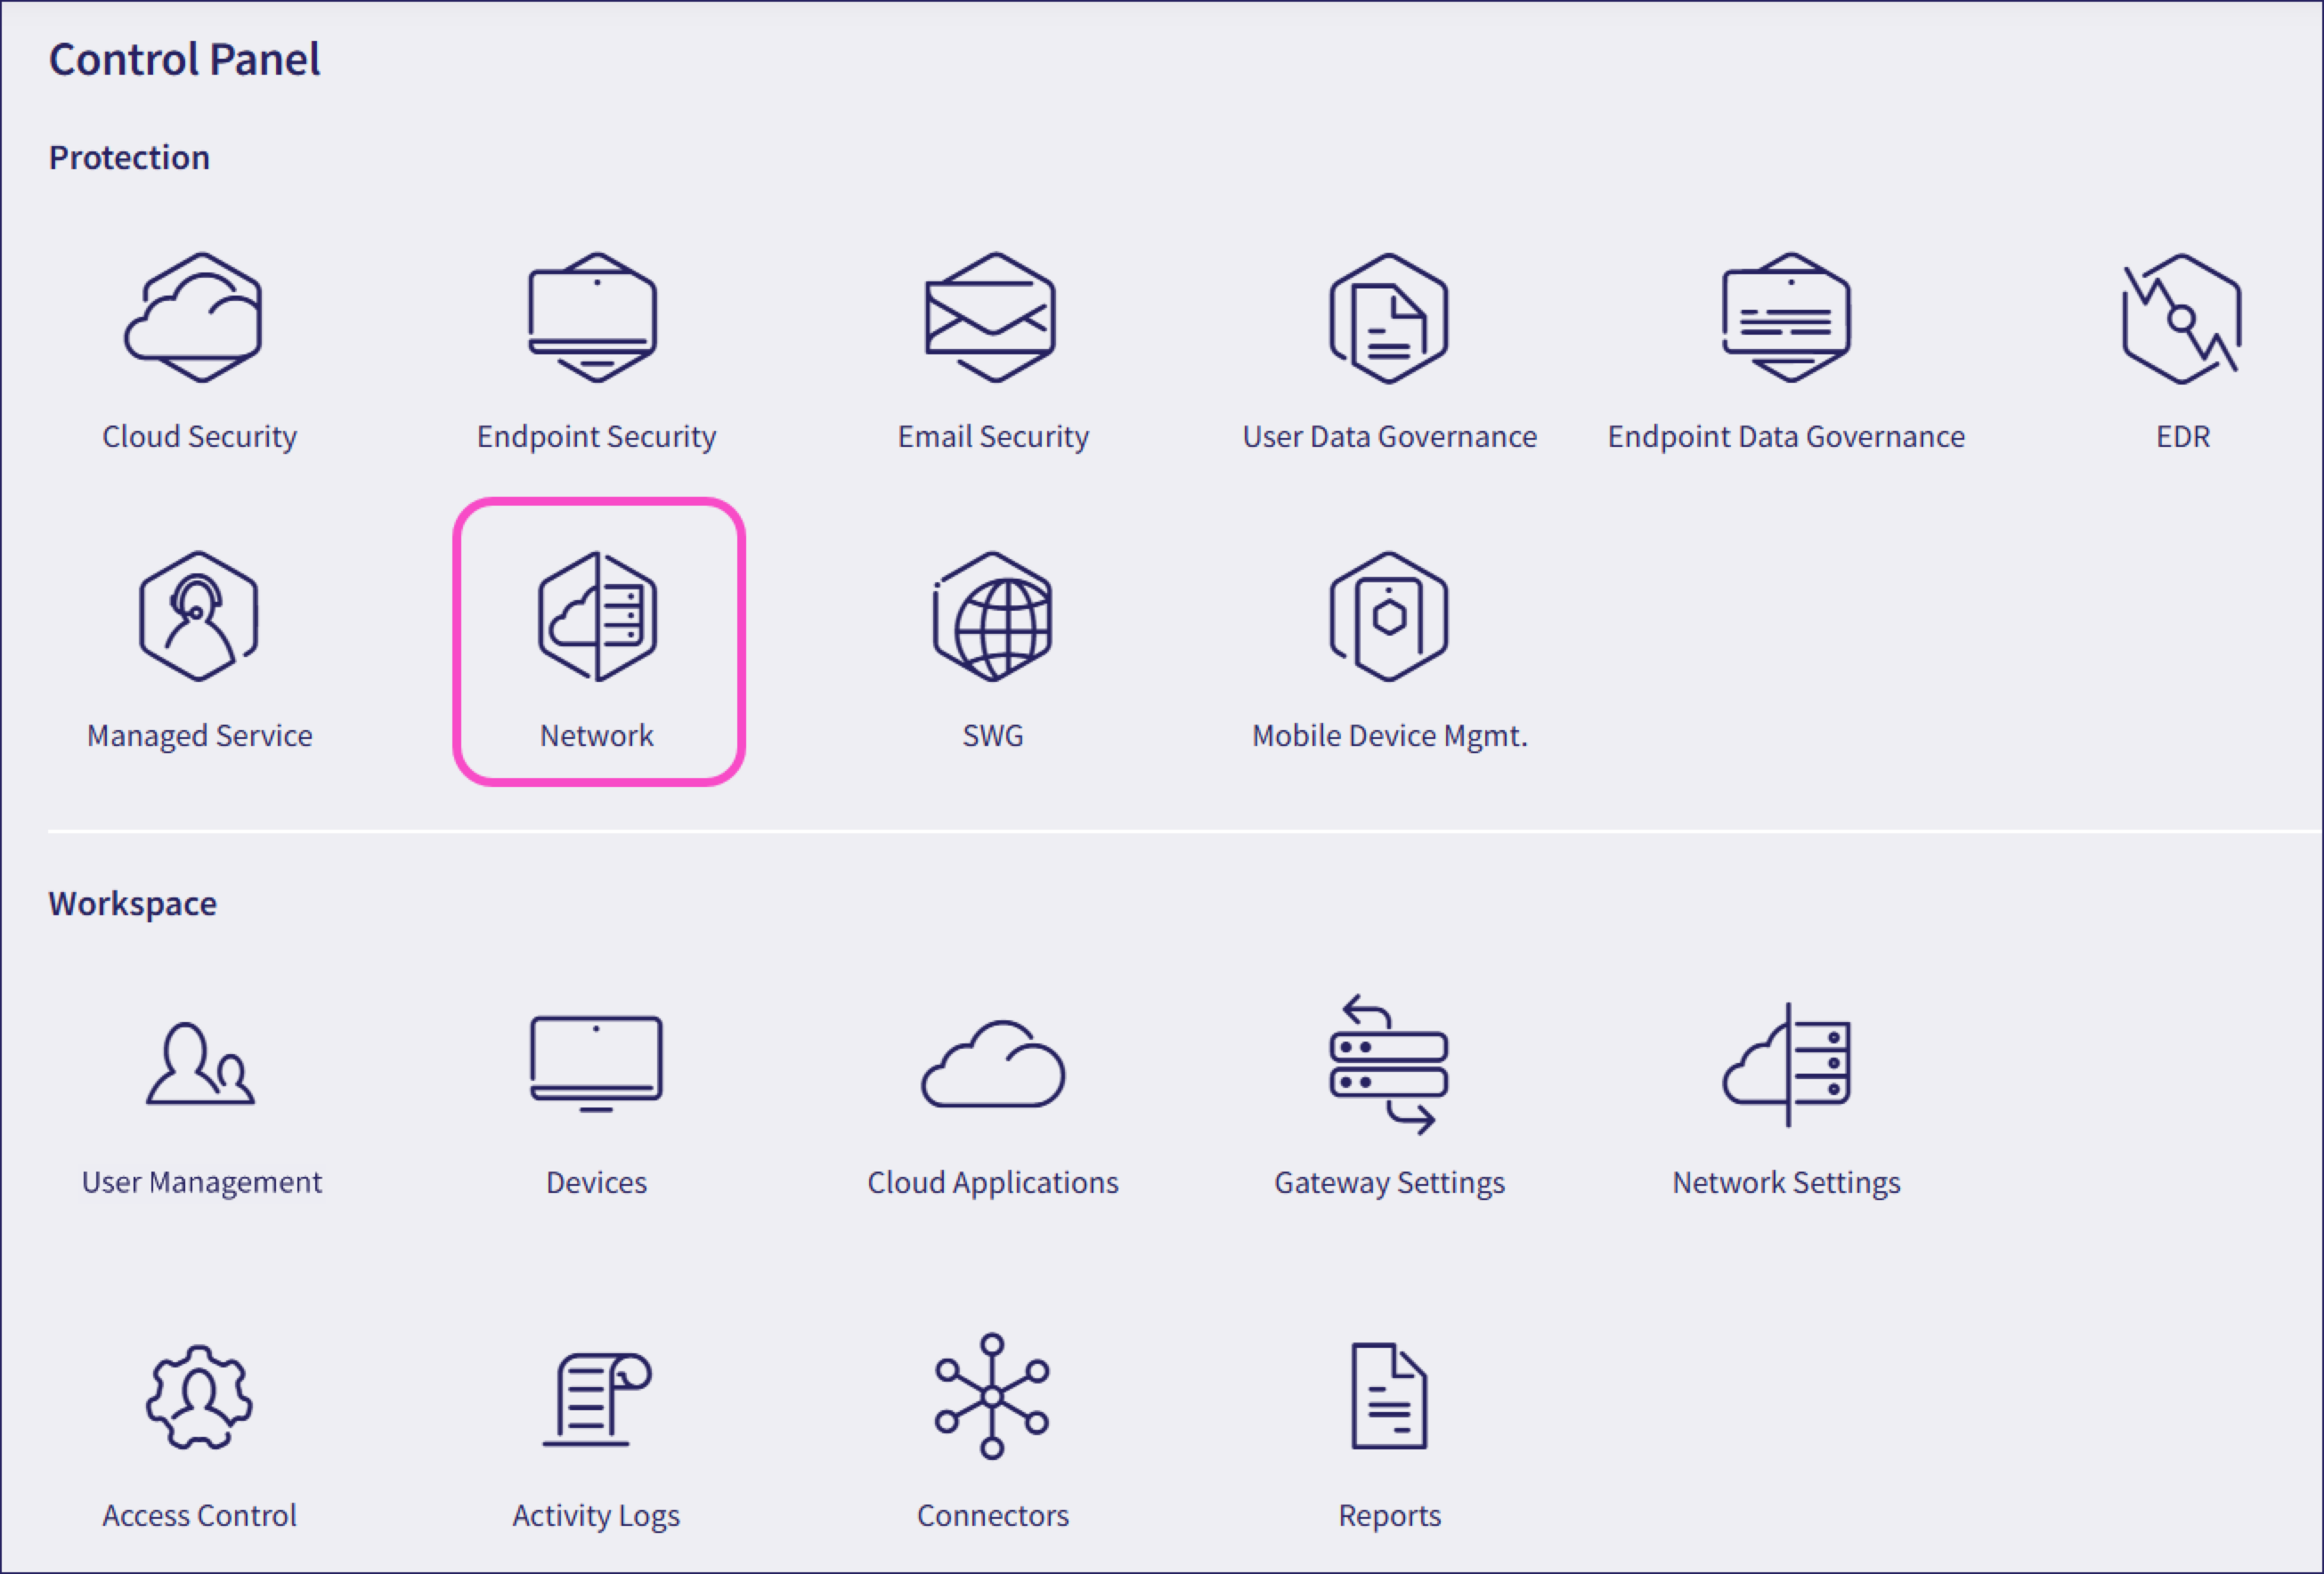
From the sidebar, select Control Panel.
Select Network:
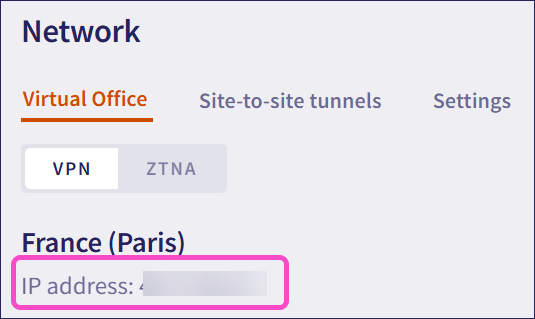
Coro displays the Coro public IP address on the Virtual Office tab:
- Remote Networks: Enter 10.8.0.0/16, 10.9.0.0/16, 10.10.0.0/16.
Leave other settings at their default value.
For Advanced, select Manual, then configure the following settings:
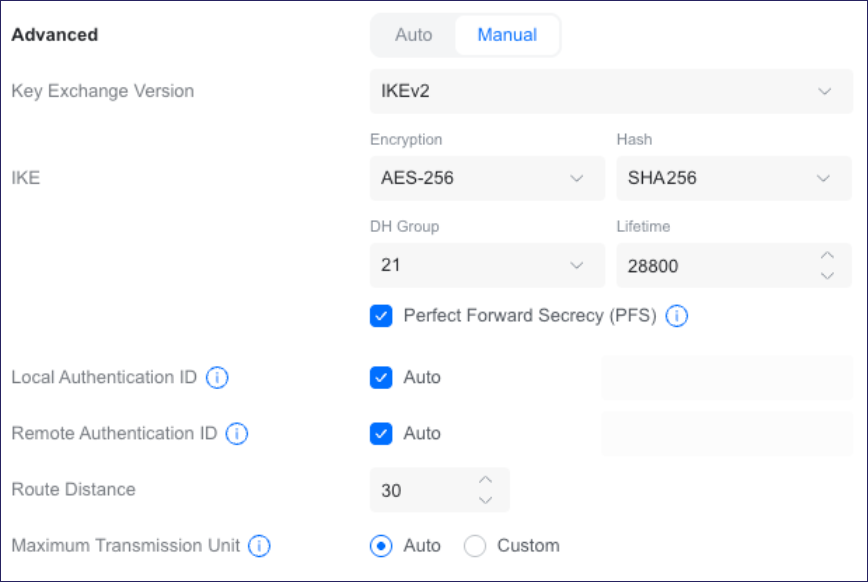
Key Exchange Version: Select IKEv2 if supported by your firewall version, or else select IKEv1.
Encryption: Select AES-256.
Hash: Select SHA256.
DH Group: Select 21.
Lifetime: Select 28800.
Perfect Forward Secrecy (PFS): Enable.
Local Authentication ID: Enable.
Remote Authentication ID: Enable.
Route Distance: Select 30.
Maximum Transmission Unit: Select Auto.
Select Add to create your Site-to-Site VPN.
Configure Coro with details of your site-to-site tunnel and firewall:
From the sidebar, select Control Panel.
Select Network:
Select Site-to-site tunnels:
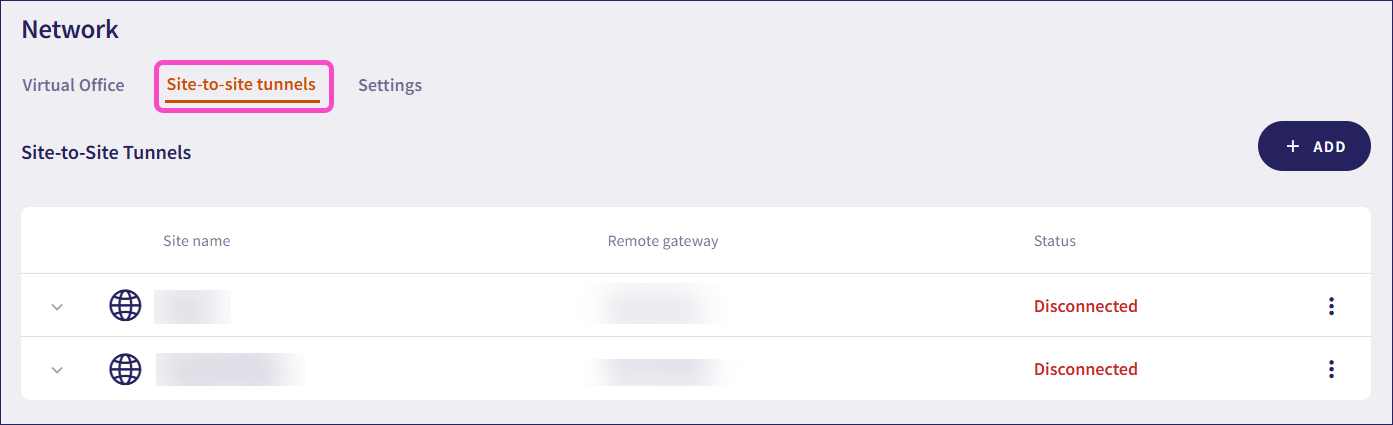
Select + ADD to add a new site-to-site tunnel configuration.
Configure your site details:

Avoid using special characters and spaces in your site details or preshared key.
- Site name: Enter a suitable name for your site-to-site tunnel.
- Site description: Enter a suitable short description for the tunnel.
- Remote gateway IP: Enter USG's local IP address, obtained here.
- Remote network IP: Enter USG's internal network IP address.
- Preshared key: Enter the preshared key used here.
- Lifetime key: Enter "28800".
In the same dialog, configure the Firewall settings:
- Remote network mask: Enter USG's remote networks, obtained here.
- IKE version: Select "IKEv2".
- Phase 1 encryption: Select "AES256-SHA256-D2" or "AES256-SHA256-D14".
- Phase 2 encryption: Select "AES256-SHA256-D2" or "AES256-SHA256-D14".
- Aggressive mode: Select "No".
To save your configuration, select SAVE.