As part of a virtual office, Coro includes the ability for customers to configure Virtual Private Networks (VPNs) together with site-to-site tunnels.
This guide describes how to configure a site-to-site VPN tunnel between your virtual office network and Microsoft Azure.
Before you start, make sure you have:
- Access as an admin user to the Coro console for your workspace.
- An active subscription (or trial) for the Coro Network module.
- An active Microsoft Azure subscription and access to the Azure admin portal.
To complete this guide, perform each of the following procedures in turn:
- Create a virtual network in Azure
- Create a virtual network gateway in Azure
- Create a local network gateway in Azure
- Create a site-to-site VPN in Azure
- Configure a tunnel in Coro Network
To create a virtual network, perform the following steps:
Sign in to the Microsoft Azure portal (https://portal.azure.com).
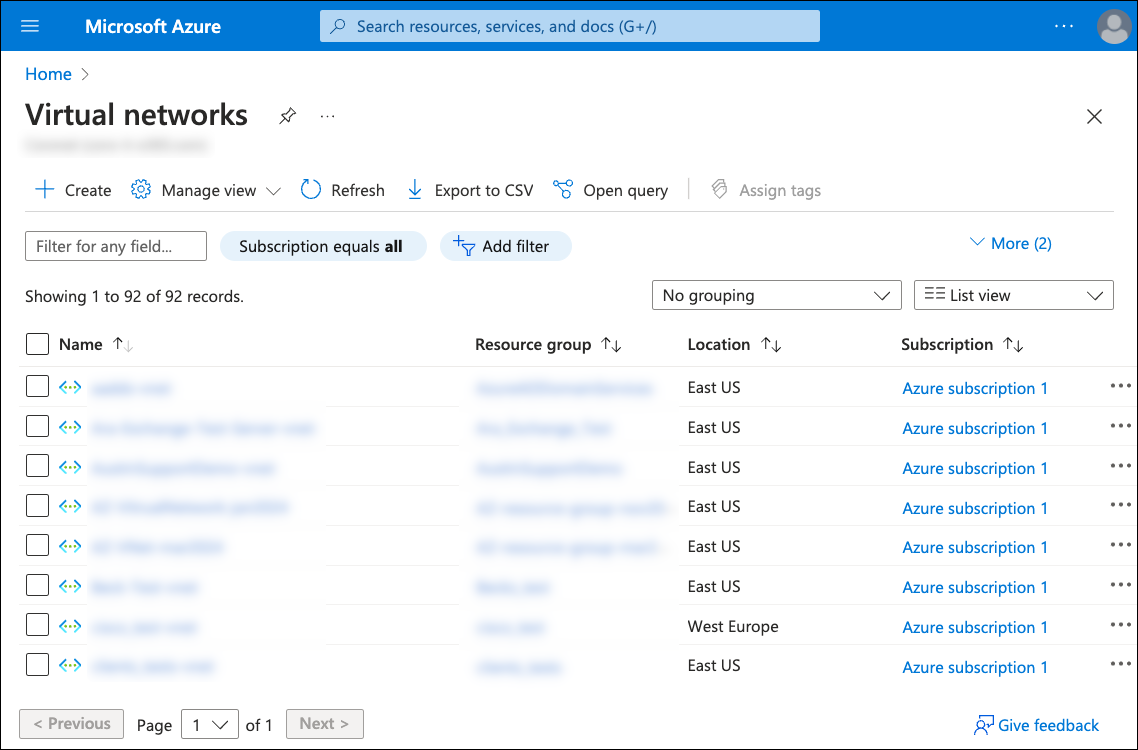
In the search field, enter "virtual networks" to locate the Virtual networks section:

Select Virtual networks from the search results to view the Virtual networks list:
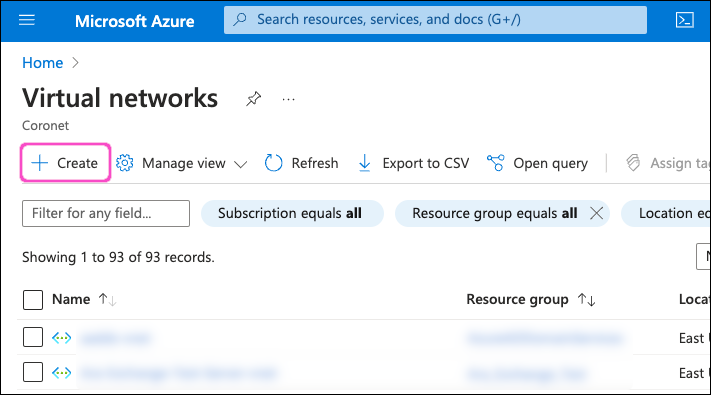
Select + Create to create a virtual network:
Microsoft Azure displays the Create virtual network page, starting with the Basics tab:
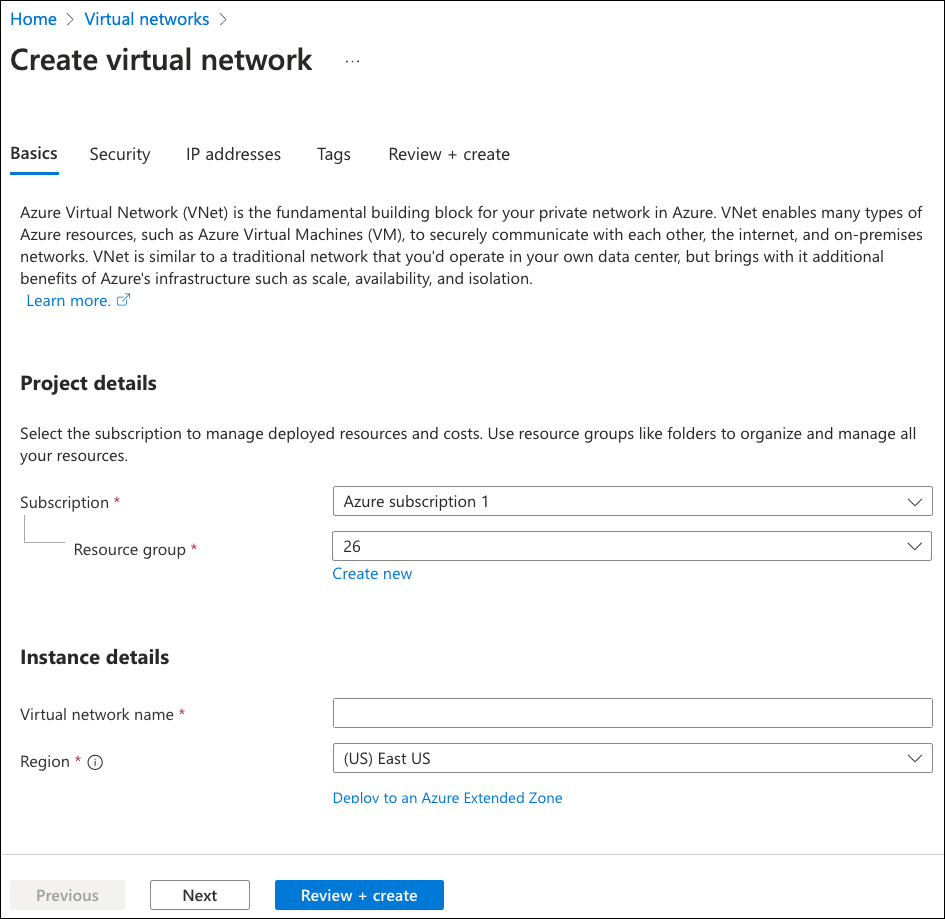
Enter the following details:
- Subscription: Select your Azure subscription.
- Resource group: Select the resource group. Alternatively, select Create new to create one for this purpose.
- Virtual network name: Enter a name for this virtual network.
- Region: Select the region into which this virtual network is added.
Select Next to continue.
Microsoft Azure displays the Security tab:

Leave all the settings in this tab as unselected (the default state). Select Next to continue.
Microsoft Azure displays the IP addresses tab.
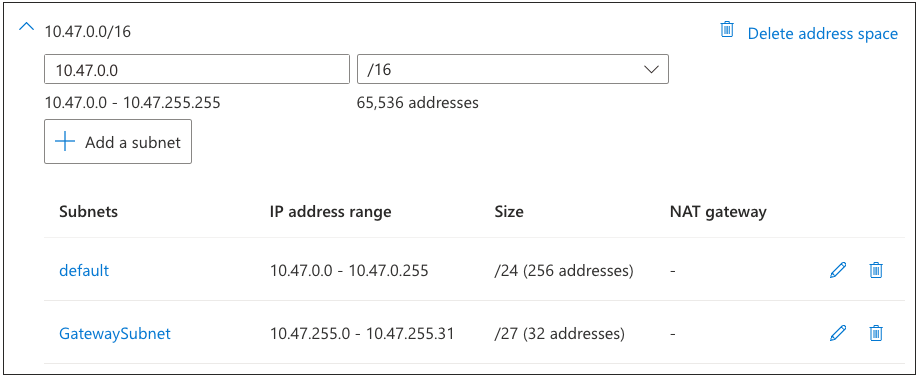
Enter a CIDR IP address that represents the subnet you want to use with this virtual network:

Keep a note of this address space for configuration in Coro later.
ImportantIn this example, Azure warns that the address range specified (10.47.0.0/16) is not within the default subnet address space for the virtual network (10.0.0.0/24). If you see this message, update the "default" subnet by selecting the adjacent edit link:

Microsoft Azure displays the Edit subnet dialog.
Set the Starting address and Size to match the subnet you specified when creating the virtual network:

Select Save.
Select Add a subnet:
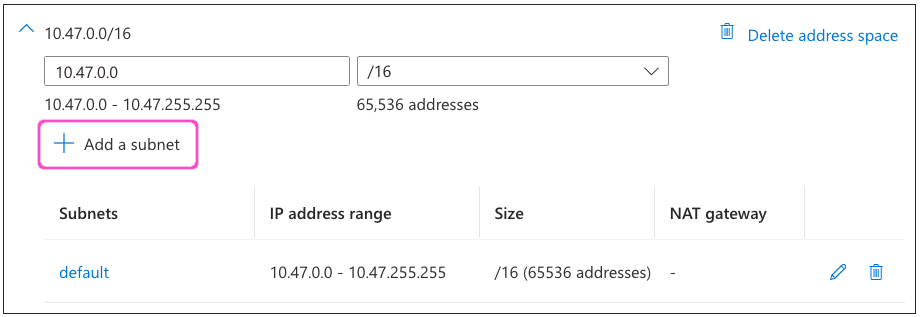
In the Add a subnet dialog, enter the following settings:
- Subnet purpose: Select "Virtual Network Gateway".
- IPv4 address range: Make sure that your virtual network address range is selected.
- Starting address: Enter the address "x.x.255.0" where "x" matches the first two octets of your selected IPv4 address.
- Size: Select "/27 (32 addresses)".
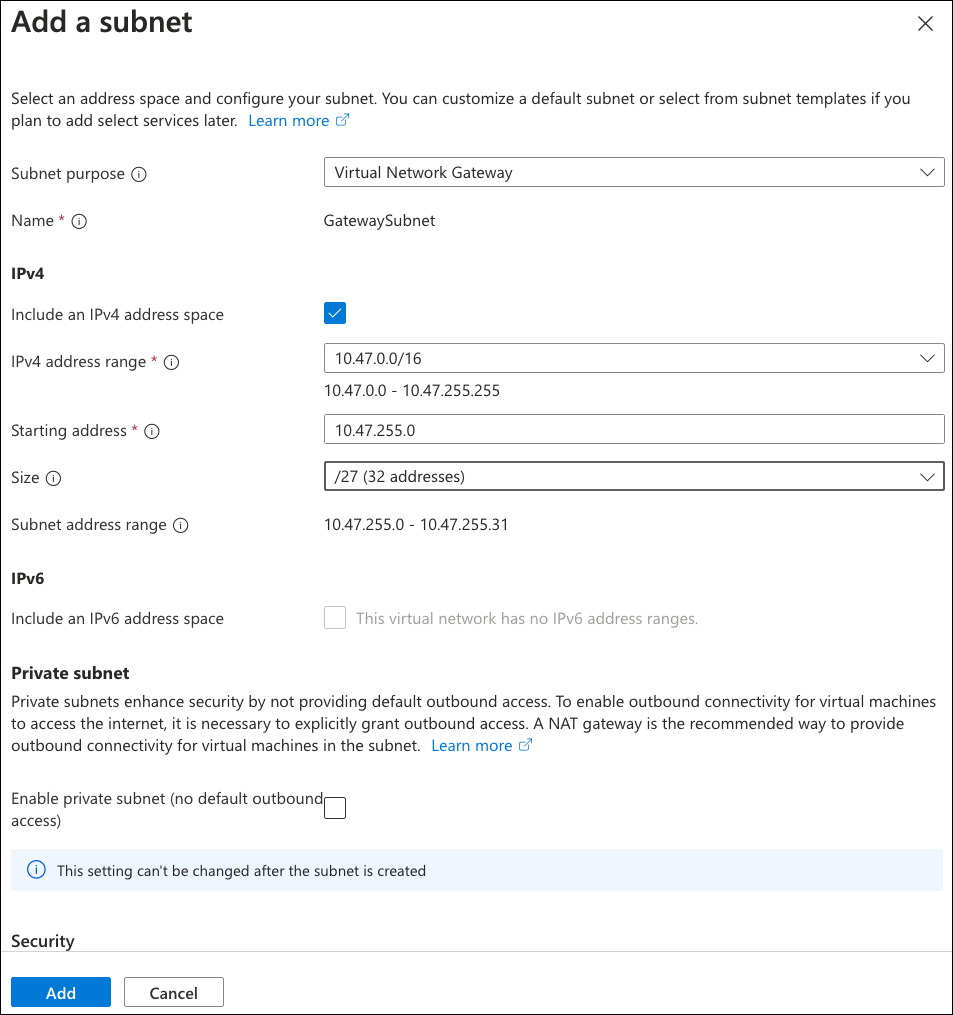
Select Add to save your changes. Your completed subnet definitions should resemble the following:
Select Review + create:

Review your virtual network settings, then select Create:

After a short wait, Azure deploys your virtual network.
To create a virtual network gateway, perform the following steps:
Sign in to the Microsoft Azure portal (https://portal.azure.com).
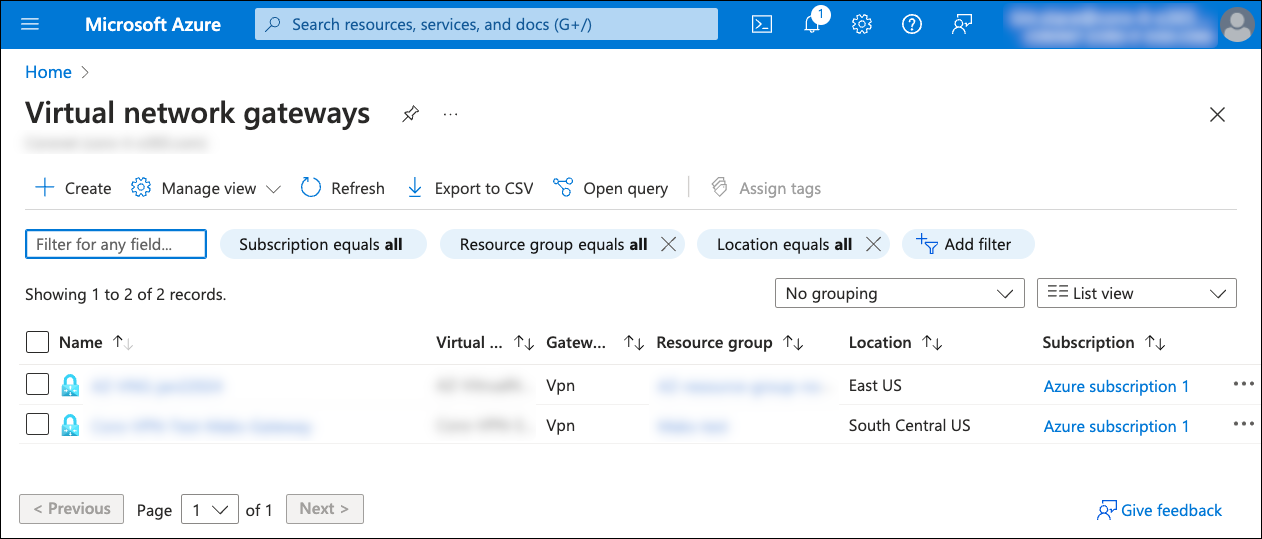
In the search field, enter "virtual network gateways" to locate the Virtual network gateways section:

Select Virtual network gateways from the search results to view the Virtual network gateways list:
Select + Create to create a virtual network gateway:
Microsoft Azure displays the Create virtual network gateway page, starting with the Basics tab:
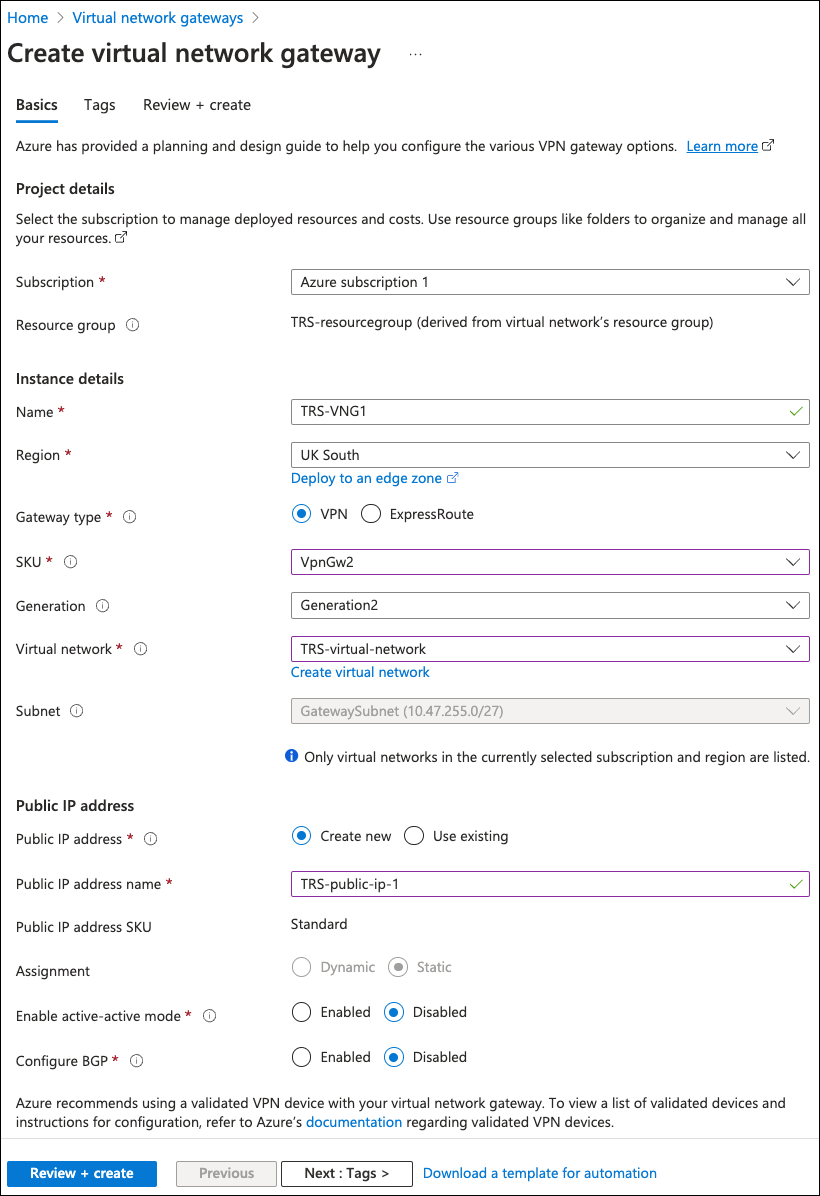
Enter the following details:
- Subscription: Select your Azure subscription.
- Name: Enter a name for this virtual network gateway.
- Region: Select the region into which this virtual network gateway is added.
- Gateway type: Select VPN.
- SKU: Select "VpnGw2".
- Generation: Select "Generation 2".
- Virtual network: Select the virtual network you created as a part of Creating a virtual network.
- Public IP address: Select Create new.
- Public IP address name: Enter a name for this public IP address definition.
- Enable active-active mode: Select Disabled.
- Configure BGP: Select Disabled.
Keep a note of the Public IP address name for configuration in Coro later.
The remaining tabs require no configuration. Select Review + create:

Review your virtual network gateway settings, then select Create:
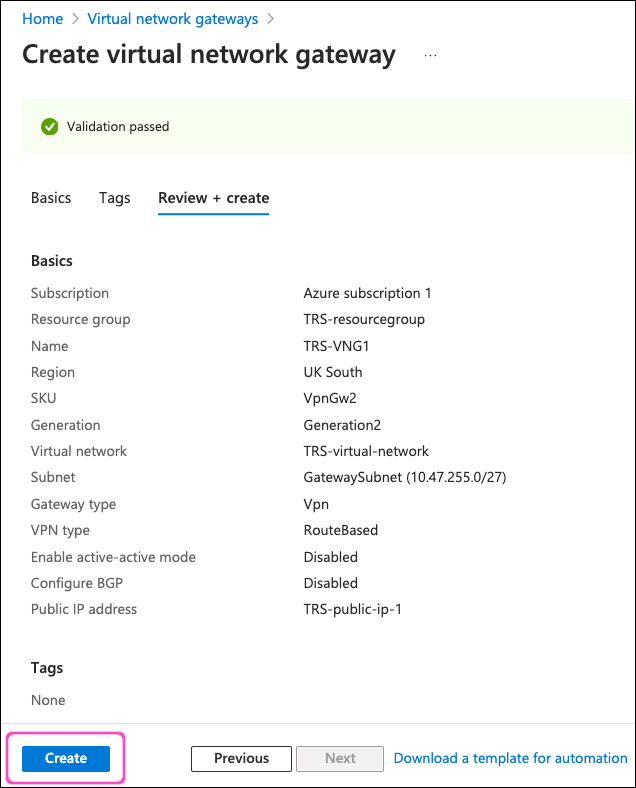
Azure deploys your virtual network gateway.
This can take up to 45 minutes to complete.
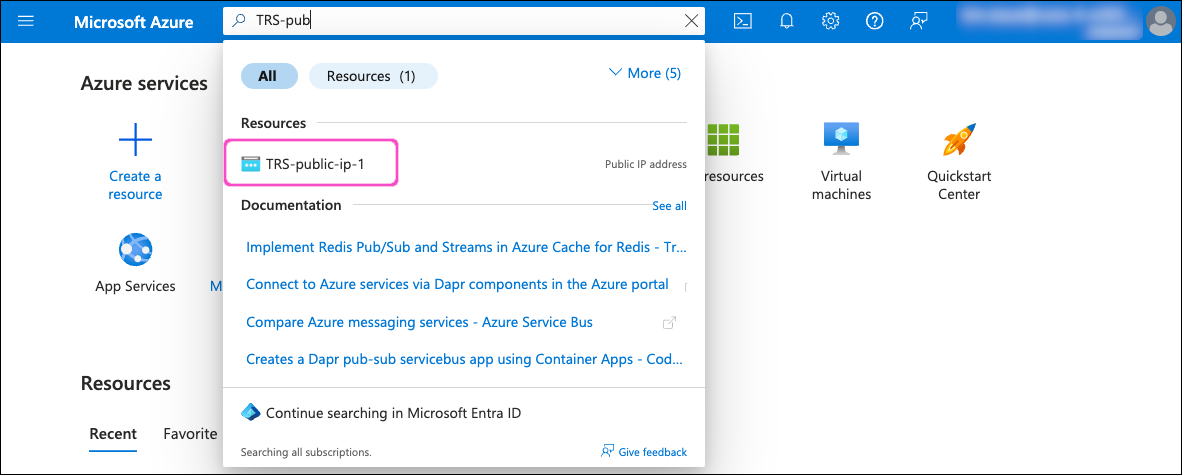
Before you continue, make a note of the newly deployed public IP address for configuring Coro later.
To find the public IP address:
In the search field, enter the name you specified for Public IP address name (during this step):
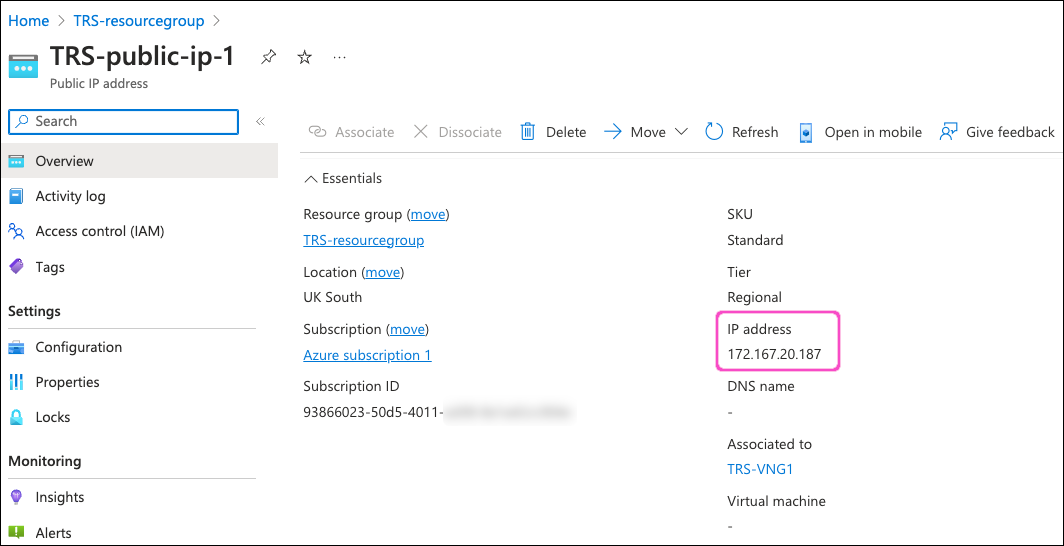
The public IP address configuration page appears. Locate the IP address field and make a note of the value:
To create a local network gateway, perform the following steps:
Sign in to the Microsoft Azure portal (https://portal.azure.com).
In the search field, enter "local network gateways" to locate the Local network gateways section:

Select Local network gateways from the search results to view the Local network gateways list:
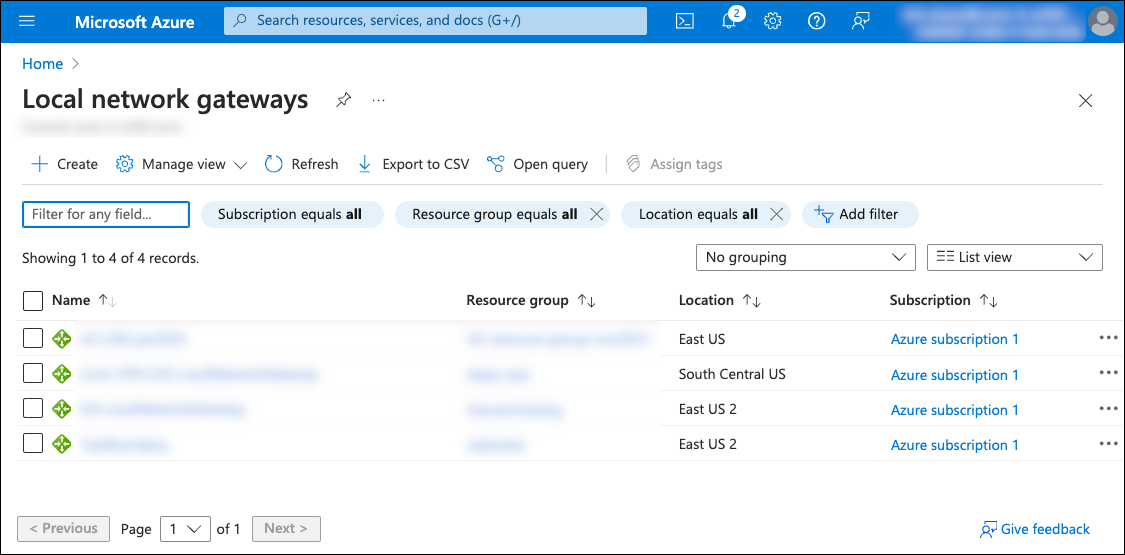
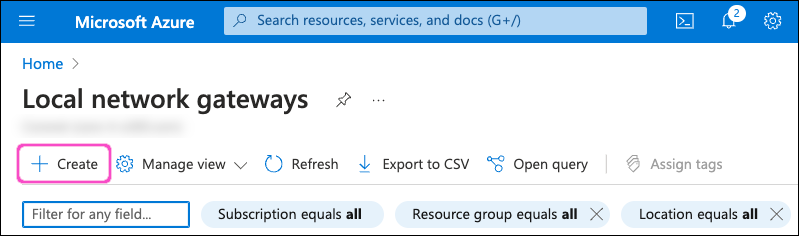
Select + Create to create a local network gateway:
Microsoft Azure displays the Create Local network gateway page, starting with the Basics tab:

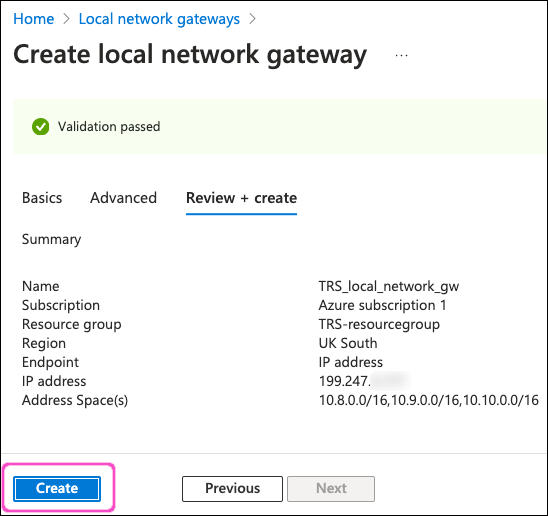
Enter the following details:
- Subscription: Select your Azure subscription.
- Resource group: Select the resource group. Or, select Create new to create one for this purpose.
- Region: Select the region into which this virtual network is added.
- Name: Enter a name for this virtual network gateway.
- Endpoint: Select IP address.
- IP address: Enter the IP address for your Coro virtual office. This address is listed at the top of the Network > Virtual Office page in the Coro console - for more details, see Virtual office.
- Address Space(s): One entry at a time, enter 10.8.0.0/16, 10.9.0.0/16, and 10.10.0.0/16 into the Add additional address range field. Azure validates each address range as you enter it, and provides a further textbox to add the next address range.
The Advanced tab requires no configuration. Select Review + create:

Review your local network gateway settings, then select Create:
After a short wait, Azure deploys your local network gateway.
Verify that your Microsoft Azure firewall allows inbound and outbound traffic for the following Coro Network subnets:
- 10.8.0.0/16
- 10.9.0.0/16
- 10.10.0.0/16
Alternatively, configure firewall policies to permit only the specific ports and protocols used by the VPN tunnel.
To create a site-to-site VPN, perform the following steps:
Sign in to the Microsoft Azure portal (https://portal.azure.com).
In the search field, enter the first few letters of the resource group you used in the previous sections. Azure displays the results in the dropdown list:
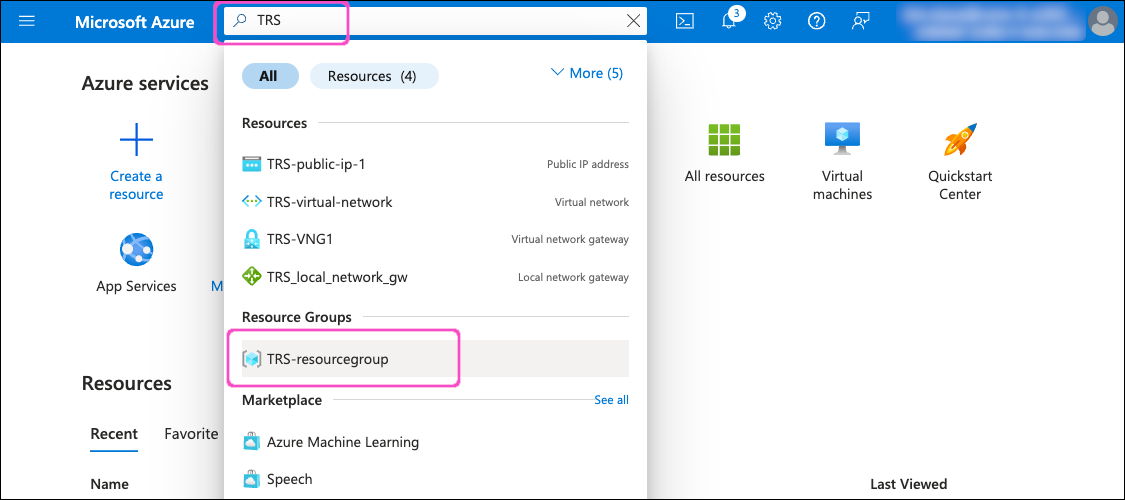
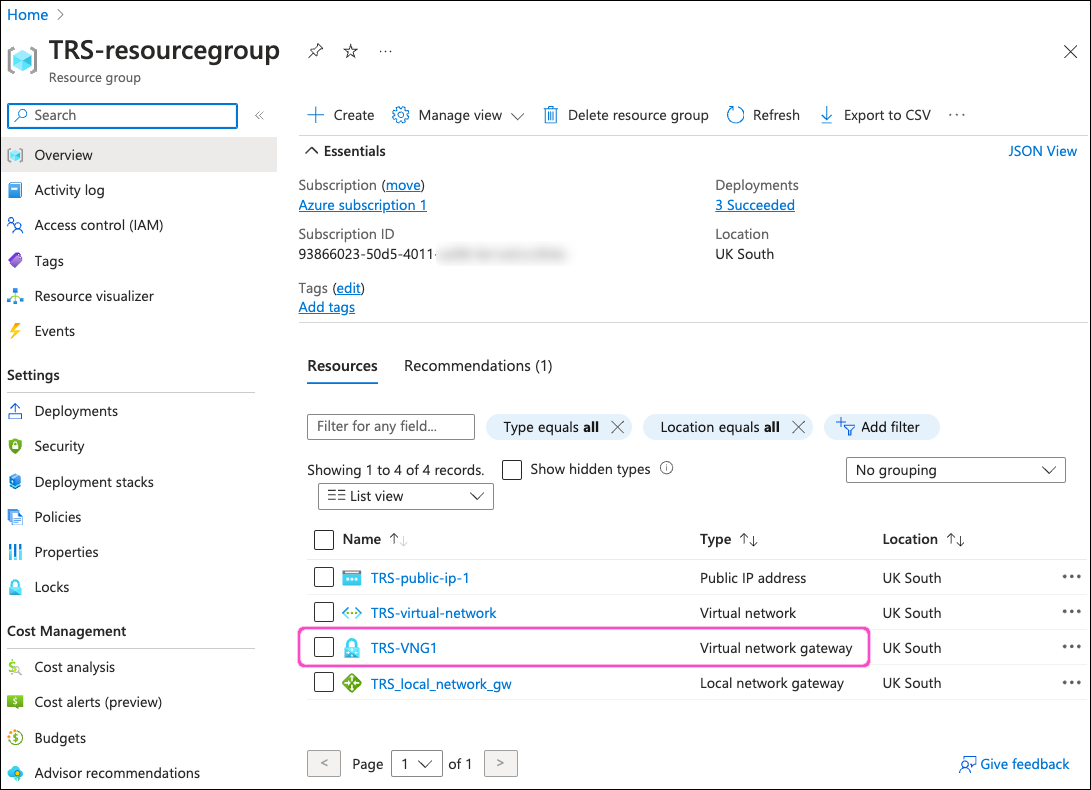
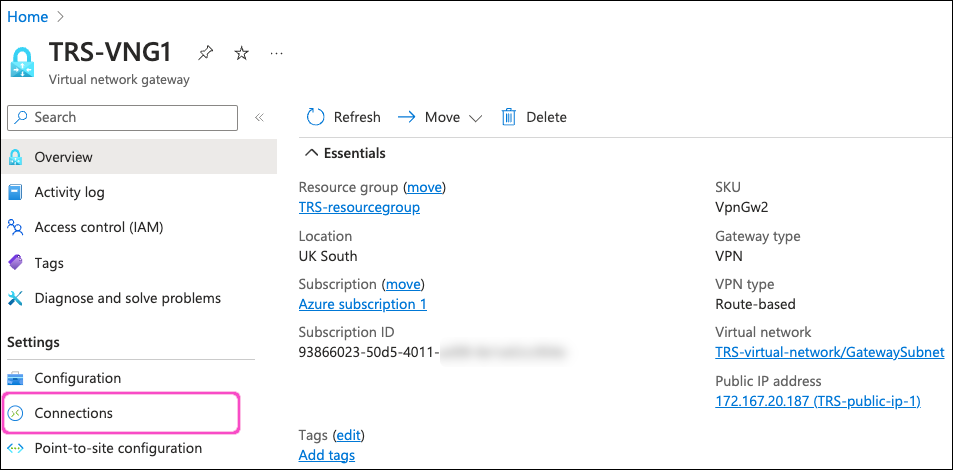
Select your resource group to view it's configuration page. Then, locate and select the Virtual network gateway you created during Creating a virtual network gateway:
On the virtual network gateway configuration page, select Connections from the left-hand menu:
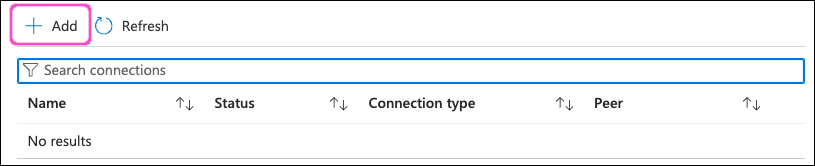
Azure displays all current connections associated with this virtual network gateway.
Select + Add to add a new connection:
Microsoft Azure displays the Create connection page, starting with the Basics tab:
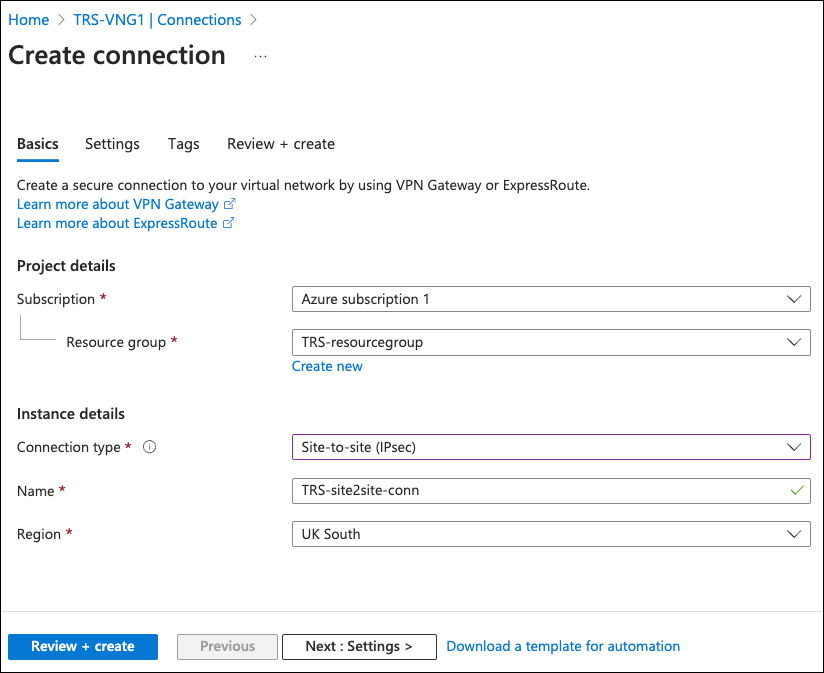
Enter the following details:
- Subscription: Select your Azure subscription.
- Resource group: Use the pre-selected resource group associated with this virtual network gateway.
- Connection type: Select "Site-to-site (IPsec)".
- Name: Enter a name for this connection.
- Region: Use the pre-selected region associated with this virtual network gateway.
Select Next to continue.
Azure displays the Settings tab:
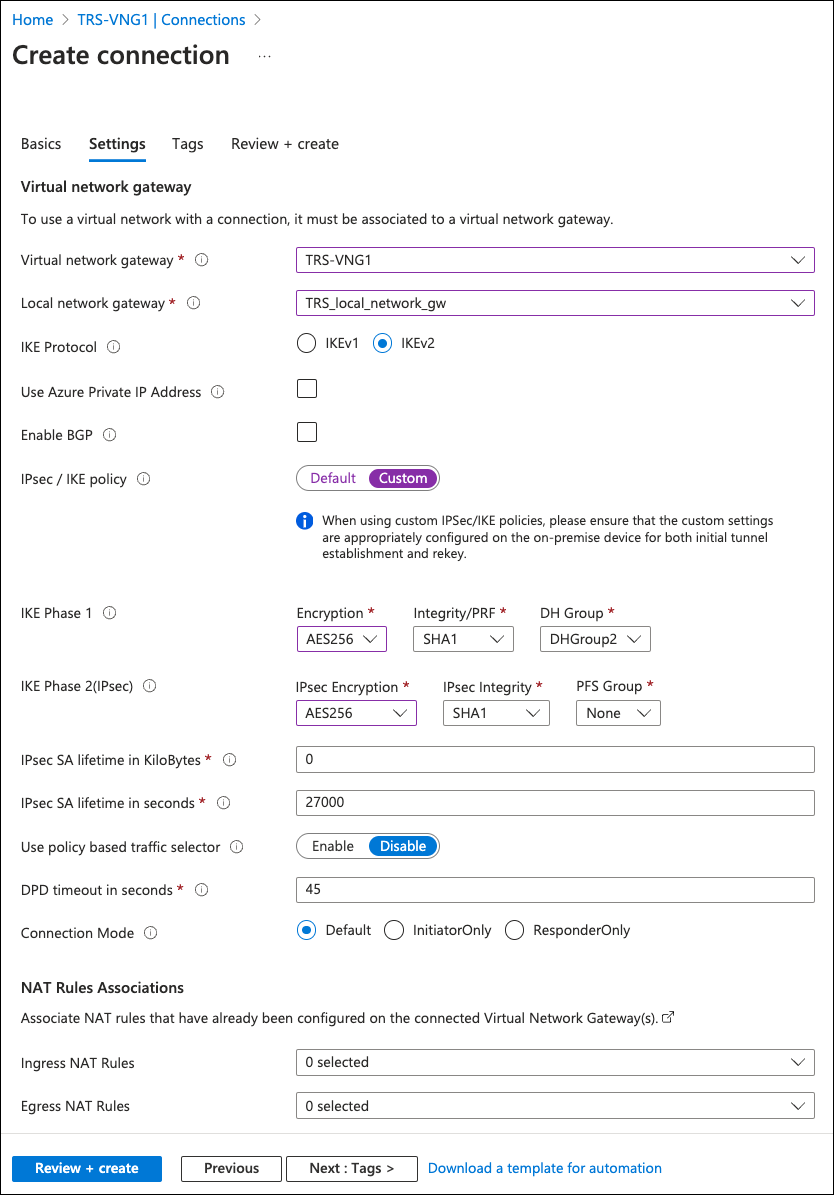
Enter the following details:
Virtual network gateway: Select the gateway you created as a part of Creating a virtual network gateway.
Local network gateway: Select the gateway you created as a part of Creating a local network gateway.
IKE Protocol: Select IKEv2.
Use Azure Private IP Address: Leave unselected.
Enable BGP: Leave unselected.
IPsec/IKE policy: Select Custom.
IKE phase 1: Set the following values:
Encryption Integrity/PRF DH Group AES256 SHA1 DHGroup2 IKE Phase 2: Set the following values:
IPset Encryption IPsec Integrity PFS Group AES256 SHA1 None IPsec SA lifetime in KiloBytes: Enter "0".
IPsec SA lifetime in seconds: Enter "27000".
Keep a note of this value for later.
Use policy based traffic selector: Select Disable.
DPD timeout in seconds: Enter "45".
Connection Mode: Select Default.
Ingress NAT Rules: Leave as "0 selected".
Egress NAT Rules: Leave as "0 selected".
Select Review + create:

Review your virtual network settings, then select Create:
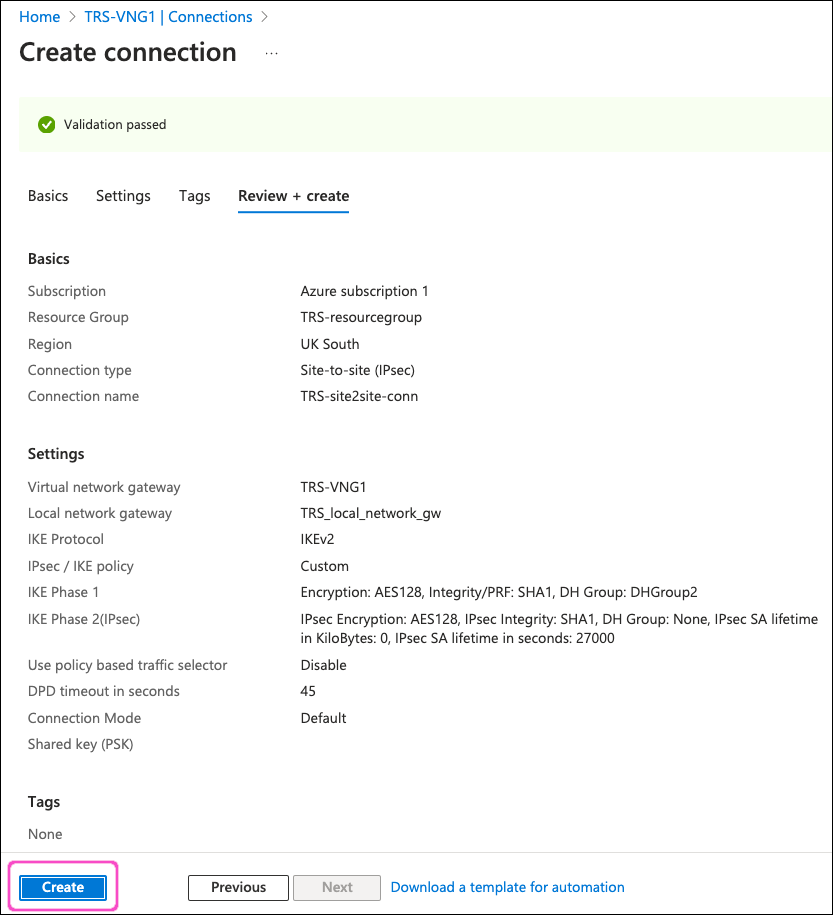
After a few minutes wait, Azure deploys the connection.
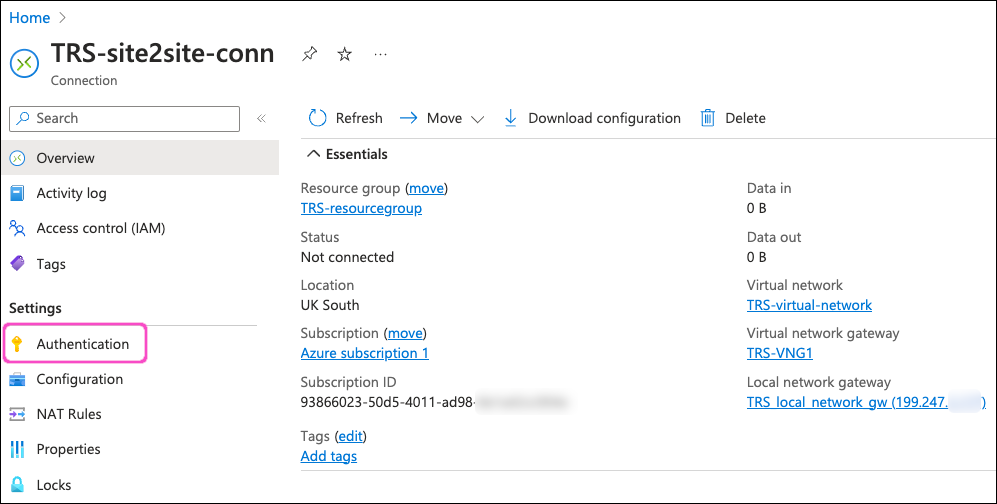
Before you continue, reset the shared key used by the site-to-site connection. This is a shared password (secret) that Azure and Coro use to authenticate and secure the tunnel.
To reset the shared key:
In the search field, locate and select the site-to-site connection resource configured as part of the virtual network gateway (the value you specified in the Name field during this step):

On the connection configuration page, select Authentication from the left-hand menu:
Enter a value into the Shared key (PSK) field:
Use a minimum of 20 characters. Make sure to keep a note for configuration in Coro later.
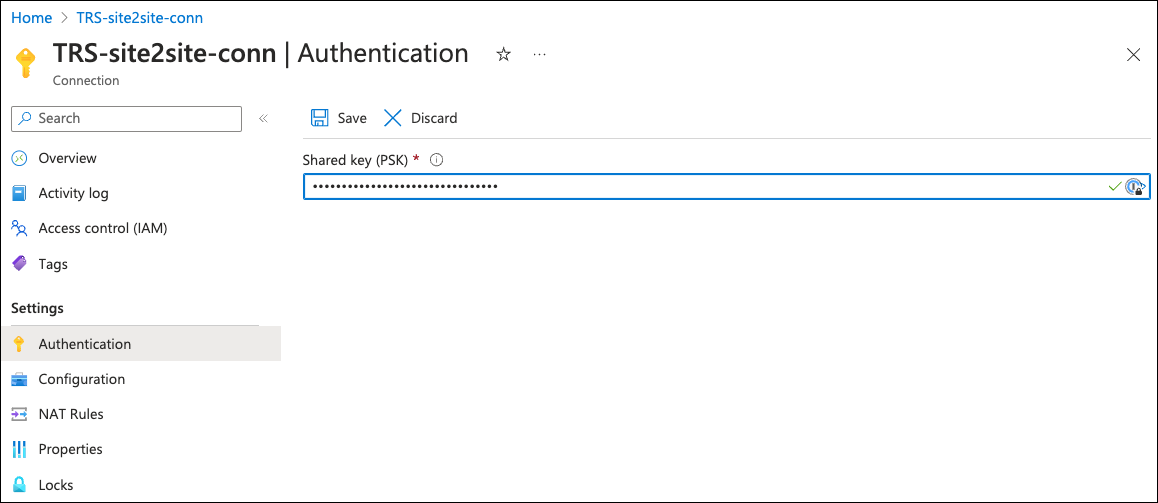
Select Save to save your key.
Before you can configure Coro with details of your site-to-site tunnel, make sure you first obtain the following items from your Azure configuration:
- Public IP address - see Creating a virtual network gateway.
- Virtual network CIDR address space - see Creating a virtual network.
- Shared key - see Creating a site-to-site VPN.
- Shared key lifetime - see Creating a site-to-site VPN.
Next, perform the following steps:
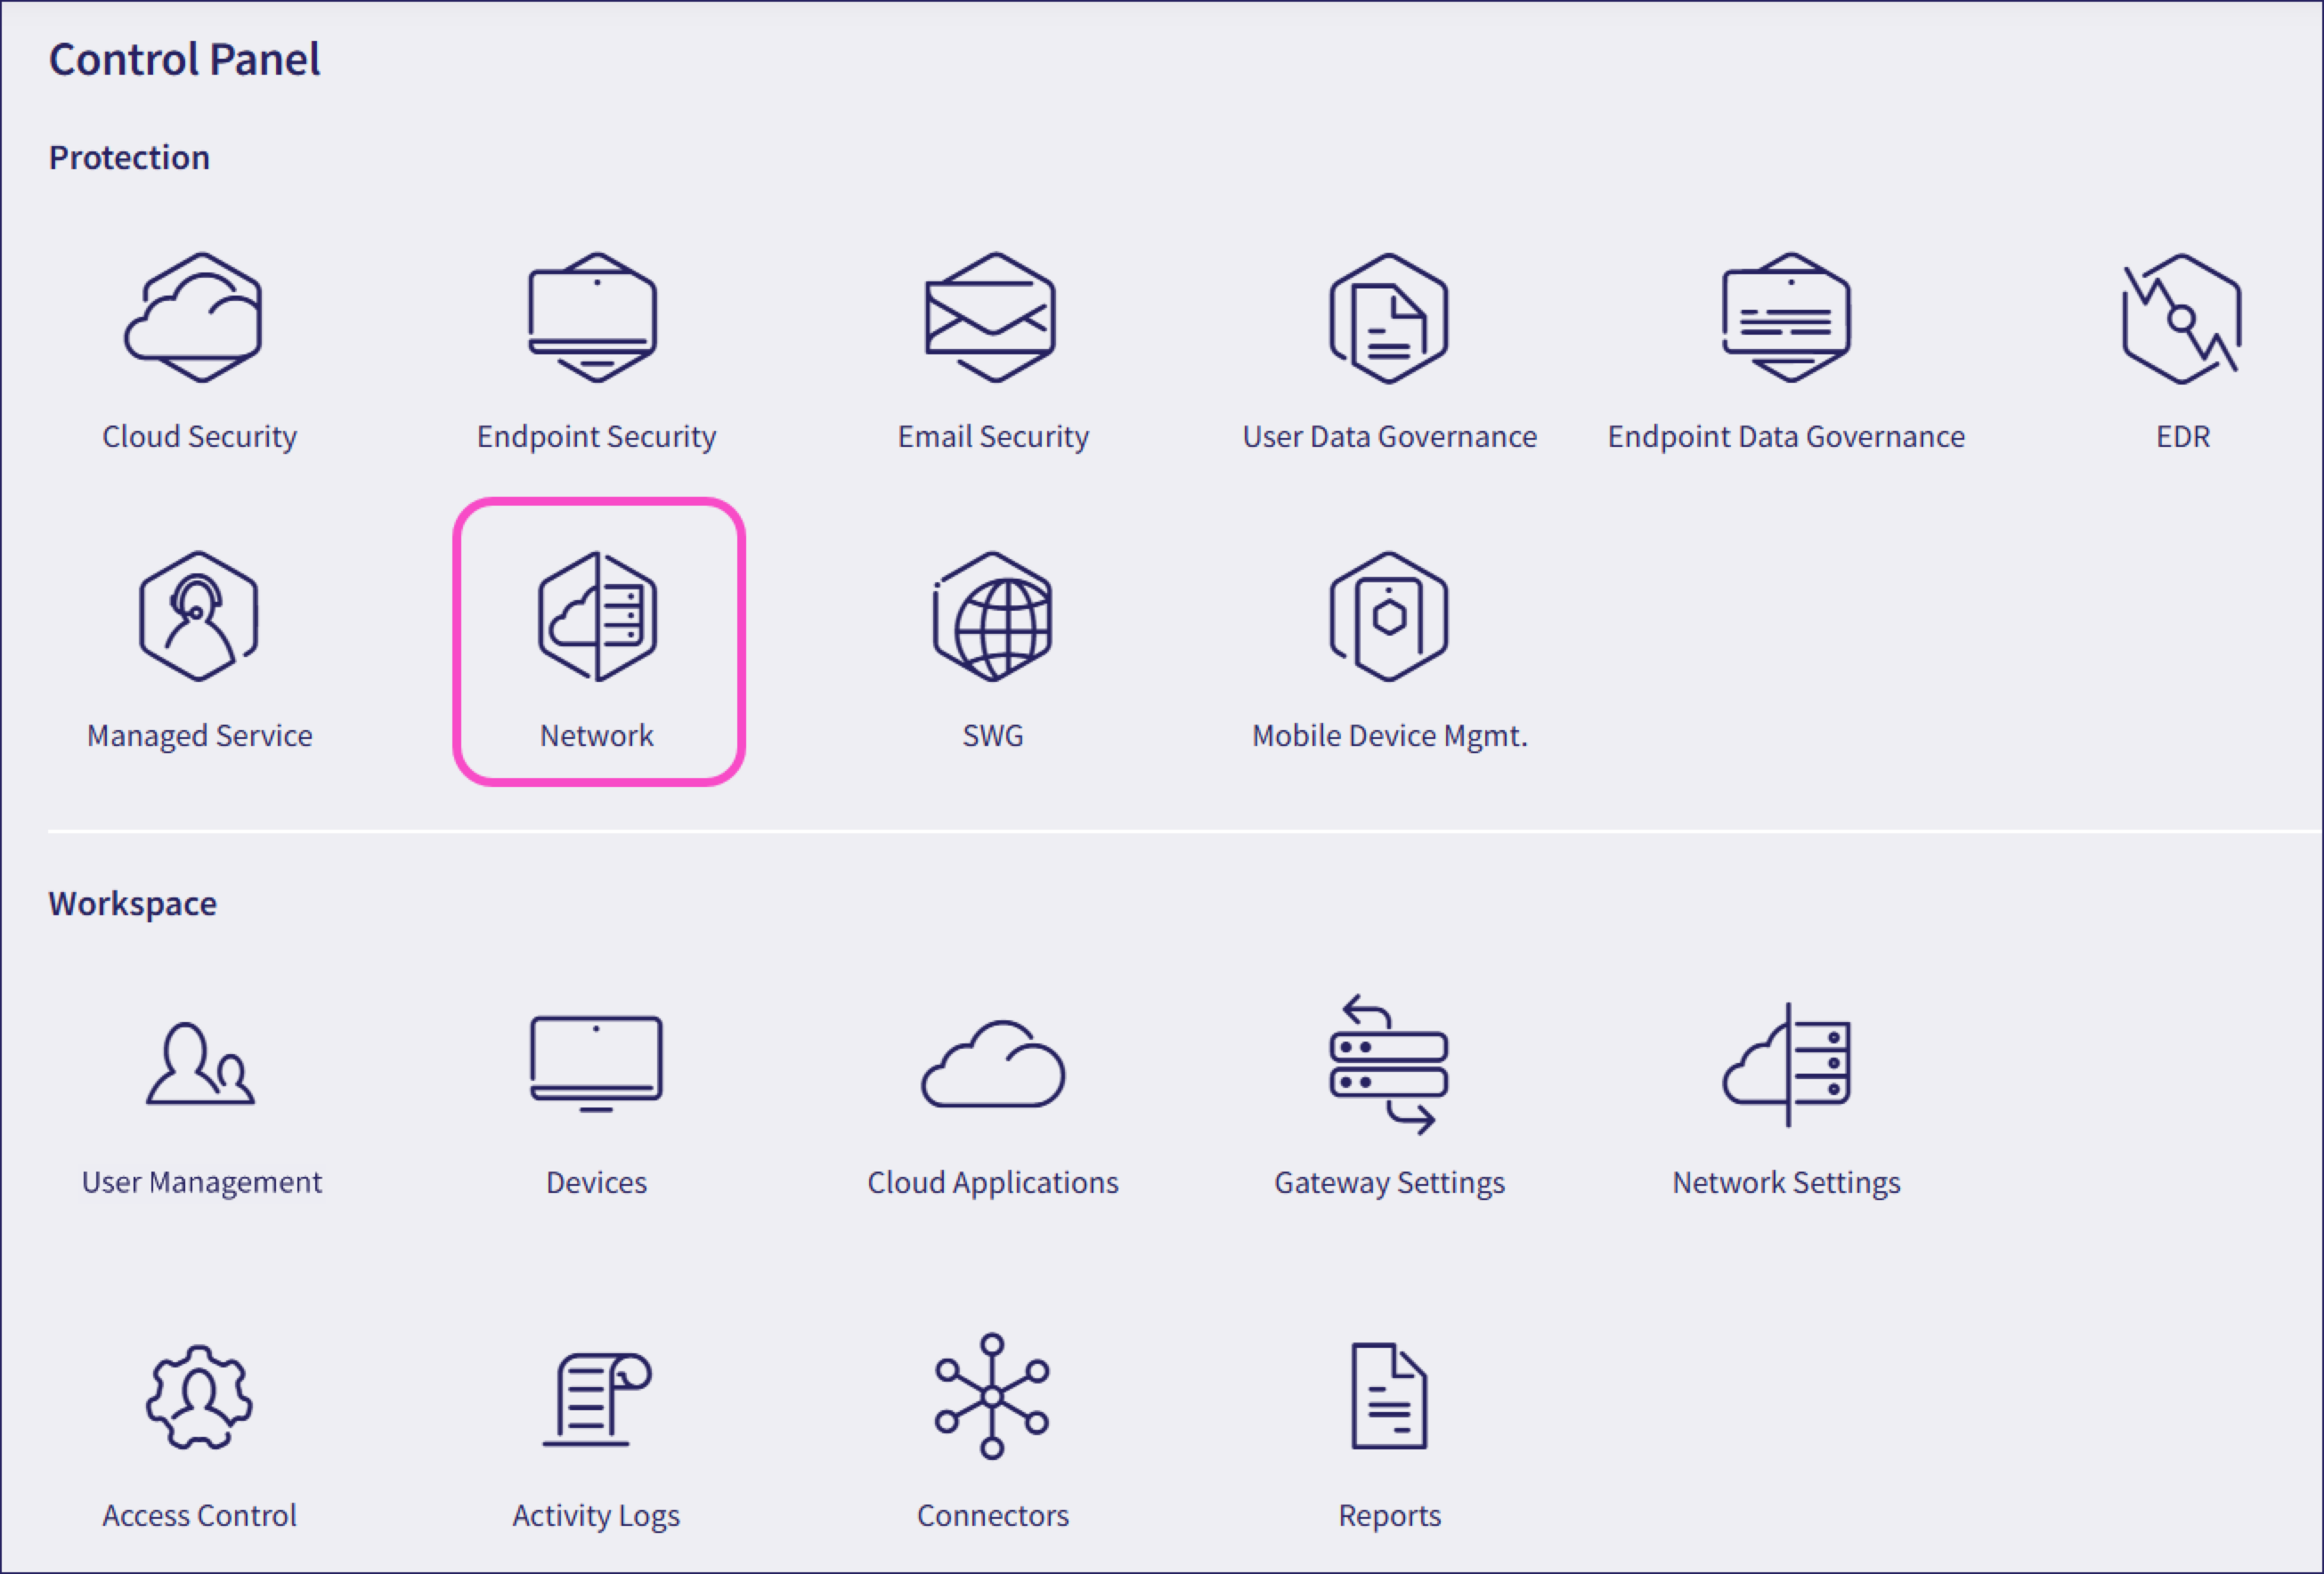
From the sidebar, select Control Panel.
Select Network:
Select Site-to-site tunnels:
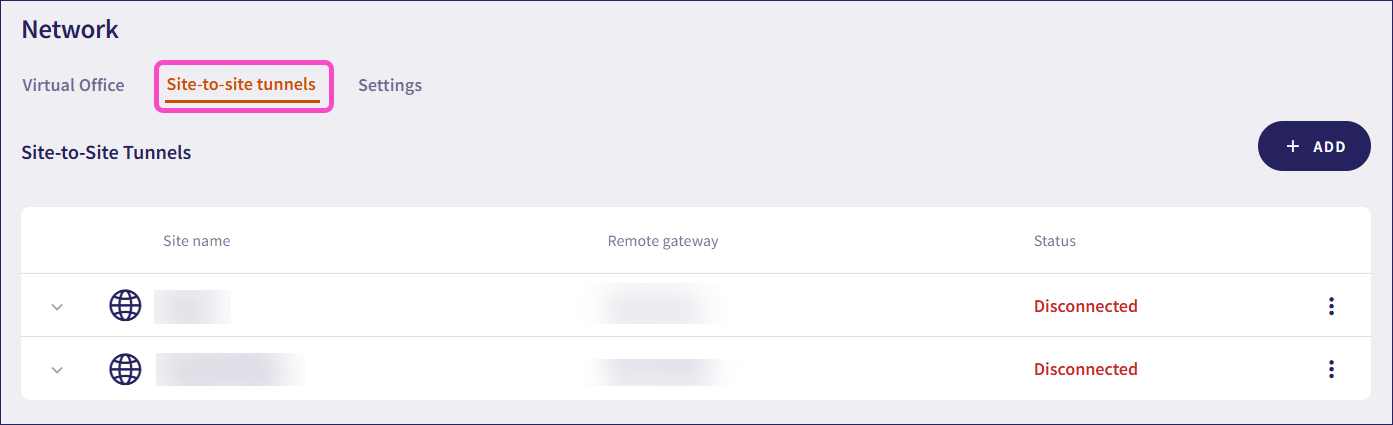
Select + ADD to add a new site-to-site tunnel configuration.
Configure your Site details:
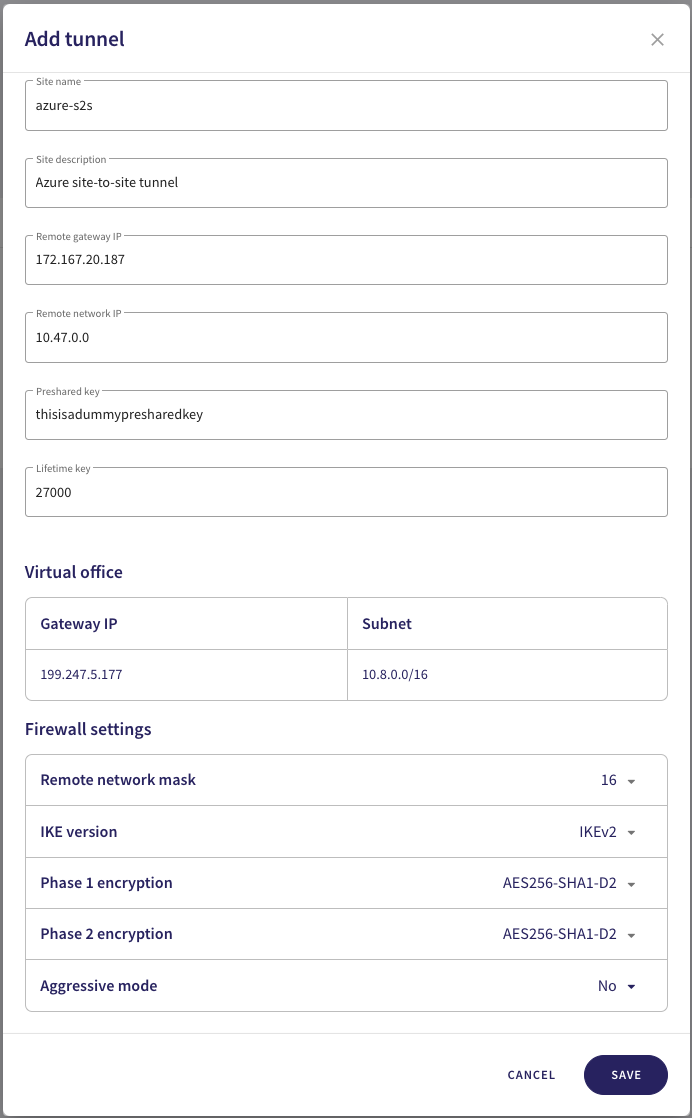
Avoid using special characters or spaces in your site details or preshared key.
- Site name: Enter a name for your site-to-site tunnel.
- Site description: Enter a short description for this tunnel.
- Remote gateway IP: Enter the public IP address configured in Azure.
- Remote network IP: Enter the virtual network CIDR address space configured in Azure.
- Preshared key: Enter the shared key configured in Azure.
- Lifetime key: Enter the shared key lifetime value configured in Azure.
In the same dialog, configure the Firewall settings:
- Remote network mask: Select your local network subnet mask ("16").
- IKE version: Select "IKEv2".
- Phase 1 encryption: Select "AES256-SHA1-D2".
- Phase 2 encryption: Select "AES256-SHA1-D2".
- Aggressive mode: Select "No".
To save your configuration, select SAVE.
After you have completed configuration of Azure and Coro Network, test the connection from the Coro console:
- Sign in to the Coro console.
- Go to Control Panel > Network > Site-to-site tunnels.
- Select the three-dot menu adjacent to your tunnel configuration, then select Test tunnel to trigger a synchronization test.
- Upon completion of a successful test, the Test status field updates to show Success.