As part of a virtual office, Coro enables customers to configure virtual private networks (VPNs) together with site-to-site tunnels.
This guide describes how to configure a site-to-site VPN tunnel between your Coro virtual office (VO) and Amazon Web Services (AWS). In this setup, AWS hosts the remote virtual private cloud (VPC), and Coro acts as the on-premises VPN gateway through your VO.
Before you start, make sure you have:
- Access as an admin user to the Coro console for your workspace.
- An active subscription (or trial) for the Coro Network module.
- An active AWS subscription and access to the AWS Management Console.
To complete this guide, perform each of the following procedures in turn:
To set up a secure site-to-site VPN tunnel between AWS and your Coro VO, you must first select a virtual private cloud (VPC) the AWS Management Console. The VPC acts as your isolated network environment where AWS resources operate. You can use an existing VPC or create a new one if required.
To create the VPC:
Sign in to the AWS Management Console (https://aws.amazon.com/console/).
From the top toolbar, select the region dropdown and choose a region in which to create the virtual network:
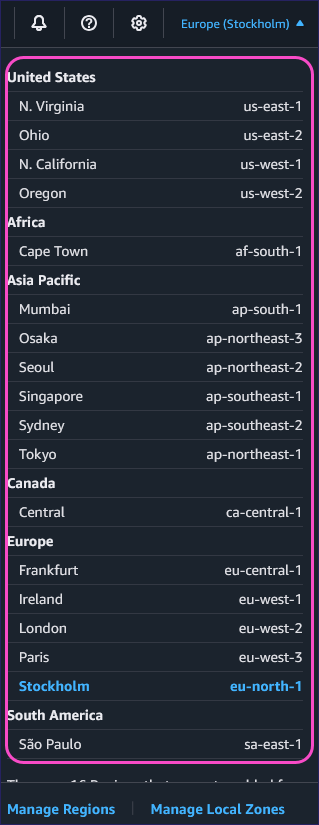 Important
The AWS region you choose affects the cost of your VPN connection.
For more information, see AWS VPN pricing (https://aws.amazon.com/vpn/pricing/).
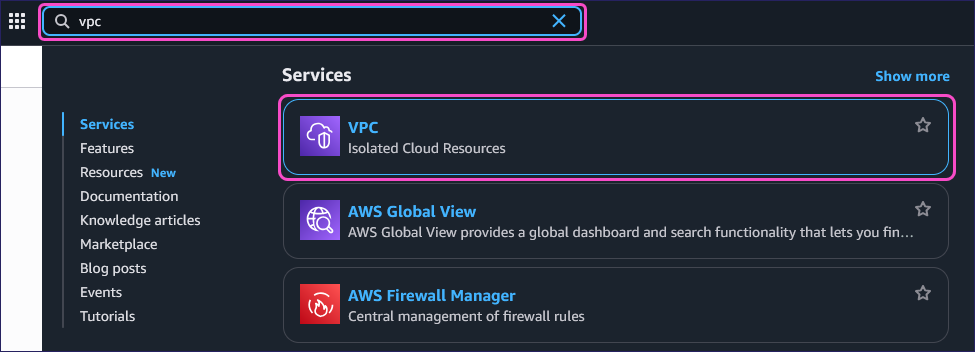
Enter vpc into the search field, and then select VPC from the Services section:
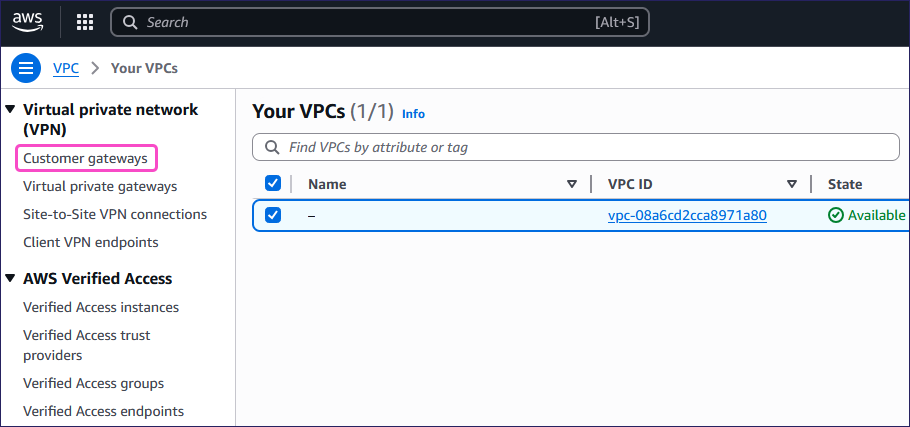
From the left pane, select Your VPCs from the Virtual private cloud section:

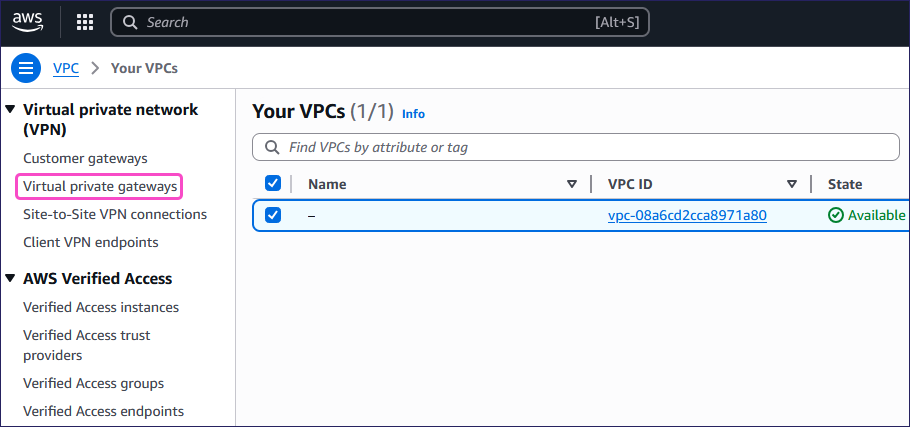
From the Your VPCs page, select the VPC that you want to use for the site-to-site VPN connection.
If there are no VPCs listed, you must first create one.
ImportantMake a note of the:
- IPv4 CIDR block: You will use this when configuring the Coro Network.
- VPC ID: You will use this when configuring the site-to-site VPN connection.

After selecting your VPC, you must create a virtual private gateway (VPG) in the AWS Management Console. This gateway acts as the AWS endpoint for your site-to-site VPN tunnel, enabling encrypted traffic between your AWS VPC and the Coro VO.
To create the VPG:
From the left pane, select Customer gateways from the Virtual private network (VPN) section:
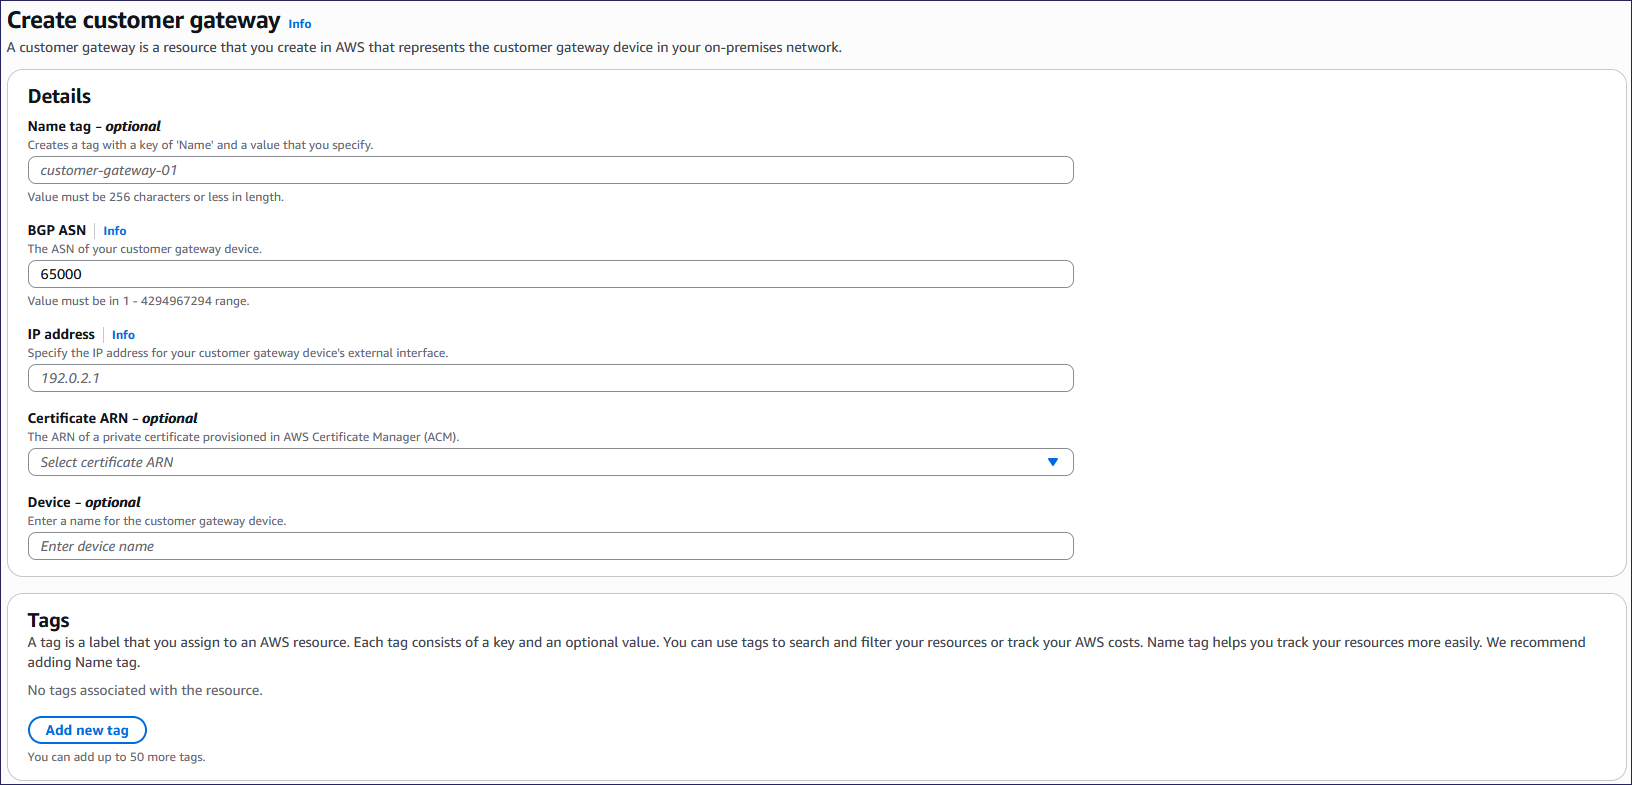
Select Create customer gateway:

AWS displays the Create customer gateway page:
 Important
The customer gateway defines the on-premises (Coro) side of the VPN tunnel. You will use it when configuring the site-to-site VPN connection.
Enter the following details:
Name tag: (Optional) Enter a suitable name.
BGP ASN: Leave as 65000.
IP address: Enter your Coro public IP address.
To retrieve your Coro public IP address:
From the sidebar, select Control Panel.
Select Network:
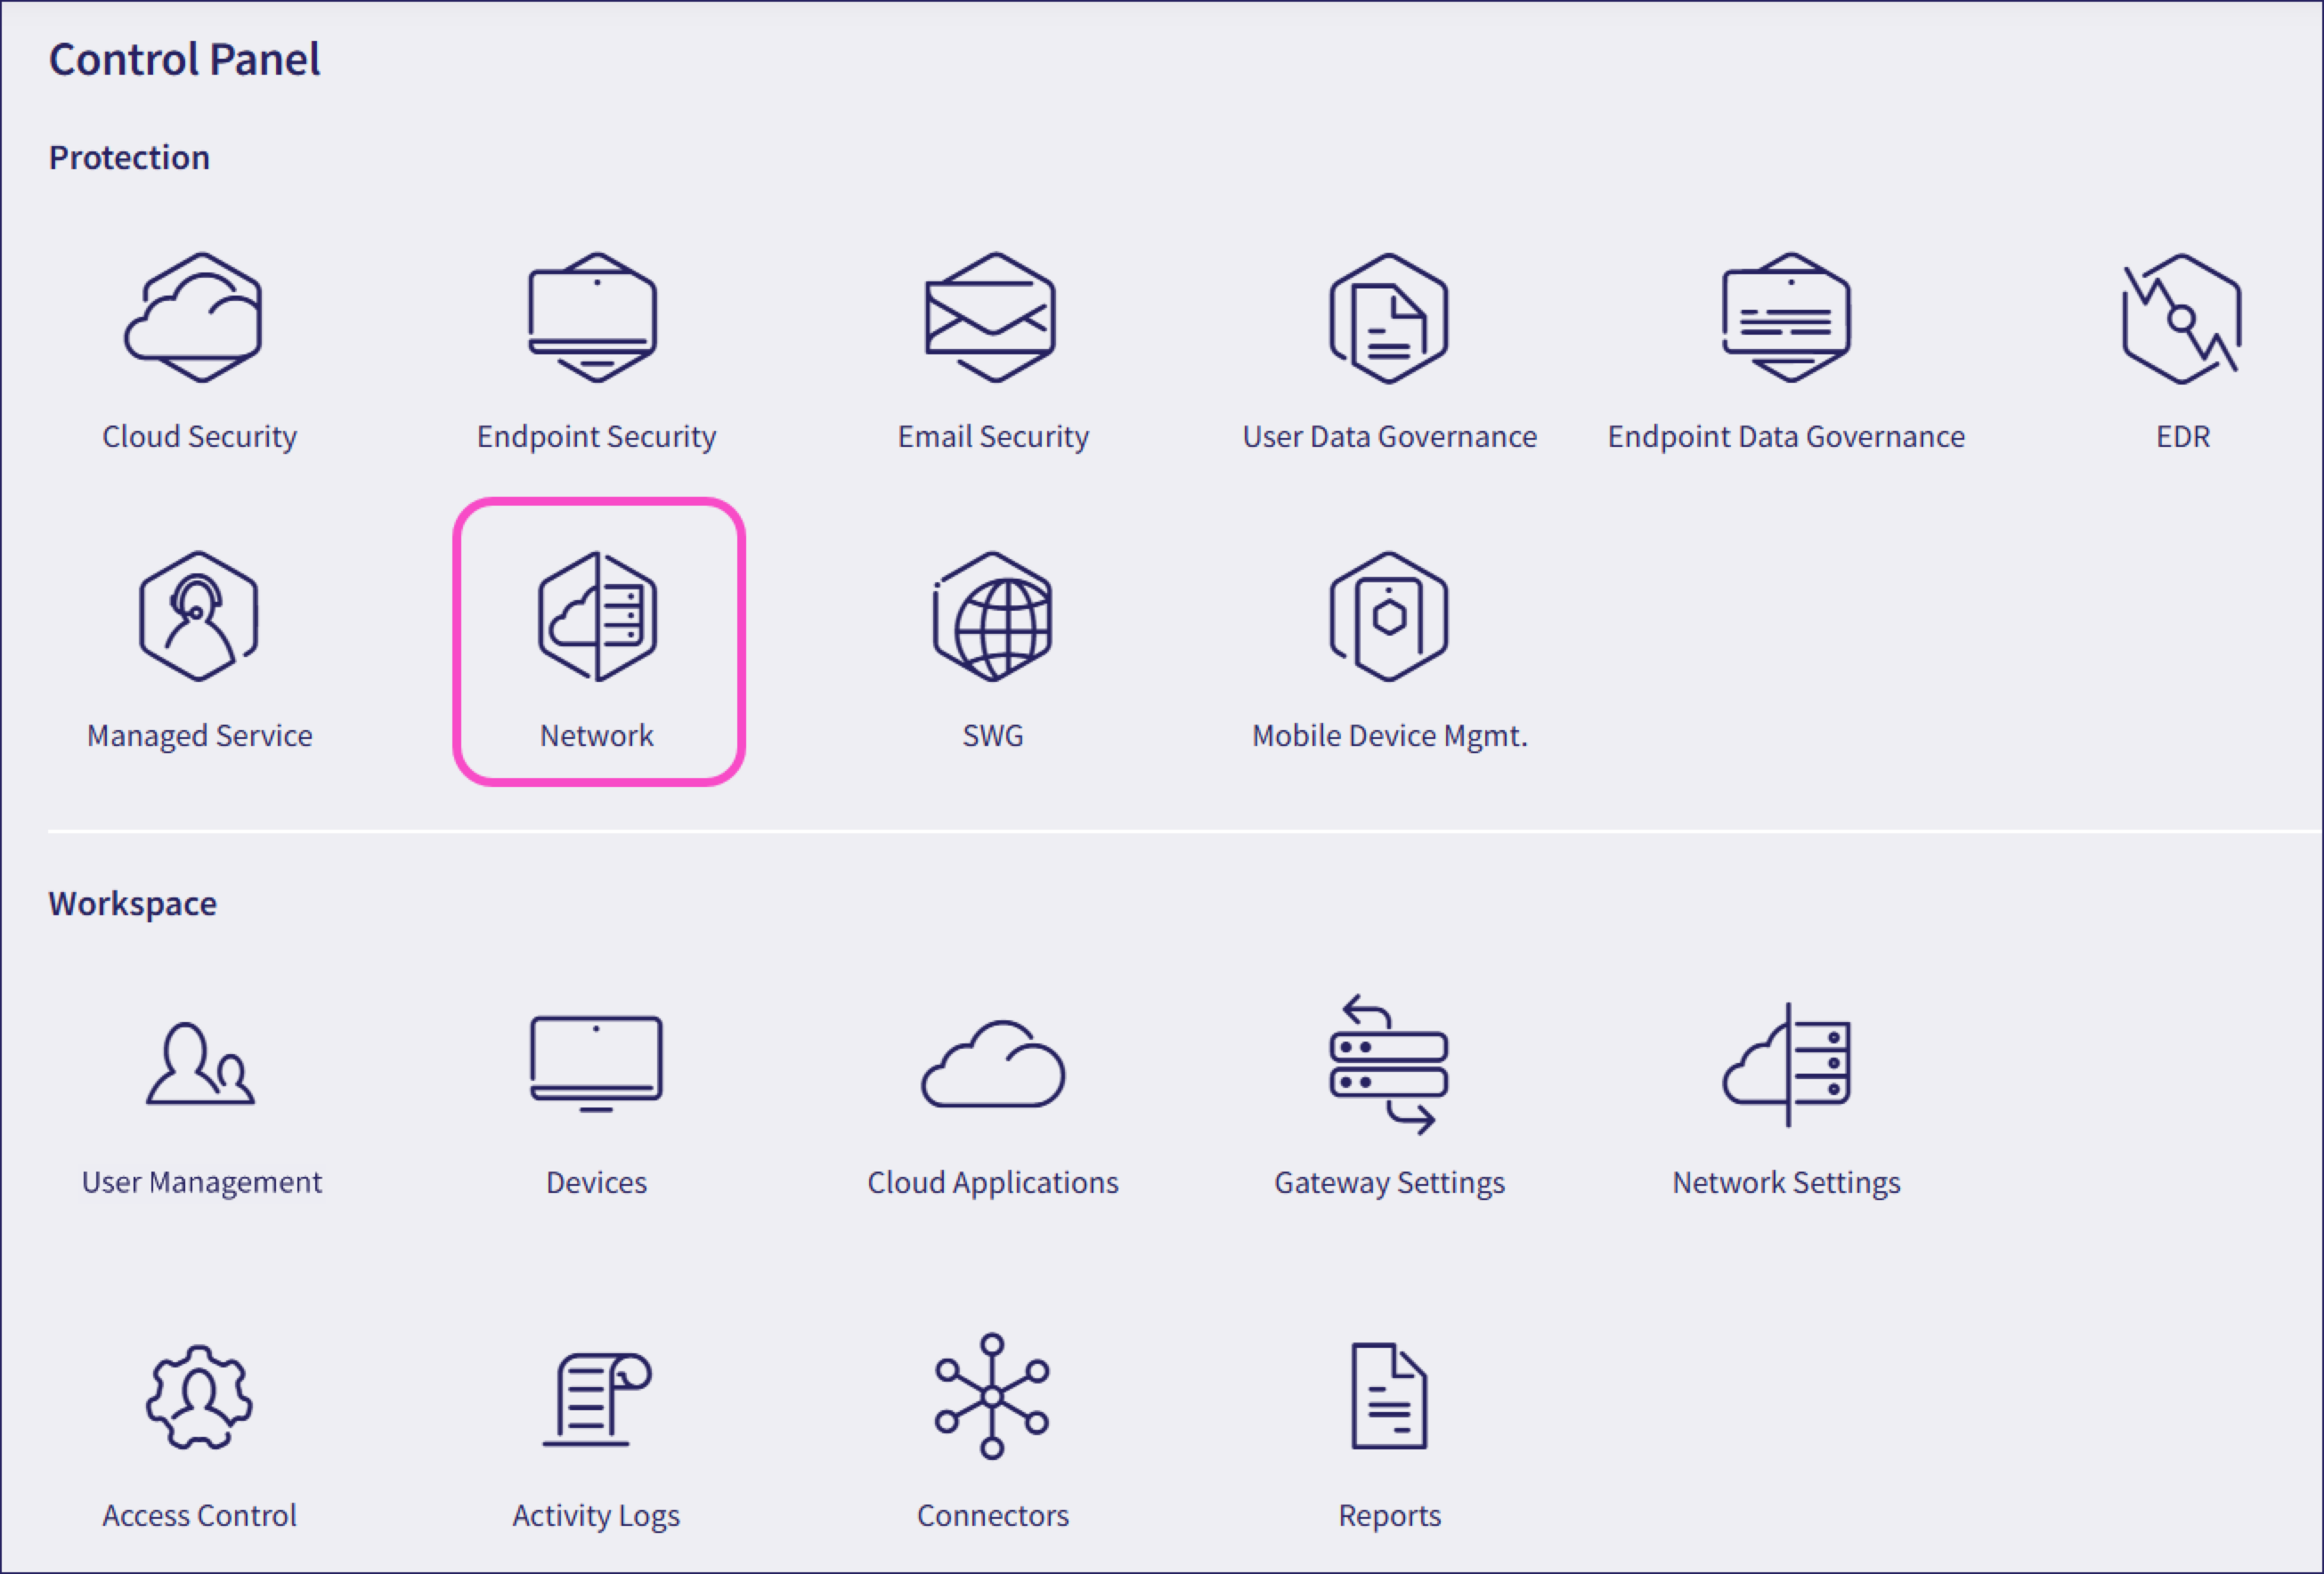
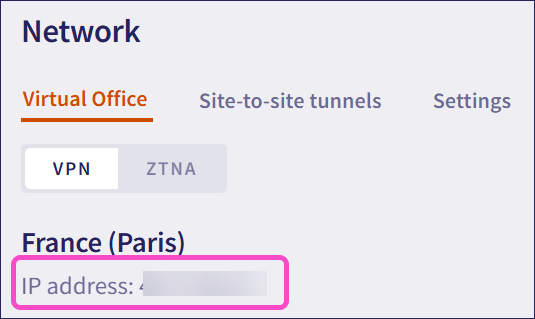
Make a note of the Coro public IP address that displays on the Virtual Office tab:
Certificate ARN: (Optional) Leave blank.
Device: (Optional) Leave blank.
Leave the Tags section empty.
Select Create customer gateway:

AWS adds the customer gateway to the list.
From the left pane, select Virtual private gateways from the Virtual private network (VPN) section:
Select Create virtual private gateway:

AWS displays the Create virtual private gateway page:
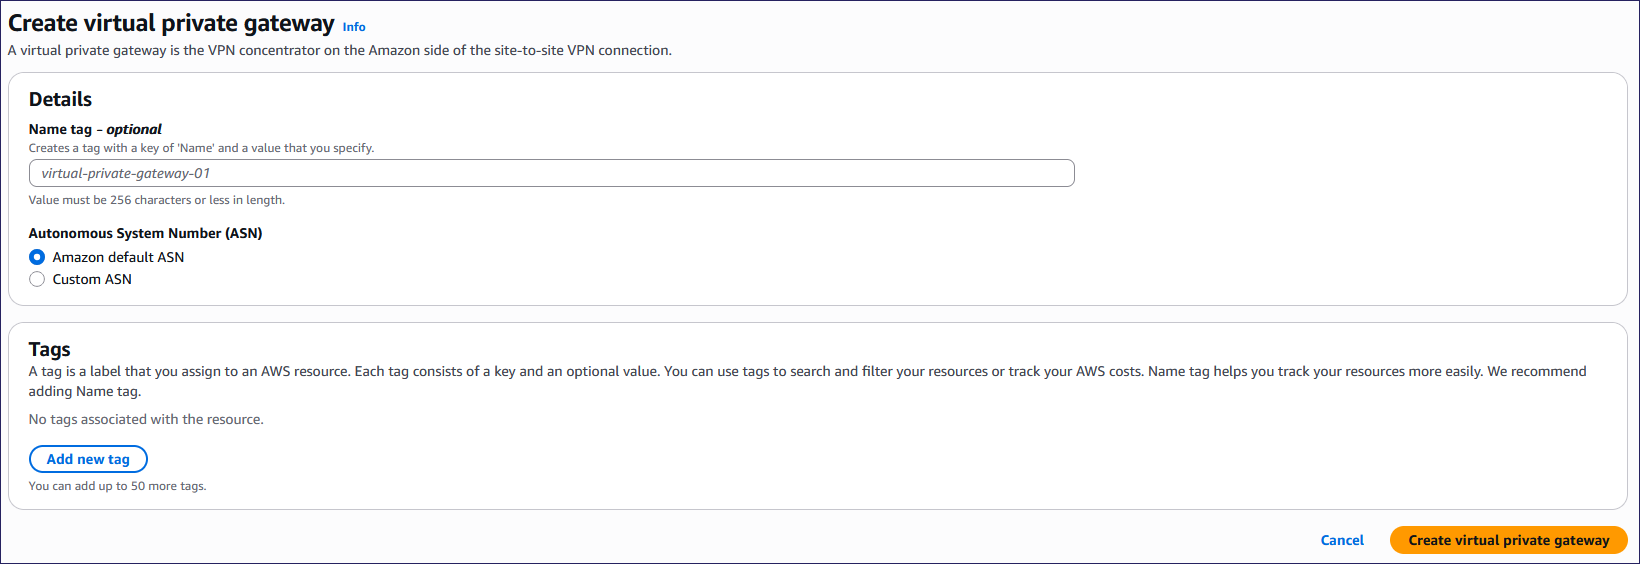
Enter the following details:
- Name tag: (Optional) Enter a suitable name.
- Autonomous System Number (ASN): Leave as Amazon default ASN.
Leave the Tags section empty.
Select Create virtual private gateway:

AWS creates the VPG.
From the Virtual private gateways list, select the new VPG, and then select Actions > Attach to VPC:

AWS displays the Attach to VPC page:
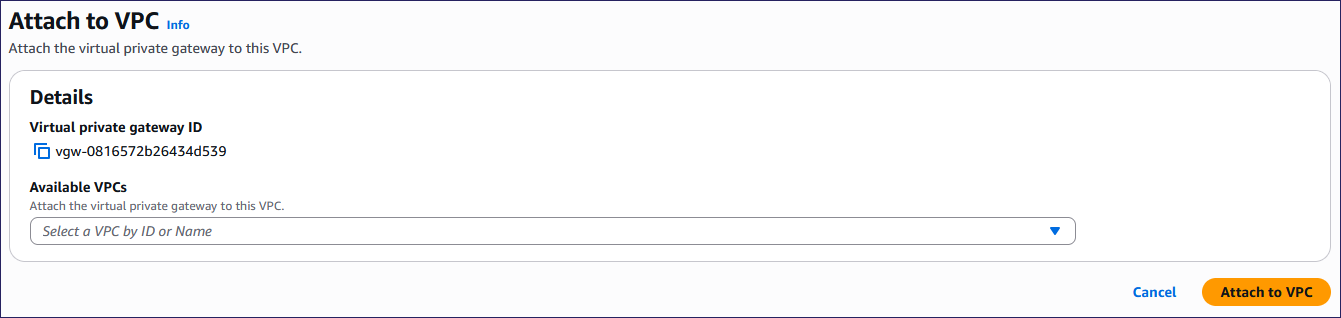
Select a VPC from the Available VPCs dropdown, and then select Attach to VPC:
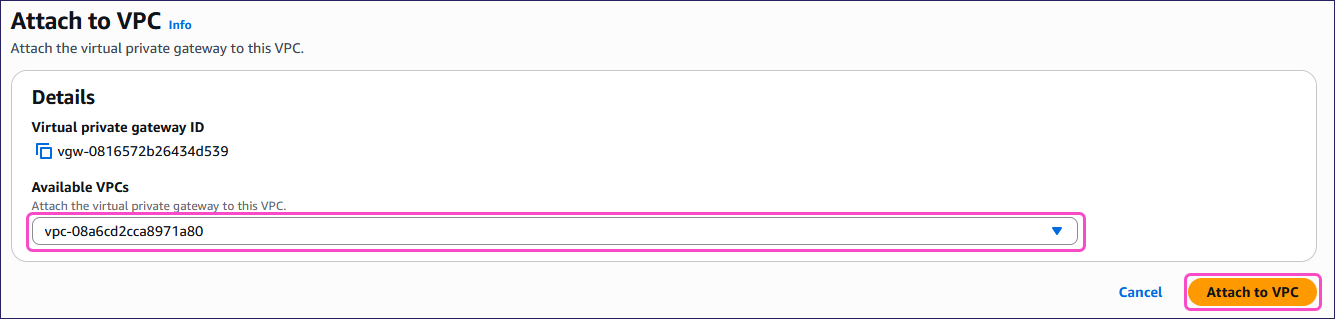
AWS might take a few minutes to attach the gateway to the VPC.
After AWS completes the process, the VPC attachment state column displays Attached:

After you create the VPC and VPG, configure the site-to-site VPN connection as follows:
From the left pane, select Site-to-Site VPN connections from the Virtual private network (VPN) section:

Select Create VPN connection:

AWS displays the Create VPN connection page:
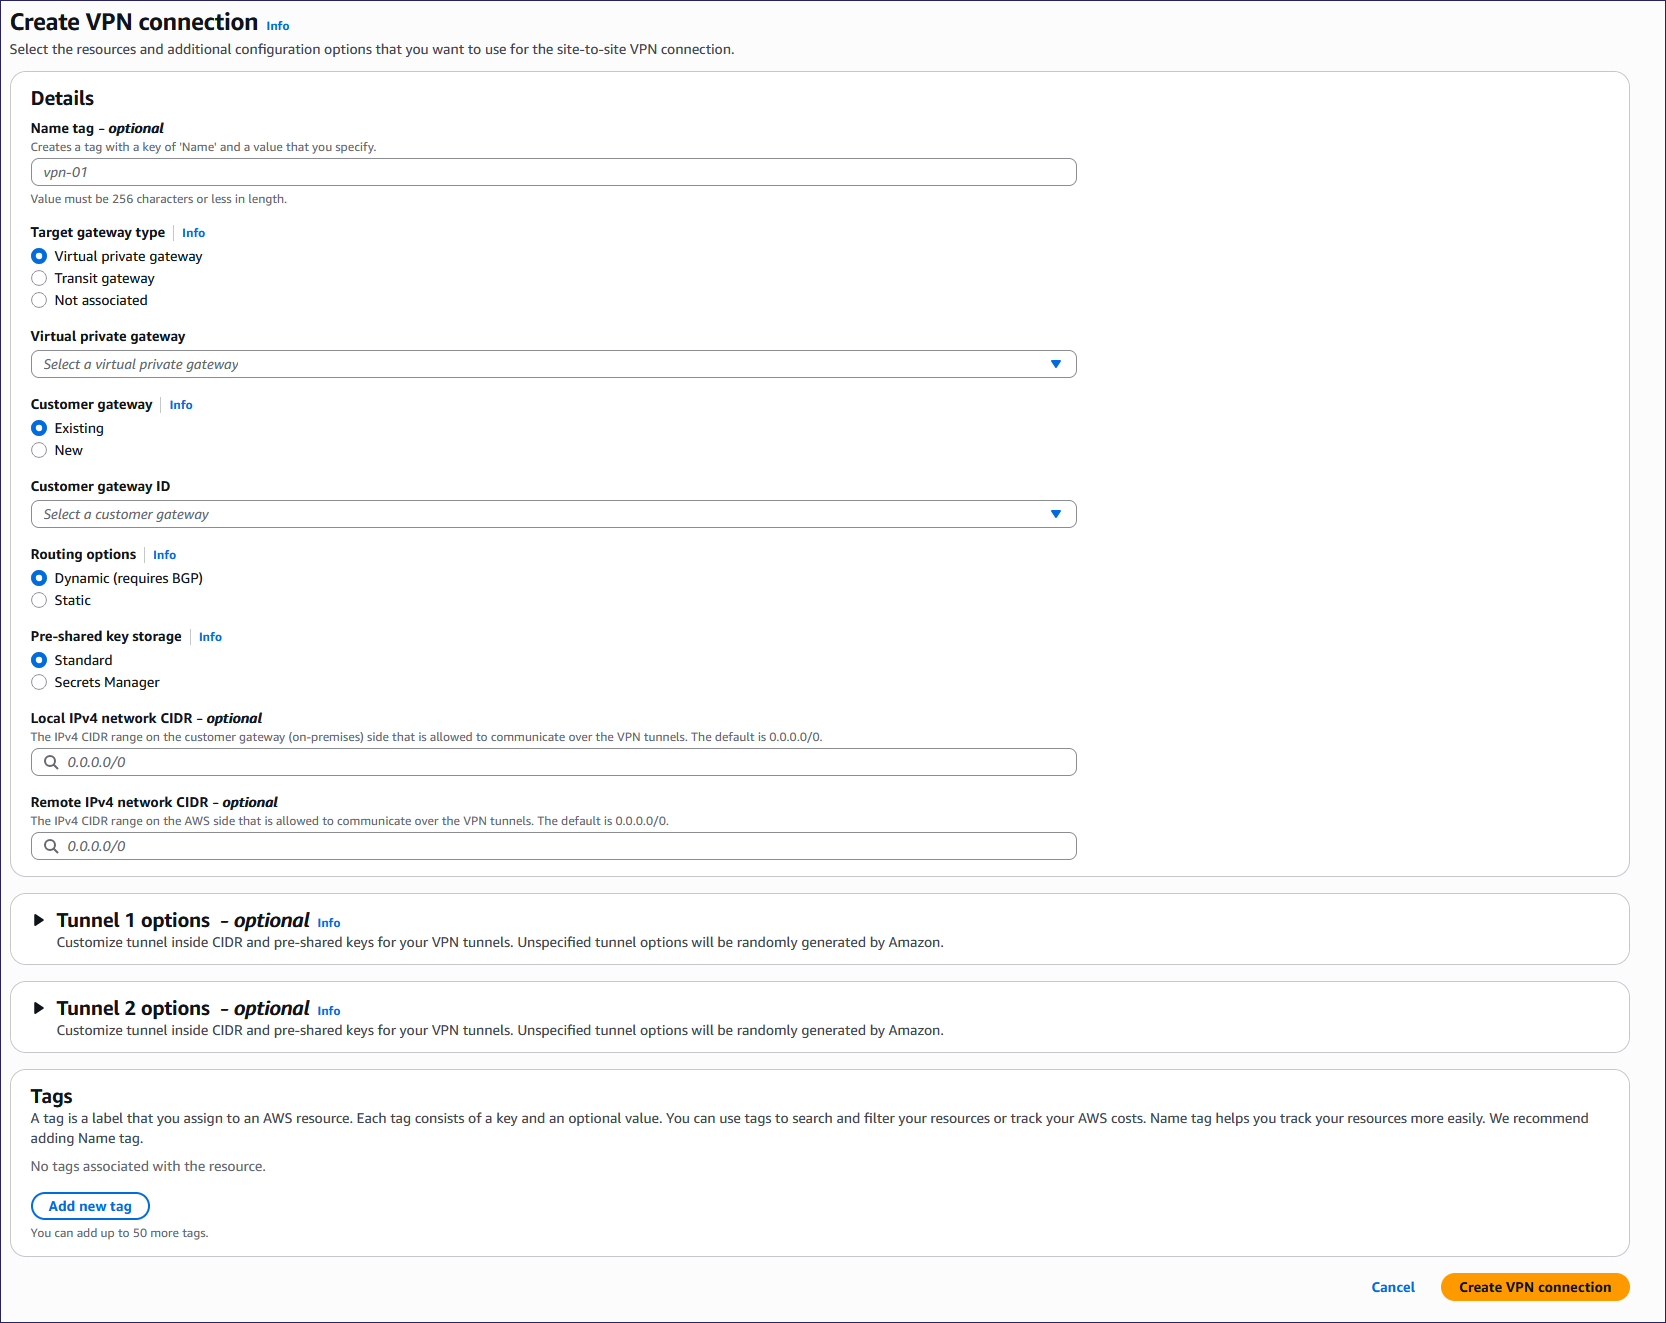
Enter the following details:
- Name tag: (Optional) Enter a suitable name.
- Target gateway type: Leave as Virtual private gateway.
- Virtual private gateway: Select your virtual private gateway.
- Customer gateway: Leave as Existing.
- Customer gateway ID: Select your customer gateway.
- Routing options: Select Static.
- Static IP prefixes: Enter 10.8.0.0/16, 10.9.0.0/16, and 10.10.0.0/16.
- Pre-shared key storage: Leave as Standard.
- Local IPv4 network CIDR: (Optional) Leave blank.
- Remote IPv4 network CIDR: (Optional) Leave blank.
Leave the Tunnel 1 options, Tunnel 2 options, and Tags sections empty.
Select Create VPN connection:

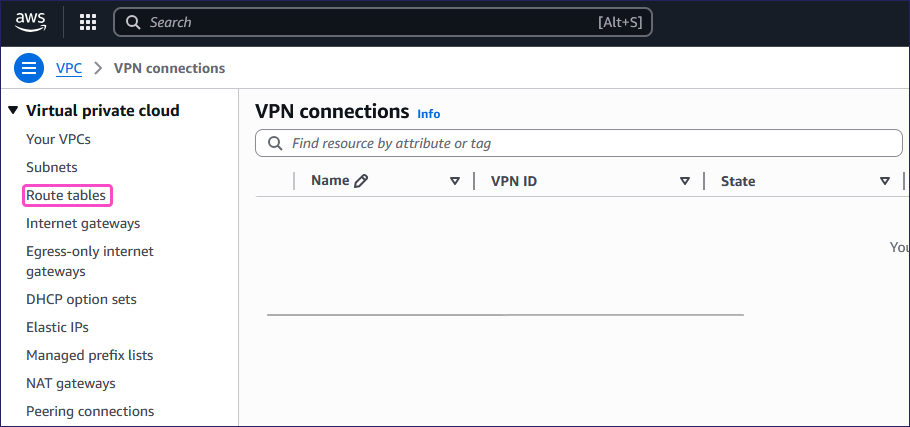
From the left pane, select Route tables from the Virtual private cloud section:
Select the route table where:
The value for VPC matches your configured VPC ID.
The value for Main is Yes:

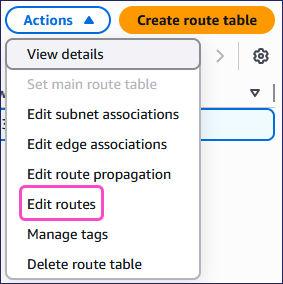
Select Actions > Edit routes:
Select Add route:
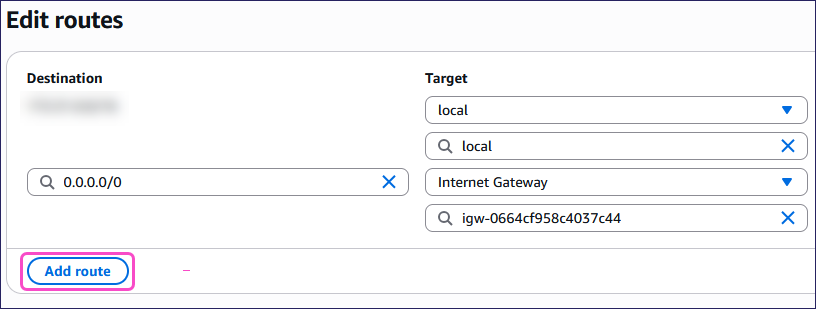
Enter the following details:
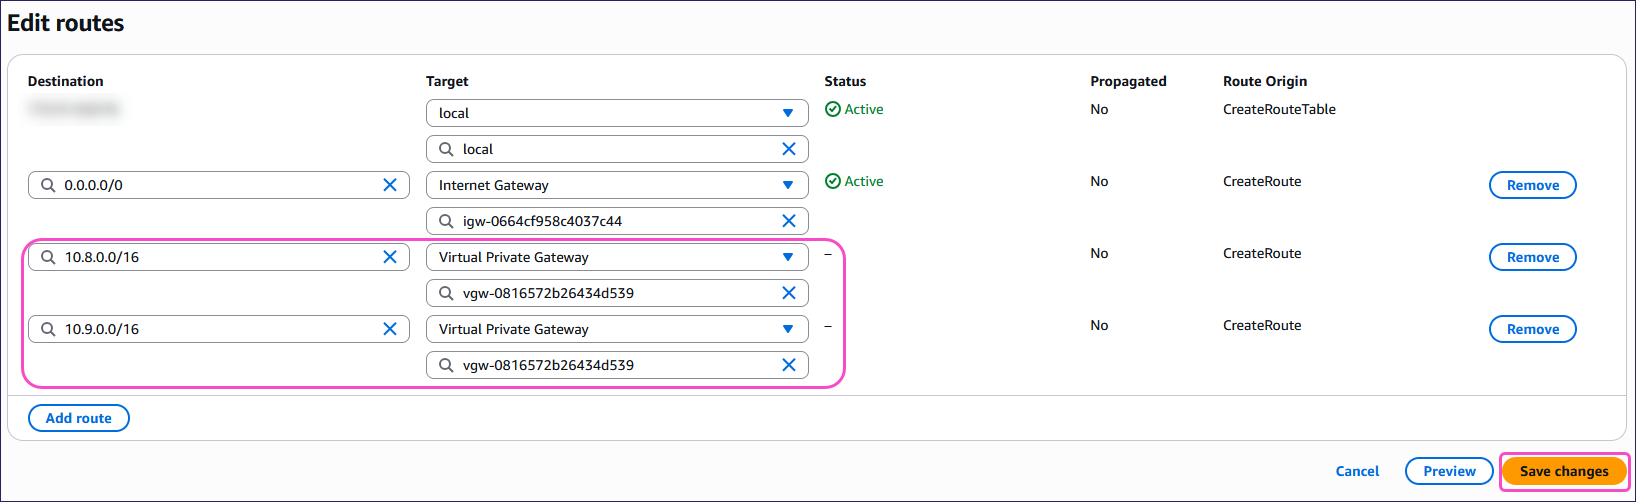
- Destination: Enter 10.8.0.0/16.
- Target: Select Virtual Private Gateway and then select your virtual private gateway.
Repeat for the following destinations:
10.9.0.0/16
10.10.0.0/16 (only required if your VPN clients connect to Coro Network using WireGuard).
Select Save changes:
AWS applies the routing configuration.
From the left pane, select Site-to-Site VPN connections from the Virtual private network (VPN) section:
Select your VPN connection, and then select Download configuration:

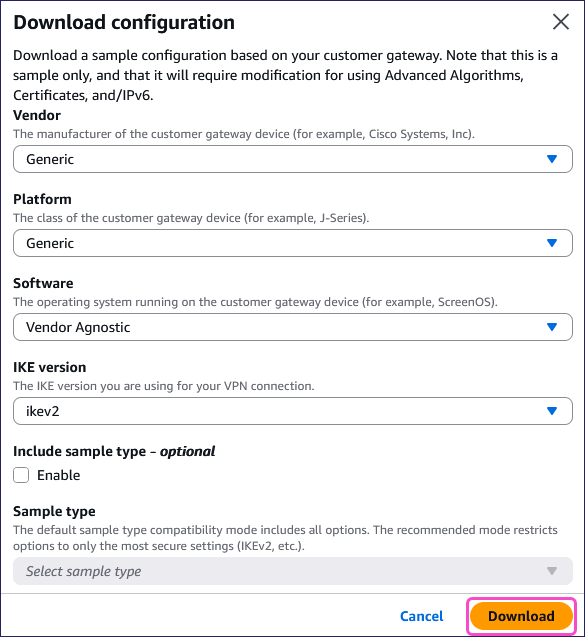
AWS displays the Download configuration dialog.
Enter the following details:
- Vendor: Select Generic.
- Platform: Select Generic.
- Software: Select Vendor Agnostic.
- IKE version: Select ikev2.
- Include sample type: (Optional) Leave disabled.
Select Download:
AWS generates and downloads a
.txtconfiguration file containing the tunnel parameters required for configuring the Coro Network site-to-site connection.Locate and open the downloaded configuration file.
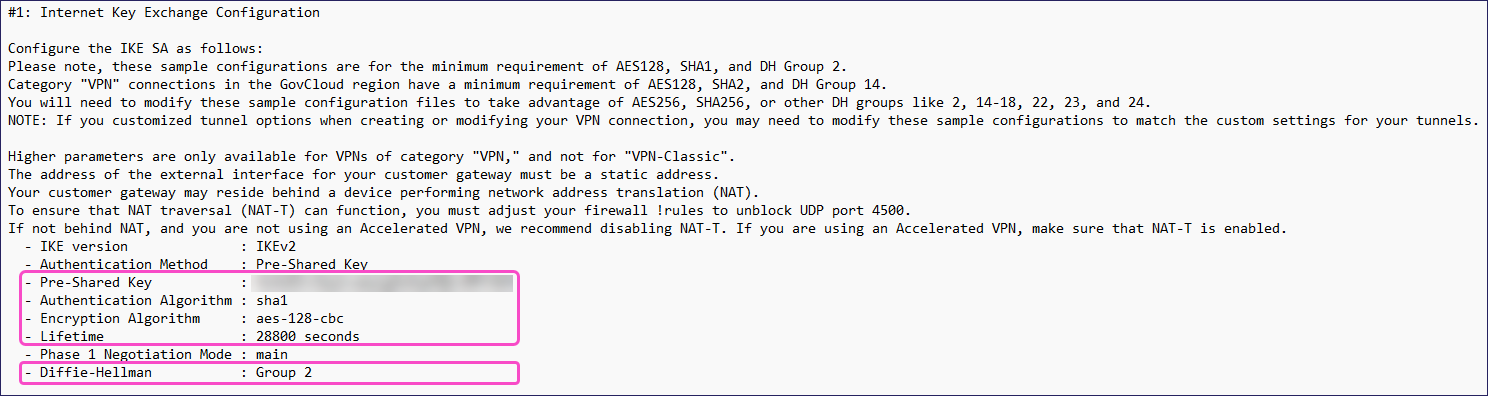
Note the following values under the #1: Internet Key Exchange Configuration section:
- Pre-Shared Key
- Authentication Algorithm
- Encryption Algorithm
- Lifetime
- Diffie-Hellman
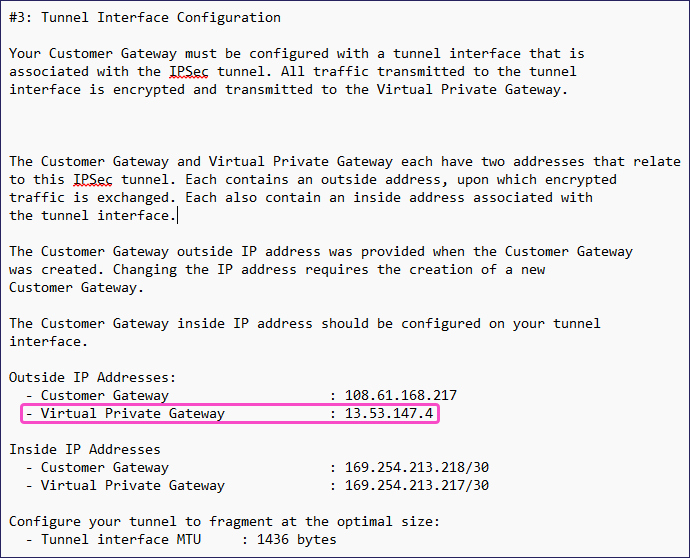
Note the Virtual Private Gateway value under the Outside IP Addresses subsection of the #3: Tunnel Interface Configuration section:
Configure Coro with details of your site-to-site tunnel and firewall settings:
From the sidebar, select Control Panel.
Select Network:
Select Site-to-site tunnels:
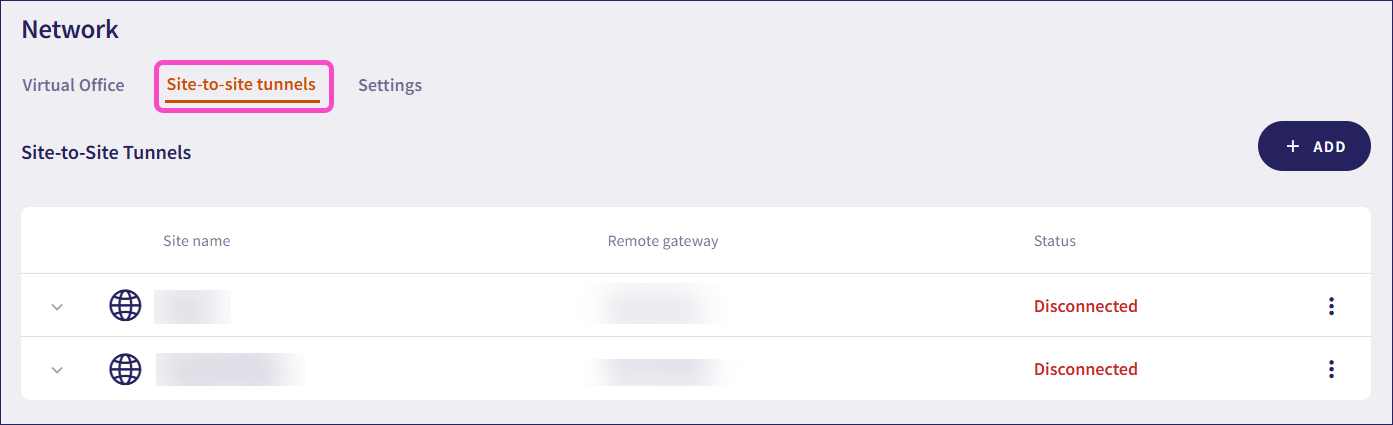
Select + ADD to create a new site-to-site tunnel.
Configure your Site details:

Avoid using special characters or spaces in your site details or preshared key.
- Site name: Enter a suitable name for your site-to-site tunnel.
- Site description: Enter a suitable short description for this tunnel.
- Remote gateway IP: Enter the Virtual Private Gateway value you recorded earlier from your AWS VPN configuration.
- Remote network IP: Enter the IPv4 CIDR address of your AWS VPC.
- Preshared key: Enter the Pre-Shared Key from your AWS VPN configuration.
- Lifetime key: Enter the Lifetime value from your AWS VPN configuration.
In the same dialog, configure the Firewall settings:
- Remote network mask: Enter the subnet mask based on your IPv4 CIDR address. For example, 16 or 24.
- IKE version: Select IKEv2.
- Phase 1 encryption: Select the encryption setting that matches the Authentication Algorithm, Encryption Algorithm, and Diffie-Hellman you configured in AWS. For example, AES-128-SHA1-D2.
- Phase 2 encryption: Select the same value as Phase 1 encryption.
- Aggressive mode: Select No.
To save your configuration, select SAVE.
After configuring the Coro Network and AWS VPN tunnel, the tunnel might still show a Down status in AWS. Follow the steps below to activate it:
Sign in to the AWS Management Console (https://aws.amazon.com/console/).
From the left pane of the Your VPCs page, select Site-to-Site VPN connections from the Virtual private network (VPN) section:
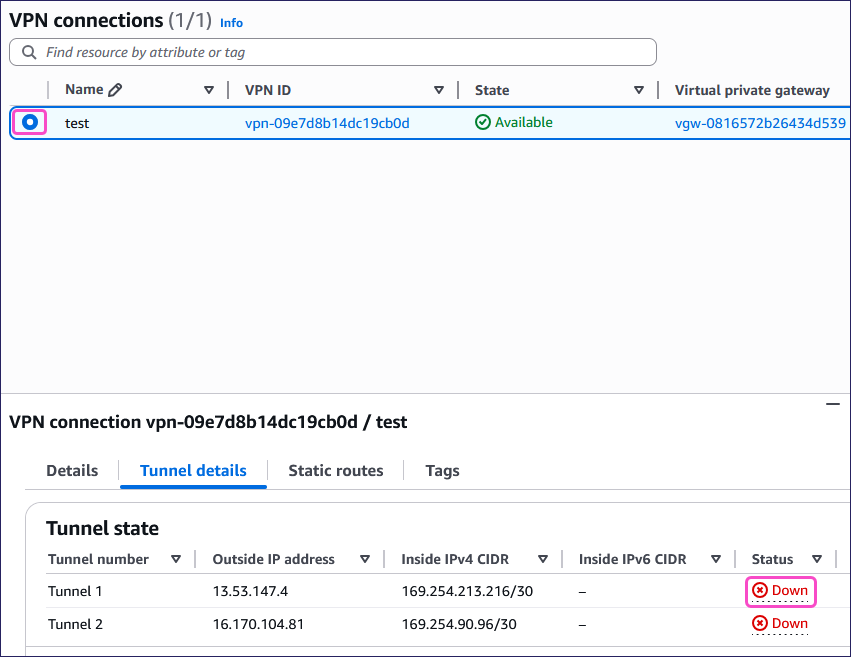
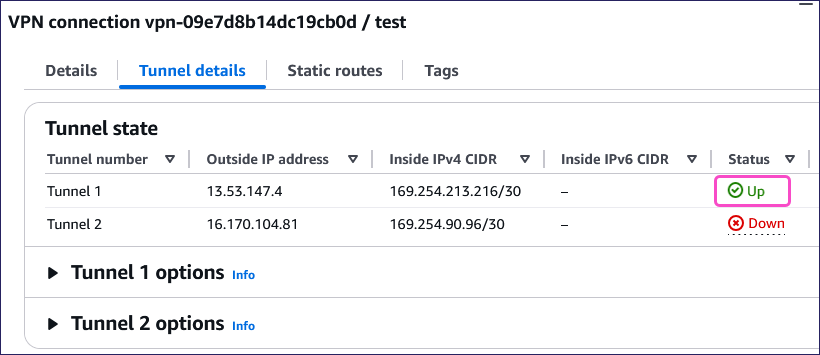
Select your VPN and then select Tunnel details.
In the Tunnel state section, AWS displays the tunnel with a Down status:
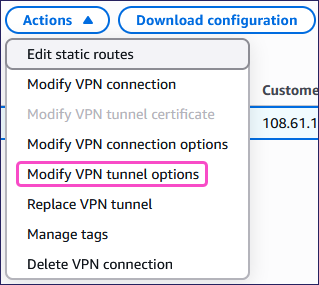
Select Actions > Modify VPN tunnel options:
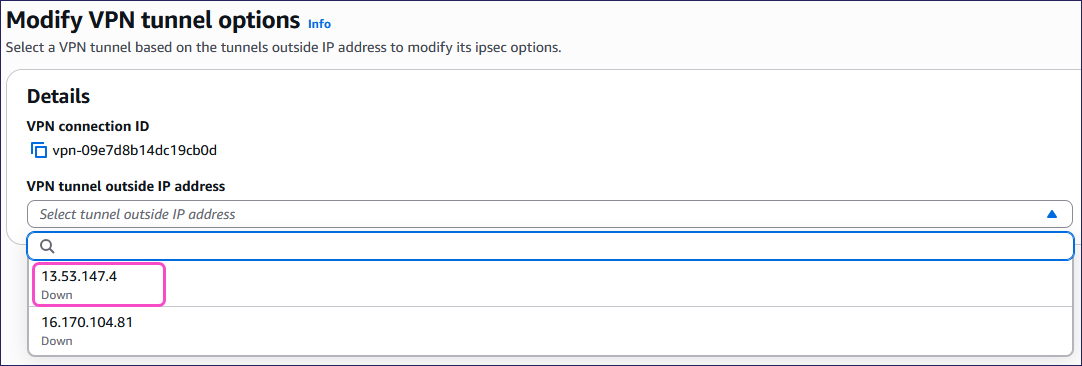
AWS displays the Modify VPN tunnel options page.
Select your VPN tunnel outside IP address from the VPN tunnel outside IP address dropdown:
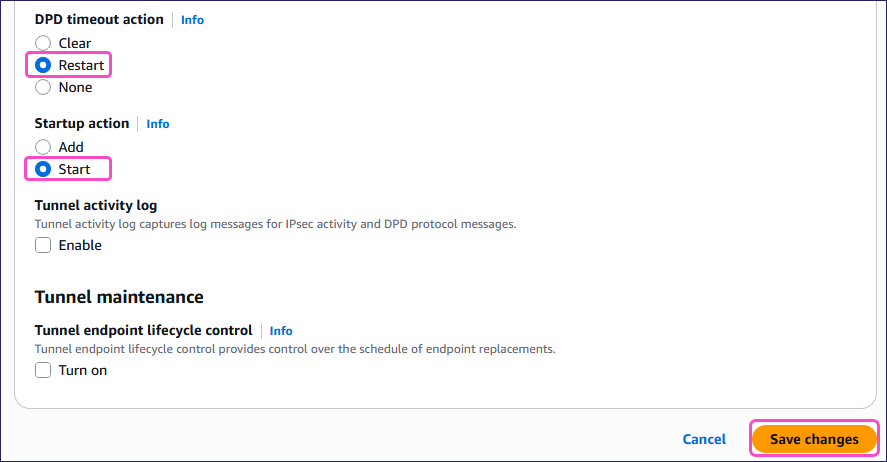
Scroll down and configure the following:
- DPD timeout action: Select Restart.
- Startup action: Select Start.
Select Save changes:
AWS updates the VPN State to Modifying:
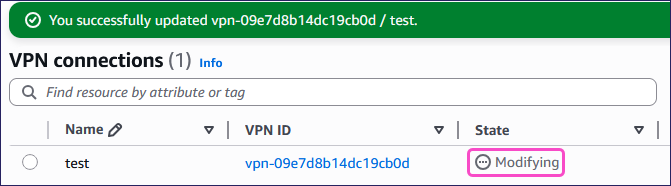
It might take a few minutes for AWS to activate the VPN tunnel.
Select Retry. AWS updates the VPN State to Available:

Select your VPN and then select Tunnel details.
The Status now shows as Up:
AWS can take up to 10 minutes to connect your VPN tunnel.
If your VPN is not connecting, try the following troubleshooting options:
Run the following command on the Coro VPN gateway device (either locally or via SSH) to restart the IPsec service:
ipsec restartEdit the VPN tunnel options:
Go to the Modify VPN tunnel options page.
Set DPD timeout action to None.
ImportantDo not save the configuration.
Change DPD timeout action back to Restart.
Select Save changes:
It might take a few minutes for AWS to activate the VPN tunnel.
Make sure there are no inbound or outbound rules blocking the VPN connection:
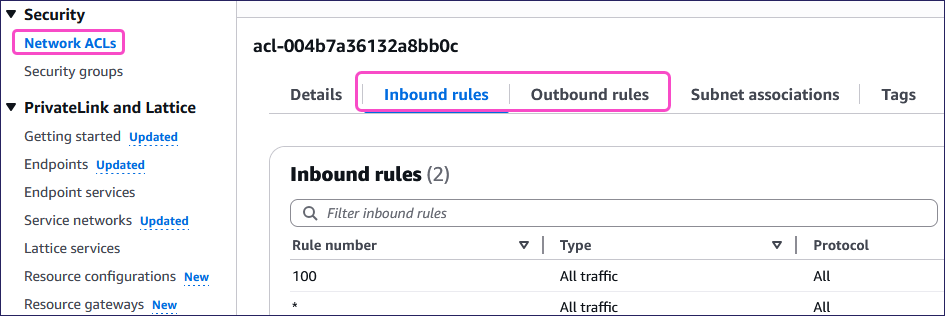
From the Your VPCs page, select Network ACLs from the Security section.
Review the Inbound rules and Outbound rules for entries that may block the VPN connection:
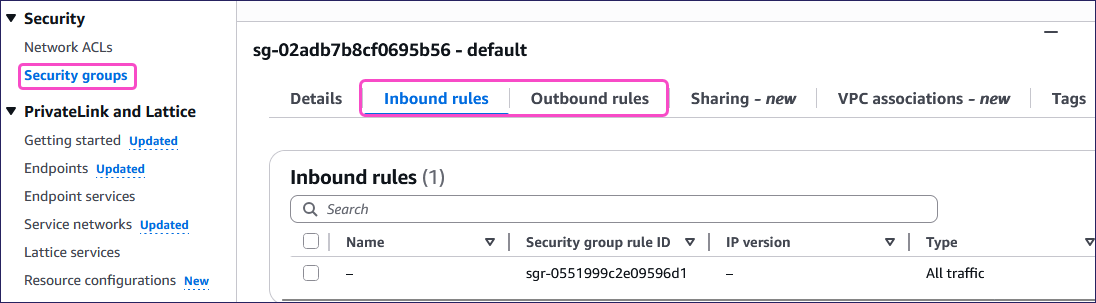
From the Your VPCs page, select Security groups from the Security section.
Review the Inbound rules and Outbound rules for entries that may block the VPN connection:
ImportantIf your AWS environment includes existing security groups, update them to allow traffic from the following Coro Network subnets:
- 10.8.0.0/16
- 10.9.0.0/16
- 10.10.0.0/16
Alternatively, configure your security groups to allow only the required ports and protocols used by the VPN tunnel.
Make sure that all required subnets are explicitly associated:
From the Your VPCs page, select Route tables from the Virtual private cloud section and then select your route table.
Select Subnet associations.
Make sure you have added all required explicit subnet associations.
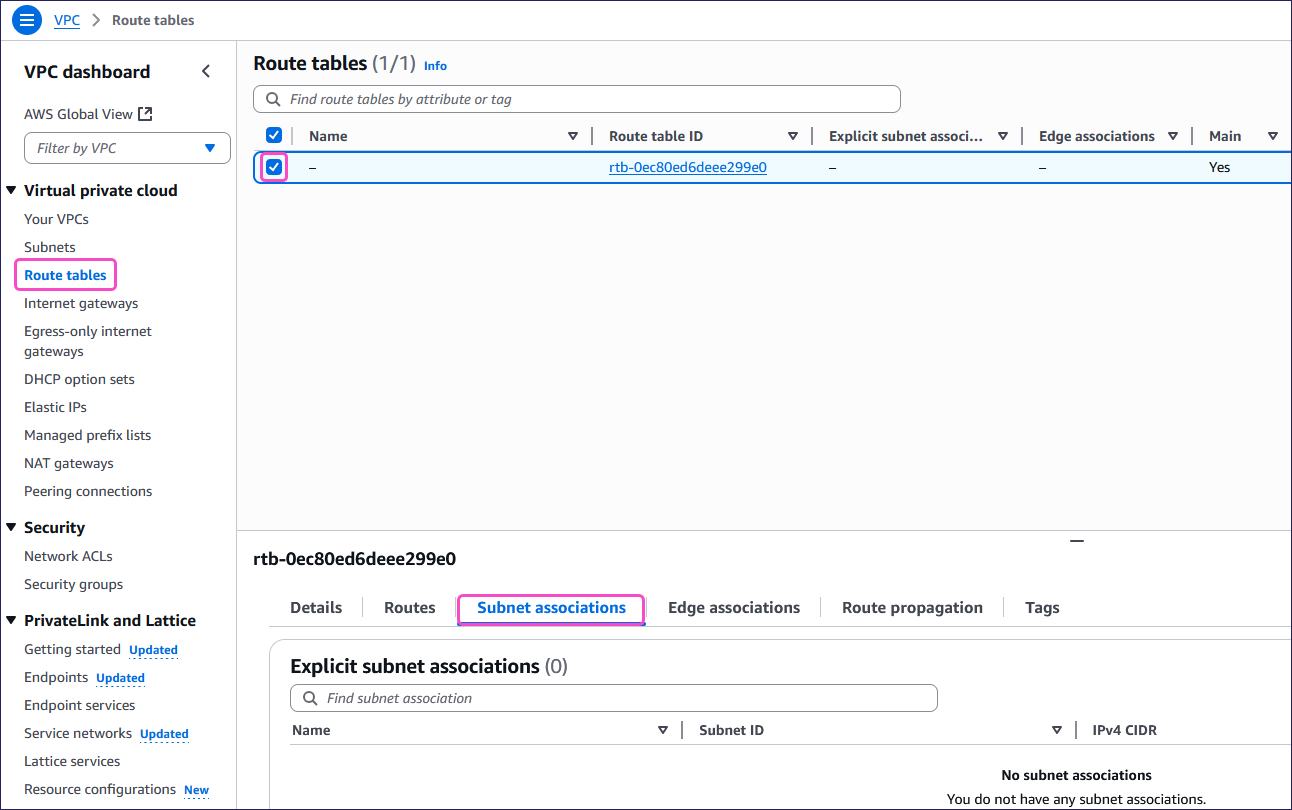 Important
By default, AWS does not automatically add explicit subnet associations.