This is a beta feature. Contact Coro Support for details.
This article describes how to configure Coro's Outbound Gateway for your email service. As part of Coro's User Data Governance module, an outbound gateway enables Coro to scan outgoing emails from your organization for exposure and sharing of monitored sensitive data in line with your configured data loss prevention policies.
Setting up an outbound gateway requires changes to an organization's own DNS and email infrastructure, as well as enabling the gateway inside your Coro workspace.
To learn more about Coro's User Data Governance module, see Introducing User Data Governance. To learn more about configuring the detection mode and sensitive data types, see Configuring data governance settings.
Coro's Outbound Gateway works with Microsoft 365 and Google Workspace email services only.
To set up the Coro Outbound Gateway to scan your outgoing emails, you must perform some configuration steps in your email and DNS services before you can configure your Coro workspace. You need to:
- Obtain all prerequisites.
- Configure DKIM to verify sent emails to recipient mail servers.
- Configure your email domain DNS settings to update the SPF record to include the Coro Outbound Gateway IP addresses.
- Configure your original mail provider to forward outgoing emails to the Coro Outbound Gateway.
- Configure your Coro workspace to set up the Outbound Gateway for your email domain.
Given the potential for service disruption during this process, Coro recommends scheduling these changes at a time of least impact.
Before you begin, make sure you have the following information:
- Coro’s Outbound Gateway host details. Contact Coro Support for details.
- Coro’s Outbound Gateway SPF domain for your workspace region:
- US:
_spf-us.coroep.com - EU:
_spf-eu.coroep.com - CA:
_spf-ca.coroep.com
- US:
- The identity of your email service provider.
- Your email domain.
Coro uses DomainKeys Identified Mail (DKIM) to add digital signatures to email messages to confirm the sender's identity and message validity to recipient mail servers.
DKIM requires sender organizations to configure their DNS records with a public key, enabling recipient mail servers to establish the validity of the message. This section describes how to configure DKIM email authentication in Gmail and Microsoft 365.
To configure DKIM for Gmail:
Sign in to Google Workspace Admin with your administrator credentials.
From the Admin console menu, select Apps > Google Workspace > Settings for Gmail > Authenticate email:
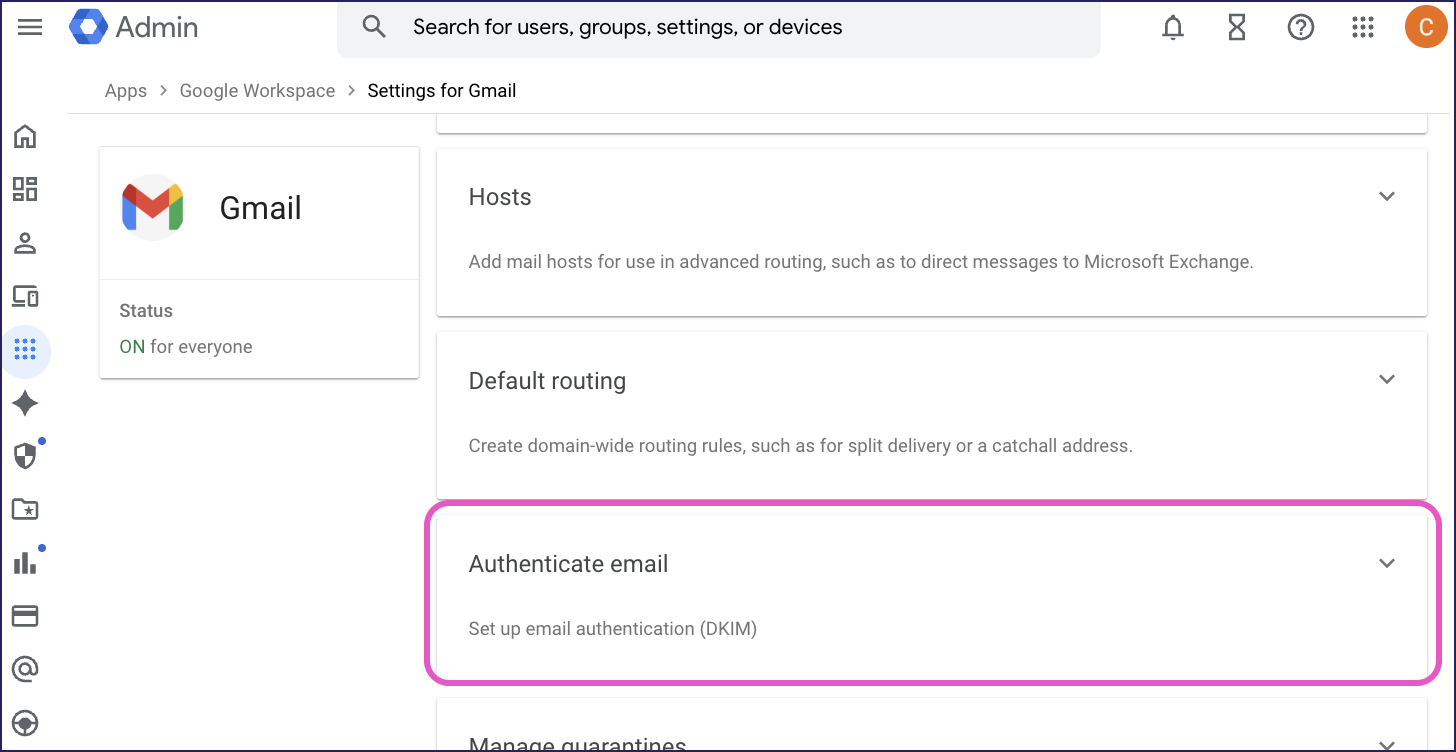
In Authenticate email, select your domain. Then select GENERATE NEW RECORD:
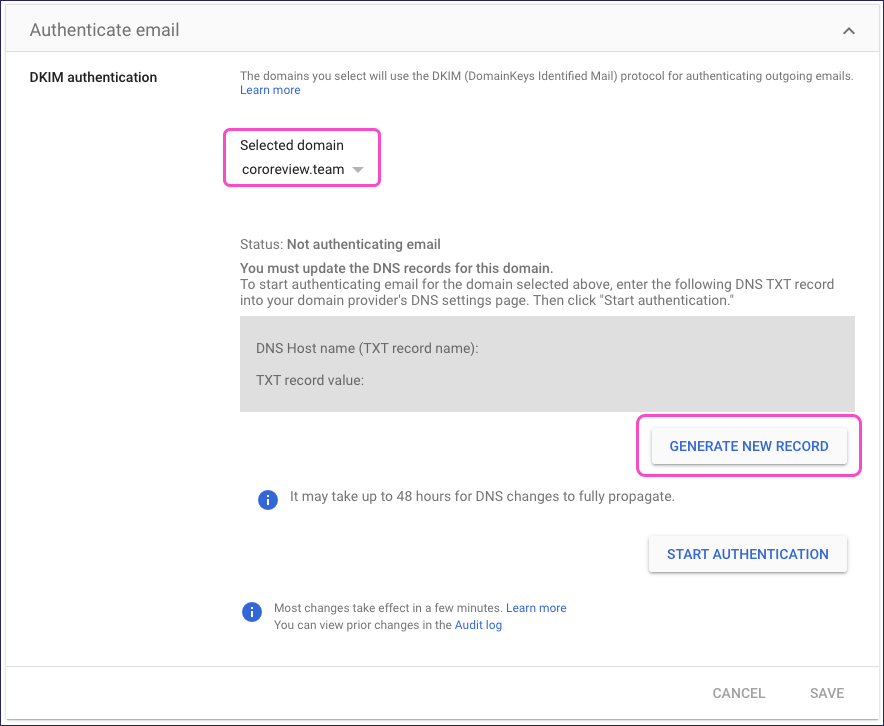
Google displays the Generate new record dialog:
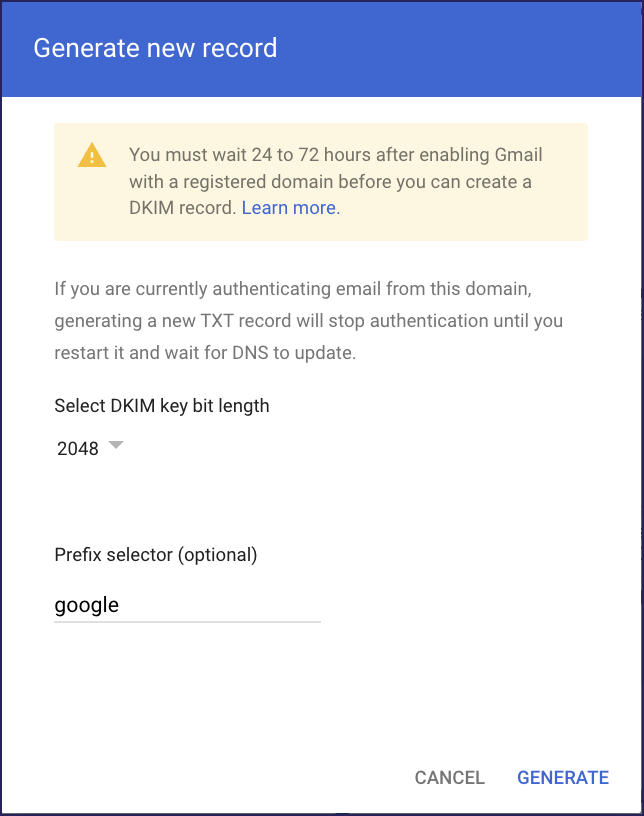
Enter the following values:
- DKIM key bit length: Coro recommends 2048 or higher.
- Prefix selector: (optional) Enter a prefix for the TXT record name, if required, or use the default value provided.
Select GENERATE.
Google returns to the Authenticate email screen, displaying the generated DKIM record details:
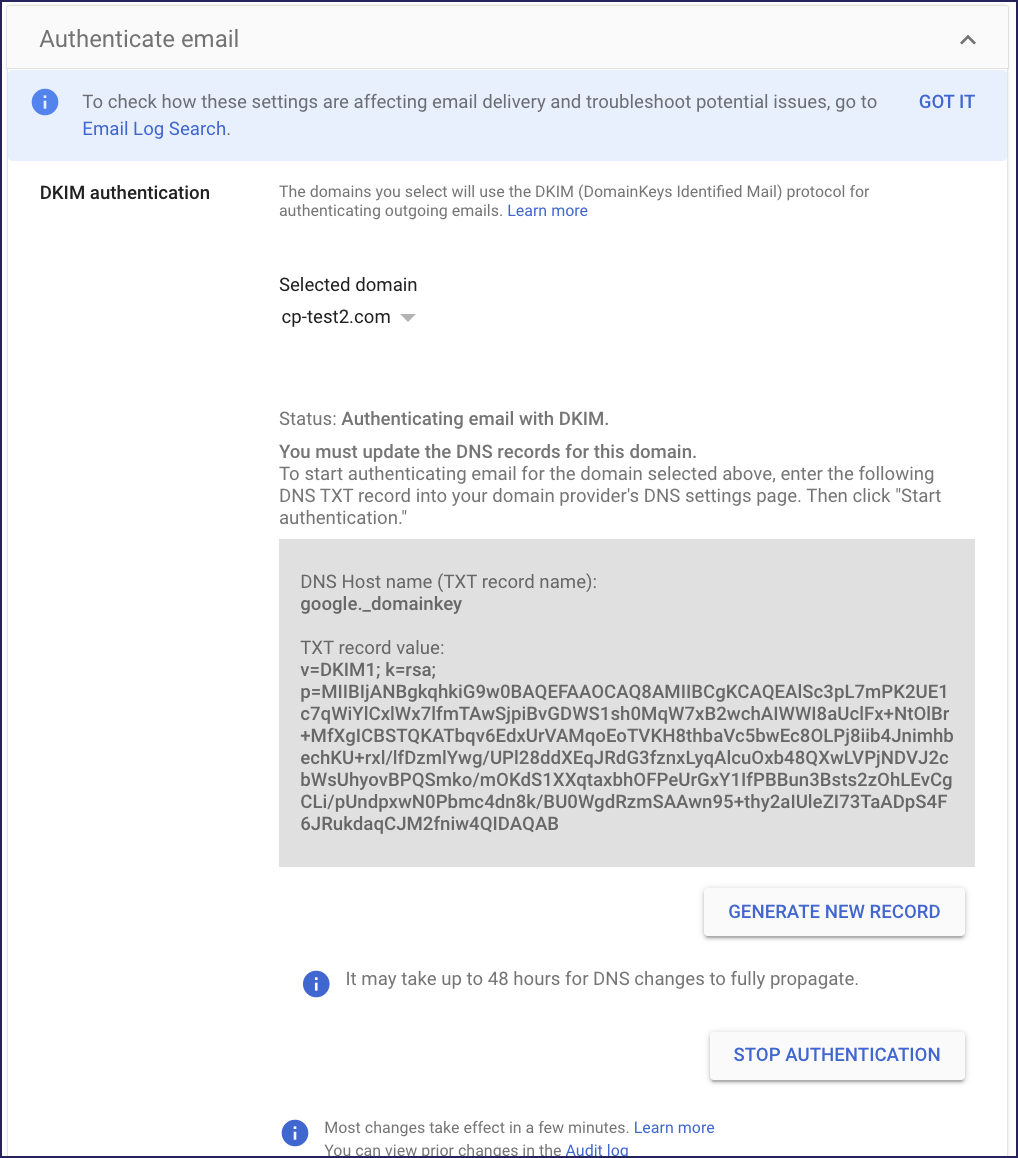
Make a note of the values shown for DNS Host name and TXT record value.
In a new browser window, sign in to your DNS provider's admin console.
Add a new TXT record to your DNS records containing the generated DKIM record:
- Host name: <DNS host name>
- Type: TXT
- TTL: Automatic, or use the default value
- Data: <Generated TXT record value>
For example:

Return to the Google Workspace admin console, and go to Apps > Google Workspace > Gmail > Authenticate email.
Select START AUTHENTICATION.
DNS record propagation can take up to an hour. After the DNS updates become visible, Google verifies the new record and enables DKIM for your domain.
To configure DKIM for Microsoft 365 (M365):
Sign in to Microsoft Defender with your administrator credentials.
Go to Email & collaboration > Policies & rules.
Defender displays the Policies & rules page:
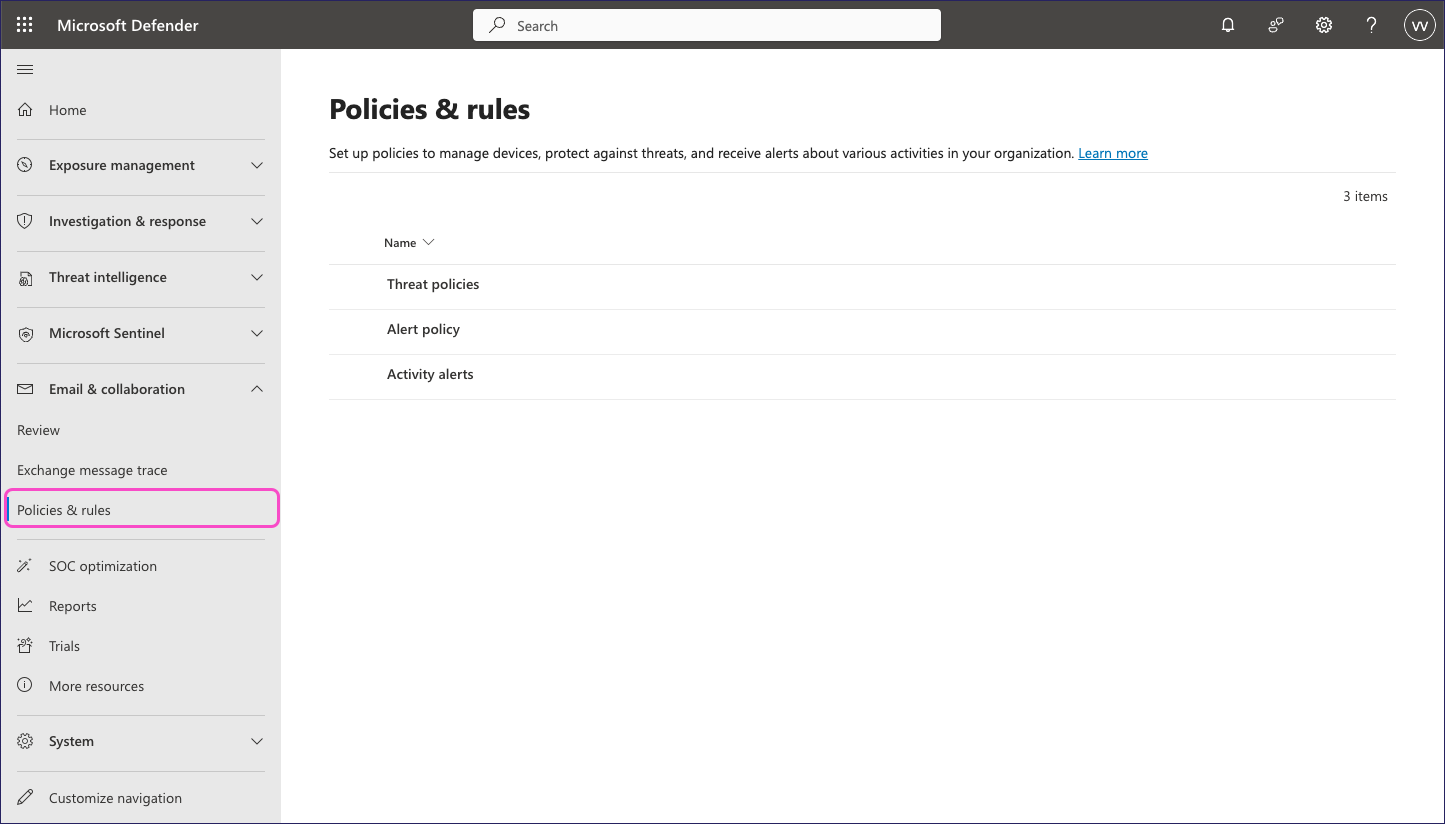
Select Threat policies.
Defender displays the Threat policies page:
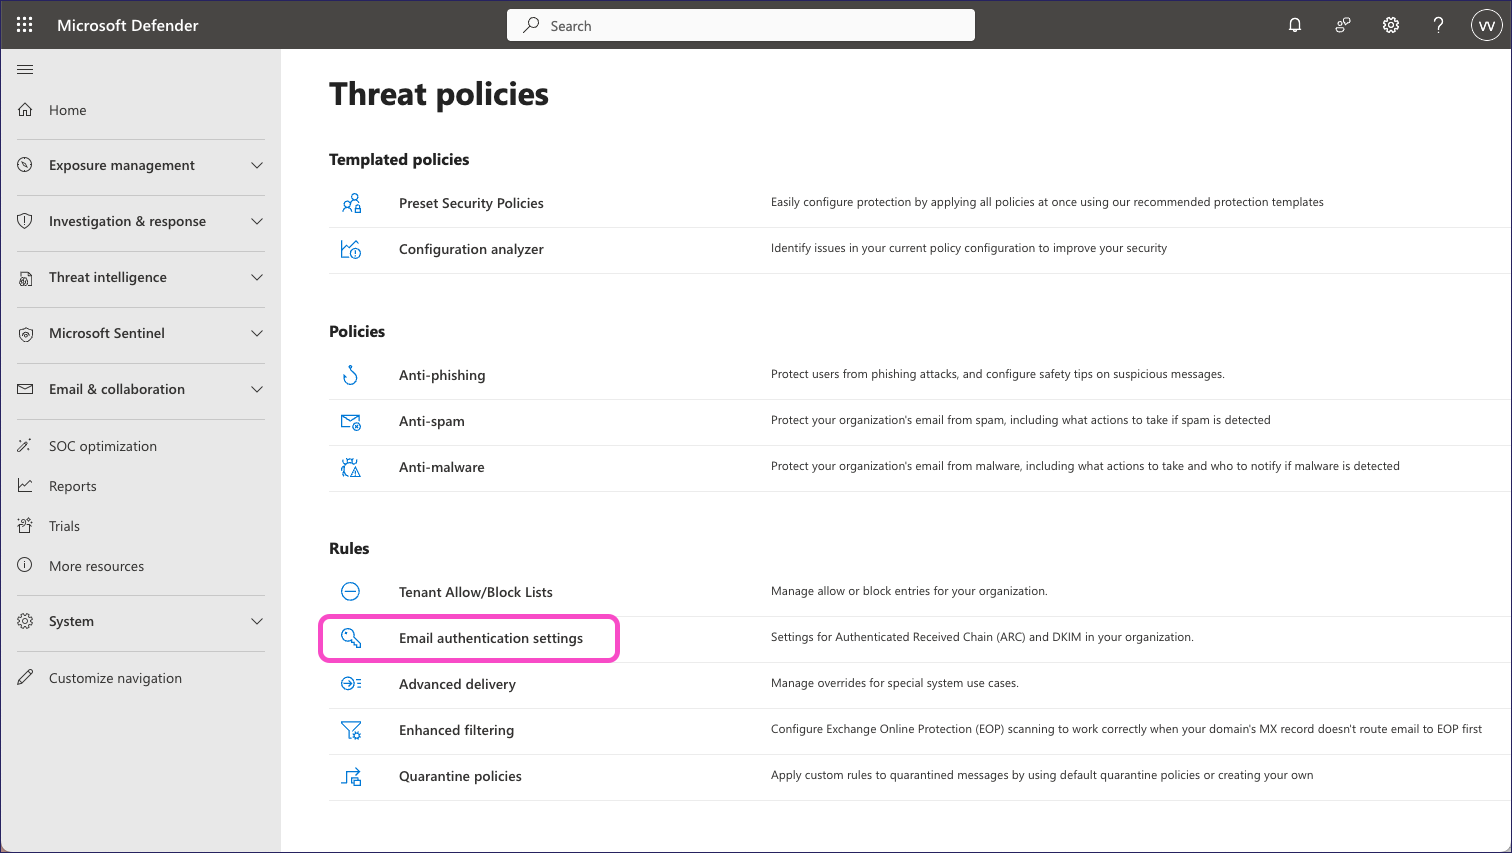
Select Email authentication settings, then select DKIM:
Defender displays the DomainKeys Identified Mail (DKIM) page:
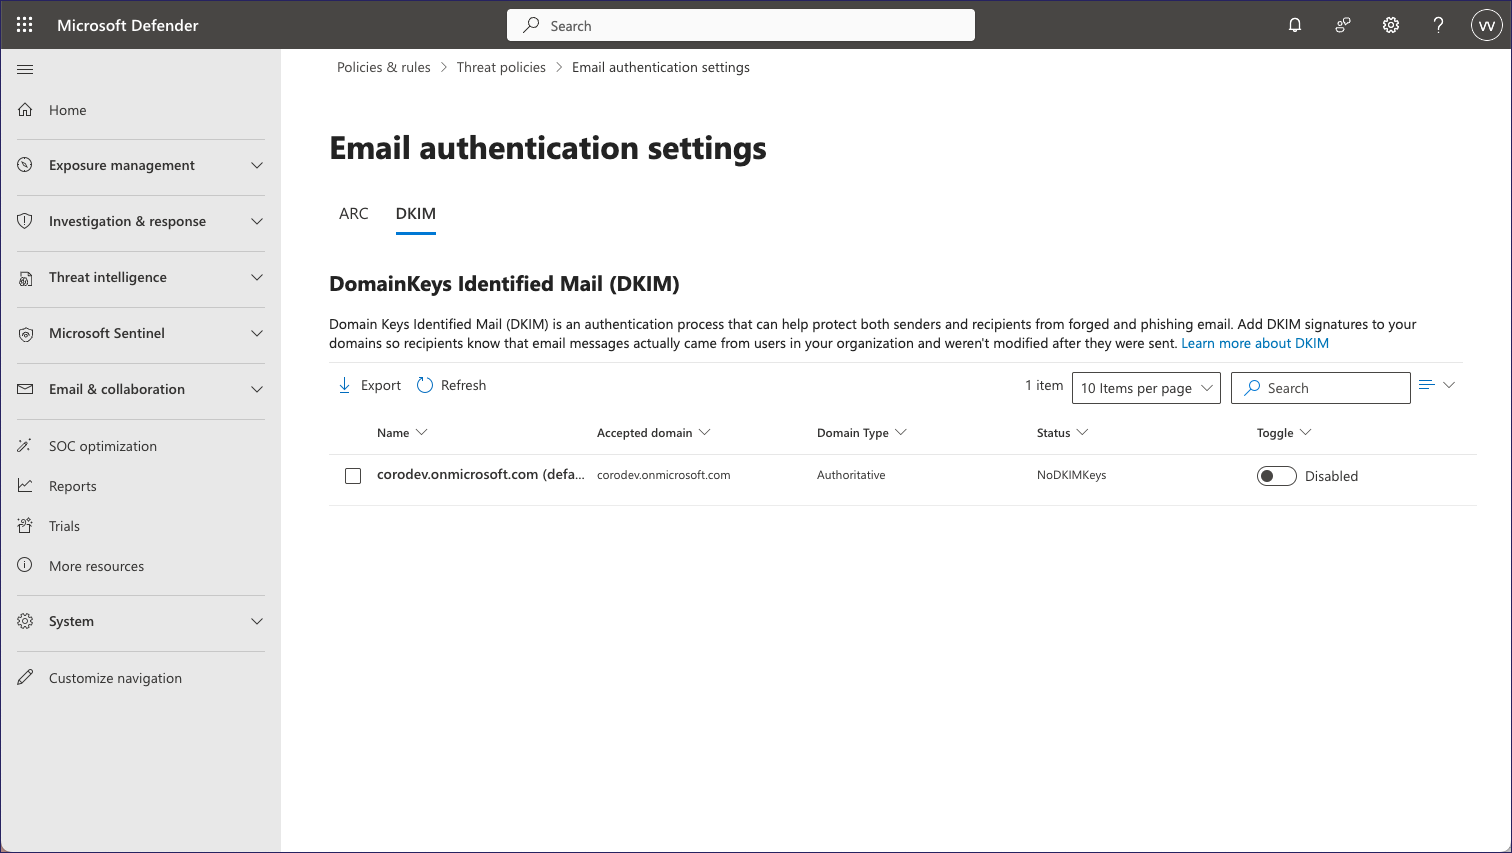
Select your domain and then, in the settings dialog, select Create DKIM keys:
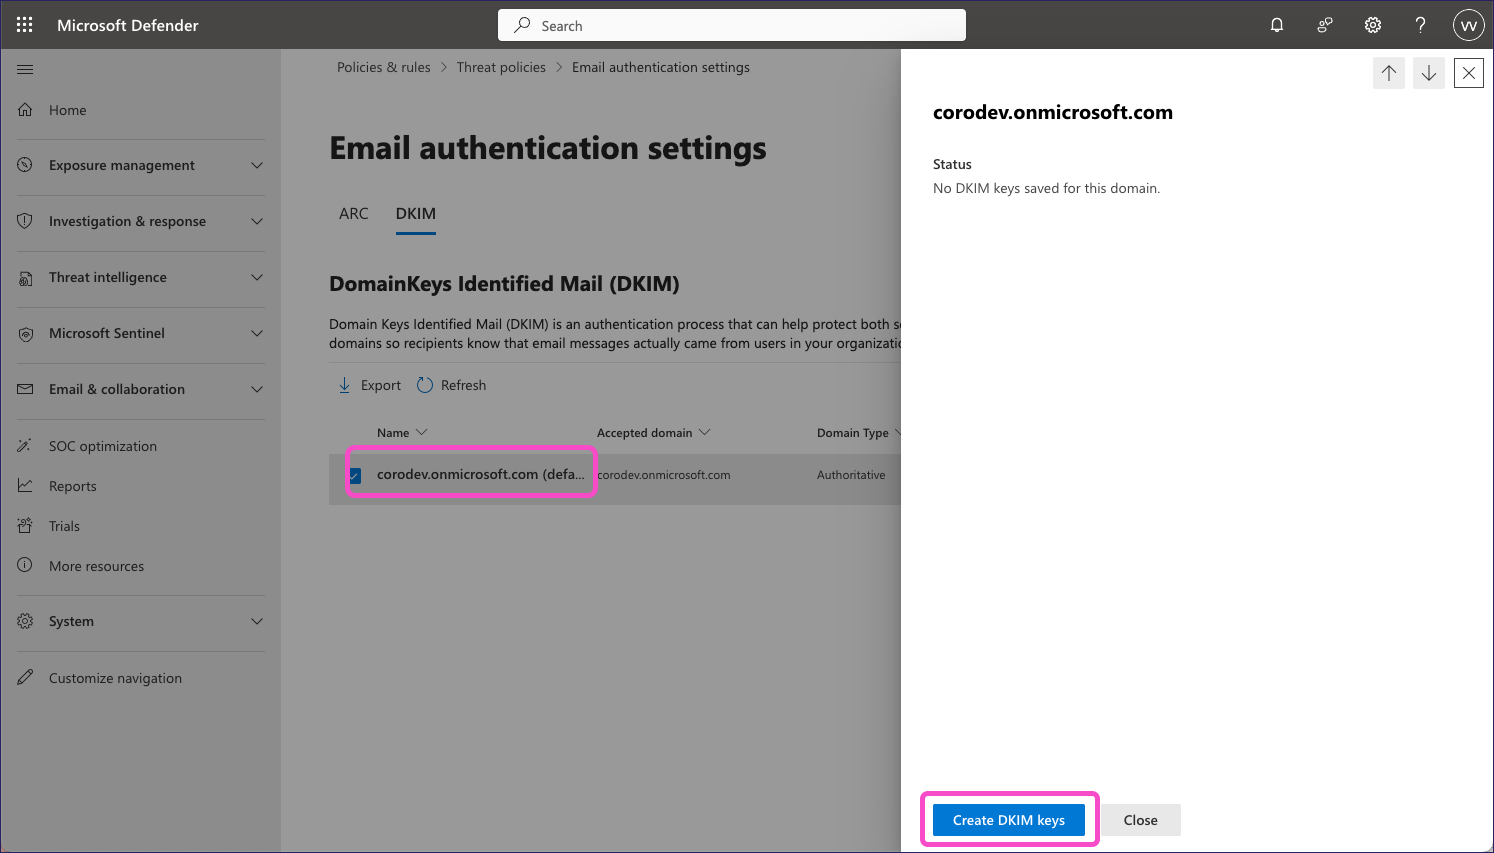
Defender displays a Publish CNAMEs dialog containing the generated DKIM keys:
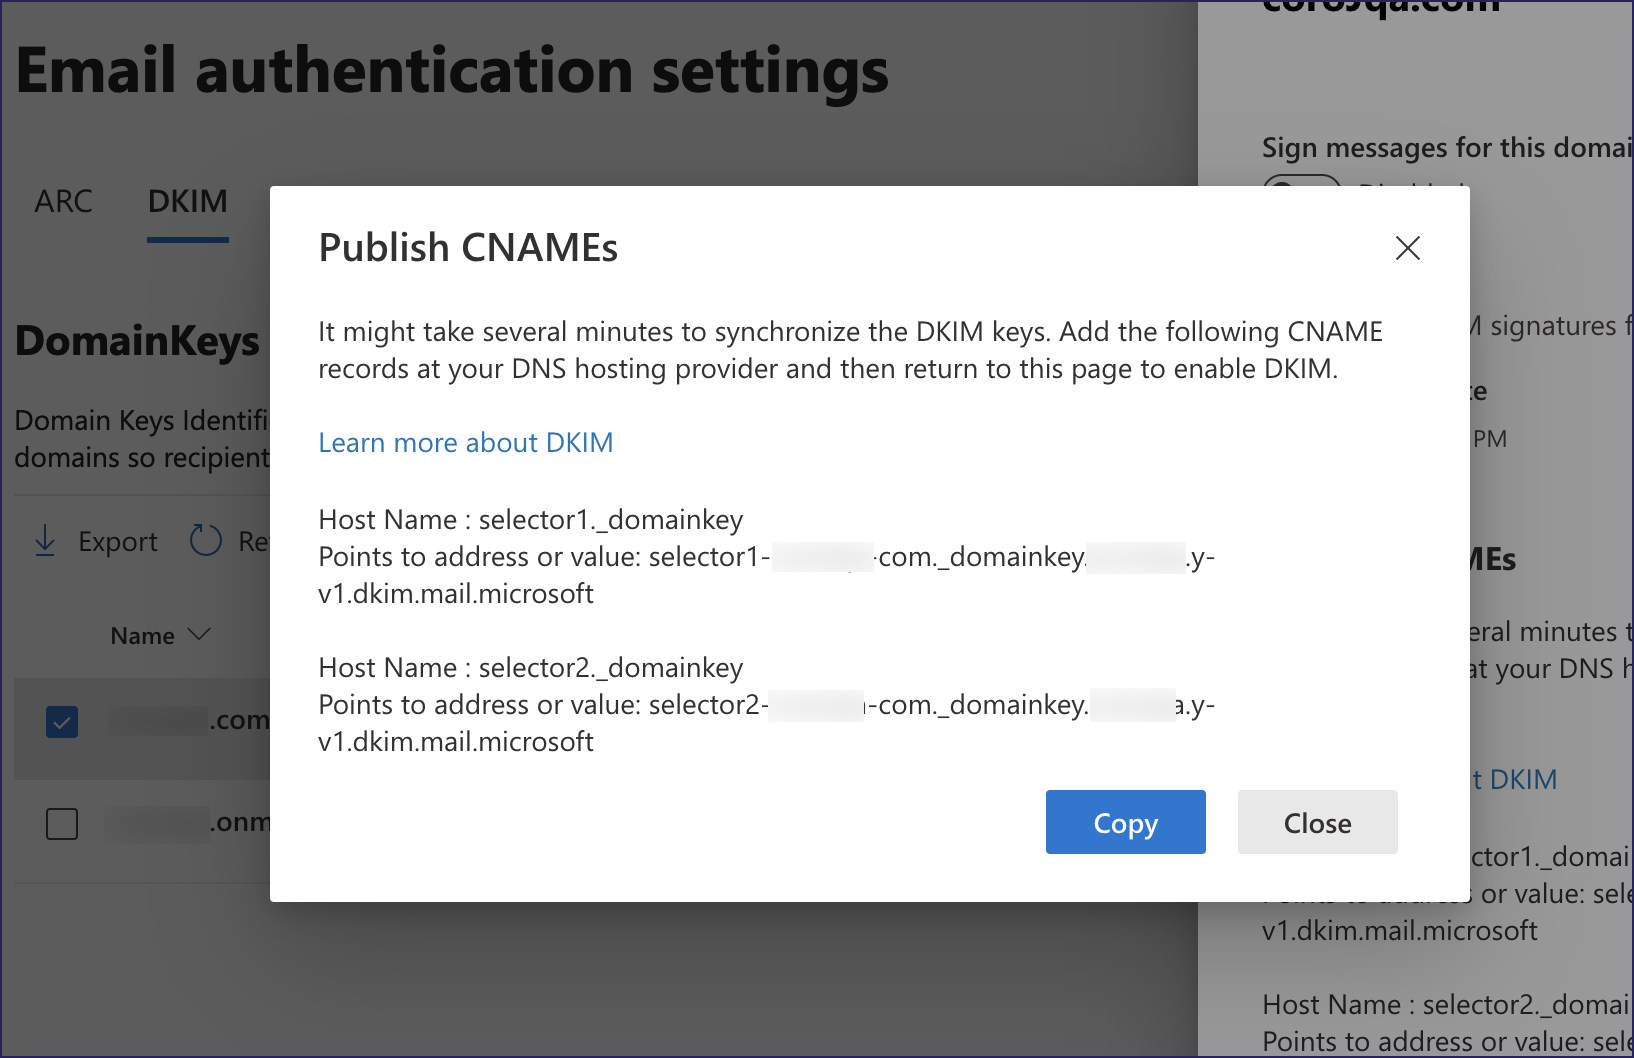
Select Copy to copy the DKIM keys to your clipboard. Or, make a note of the host names and corresponding key values.
In a new browser window, sign in to your DNS provider's admin console.
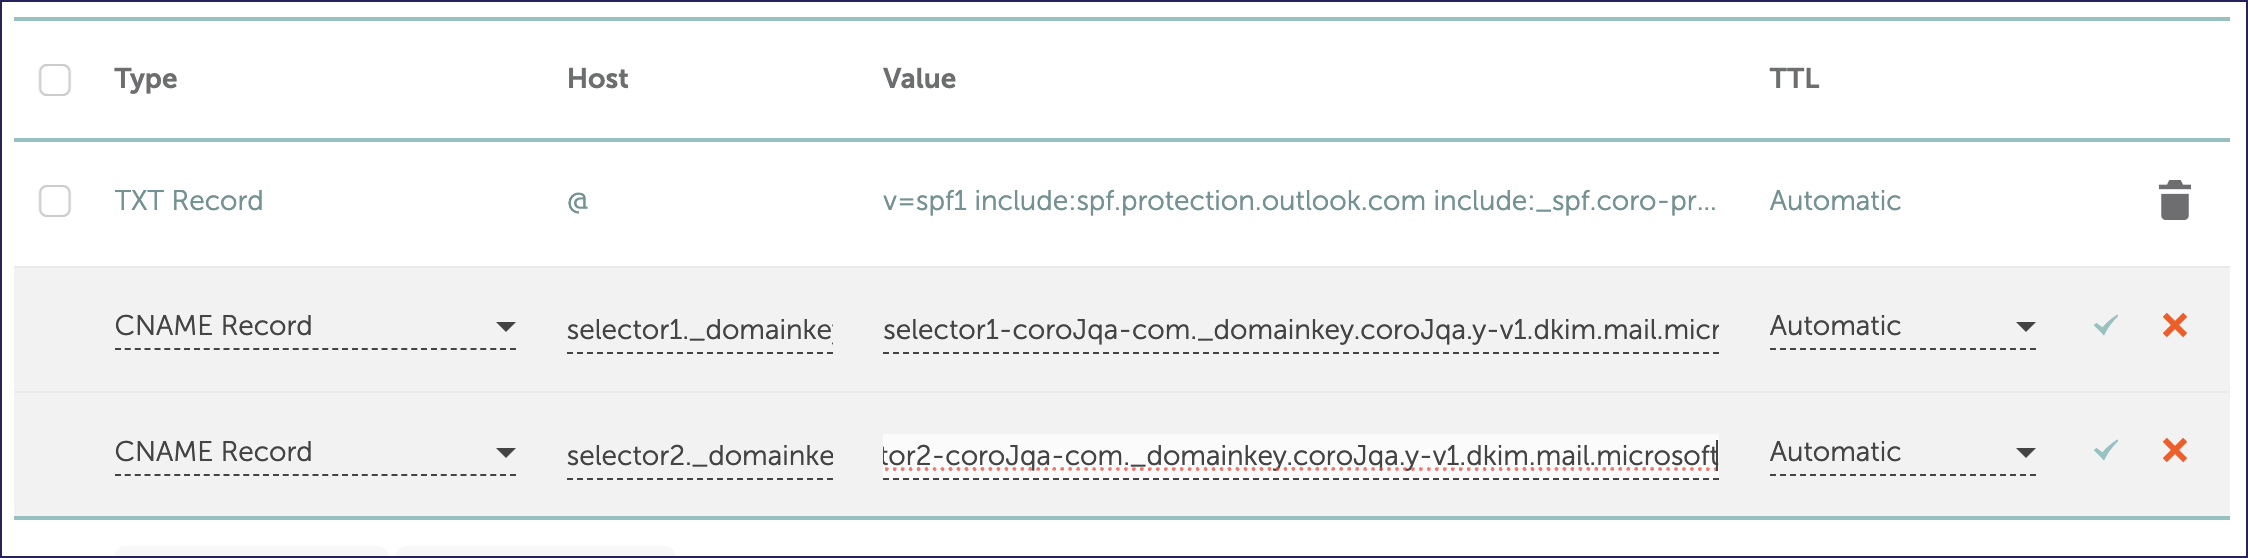
Add new CNAME records to your DNS records containing the generated DKIM keys:
- Host name: <host name>
- Type: CNAME record
- TTL: Automatic, or use the default value
- Data: <DKIM key value>
For example:
DNS record propagation can take up to 48 hours. Confirm that your changes have taken effect before proceeding.
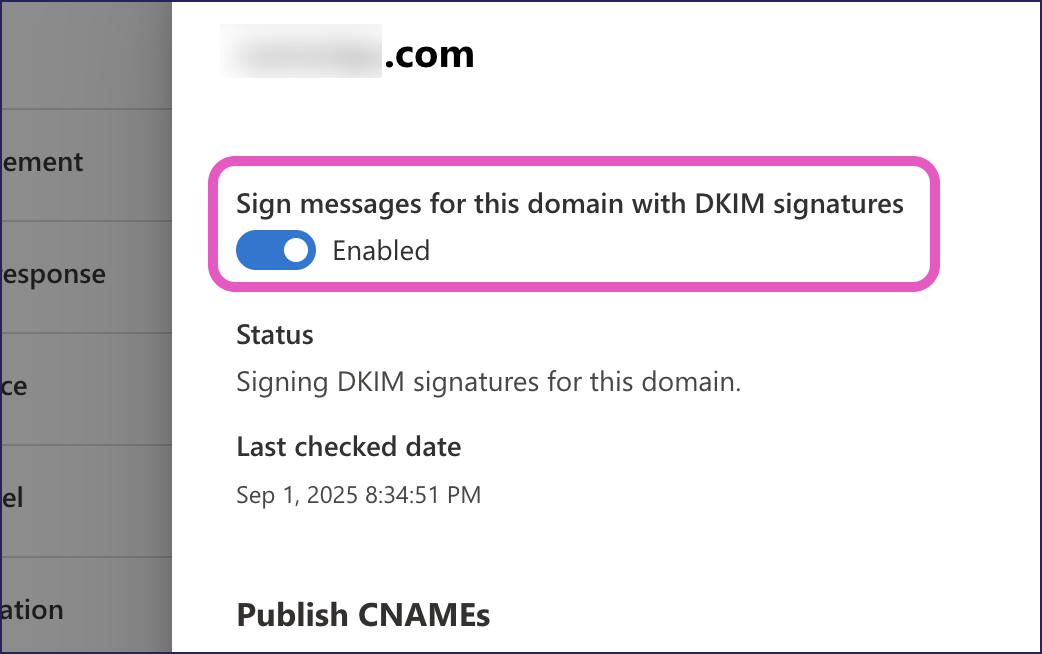
Return to the Microsoft Defender admin console, and go to Email & collaboration > Policies & rules > Threat policies > Email authentication settings > DKIM.
Select your domain and then, in the settings dialog, enable Sign messages for this domain with DKIM signatures:
Defender displays a security notice concerning a short time delay for change synchronization.
Select OK to acknowledge and dismiss the notice.
To ensure your email service does not treat messages received from Coro's Outbound Gateway as spam, add the gateway domain to the SPF record in the DNS configuration for your email domain.
This section provides a general example of the configuration you need to add in your domain provider's management console, as well as a specific guide for Google Domains Service.
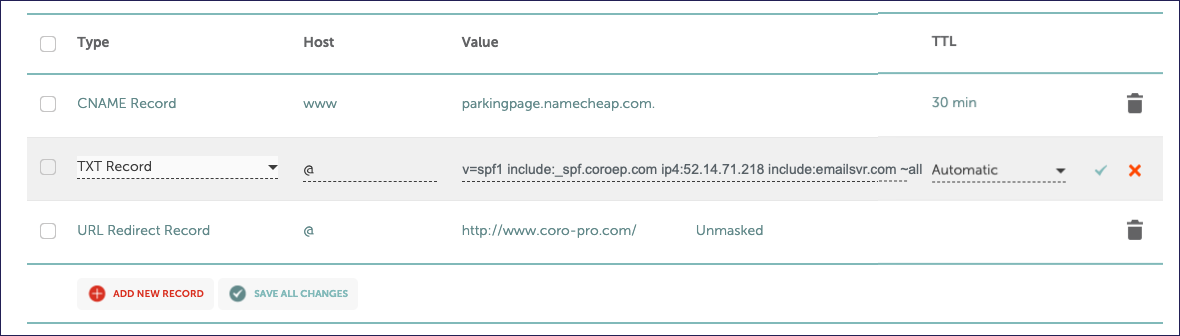
Add Coro's Outbound Gateway SPF domain together with the original IP address, if originally included, and SMTP server of your mail provider as a TXT record in your DNS configuration, using the format:
v=spf1 include:_spf-us.coroep.com ip4:52.14.71.218 include:emailsvr.com ~all
In this example, 52.14.71.218 and emailsvr.com are the original IP address and SMTP server for your email service. Substitute _spf-us.coroep.com with the SPF domain for your workspace region, as applicable (see Prerequisites).
To configure your DNS, add or update the relevant record with this content. For example:
To configure SPF records in Google Domains Service (for organizations that registered their domains using Google DNS):
Sign in to Google Domains Service (https://domains.google.com/) with your administrator credentials.
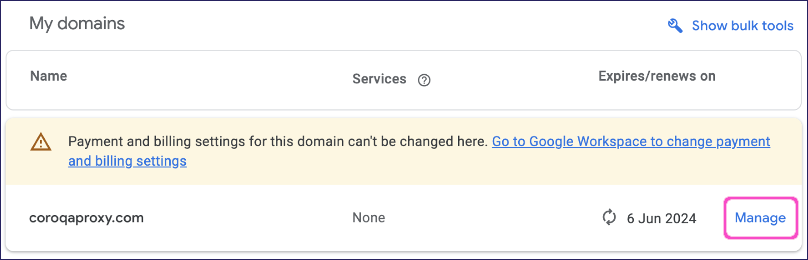
Select your domain, then select Manage:
Select DNS.
(Recommended) Back up the current DNS settings as a precaution by selecting Export DNS records.
Select Manage Custom Records > Create new Record, or change an existing record if one was already added.
Configure the following settings:
Type: Select TXT.
TTL: Enter 3600.
Data: Add Coro's Outbound Gateway SPF domain together with Google's SPF domain, using the format:
v=spf1 include:_spf-us.coroep.com include:_spf.google.com ~all
Substitute
_spf-us.coroep.comwith the SPF domain for your workspace region, as applicable (see Prerequisites).
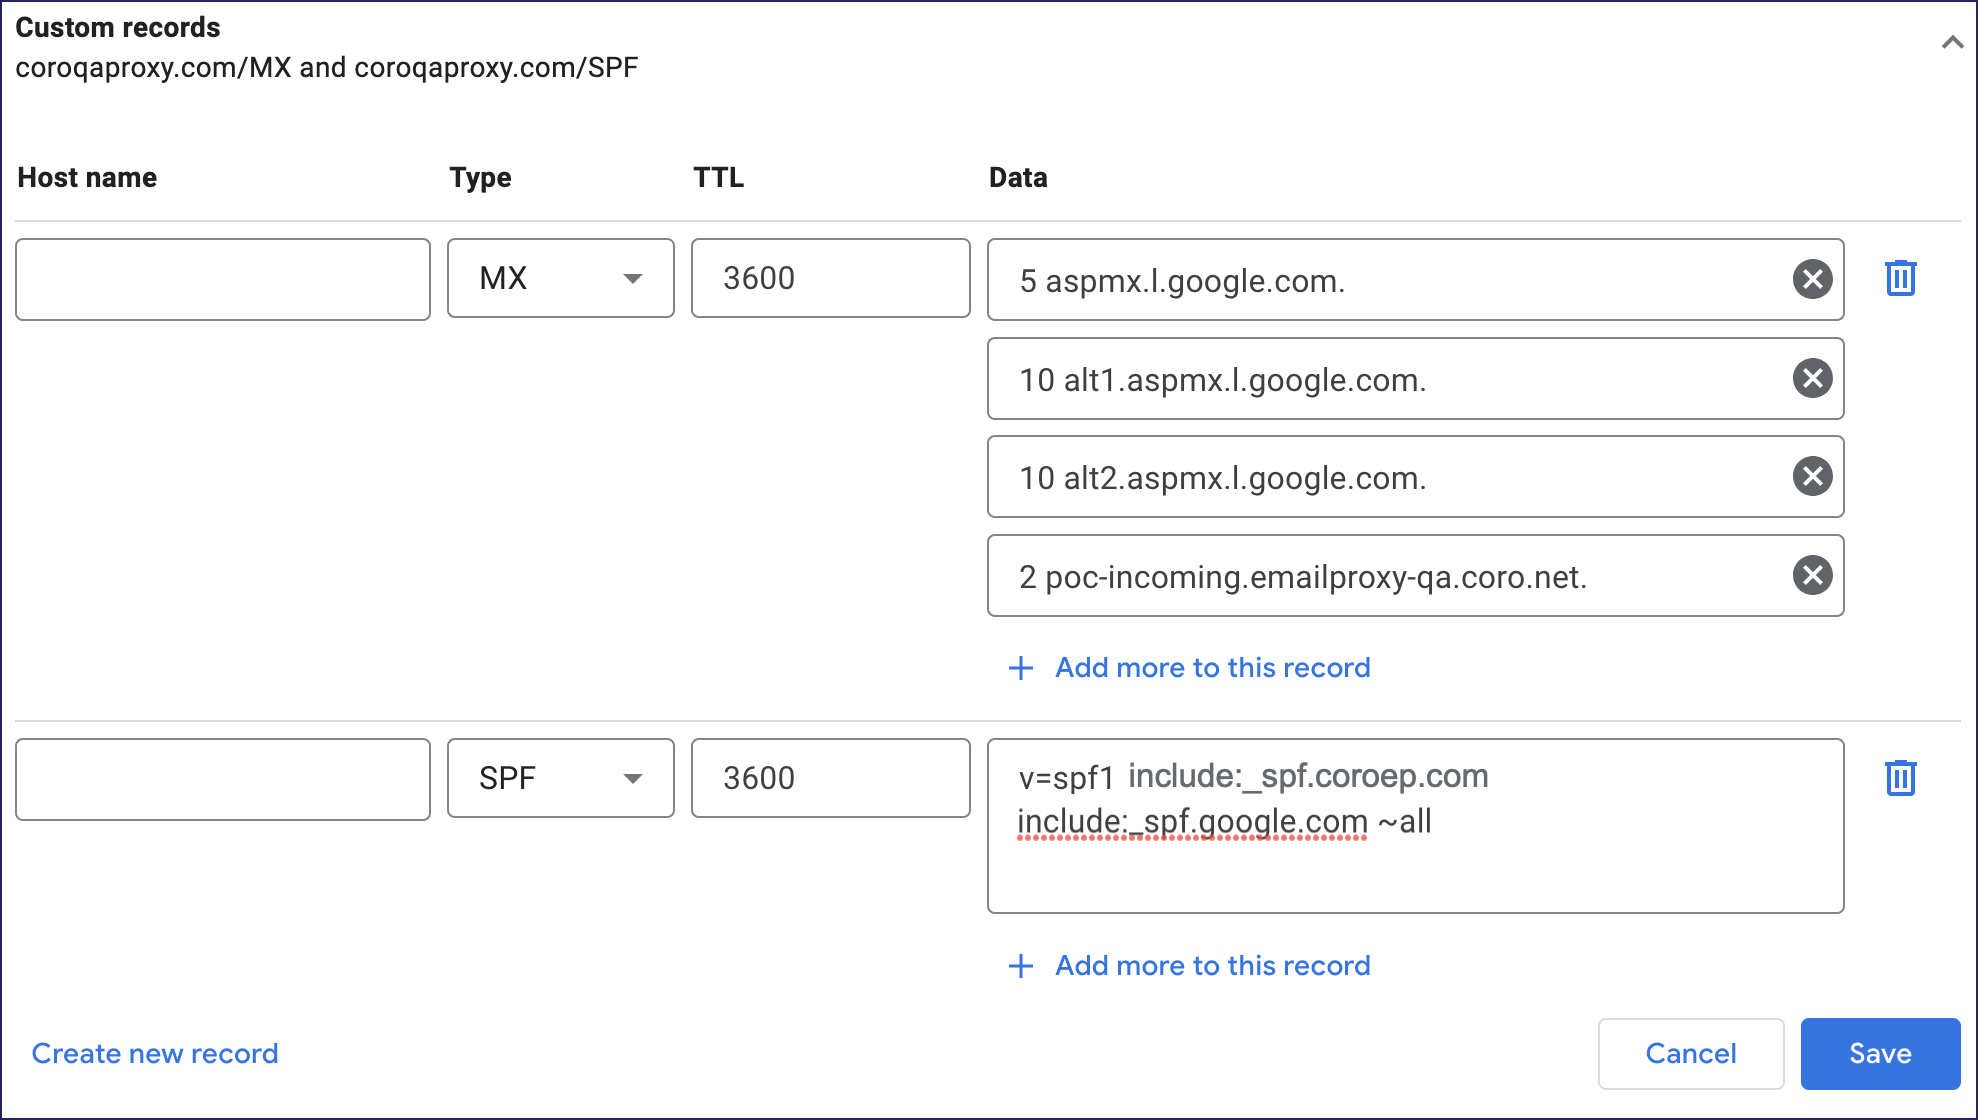
Select Save.
(Optional) If Google requests confirmation of overwriting an existing configuration, select Yes.
Coro's Outbound Gateway operates with the following email providers:
If you stop using the Outbound Gateway, make sure to revert the changes that you make in this section. Failure to do this might impact delivery of outgoing email.
To configure Gmail to work with Coro's Outbound Gateway, perform the following two-part procedure:
Sign in to Google Workspace Admin with your administrator credentials.
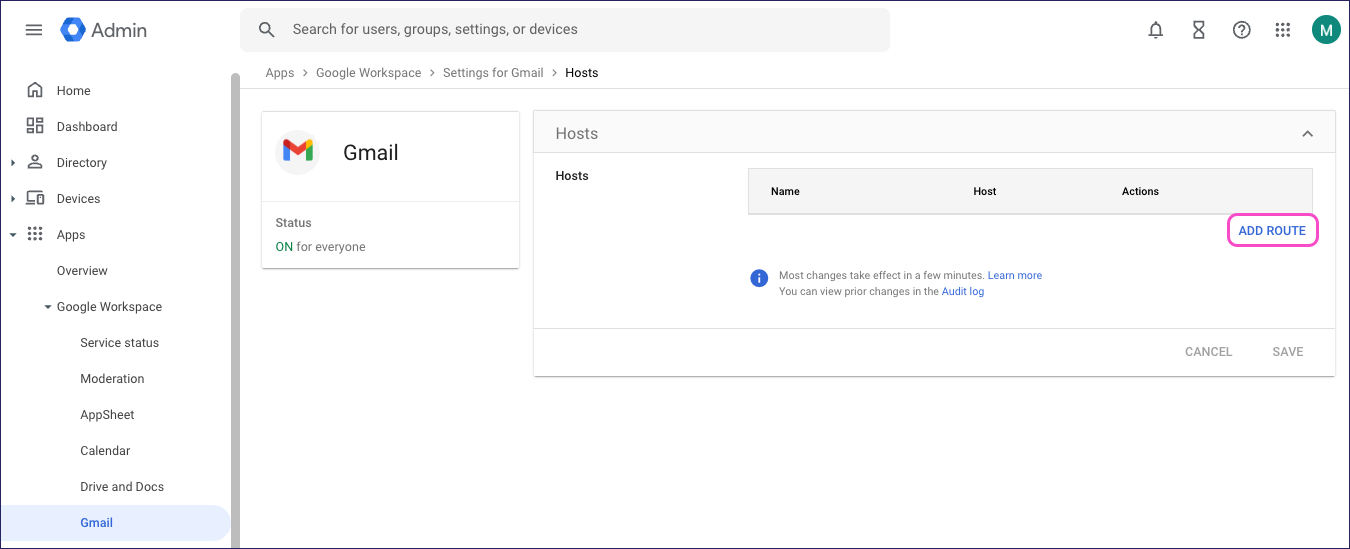
From the Admin console menu, select Apps > Google Workspace > Gmail > Hosts.
Select Add Route:
Gmail displays the Add mail route dialog.
Enter the following details:
- Name: Enter a route name for the Outbound Gateway.
- Specify email server: If Coro Support supplies one hostname or IP address for the Outbound Gateway in your circumstances, select Single host. If you recieve multiple hostnames or IP addresses, select Multiple hosts.
- Enter host name or IP: Enter the specified Outbound Gateway hostname or IP address. Specify port 25 for all entries (unless instructed otherwise by Coro Support).
- Options: Disable all checkboxes.

Select SAVE.
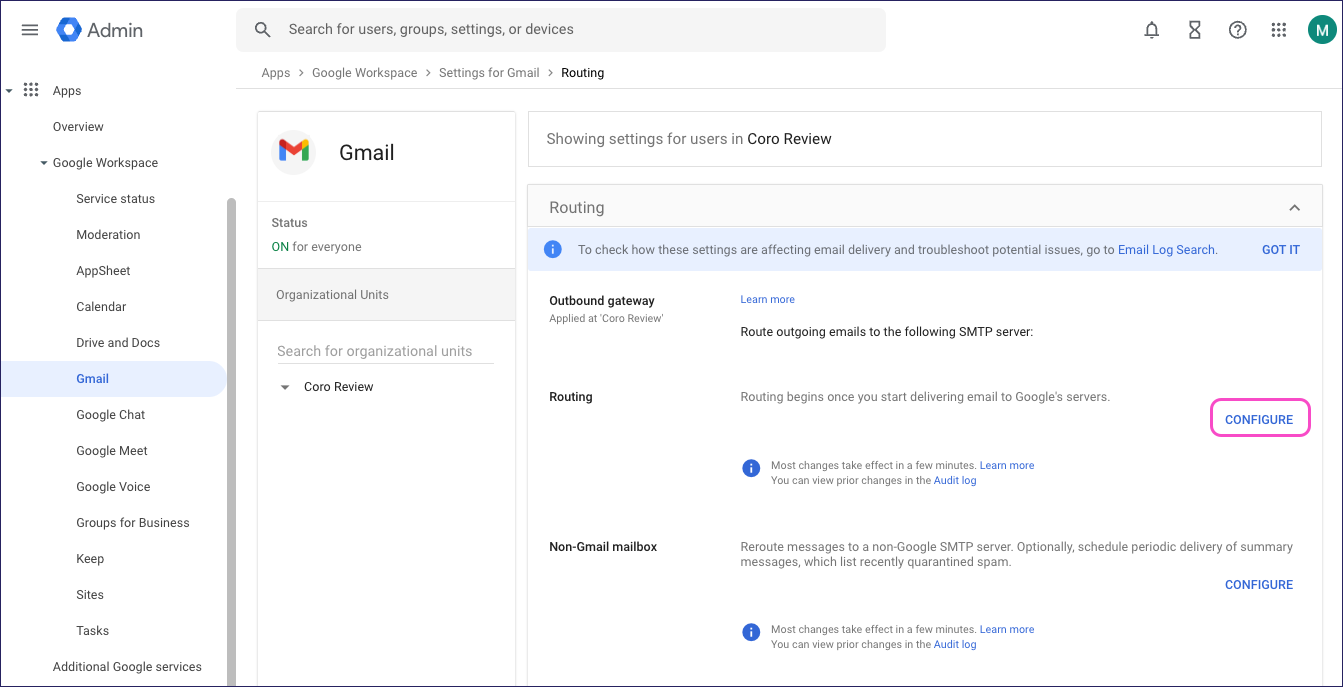
From the Admin console menu, select Apps > Google Workspace > Gmail > Routing.
In the left pane, select your top-level organization.
Locate Routing and select CONFIGURE (or ADD ANOTHER ROUTE if you have existing routing in place):
Gmail displays the Add setting dialog.
Enter the following details:
- Routing: Enter a name or description for the routing setting.
- Email messages to affect: Select Outbound and Internal - Sending.
- For the above types of messages, do the following: Select Modify message.
- Route: Select Change route.
- Normal Routing: Select the Outbound Gateway route you created in Part 1.
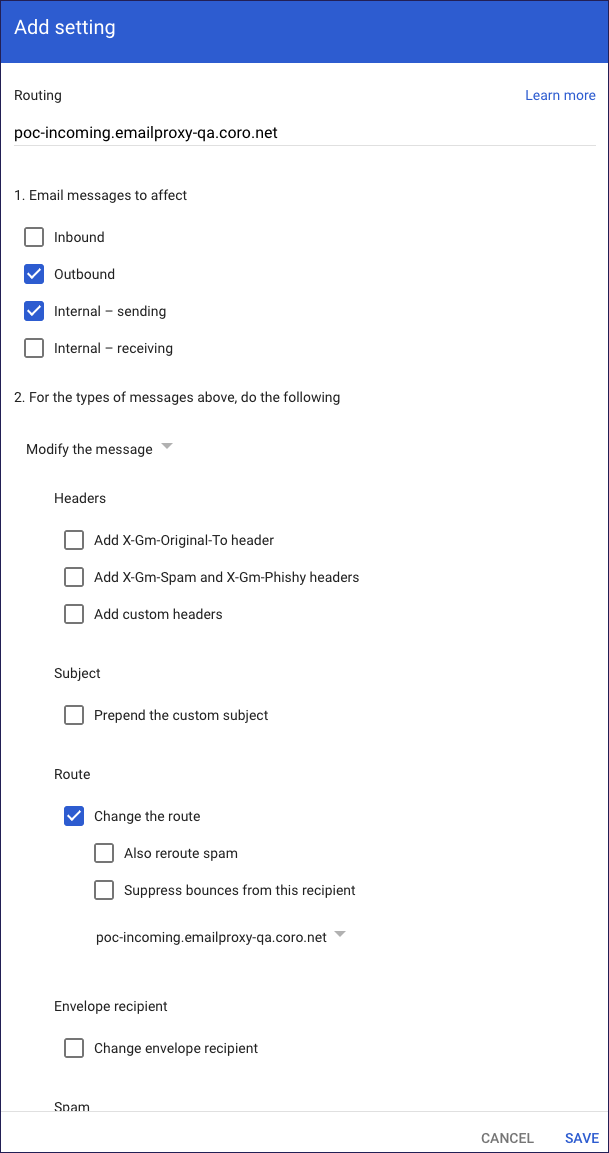
Select SAVE.
To configure Microsoft 365 (M365) to work with Coro's Outbound Gateway, perform the following two-part procedure:
Create an email flow connector for Coro in Microsoft Exchange admin center:
Sign in to Microsoft Exchange admin center with your administrator credentials.
Go to Mail flow > Connectors.
In the Connectors page, select + Add a connector:
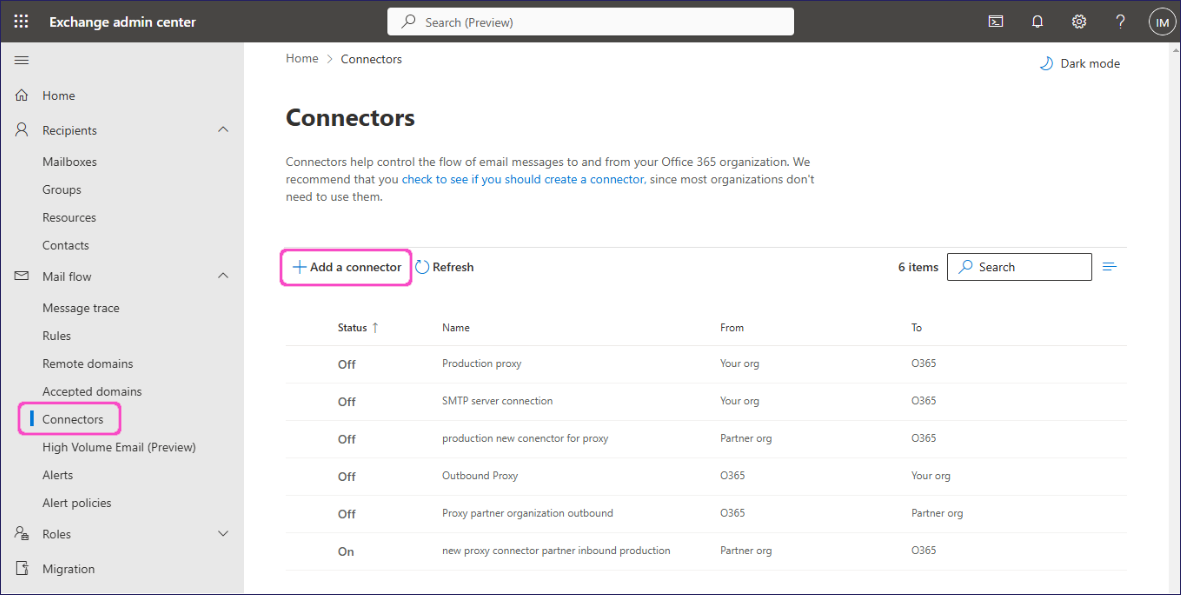
Exchange admin center displays the Add a connector dialog, starting at the New connector step.
Select the following options:
- Connection from: Select Office 365.
- Connection to: Select Partner organization.
Select Next to continue.
In the Name step: Add a name (and optional description) describing the outbound mail connection.
Select Next to continue.
In the Use of connector step, select Only when i have a transport rule set up that redirects messages to this connector.
Select Next to continue.
In the Routing step, select Route email through these smart hosts, then enter the hostnames or IP addresses of the Outbound Gateway provided to you by Coro Support.
Select Next to continue.
In the Security restrictions step, make sure Always use Transport Layer Security (TLS) to secure the connection is enabled, then select Any digital certificate, including self-signed certificates.
Select Next to continue.
In the Validation email step, enter a valid email address in your domain to test the connector. Then, select Validate.
Exchange admin center tests the connector, showing a Validation failed warning for the email send test:
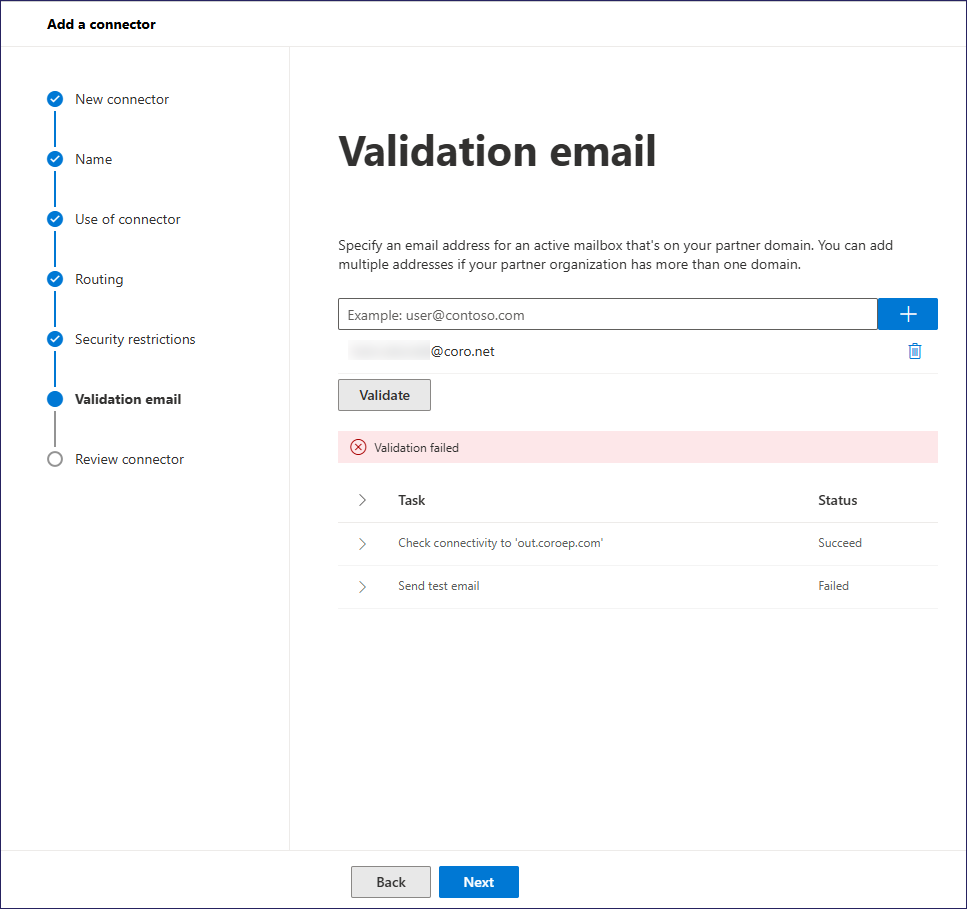 Important
This is an expected failure since Coro is not yet fully configured. It is safe to ignore.
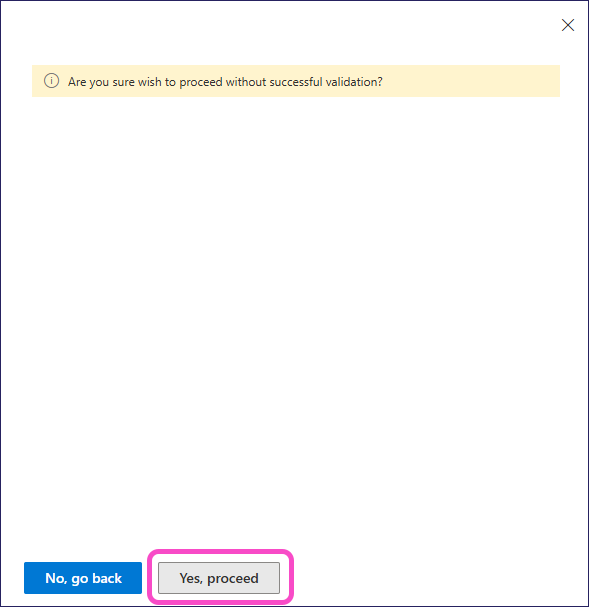
Select Next. Then, when Exchange prompts you to confirm that you want to proceed despite the validation failure, select Yes, proceed:
Use the Review connector step to confirm your connector settings:
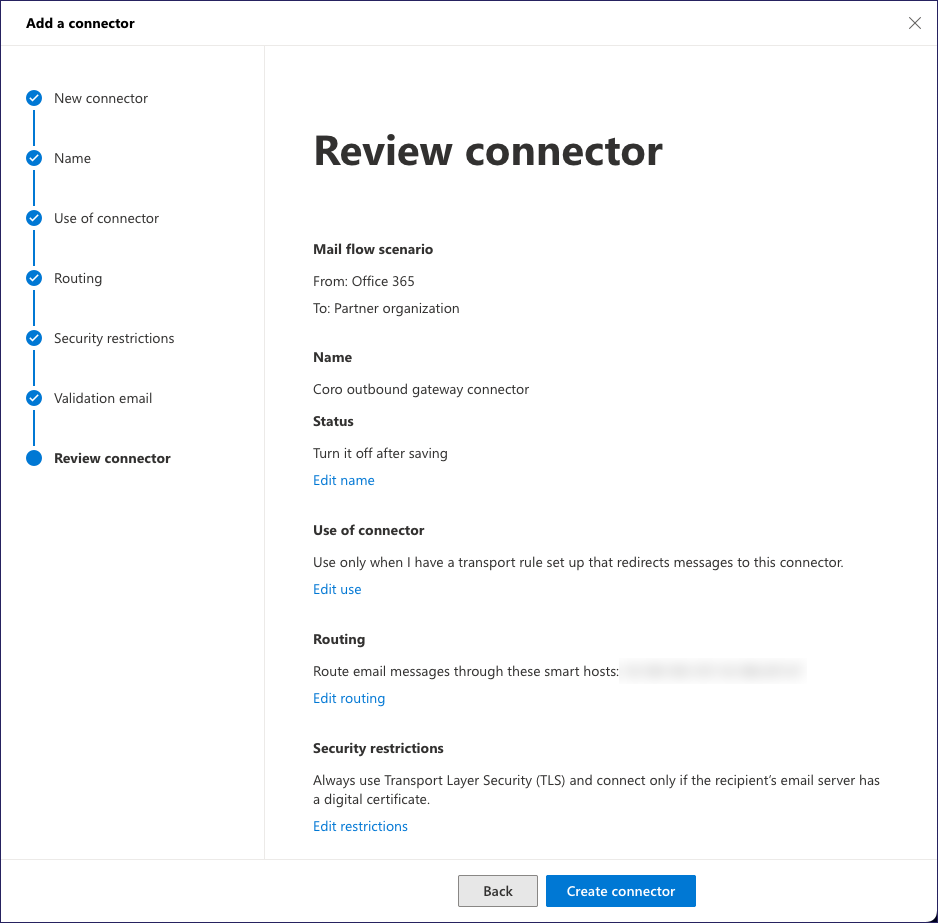
Select Create connector.
M365 creates your new connector based on the settings you provided.
Make sure the new connector has a Status of On before proceeding to part 2.
Add rules for the new mail flow connector in Microsoft Exchange admin center:
Sign in to Microsoft Exchange admin center with your administrator credentials.
Go to Mail flow > Rules.
Select Add a rule:
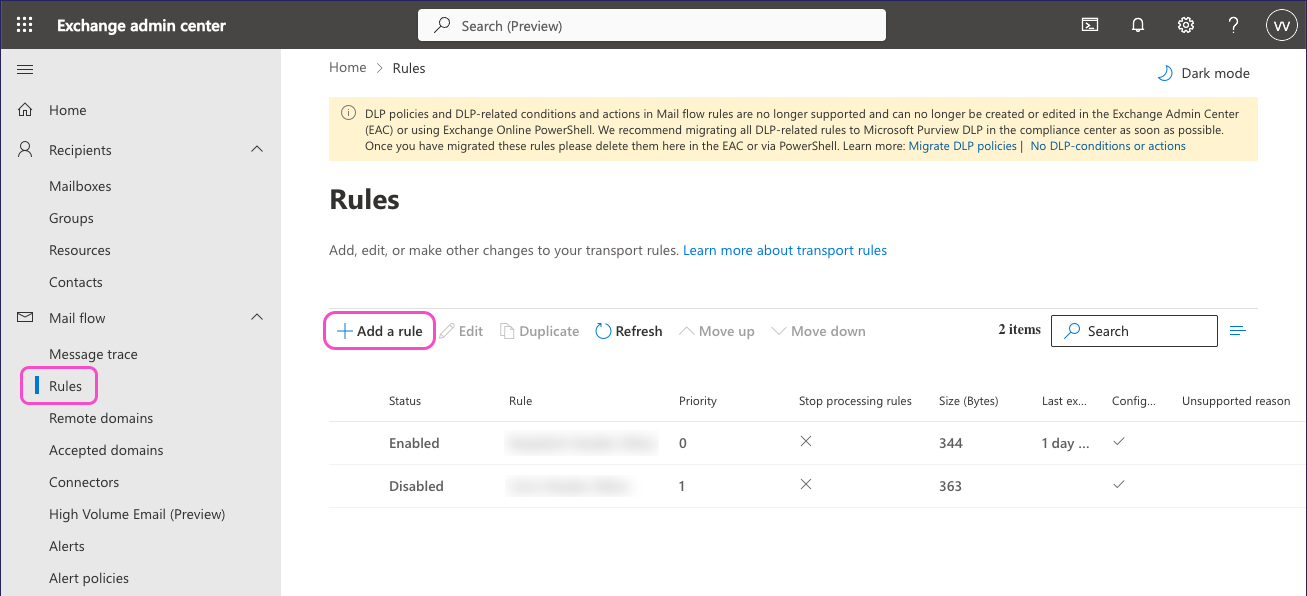
From the dropdown, select Create a new rule.
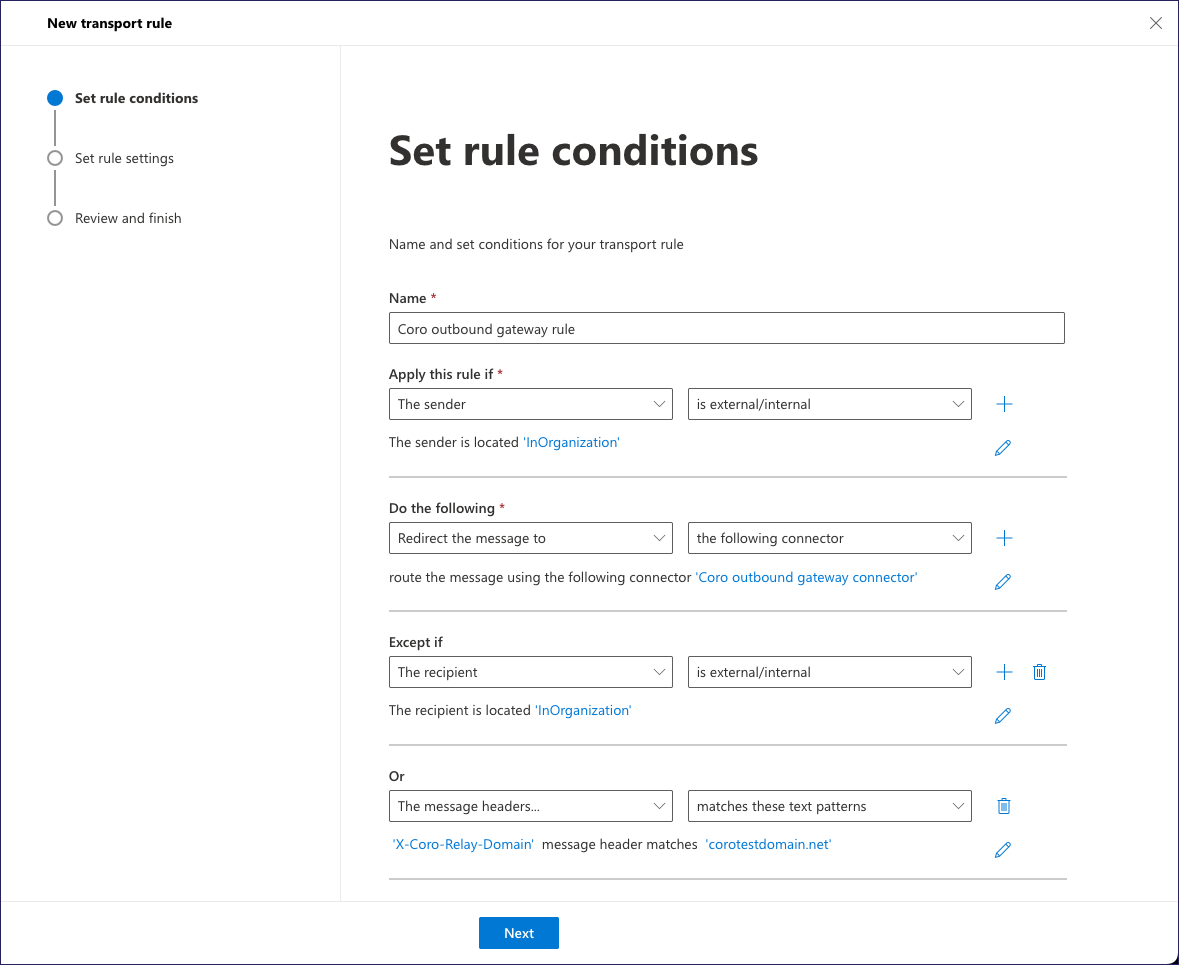
In the Set rule conditions step, enter the following details:
- Name: Add a descriptive name for your rule.
- Apply this rule if: Select The sender and is external/internal.
- In the select sender location dialog, select Inside the organization. Select Save to continue.
- Do the following: Select Redirect the message to and the following connector.
- In the select connector dialog, select the connector you created in Part 1. Select Save to continue.
- Except if: Select The recipient and is external/internal.
- In the select recipient location dialog, select Inside the organization. Select Save to continue.
- Select + to add an additional exception.
- In the second exception, under Or, select The message headers... and matches these text patterns.
- Select Enter text then, in the specify header name dialog, enter
X-Coro-Relay-Domain. Select Save to continue. - Select Enter words then, in the specify words or phrases dialog, enter your email domain. Select Save to continue.
Select Next to continue.
In the Set rule settings step, enter the following settings:
- Rule mode: Select Enforce.
- Severity: Select Not specified.
- Leave all checkboxes disabled.
- Match sender address in message: Select Header.
- Comments: (Optional) Add any further information you need.
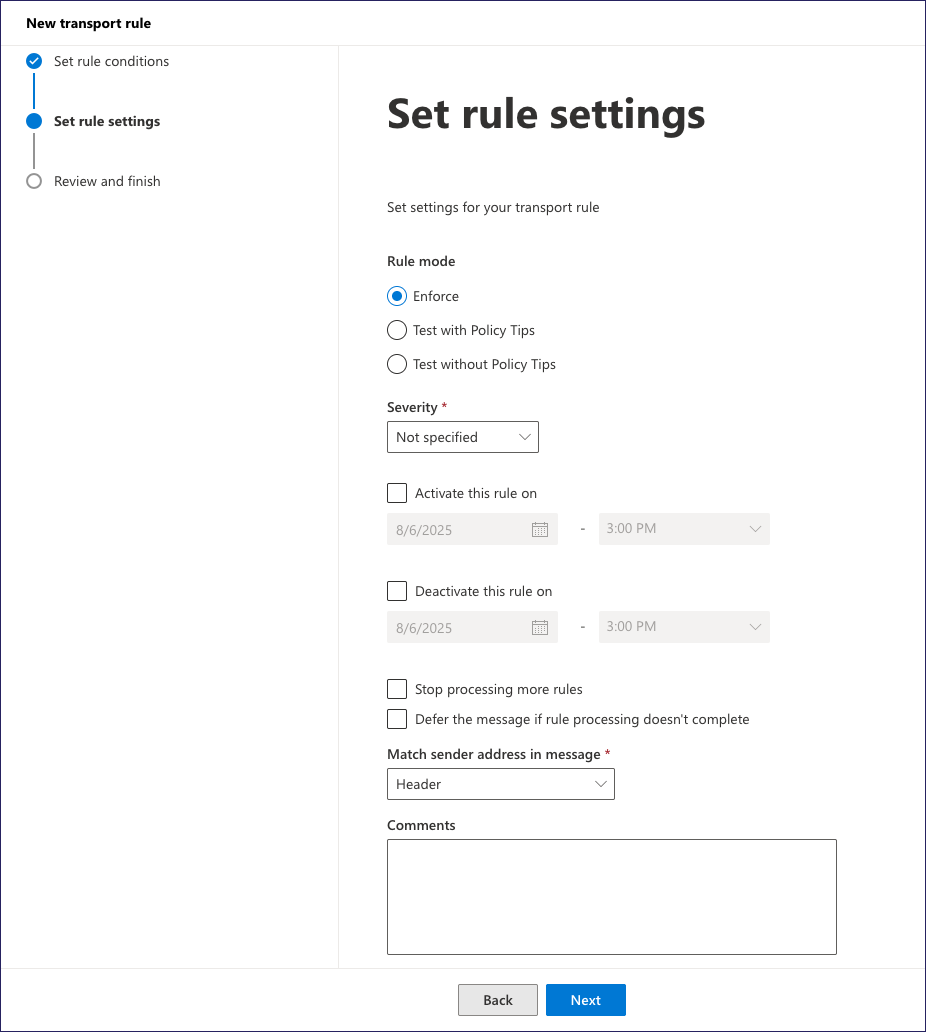
Select Next to continue.
In the Review and finish step, review your settings.
Select Finish.
Exchange creates your new rule based on the settings you provided.
Locate your new rule and select it.
Exchange shows a dialog of your rule configuration.
Enable the rule:
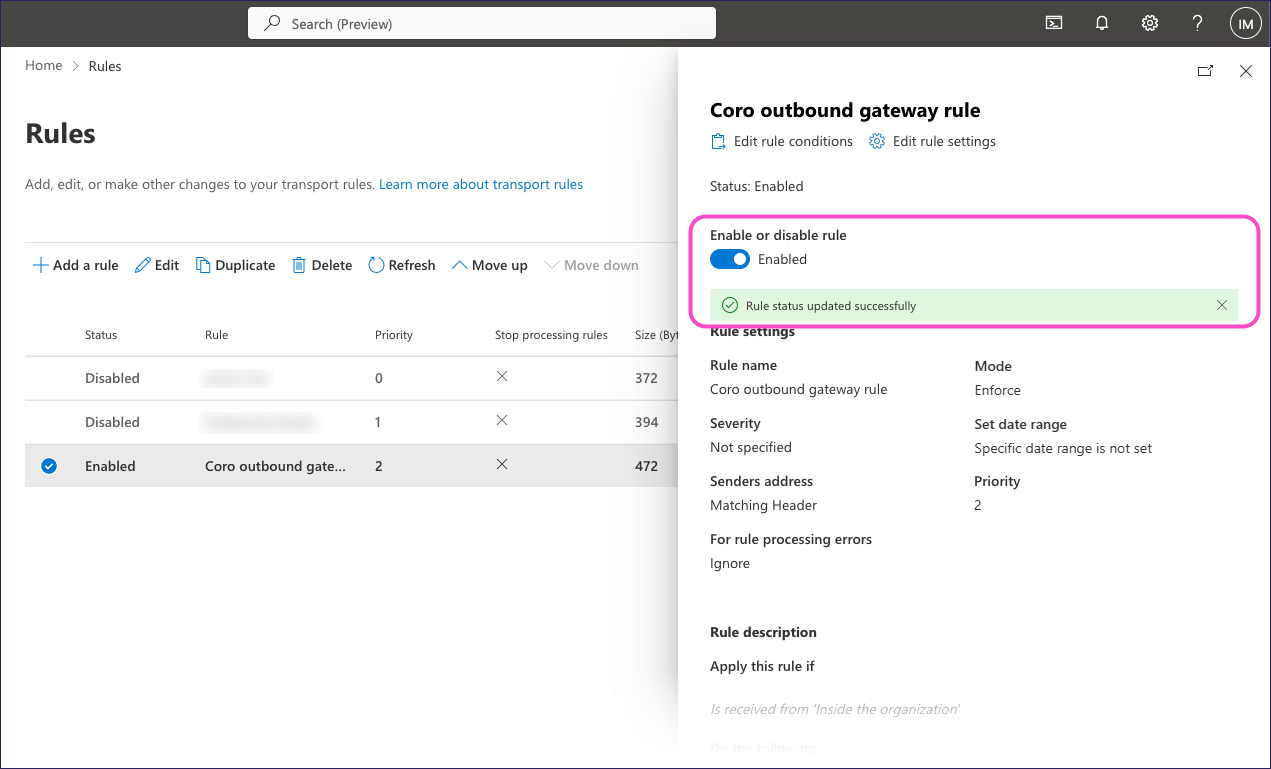
After a short wait, Exchange shows a banner with the updated rule state.
Close the rule configuration dialog.
Refresh the browser page to reload the rule list. Make sure the new rule has a Status of Enabled.
Request technical support from the service provider to add Coro's Outbound Gateway as an outbound gateway proxy.
After you have configured your DNS and email service, enable the Outbound Gateway in your Coro workspace. This process takes place inside the Coro console.
Before you begin this procedure, make sure you have the following:
- Your email domain name
- A configured default email app on your local device capable of sending external emails
To enable the Outbound Gateway:
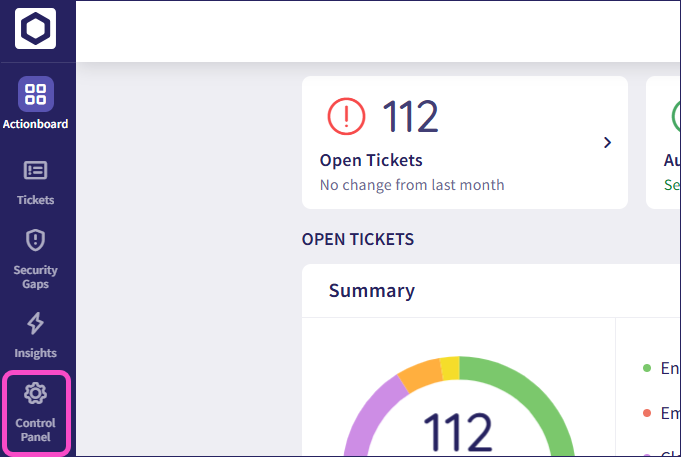
From the sidebar, select Control Panel:
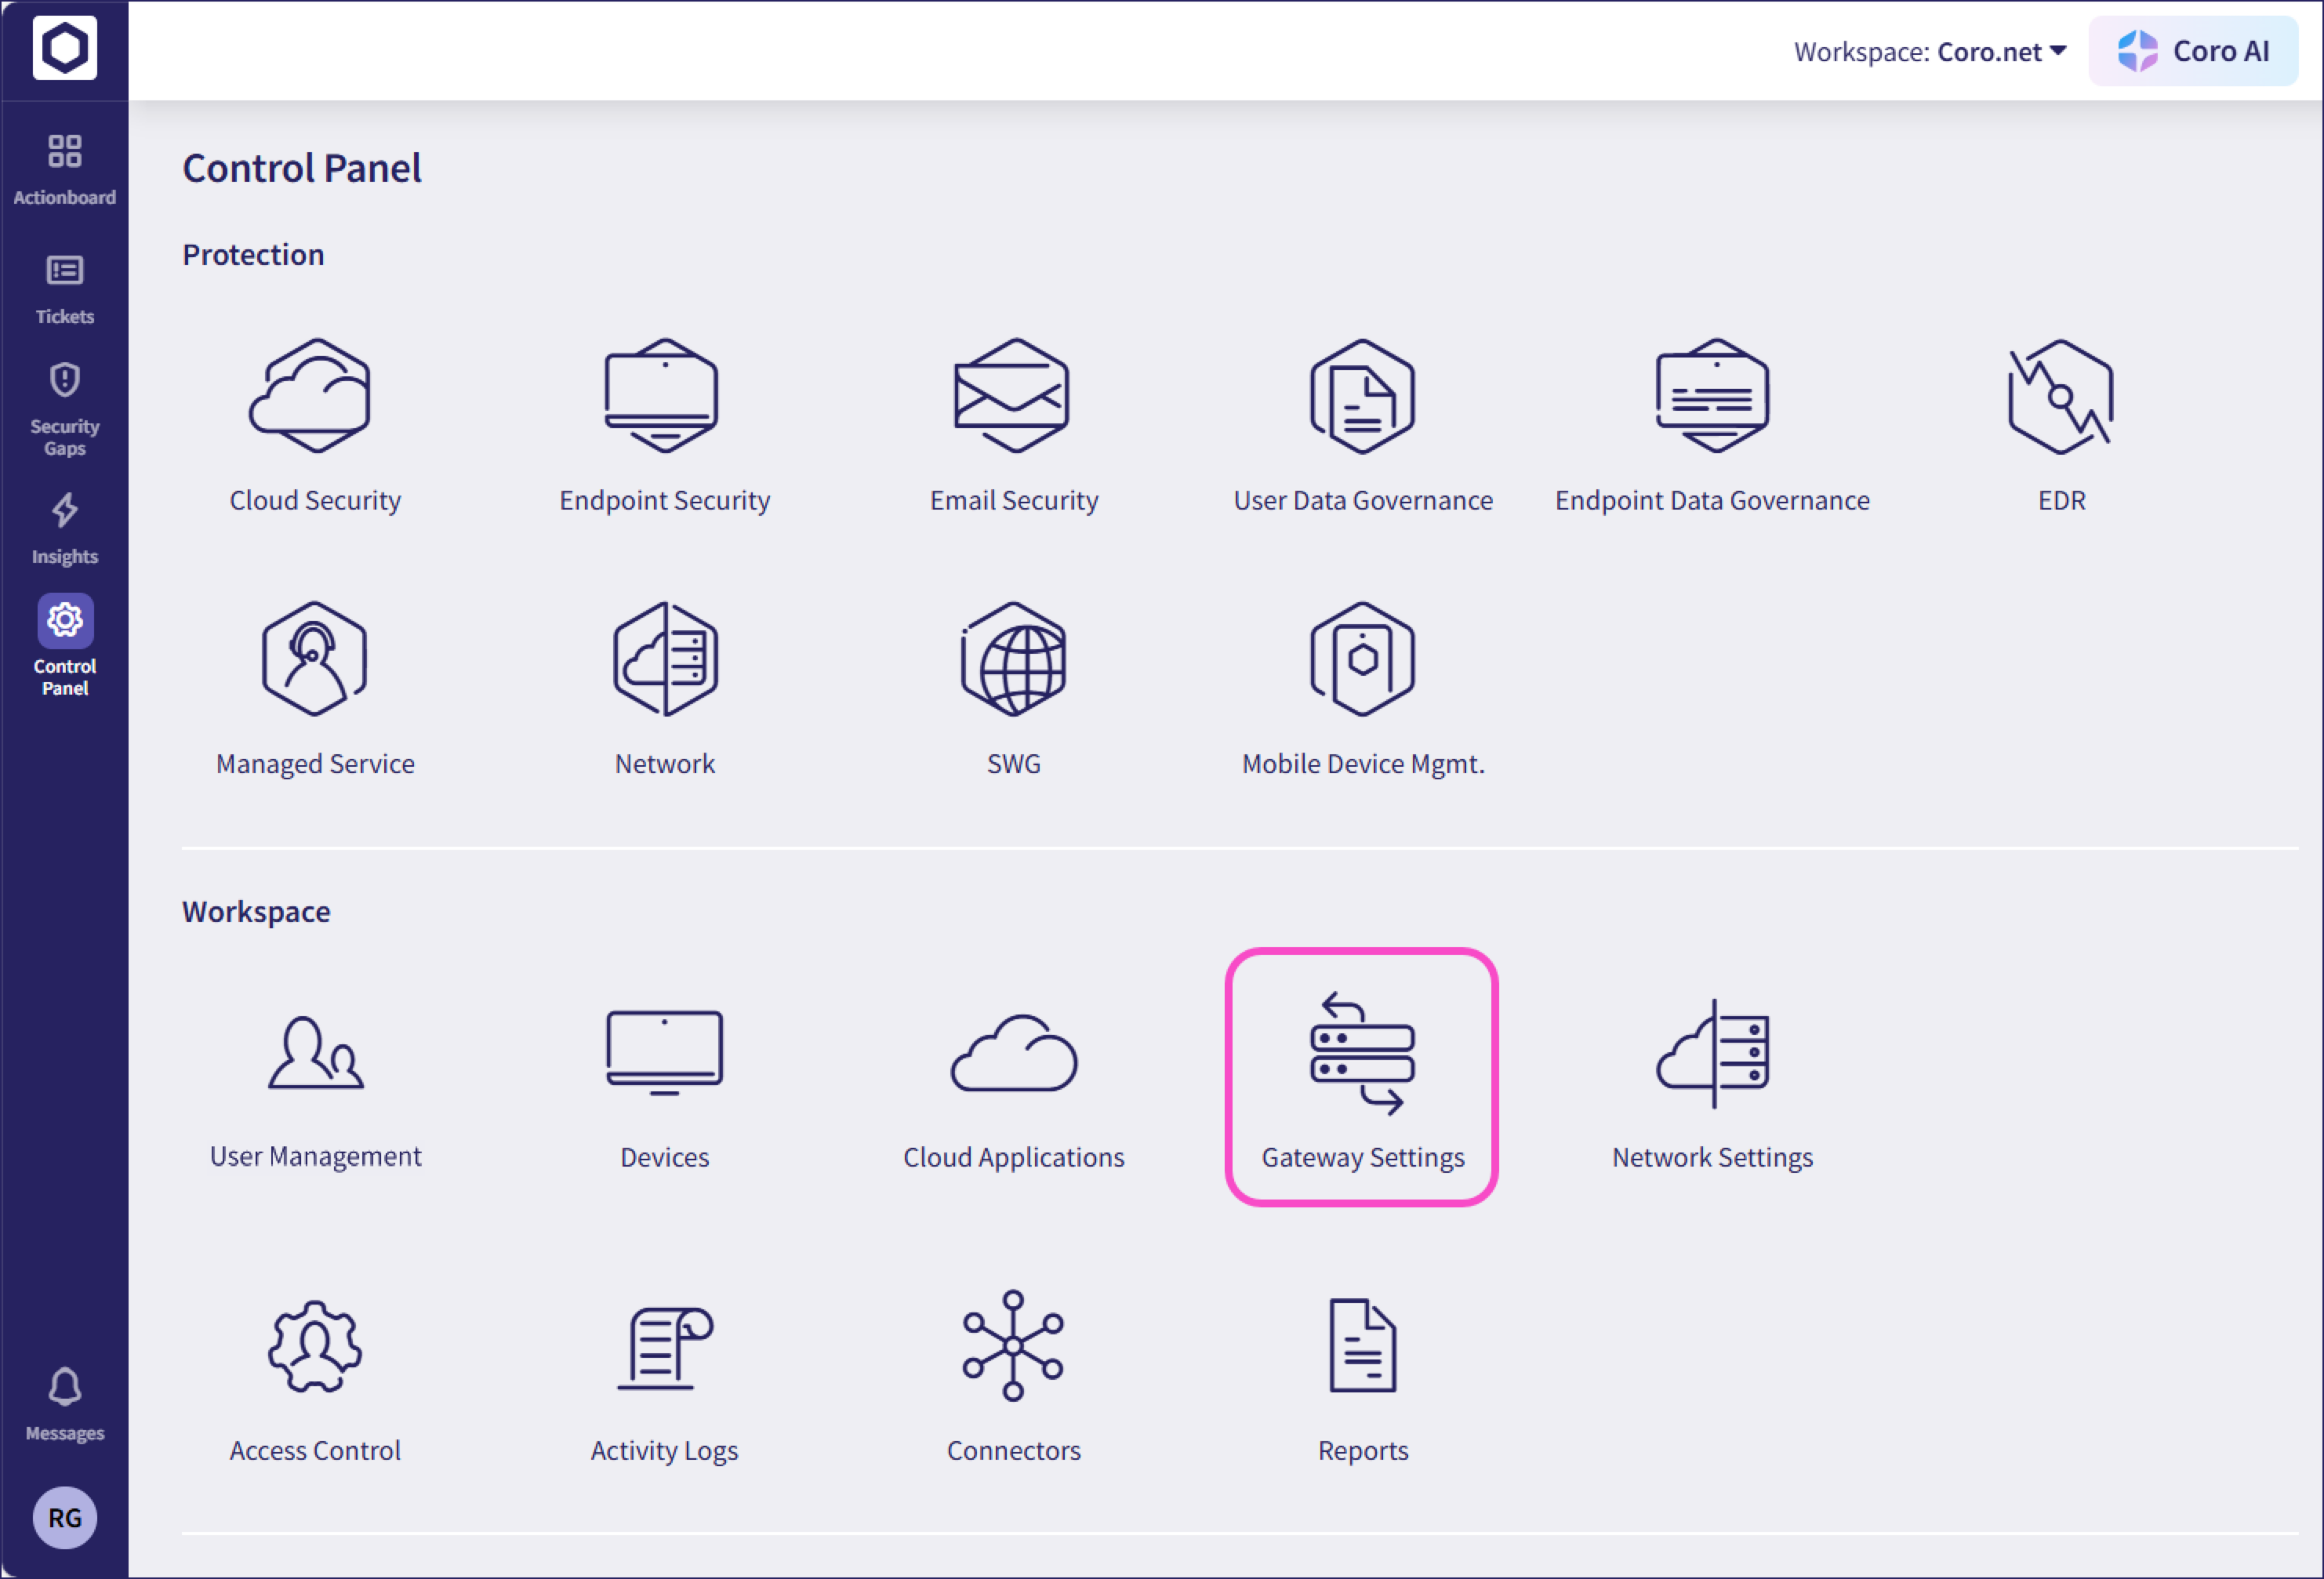
Select Gateway Settings:
Select Outbound Gateway:
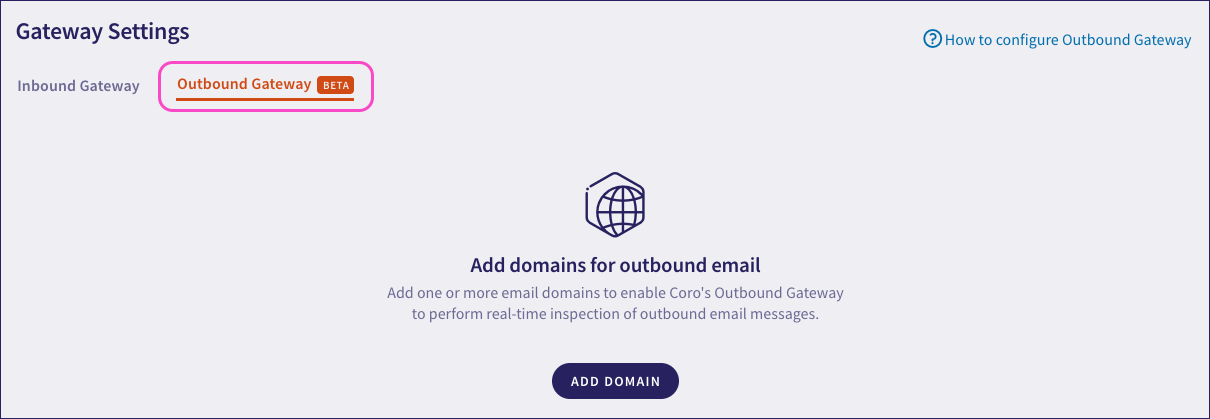
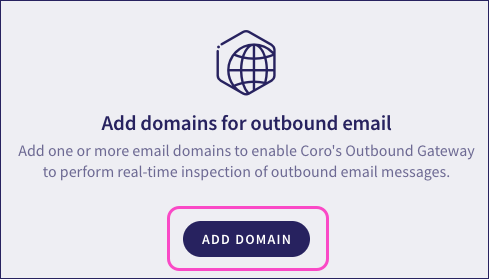
Select + ADD DOMAIN:
Coro displays the Add Outbound Gateway dialog:
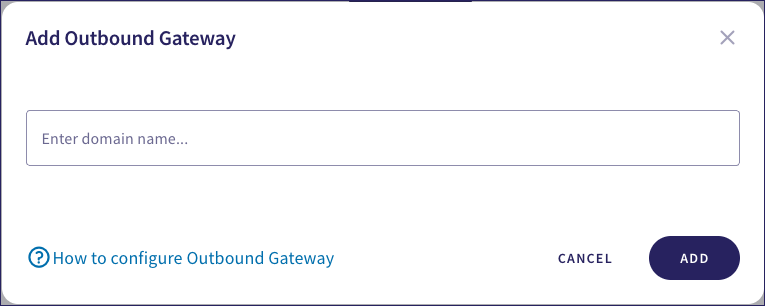
Enter your email domain, then select ADD.
Before you can use the gateway, Coro displays a dialog requesting you test the connection by sending a verification email:
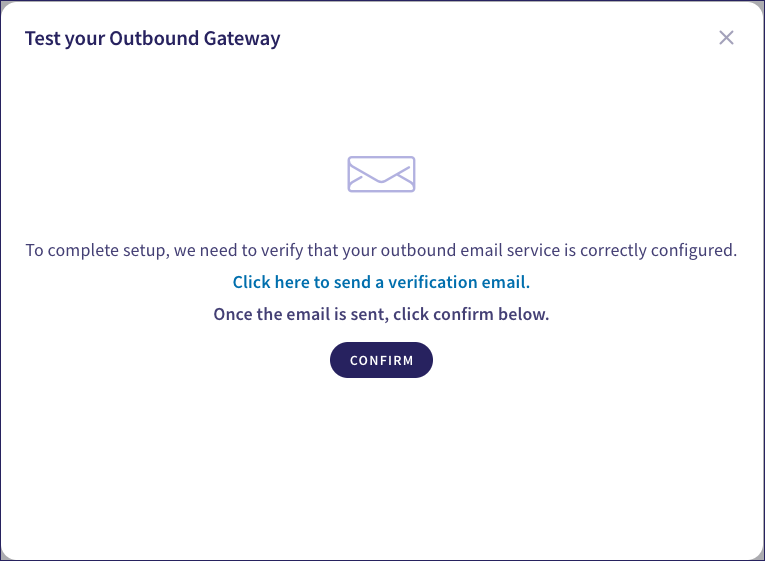
Select Click here to send a verification email.
Coro opens your device's default email app and prepopulates a new email with the required details. For example:
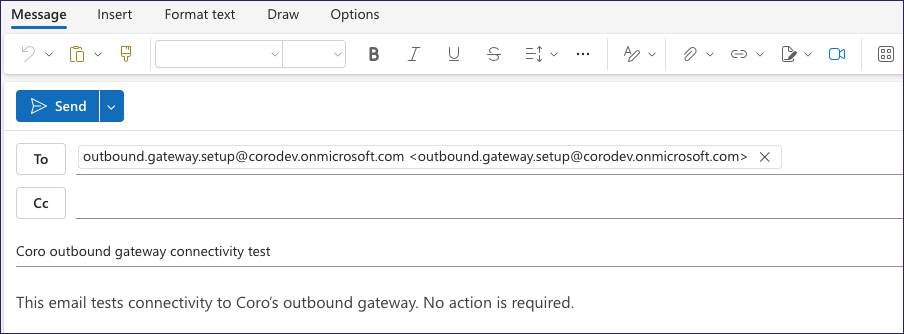 Important
Do not change the To address. Coro uses this address to observe receipt of the email, confirming that the test was successful.
Send the email, then return to the Coro console. Select CONFIRM to acknowledge:

Coro displays a dialog confirming that the test is now running:

Select DONE to close the dialog.
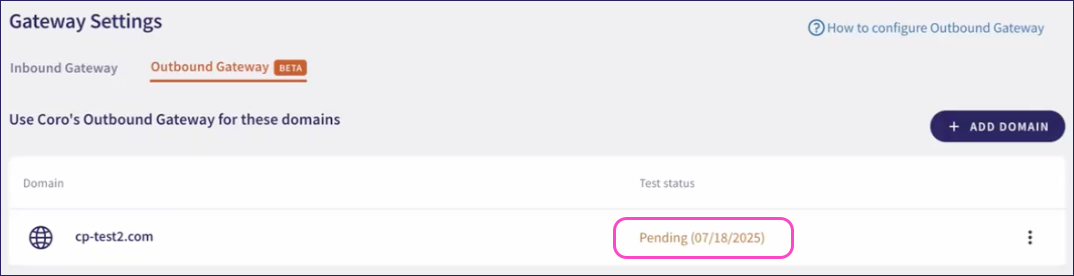
Coro checks for receipt of the test email at five minute intervals. During this time, Coro shows your new domain in the Outbound Gateway tab with a Test status of Pending:
After Coro confirms receipt of the test email, this status changes to Passed:
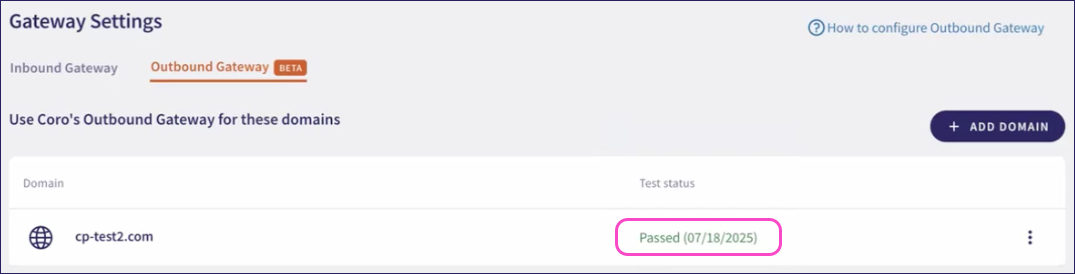
This completes configuration of the Outbound Gateway. Coro is now monitoring and protecting your outbound email.
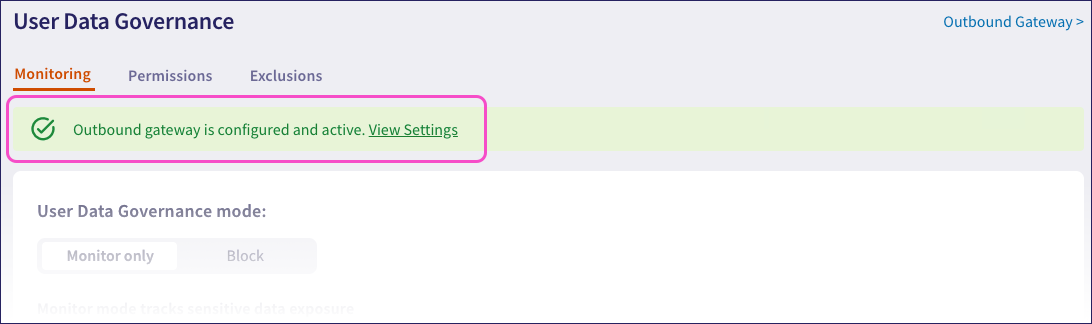
Coro displays the current status of the Outbound Gateway in a banner at the top of the User Data Governance > Monitoring tab:
Coro provides the following options for an added domain through the corresponding three-dot menu:
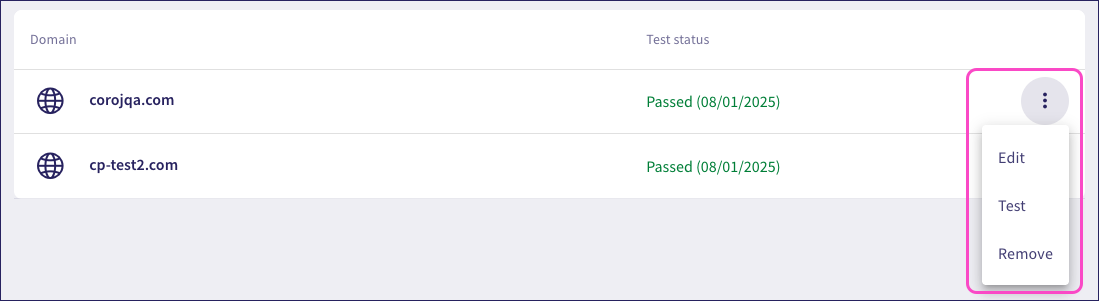
- Edit: Change the domain and retest the connection.
- Test: Repeat the connection test.
- Remove: Delete the domain and remove the connection to the Outbound Gateway.