Creating workspaces
Managed Service Provider (MSP) admin users with sufficient permissions can create additional workspaces from channel workspaces. These additional workspaces can either be other channel workspaces managed by MSP admin users or direct child workspaces that belong to an MSP admin user's customers.
To create a new workspace:
Select Global view:

From the sidebar, select
 to access Workspaces.
Coro displays the Workspaces page:
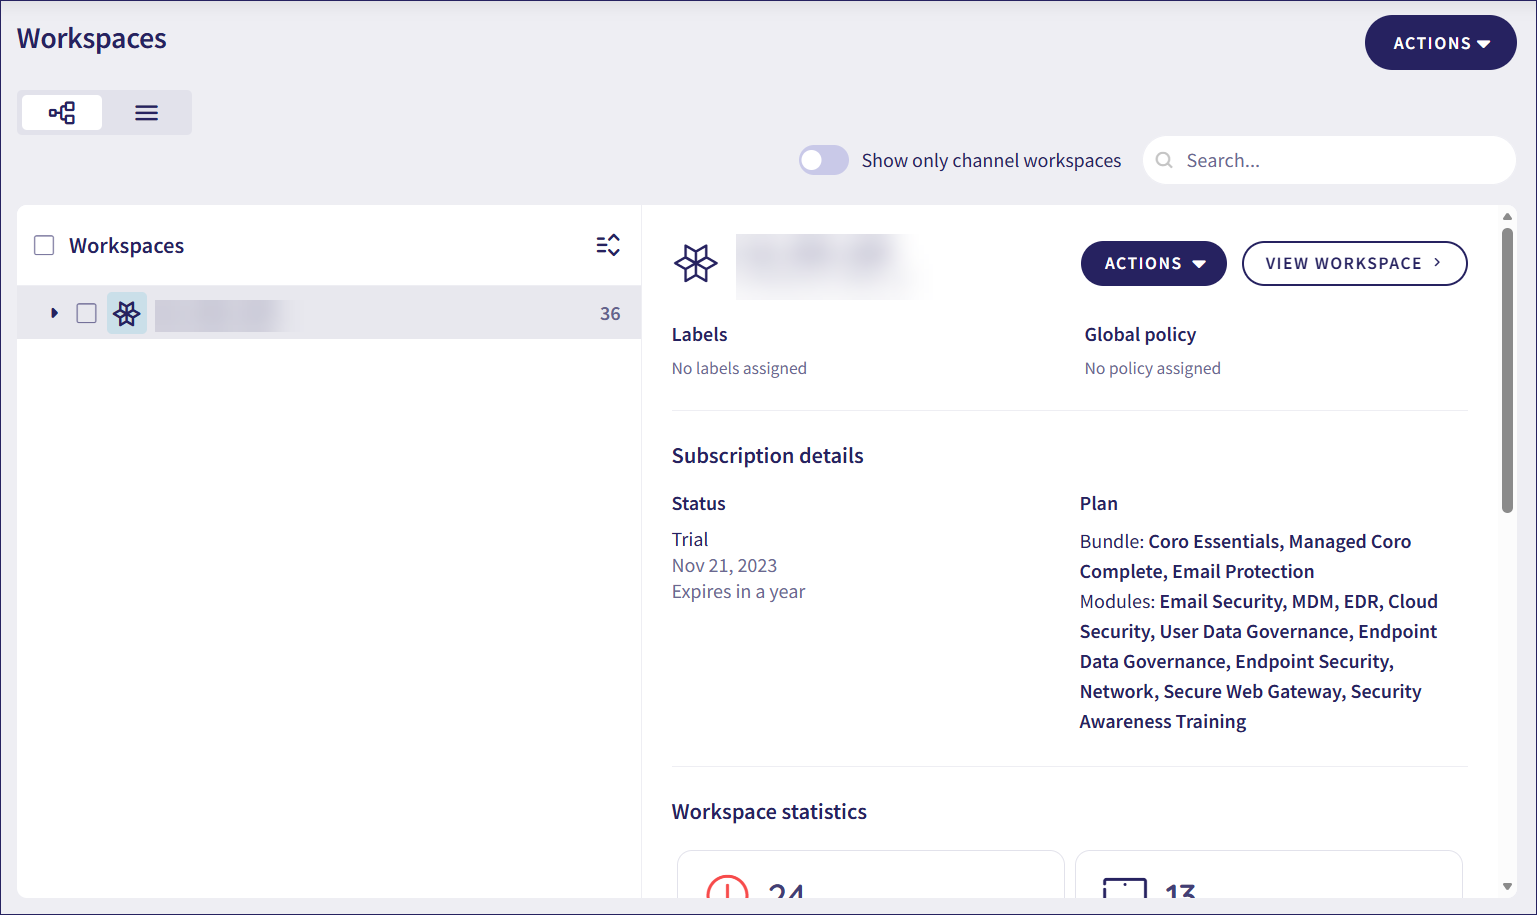
Select ACTIONS:

Select from:
Create Channel Workspace: Creates a new MSP channel workspace.
Create Child Workspace: Creates a new child workspace.
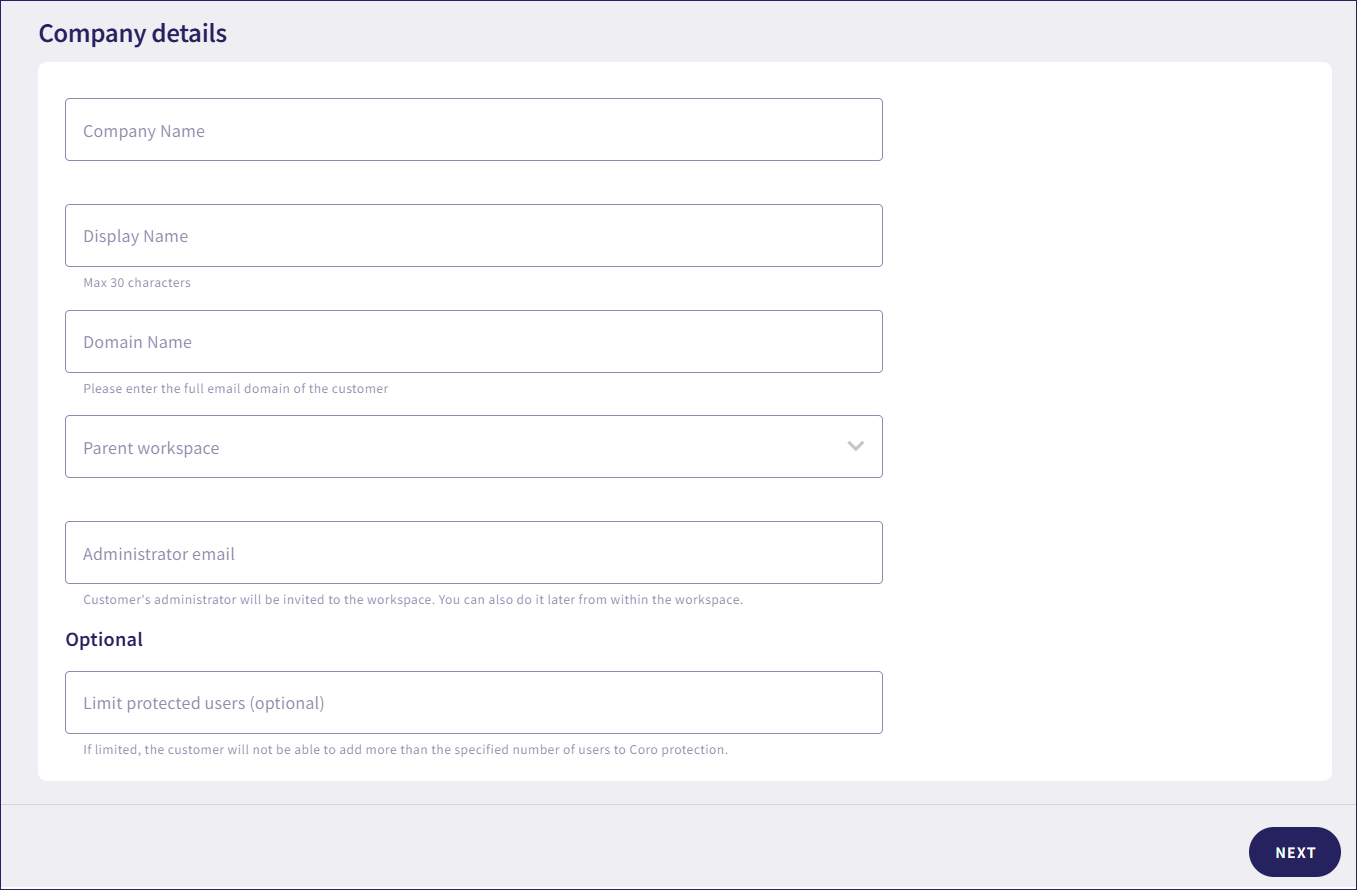
Enter the company details:
Company name: Enter the full name of the customer.
Display name: Enter a name for the workspace. A maximum of 30 characters are allowed.
Domain name: Enter the full domain of the customer.
Parent workspace: Select the parent workspace.
Administrator email: Enter the email address of the person who is nominated as the admin user of the new workspace. Nominated admin users are invited to the workspace via email. If the nominated person is already an MSP admin user in the workspace hierarchy, they aren't added as an admin user in the new workspace.
Limit protected users (for child workspaces): Enter the maximum number of protected users that can be added to the workspace.
Select NEXT.
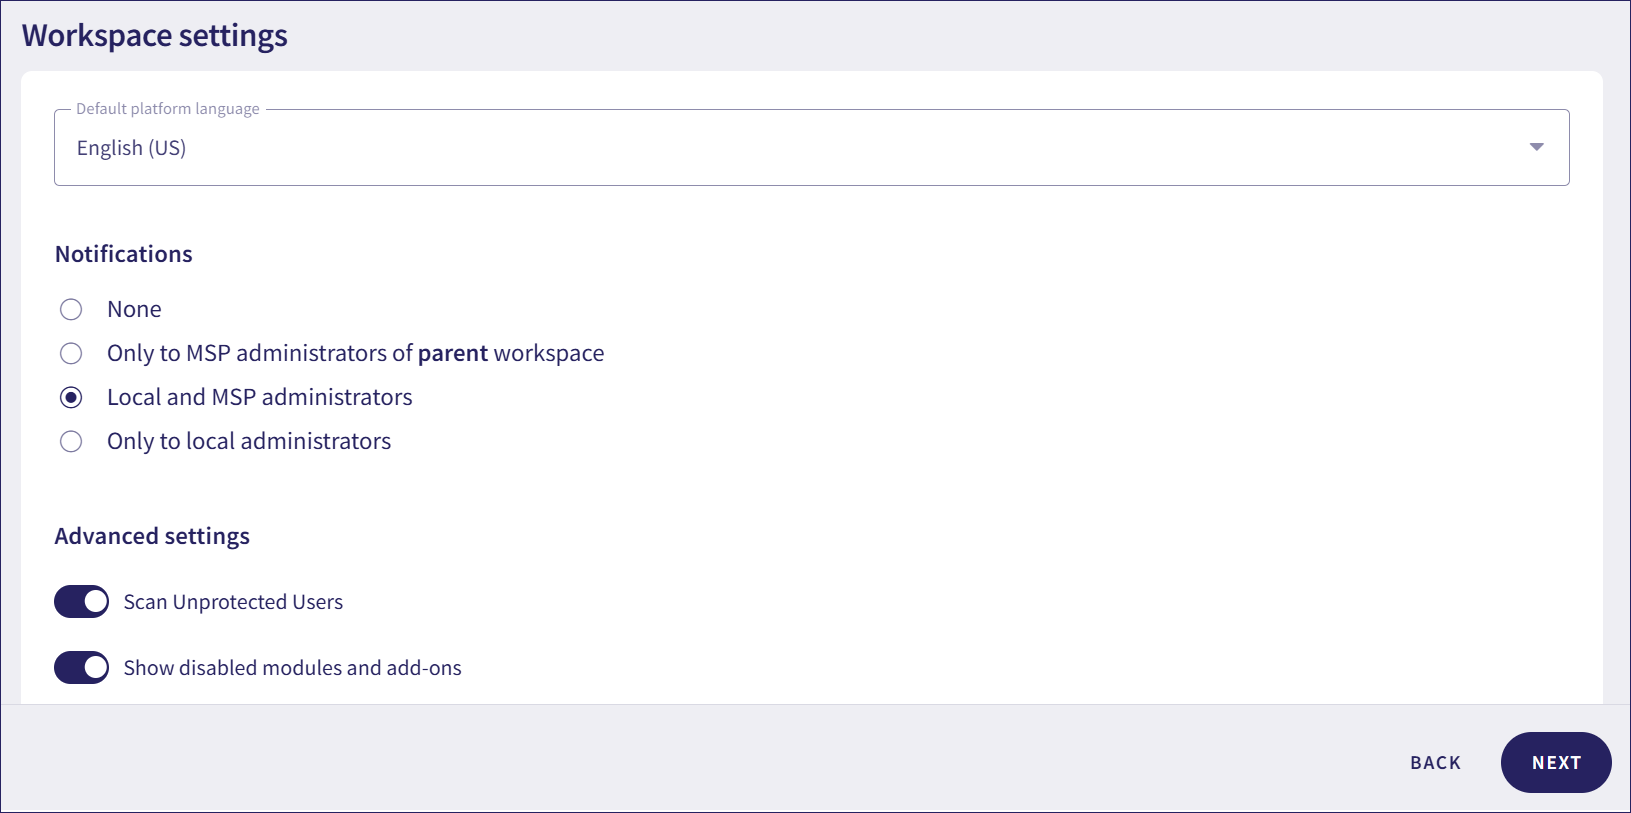
Select the workspace settings:
Default platform language: Select the language for this workspace. The options include:
- English (US)
- English (UK)
- French (Canada)
- French (France)
- German
- Italian (Italy)
- Spanish (Spain)
Notifications (for child workspaces): Select which admin users should receive email notifications. The options include:
- None: Do not send notifications.
- Only to MSP administrators of parent workspace: Send notifications to MSP admin users of the parent workspace.
- Local and MSP administrators: Send notifications to MSP admin users of the parent workspace and admin users of the child workspace.
- Only to local administrators: Send notifications to admin users of the child workspace.
This sets the notifications at the workspace level. Each admin user can customize their personal notifications in the user profile. For more information, see configuring notifications.
Show Contact Support Link (for channel workspaces): Enable this option to display a link to Coro support in the workspace.
Scan Unprotected Users: Enable this option to activate email malware and phishing scans for all protectable users in workspaces that are in Trial state.
Show disabled modules and add-ons: Enable this option to display disabled modules and add-ons in the workspace. Disabled modules and add-ons can be enabled to access additional functionality.
ImportantEnabling Scan Unprotected Users impacts workspace billing.
Enabling modules or add-ons that were previously disabled impacts workspace billing.
When you create a channel workspace, PSA is enabled by default. For more information on PSA, see PSA overview.
Select NEXT.
(Optional) For channel workspaces, select the branding settings:
Brand Color: Enter a color, in HEX format, to specify the brand color for the workspace.
Support Email: Enter the support email address for the customer, up to 100 characters.
Company Address: Enter the company name and address that appear in the footer of emails sent from the no-reply email address.
Replace Coro icons: Replace the icons users see in the Coro console and email headers.
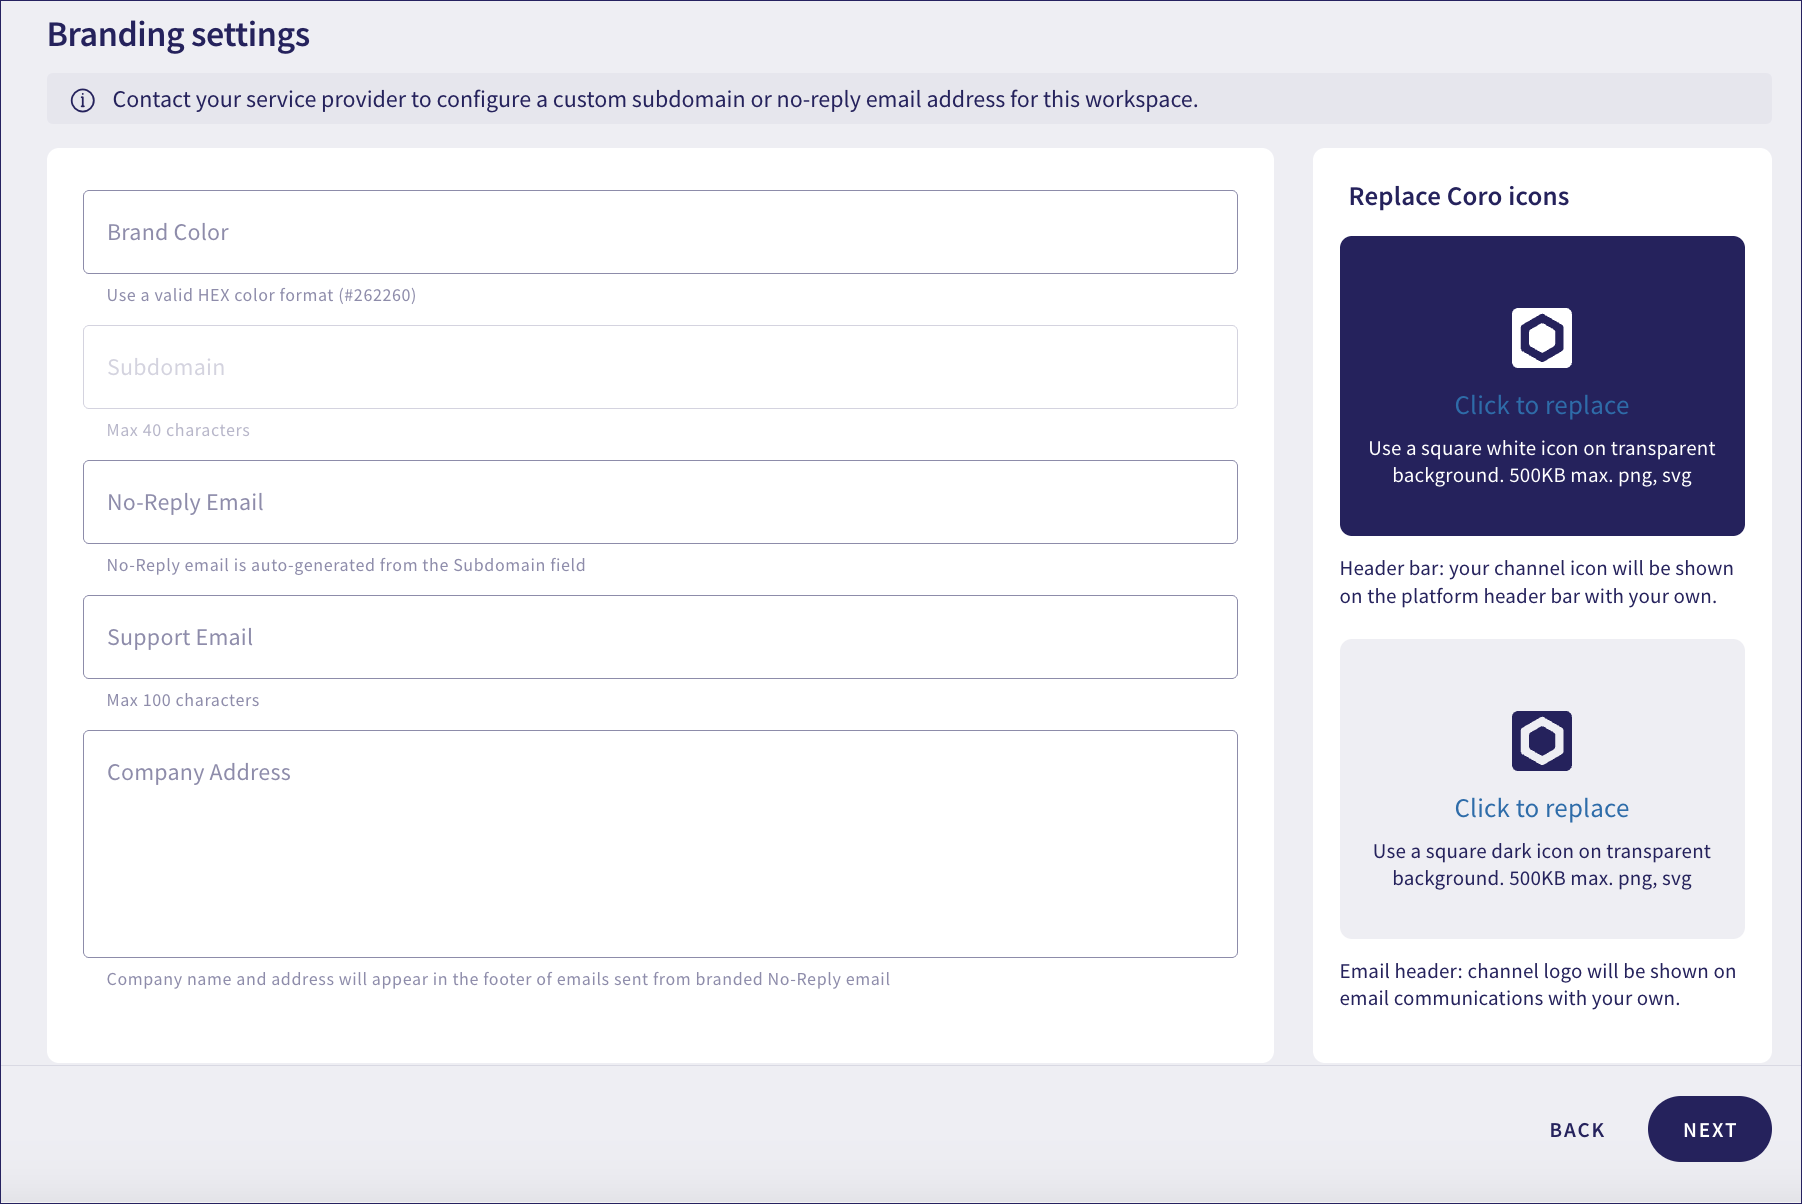
Contact your service provider to set up a Subdomain and No-Reply Address.
Select NEXT.
Select the bundles and modules for your subscription.
Select Managed to enable managed service for a bundle, module, or package:

Select NEXT.
Review your subscription and select CREATE WORKSPACE:
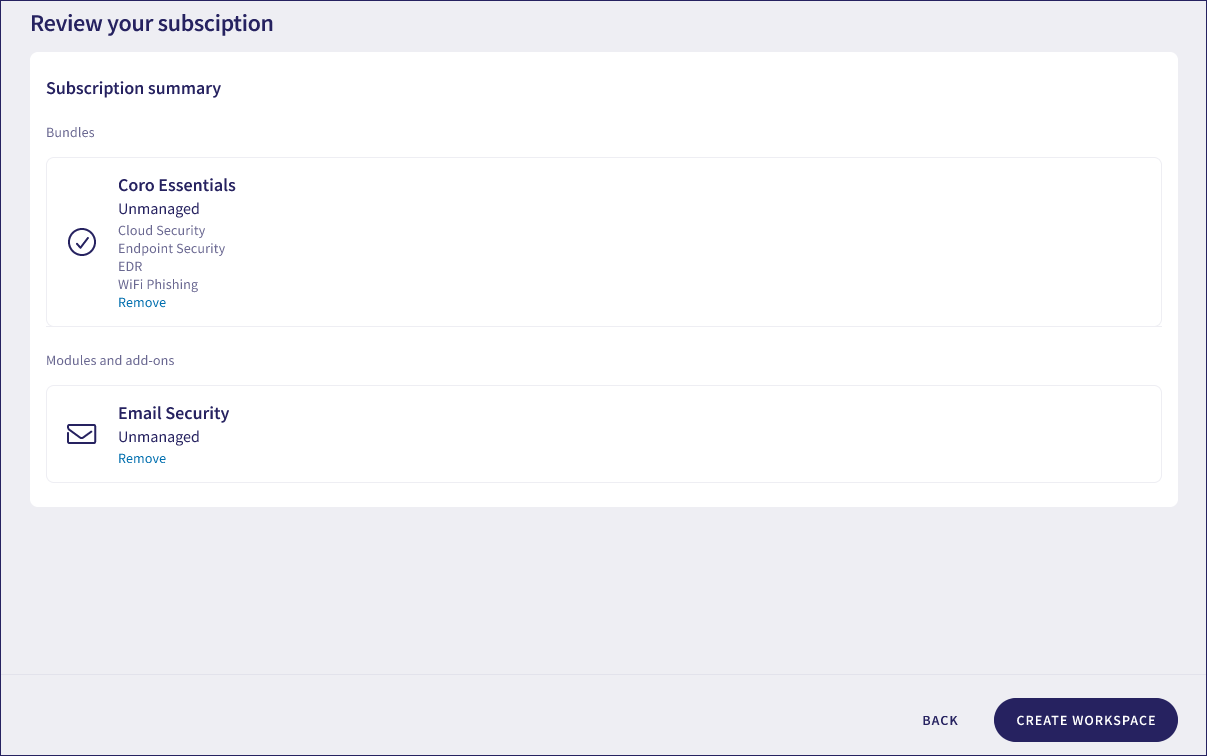
Coro creates the workspace and sends an invitation to the specified administrator email address. For child workspaces, Coro also emails root MSP admin users that a new workspace is created.
Coro displays a confirmation dialog:
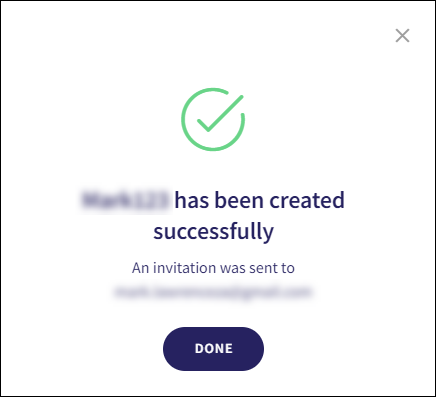
Select DONE.
You can only create additional workspaces while signed into an existing MSP channel workspace.
To activate demo mode for your child workspaces, send a request to Coro support.