Using VSS backup protection on your Windows endpoints
Ransomware attacks typically corrupt or encrypt local files, so taking frequent backups of your files is essential to allow quick recovery and minimize business impact. The Coro agent utilizes the Windows VSS (Volume Shadow Copy Service) mechanism to automatically save a snapshot of your endpoint device's files.
To enable VSS protection for your endpoint devices:
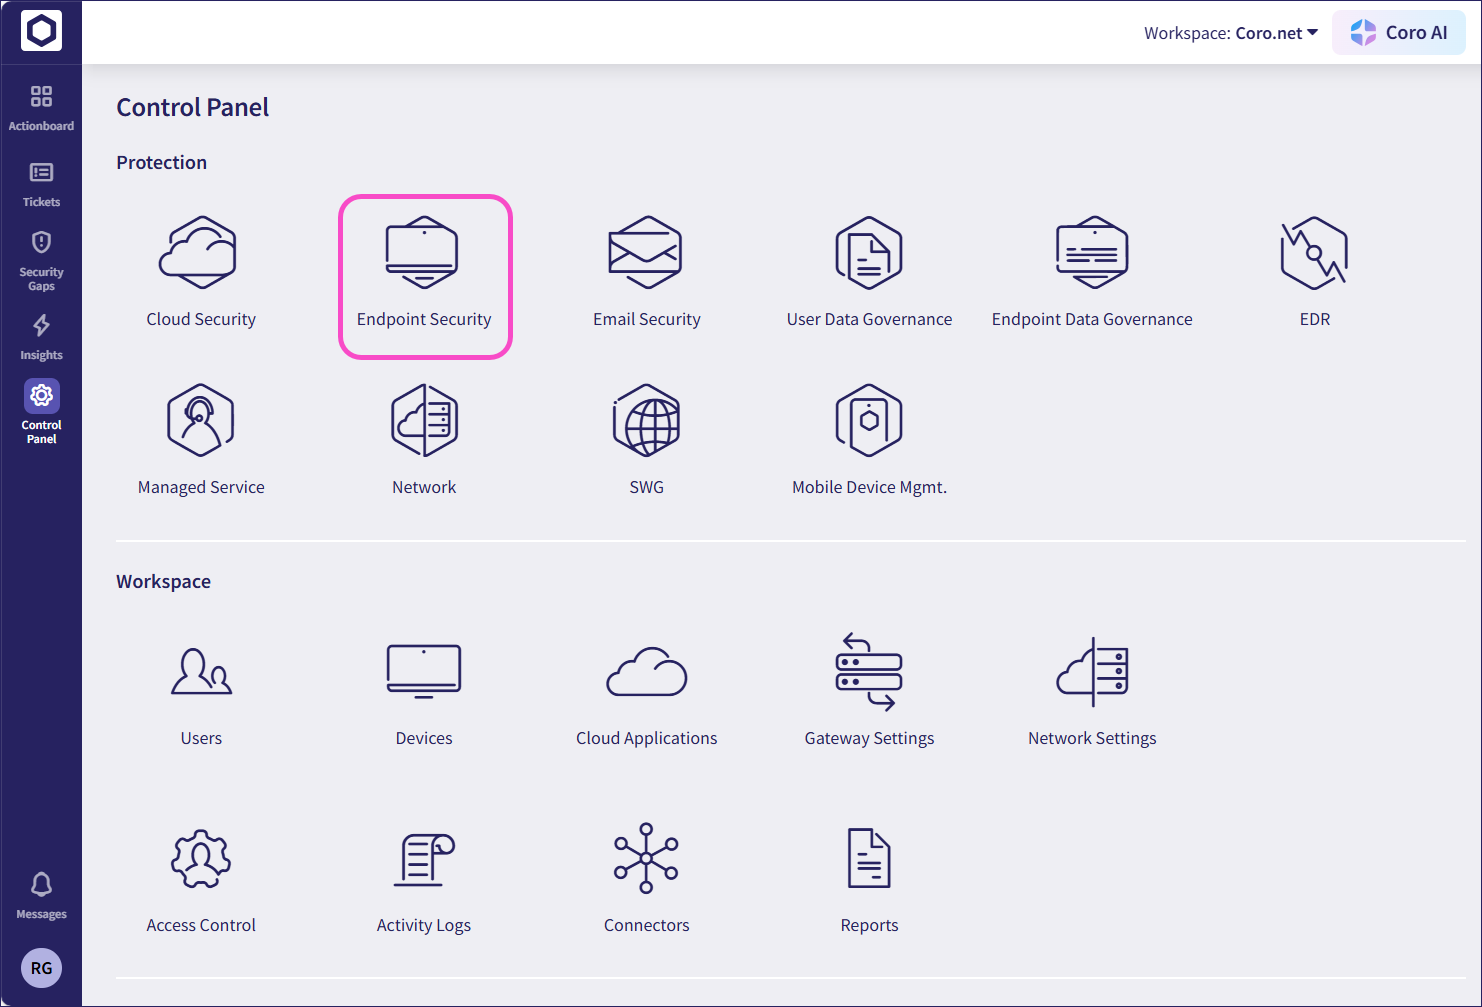
From the sidebar, select Control Panel.
Select Endpoint Security:

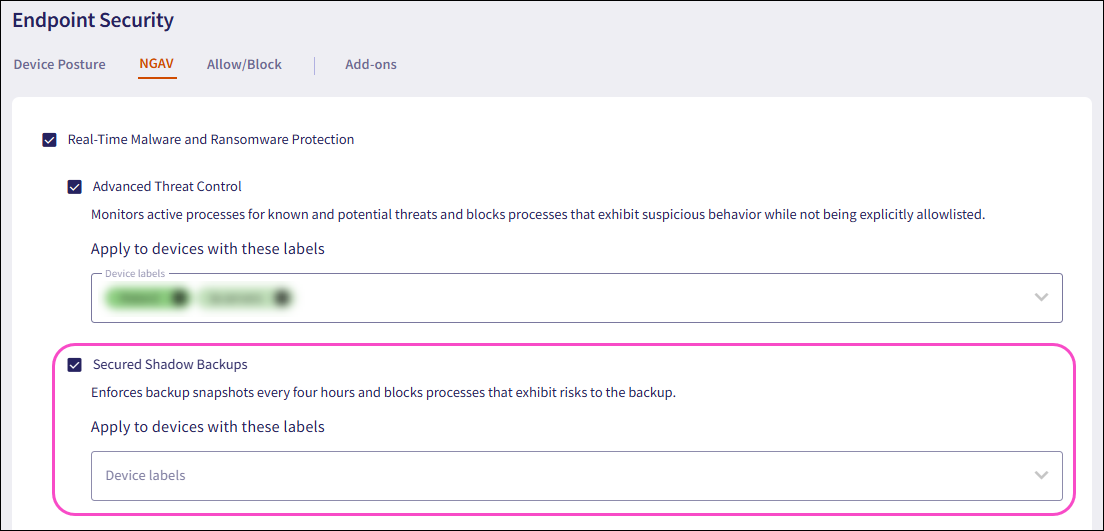
Select the NGAV tab.
Enable Secured Shadow Backups and apply the required device labels:

This feature is available only for Windows devices.
What is backed up and when
VSS backup protection operates according to the following parameters:
- VSS takes a snapshot of all accessible storage volumes every four hours.
- Files selected for the backup are those that are identified as modified since the previous snapshot.
- The number of saved copies depends on the disk space allocated in Windows’ “System Protection” configuration.
Can I use Windows' "Previous Versions" feature to restore a backup
In some versions of Windows, you can use the "Previous Versions" functionality to complete the restore operation.
This functionality is not present in Windows 11 22H2, in which case you should consider using the manual procedure described in this article.
How do I restore a backup manually
Coro recommends using the standard Windows command utilities vssadmin and mklink to restore files from a backup snapshot.
The following procedure describes how to locate and restore one or more backed-up files:
On your Windows device, open a Command Prompt as the system administrator (in the Start Menu, search for "cmd", then right-click Command Prompt and select "Run as administrator").
Determine which drive for which you want to restore files. Then, at the Command Prompt execute the following command:
vssadmin list shadows /for=<drive letter>:This command lists all backup snapshots for the selected <drive letter>, by creation time. For example, in a backup list for your e: drive with only one previous snapshot, you would see:
Contents of shadow copy set ID: {119523d5-00fb-49d1-bd0e-647152cc1713}
 Contained 1 shadow copies at creation time: 3/3/2023 7:45:48 AM
  Shadow Copy ID: {f73833e7-60f0-4aed-8b2e-e79832b568d6}
   Original Volume: (E:)\\?\Volume{2555b465-36cb-4ae7-b031-13ddf00a6e2e}\
   Shadow Copy Volume: \\?\GLOBALROOT\Device\HarddiskVolumeShadowCopy9
Locate the snapshot that you determine will contain the most recent good copy of your damaged or missing files. Make a note of the
Shadow Copy Volumefor that snapshot. For the above example, we see:Shadow Copy Volume: \\?\GLOBALROOT\Device\HarddiskVolumeShadowCopy9Use the
mklinkcommand to create a directory on your target drive ("e:\shadowrestore" in this example) that is symbolically-linked to the snapshot directory named in the Shadow Copy Volume identifier from the previous step:mklink /d e:\shadowrestore \\?\GLOBALROOT\Device\HarddiskVolumeShadowCopy9\Ensure you append a trailing backslash (\) to the volume identifier.
The sym-linked "e:\shadowrestore" directory should now contain the contents of the selected backup. Use File Explorer or the command prompt to navigate-to and browse the files contained there for your desired backup copy. Copy and paste your selected files to their original locations on your hard drive.
When you have completed this operation, delete the "e:\shadowrestore" directory to remove the sym-link.
Backup copy protection
Attackers understand that snapshots make their attack futile, so they have learned to target backups in order to delete or corrupt them. To overcome this threat, the Coro agent monitors access to VSS copies and utilizes the Advanced Threat Control mechanism to kill processes trying to tamper with the backup.
A side effect of backup protection is the potential for disrupting legitimate applications, in which case these processes need to be added to the allow list by using the “Approve process group” action.