To use Security Awareness Training (SAT), system administrators must first allowlist Coro in an organization's email domain. This ensures that SAT phishing simulation emails from Coro are not blocked or mistaken for real threats.
This guide provides instructions on how to configure allowlist rules in your email provider, together with the latest list of domains and addresses used as part of the service.
Microsoft 365 users can choose to use Coro’s allowlisting app, which automatically sets up all rules for you. For more details, see Using the Coro allowlisting app.
Coro SAT is supported in the following platforms:
To allowlist SAT emails in Microsoft 365, perform the following two-part procedure:
Phishing simulation emails sent by Coro all include a specific identifying header. Configure Microsoft Exchange to recognize and allow emails containing this header.
To configure Microsoft Exchange:
Sign in to Microsoft Exchange admin center with your administrator credentials.
Go to Mail flow > Rules.
On the Rules page, select + Add a rule:
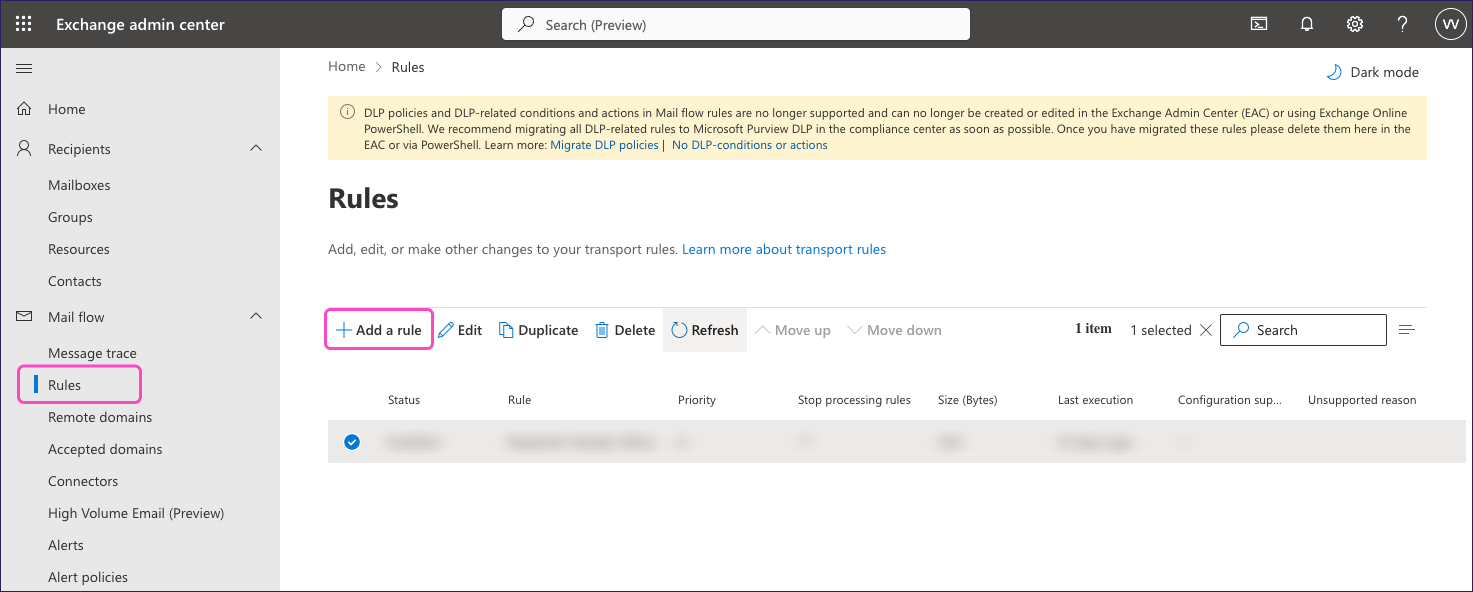
From the dropdown, select Create a new rule.
Exchange displays the New transport rule dialog, on the Set rule conditions step:
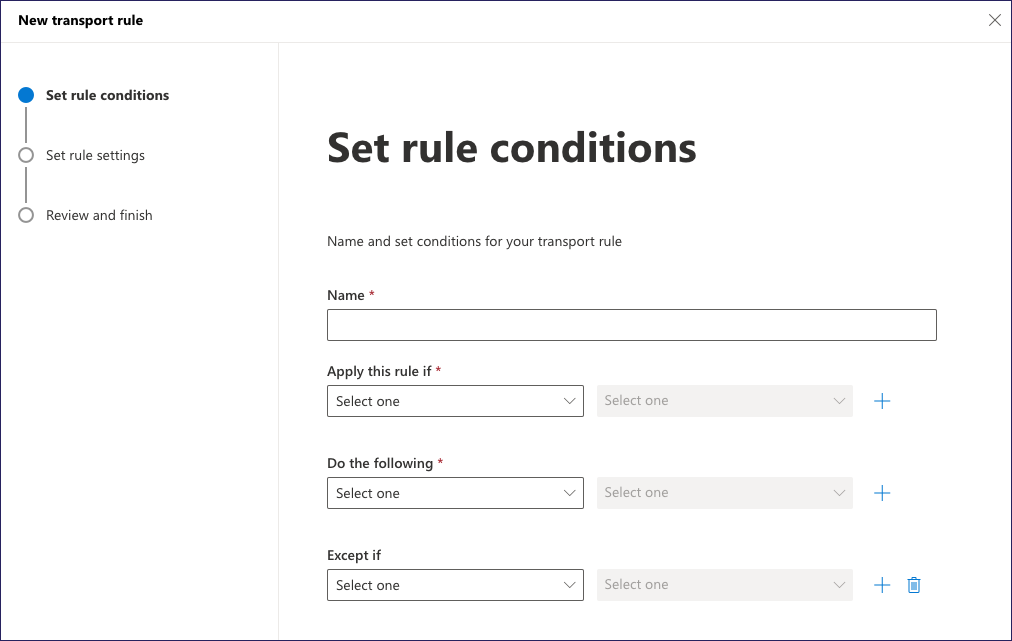
Enter a name. Coro recommends Coro Header Allow.
Under Apply this rule if, select The message headers... from the first dropdown. Then, select matches these text patterns from the second dropdown.
Select Enter text. Then, enter the email header name present in all SAT emails:
X-BPSATSelect Enter words. Then, enter the email header value present in all SAT emails:
66Y7U72LTSUnder Do the following, select Modify the message properties from the first dropdown. Then, select Set the spam confidence level (SCL) from the second dropdown.
Exchange displays the specify SCL dialog:
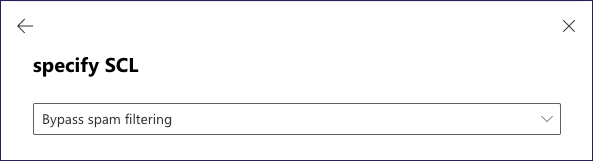
Make sure the dropdown is set to Bypass spam filtering. Then, select Save.
The Set rule conditions step should now resemble the following:
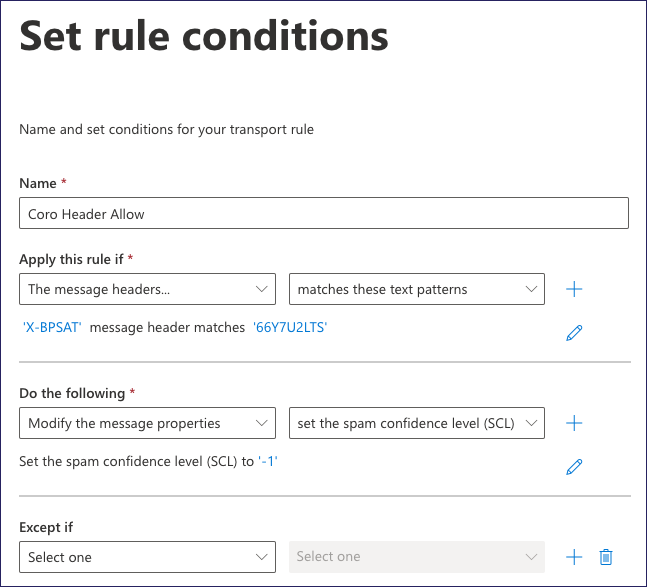
Leave the remaining settings as their default values and select Next to proceed.
On the Set rule settings step, leave all settings as their default values and select Next to proceed.
On the Review and finish step, select Finish to add the new rule. Then, select Done to close the dialog.
On the Rules page, locate and select your new rule.
Exchange shows a rule summary dialog:
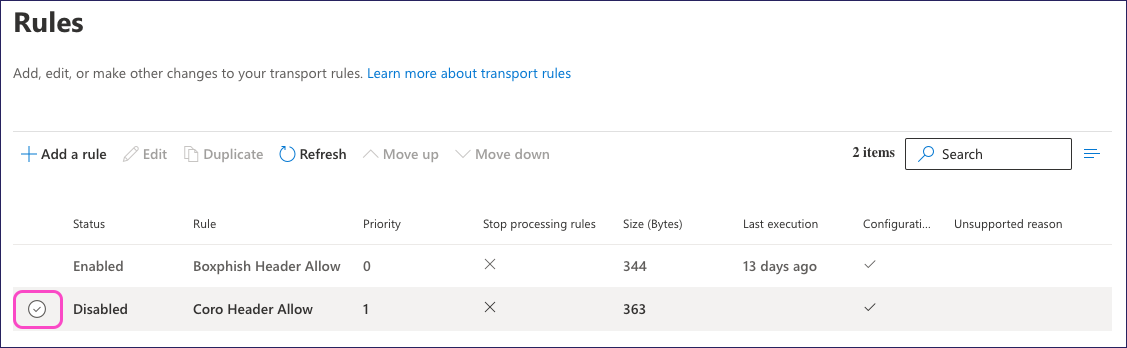
Enable your rule by selecting Enable or disable rule.
After a short wait, Exchange confirms the rule status was updated successfully.
Select Edit rule settings.
Exchange displays the rule edit dialog.
Enter a Priority of 0 (zero) to make sure your new rule is a higher priority than other inbound rules:
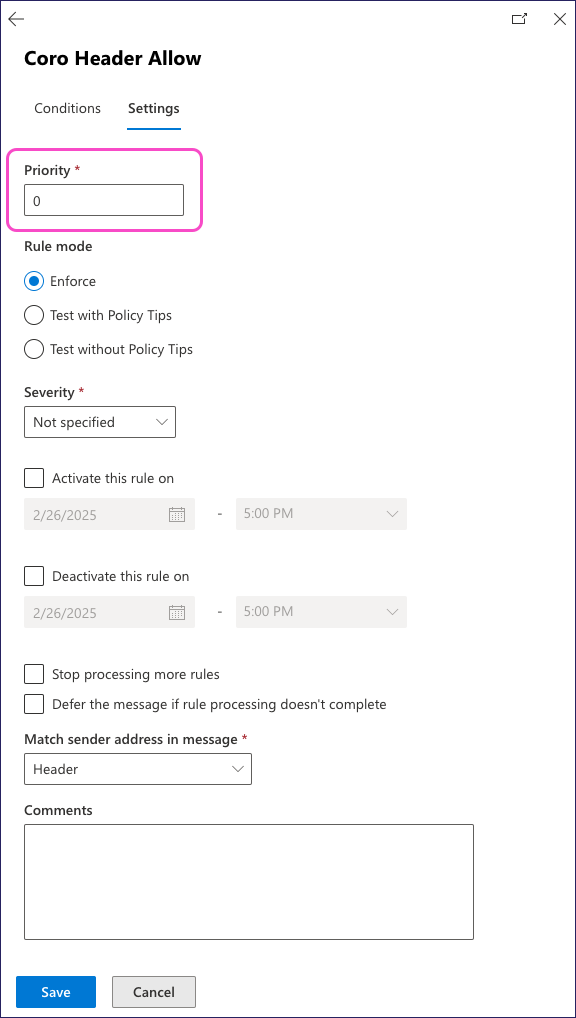
Select Save to save your changes.
To make sure Microsoft Defender does not flag phishing simulation emails as potential threats, declare the list of simulation domains, IP addresses, and URLs used by Coro SAT.
Coro provides a PowerShell script to automate the process. Follow the instructions in Using PowerShell to execute the script on your M365 tenant.
Alternatively, add the simulation details manually in Microsoft Defender admin center.
Coro recommends this method because it automatically adds Coro's SAT simulation domains, IP addresses, and URLs without an administrator needing to enter them individually into Microsoft Defender admin center.
To add Coro SAT simulation domains, IP addresses, and URLs into Microsoft Defender through a PowerShell script:
Connect to your M365 tenant via PowerShell.
ImportantMake sure you are connected as an account with administrator privileges.
Verify whether the Exchange Online Management module is installed on your tenant by entering:
Get-Module -ListAvailable -Name ExchangeOnlineManagement
If the module is installed, PowerShell displays the module details. Perform an update to make sure you have the latest version:
Update-Module ExchangeOnlineManagement
If the module is not installed, install it by entering:
Install-Module -Name ExchangeOnlineManagement -Force
Load the module into your PowerShell session by entering:
Import-Module ExchangeOnlineManagement
When connecting to Exchange Online via PowerShell, the execution policy set for PowerShell determines how scripts run on your tenant.
Coro recommends using a RemoteSigned policy as this ensures:
- Locally-created scripts run without requiring a digital signature.
- Trusted publishers must sign scripts downloaded from the internet.
Set the execution policy by entering:
Set-ExecutionPolicy RemoteSigned -Scope CurrentUser
If prompted, allow the execution policy change by entering y (for "Yes") or a (for "All").
Use Modern Authentication to connect to Exchange Online by entering:
Connect-ExchangeOnline -UserPrincipalName admin@yourdomain.com
Complete the sign-in process, including any multi-factor authentication steps, when prompted.
Modern Authentication is the default connection method for standard M365 tenants.
Download the Coro SAT Phishing Simulation Override Policy PowerShell script to your tenant. Make a note of the download location.
Run the script in your PowerShell session using the full path to the script's location. For example:
& "C:\Users\User\Downloads\CoroSAT-PhishSimOverridePolicy.ps1"
If PowerShell prompts you to approve a security warning for running the script, enter R to proceed.
While the script executes, PowerShell displays the override policy being added.
After the script completes successfully, PowerShell displays an error message:
 Important
This error message is expected and confirms the script completed successfully. If you see any other errors, this might indicate issues requiring investigation. Contact Coro Support for advice.
To verify that the allowlist is correctly populated, use the steps included in Using the admin center to view the Advanced delivery > Phishing simulation page in Microsoft Defender admin center:
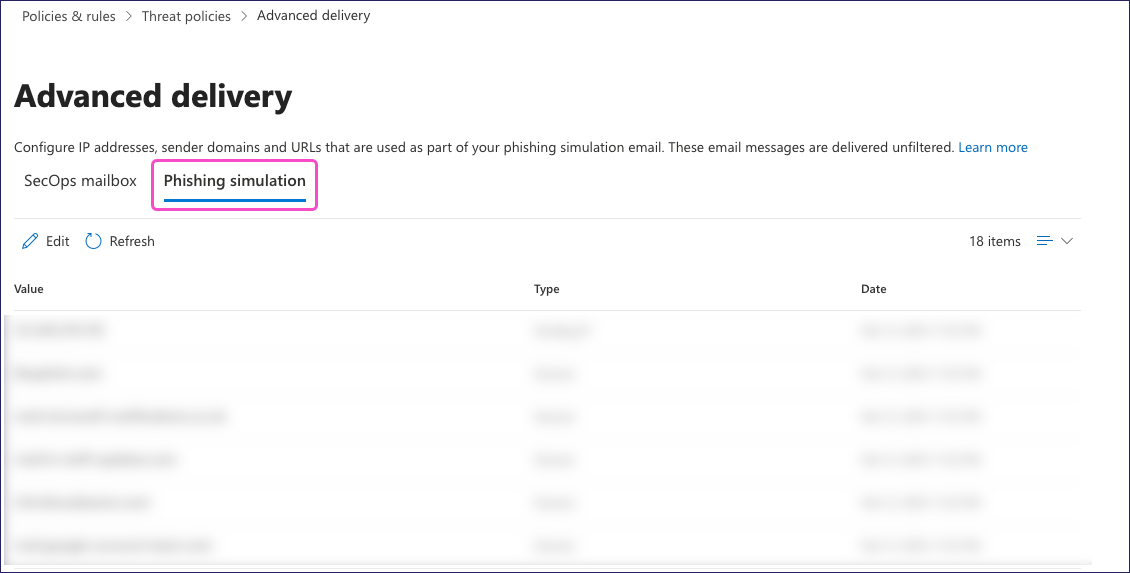
Confirm that this page includes all simulation domains, IP addresses, and URLs required for Coro SAT to function.
To manually add all Coro SAT simulation domains, IP addresses, and URLs into Microsoft Defender admin center:
Sign in to Microsoft Defender with your administrator credentials.
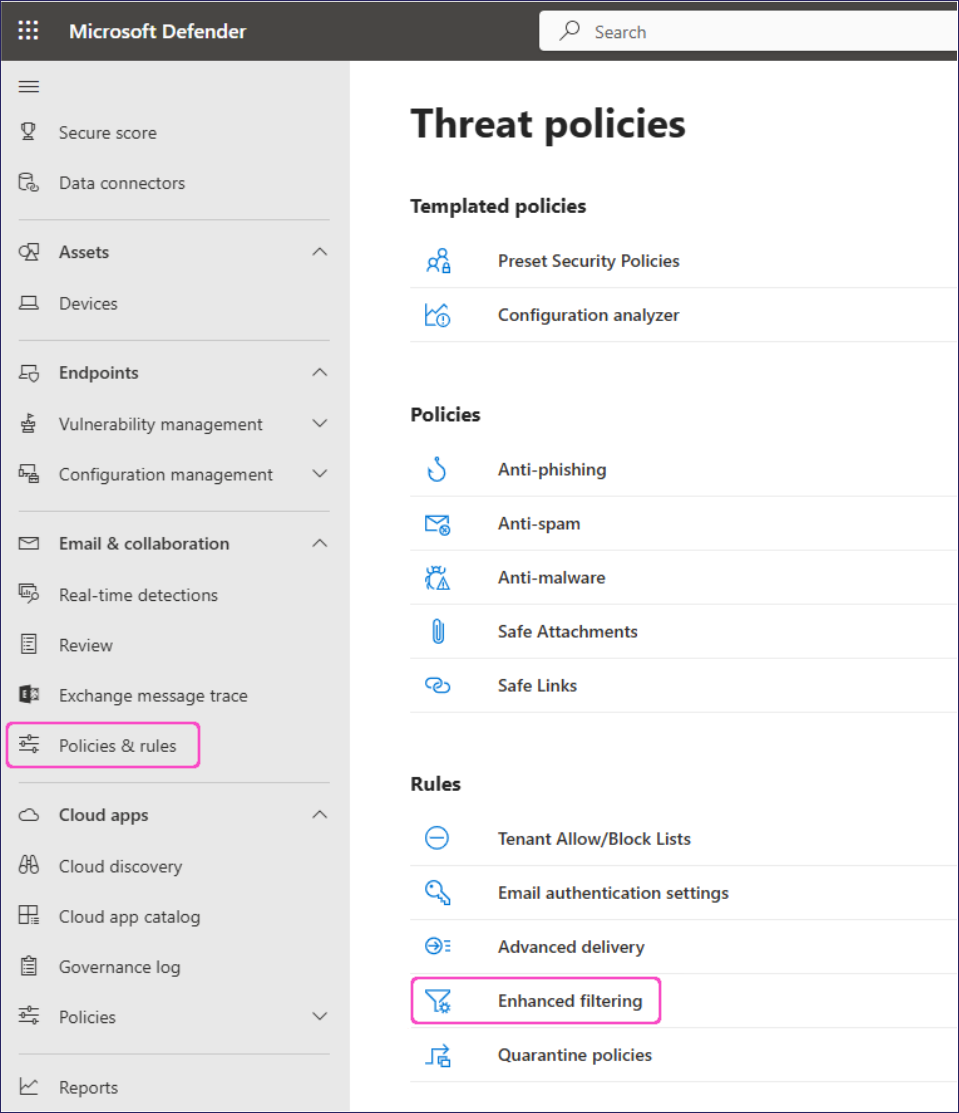
Go to Email & collaboration > Policies & rules.
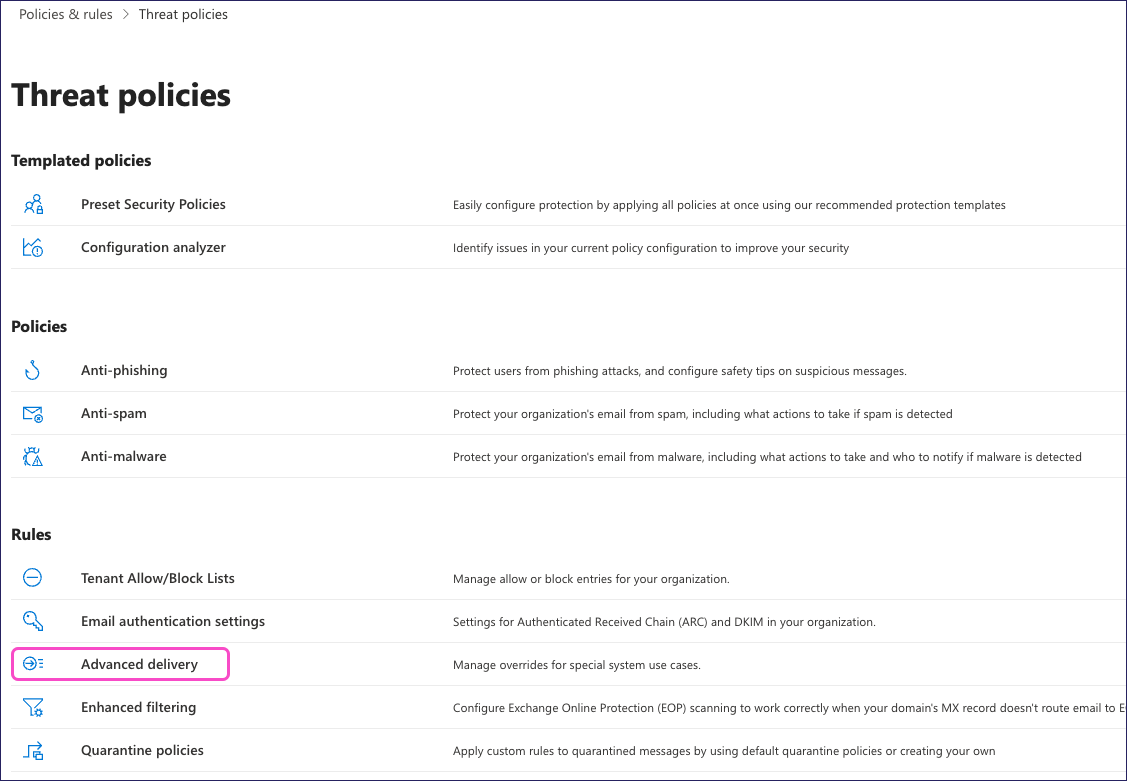
Defender displays the Policies & rules page:
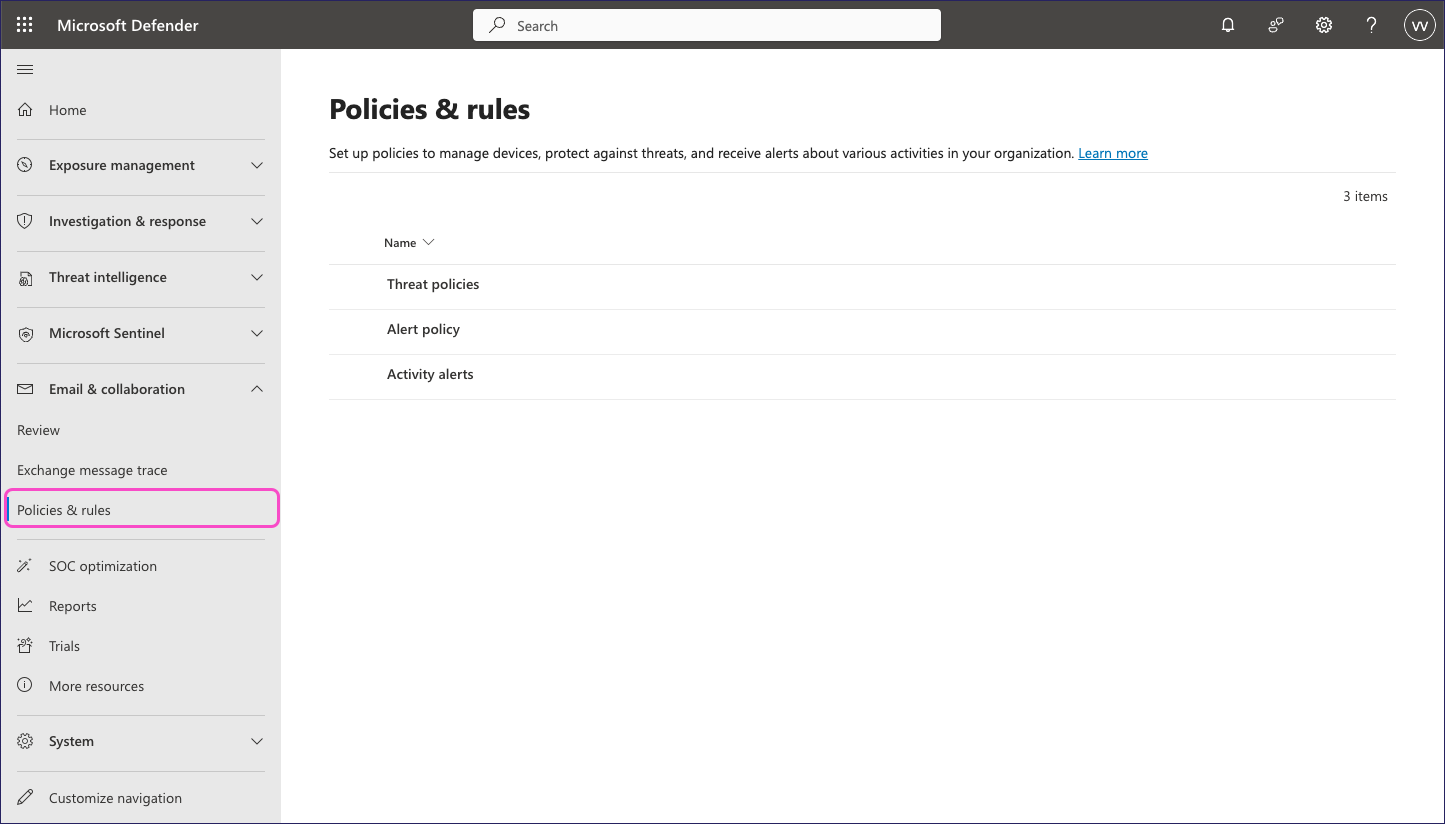
Select Threat policies.
From the Rules section, select Advanced delivery:
From the Advanced delivery page, select Phishing simulation:
If this page is already populated with phishing simulation rules, select Edit. Otherwise, select Add.
Defender displays the Edit third party phishing simulations dialog:
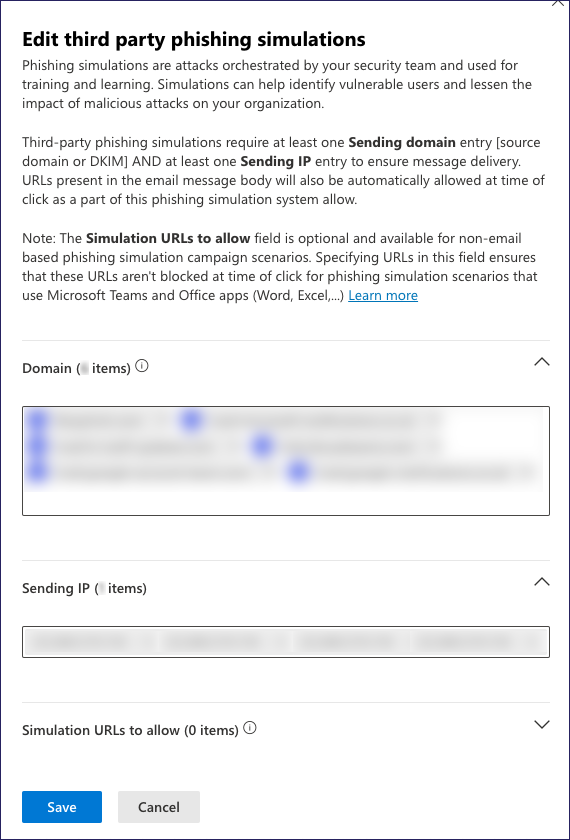
Populate the Domain section with the following list of domains:
apple.isecurity-alerts.com
box.boxphishmail.com
Boxphish.com
drive.fileboxshare.com
eu.sat-coro.net
info.bluuebeams.com
info.dhlshipping.co.uk
info.electrosoftt.com
info.freshworked.co.uk
info.gmaillogin.co.uk
info.google-notificatons.com
info.just-eat-voucher.co.uk
info.mail365-team.com
info.microsoft-security-alerts.com
info.mydeliverytracker.com
info.netlfix-update-details.com
info.netlixnotifications.co.uk
info.noreply-linkedinverify.co.uk
info.onedrivesharing.com
info.who-travel-updates.com
mail.365invoices.com
mail.amazoneorder.com
mail.bankfraudteam.com
mail.dropbox-notifications.co.uk
mail.fa-uk.com
mail.file-transf3rs.com
mail.google-account-team.com
mail.google-notifications.co.uk
mail.hr-staff-updates.com
mail.insightfulsurveys.com
mail.linkedin-network.com
mail.microsoft-notifications.co.uk
mail.netflix-password.co.uk
mail.noreply-amazon.co.uk
mail.noreply-ubercredit.co.uk
mail.staff-payroll-updates.com
mail.theaccountsgroup.com
mail.webcontracttar.co.uk
mail.windowsmessages.com
portal.coffee-vouchers.com
promo.e-cards-mail.com
sat-coro.net
secure.accessyourcloud.co.uk
security.microsoftaccountalert.com
Populate the Sending IP section with the following IP address list:
23.249.219.118
18.168.104.87
13.42.200.223
3.9.228.40
3.127.7.20
63.178.172.172
13.216.31.253
74.177.142.1
Populate the Simulation URLs to allow section with the following:
*.sat-coro.net/*
*.eu.sat-coro.net/*
*.microsoft-notifications.co.uk/*
*.dropbox-notifications.co.uk/*
*.gmaillogin.co.uk/*
*.file-transf3rs.com/*
Select Save to save your changes.
If you use Coro's Inbound Gateway proxy for your incoming email, SAT requires you to make an update to the filtering configuration for the mail flow connector you created when setting up the gateway.
Make the following updates to the enhanced filtering configuration in Microsoft Defender admin center to ensure that Coro's SAT IP addresses are not restricted:
Sign into Microsoft Security admin center with your administrator credentials.
Go to Email & Collaboration > Policies & Rules > Threat policies.
Select Enhanced filtering:
Select the inbound email connector you created for the Inbound Gateway.
In the detail pane for the connector, select Skip these IP addresses that are associated with the connector, then enter the full list of Coro SAT IP addresses together with the list of Coro Inbound Gateway IP addresses (as specified in the connector configuration):
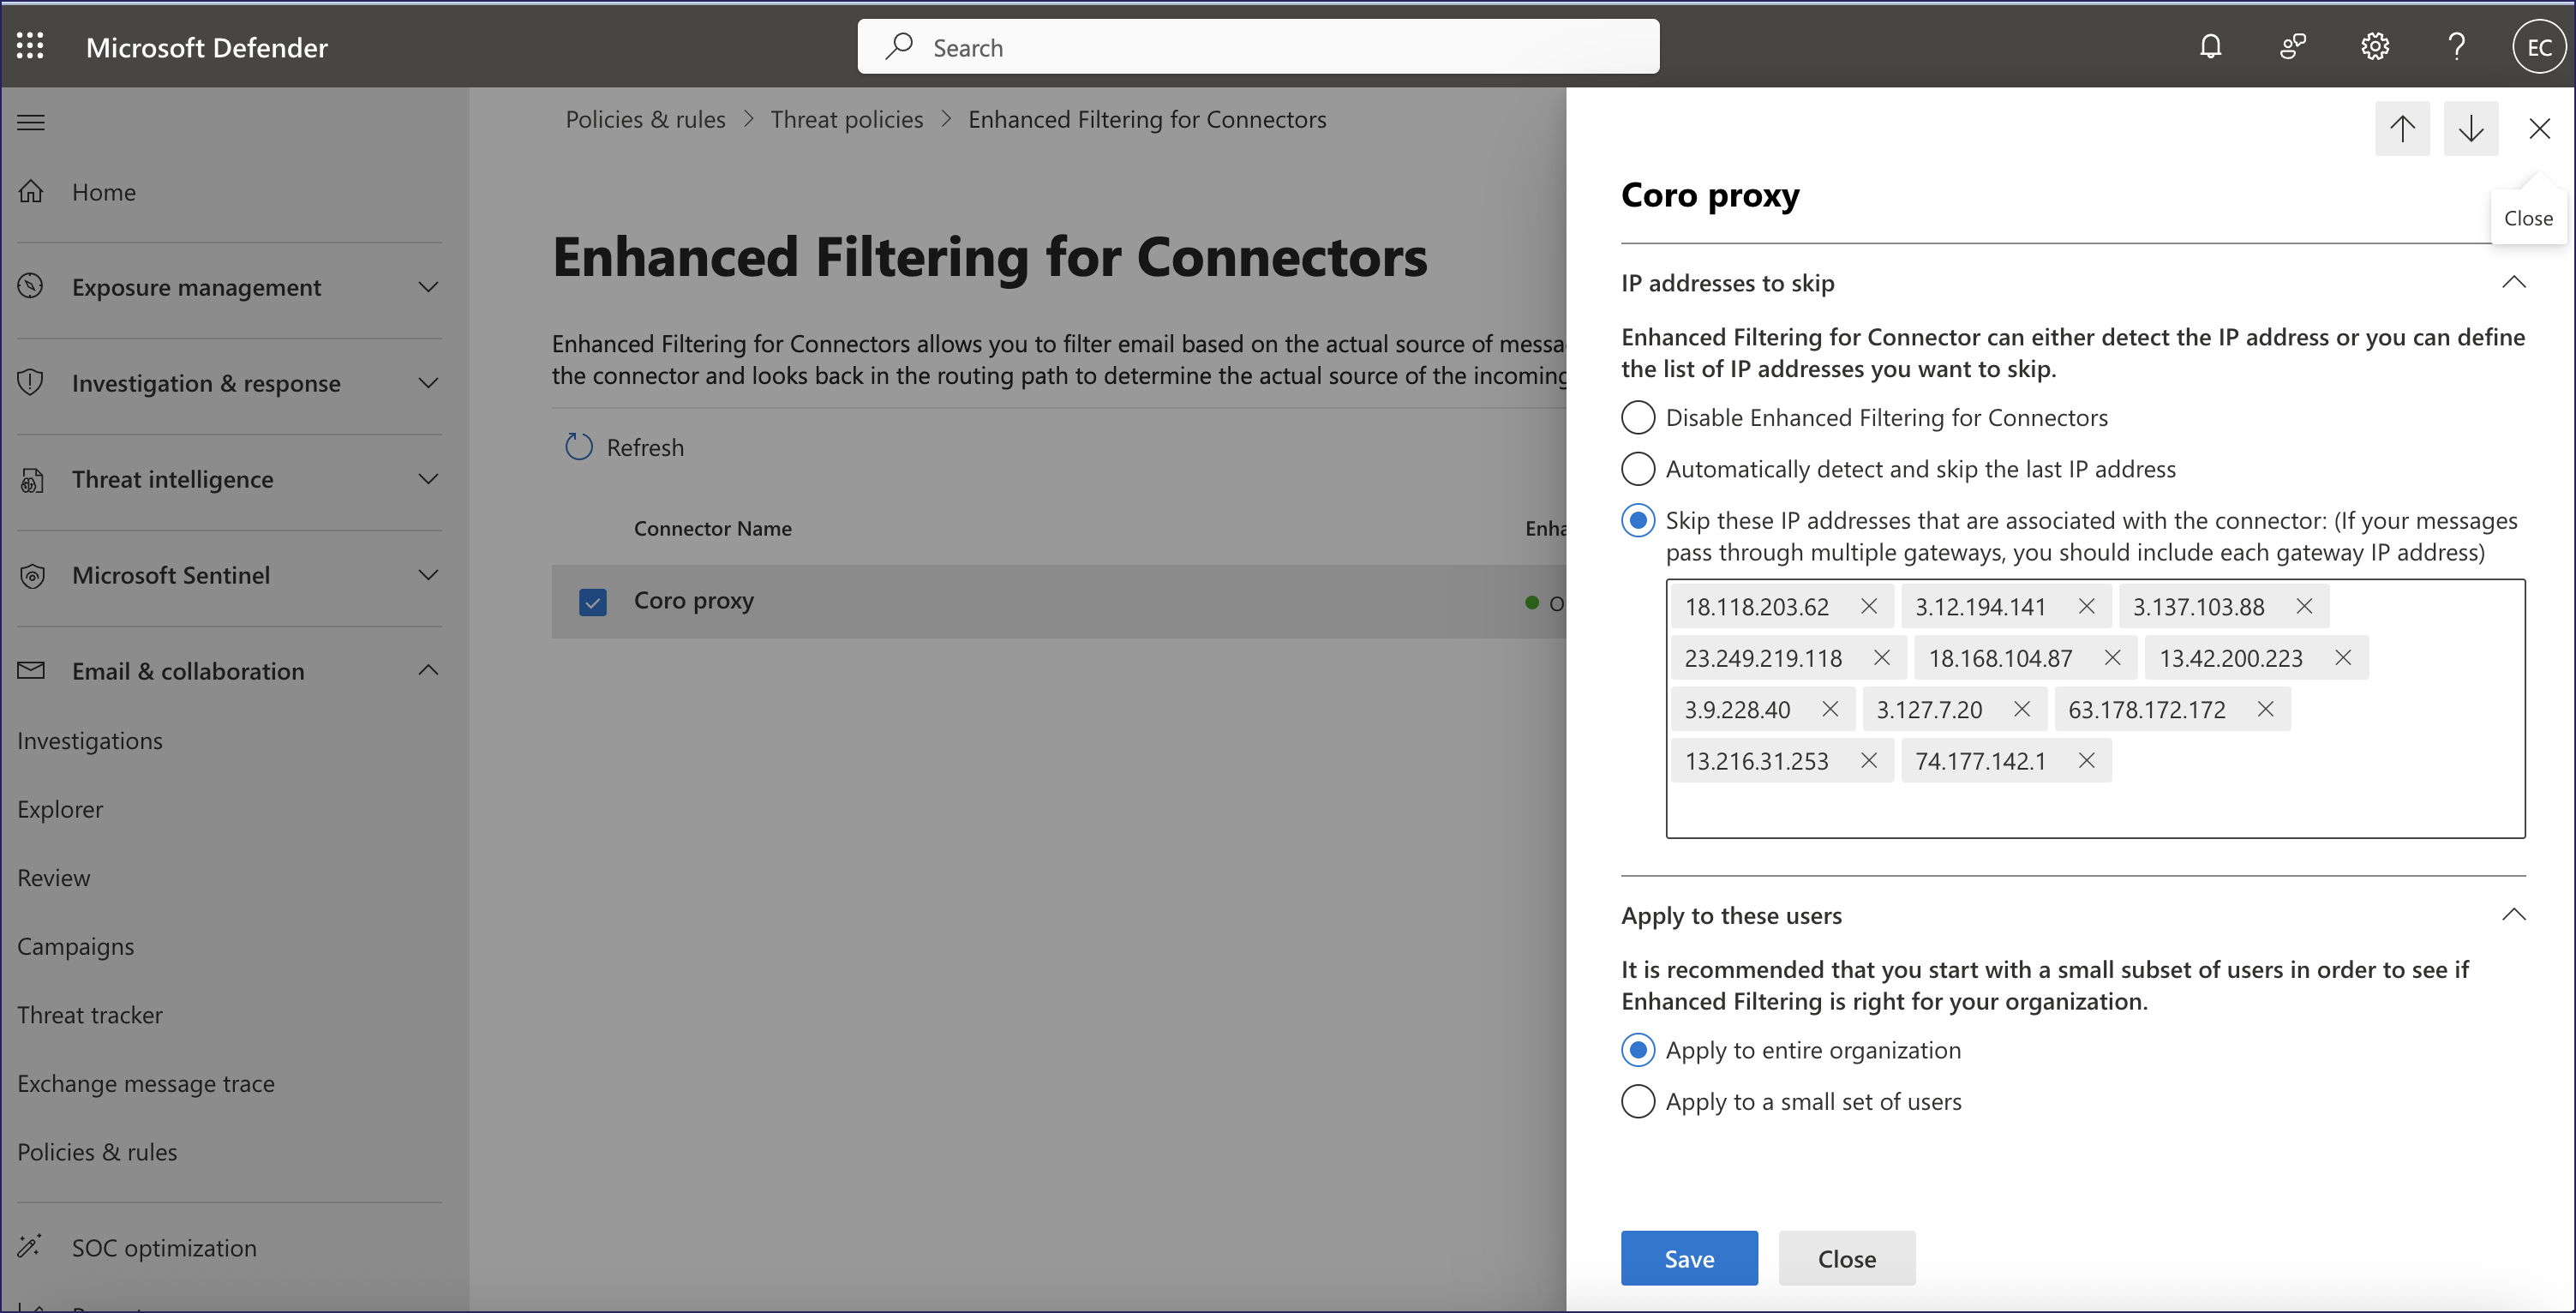
For Apply to these users, select Apply to entire organization.
Select Save.
To allowlist Coro SAT in Google Workspace:
Sign in to the Google Workspace admin console with your administrator credentials.
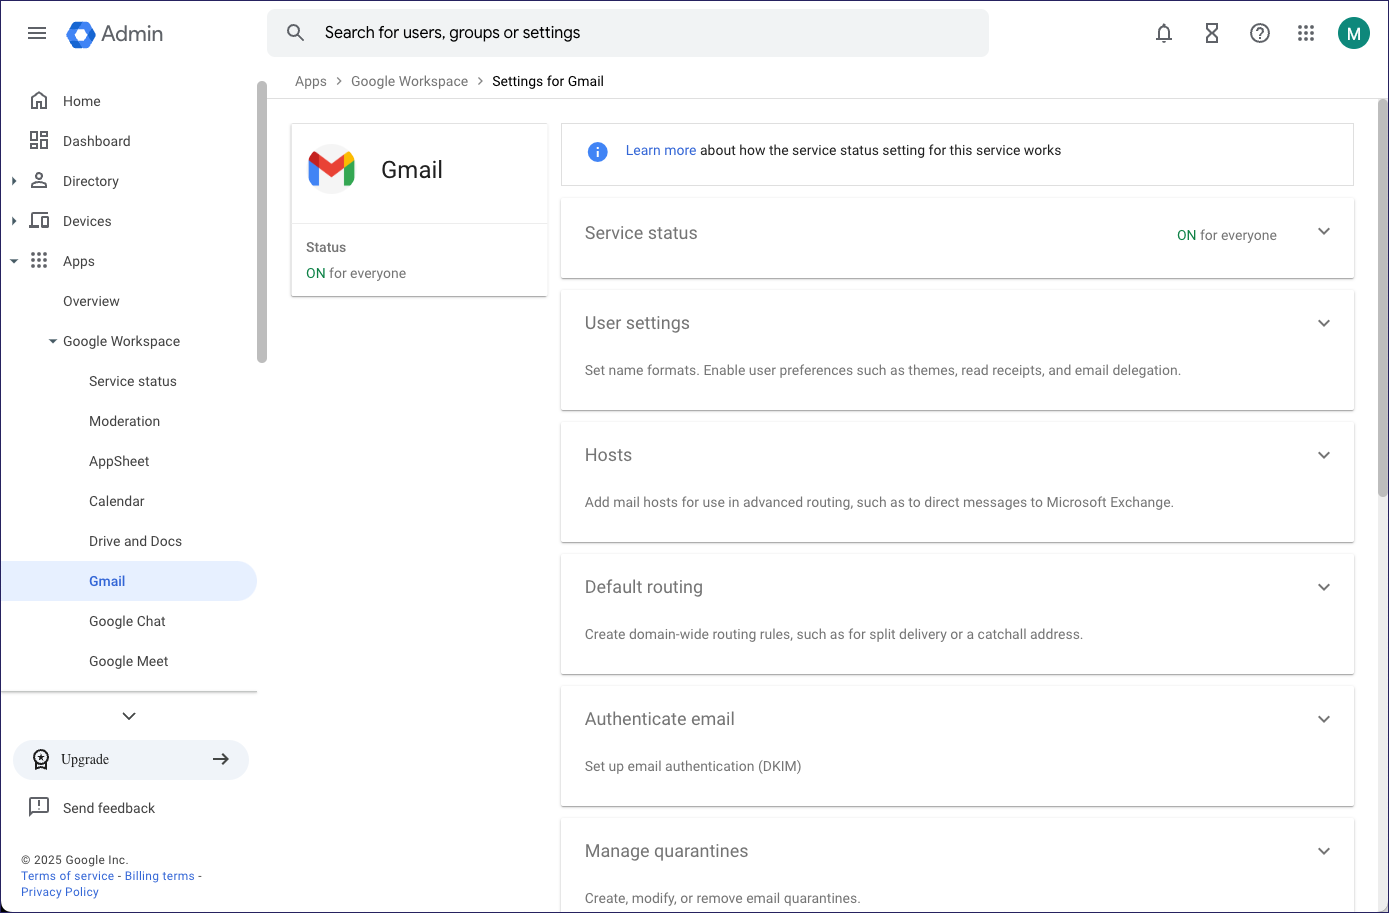
Select Apps > Google Workspace > Gmail.
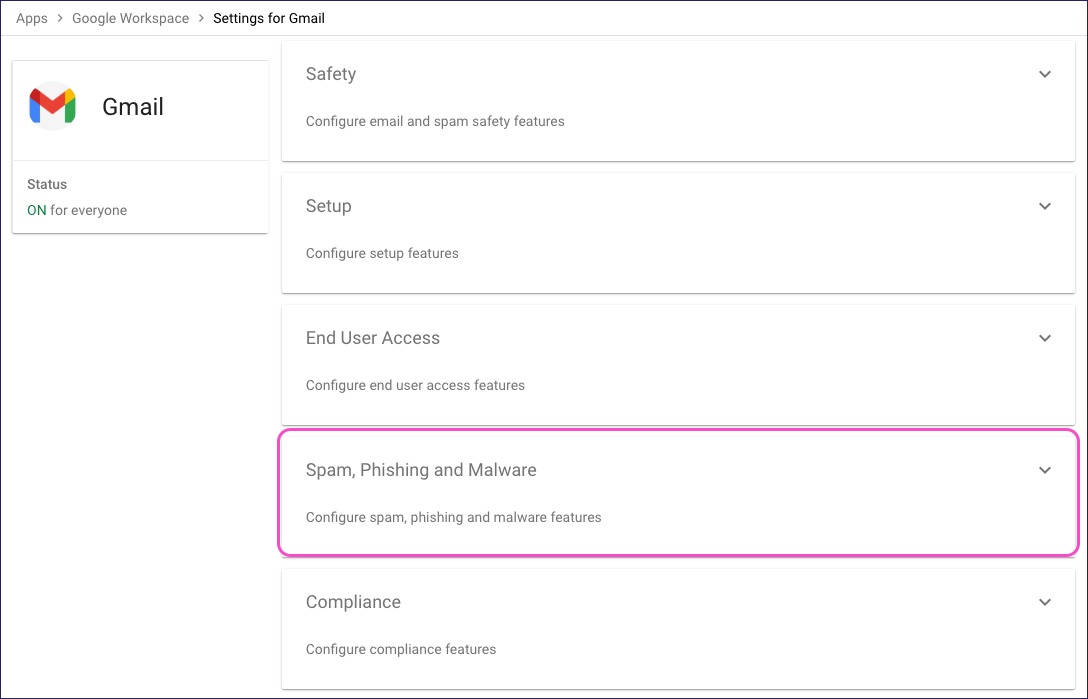
Google displays the Settings for Gmail page:
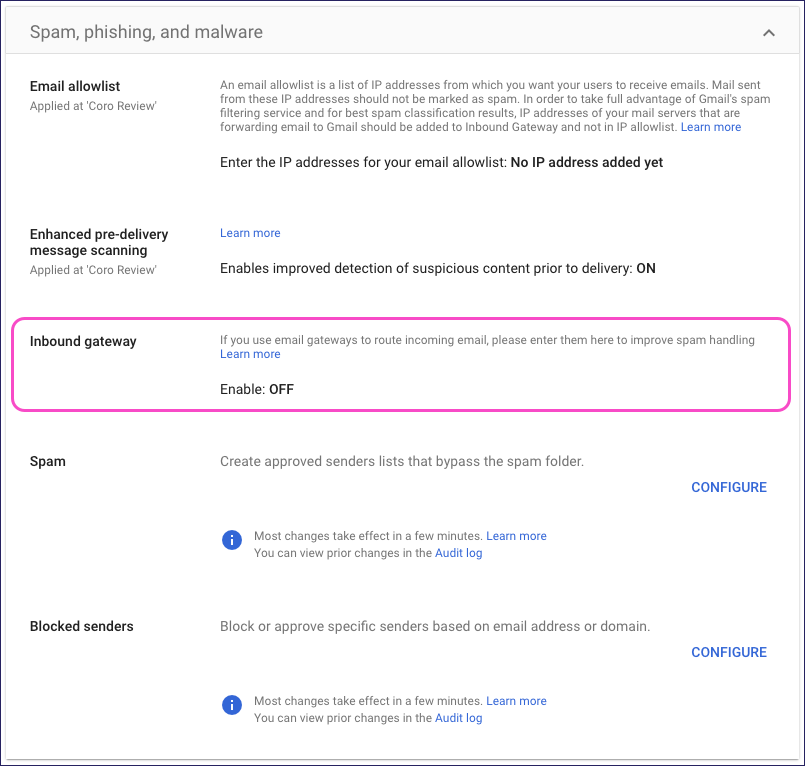
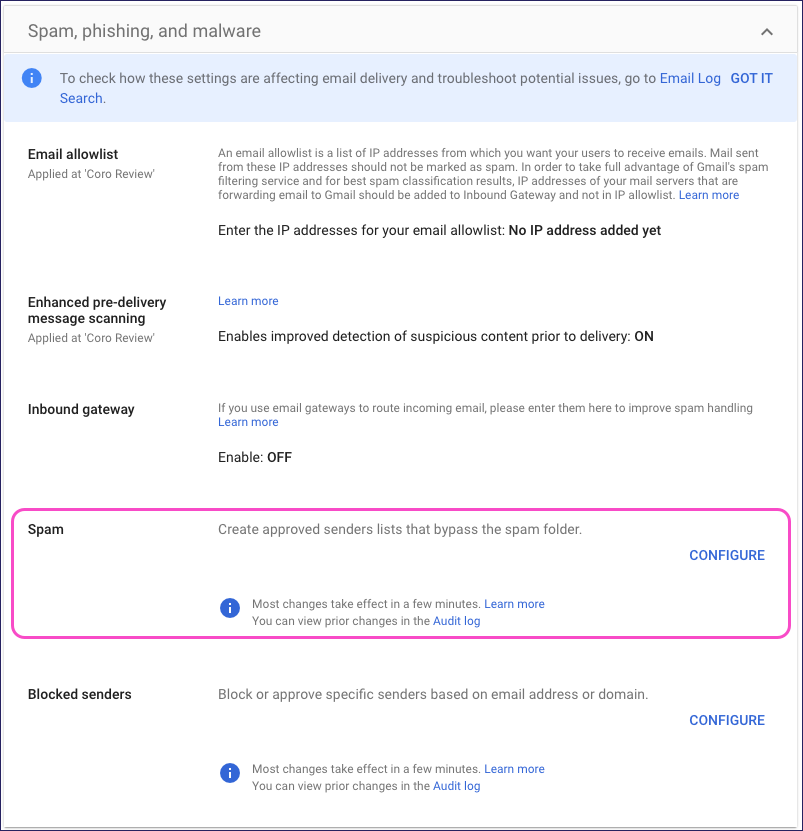
Locate and select Spam, Phishing and Malware:
Next, perform the following three-part procedure:
- Allowlist Coro's sender IP address
- Add Coro's sender IP address as an inbound mail gateway
- Allowlist Coro's SAT domains
To prevent Google from categorizing SAT emails from Coro as spam (and potentially quarantining or moving emails so users do not receive them), add Coro's sender IP address to the email allowlist.
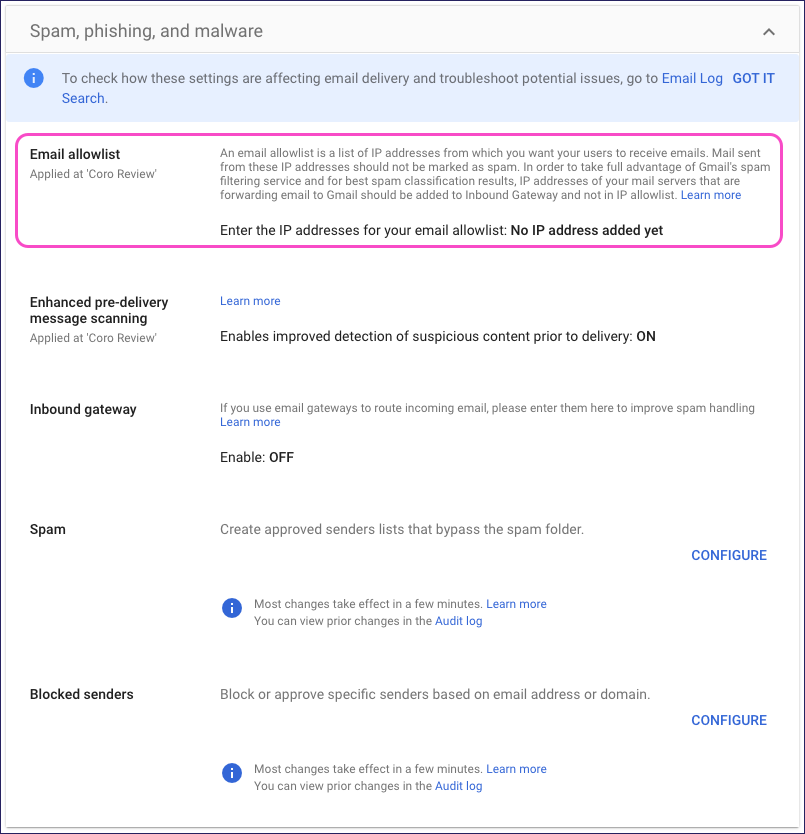
From the Spam, phishing, and malware page, select Email allowlist:
Enter the following Coro SAT IP addresses as a comma-separated list:
23.249.219.118,
18.168.104.87,
13.42.200.223,
3.9.228.40,
3.127.7.20,
63.178.172.172,
13.216.31.253,
74.177.142.1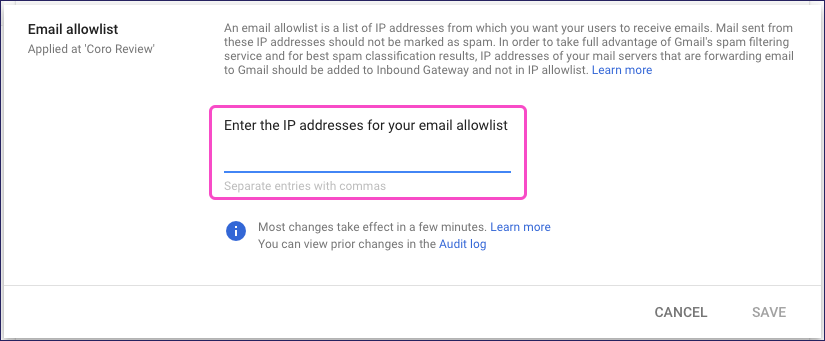
Select Save.
If you use (or plan to use) Coro's Inbound Gateway proxy for your incoming email, review the additional steps at the end of this section.
Google can automatically tag incoming emails it believes to be suspicious with warning banners to highlight the risk to recipients. To best assess your users' vulnerability to phishing, prevent Google from adding warning banners by adding Coro's sender IP address as an inbound gateway.
From the Spam, phishing, and malware page, select Inbound gateway:
In the Inbound gateway dialog, select Enable, then enter the following settings:
Gateway IPs: Add the SAT IP address list from the previous section.
Google requires you to add each IP address individually. Select ADD and enter a single address from the list, then select Save. Repeat for each IP address.
Automatically detect external IP (recommended): Disable.
Reject all mail not from gateway IPs: Disable.
Require TLS for connections from the email gateways listed above: Enable.
Message is considered spam if the following header regexp matches: Enable.
Regexp: Enter a random series of characters to represent a header that does not exist in Coro's SAT emails.
Test expression:
- Select Message is spam if regexp matches.
- Enable Disable Gmail spam evaluation on mail from this gateway; only use header value.
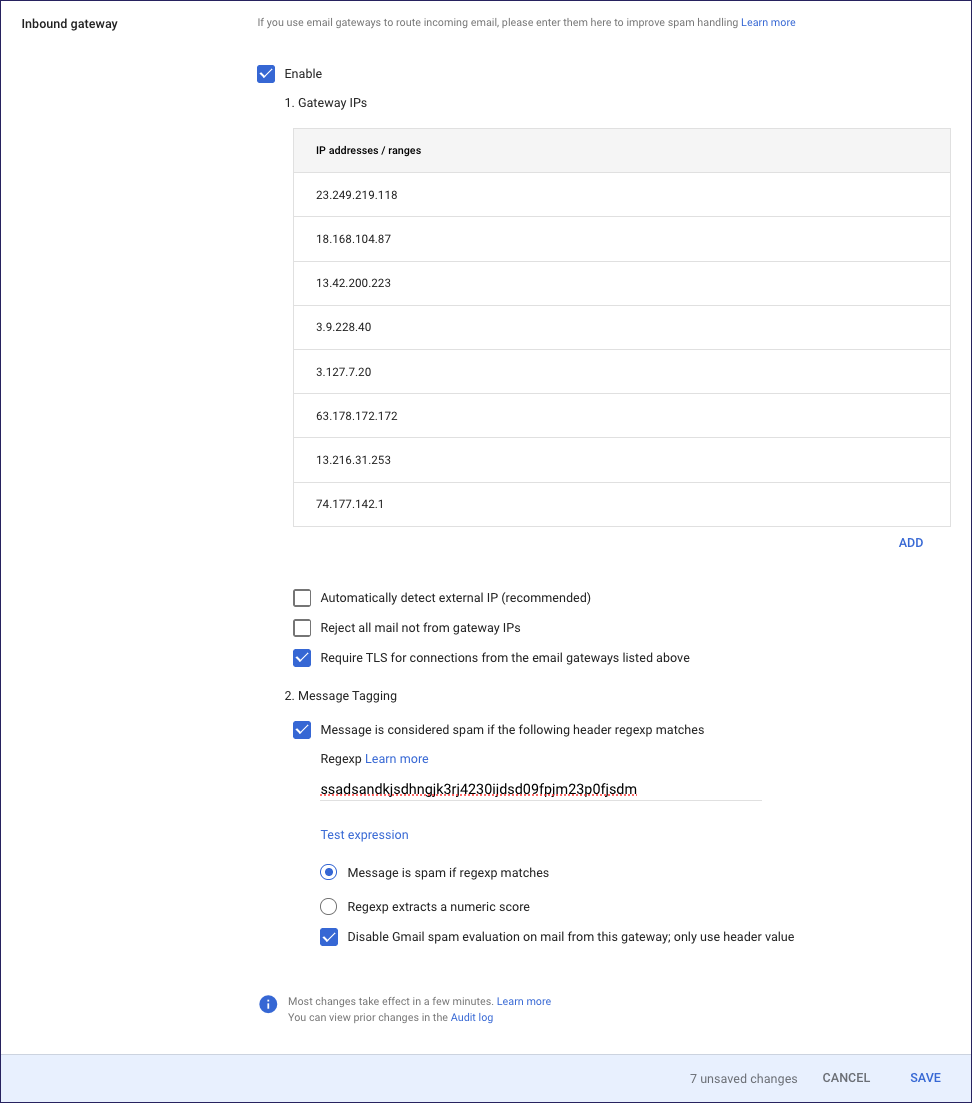
Select SAVE to save your changes.
If you use Coro's Inbound Gateway email proxy, make sure to add the Inbound Gateway's IP addresses to your inbound mail gateway settings in Google Workspace. The complete list should be a combination of Coro Inbound Gateway and Coro SAT IP addresses.
Contact Coro Support for the full list of IP addresses.
Make the following changes to your configuration:
From the Spam, phishing, and malware page, select Inbound gateway to edit the settings:
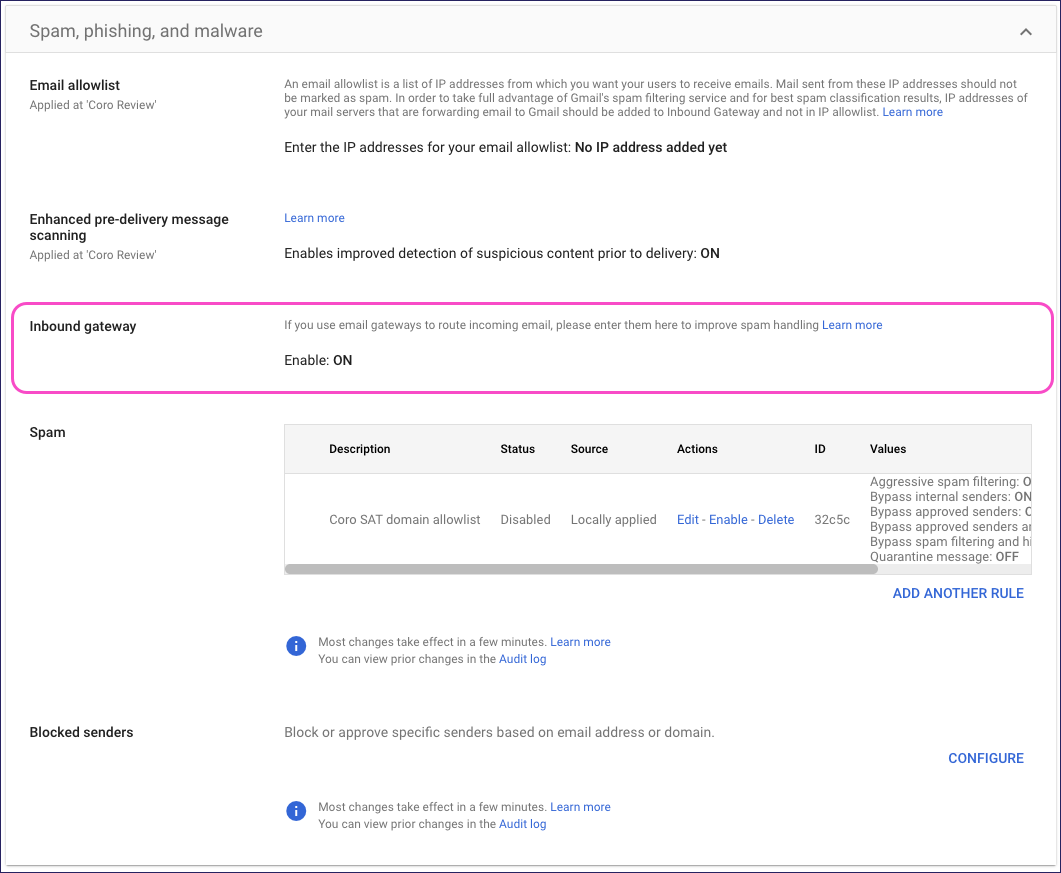
Google displays the Inbound gateway dialog.
Make the following changes:
Gateway IPs: Add the Inbound Gateway IP addresses to the list.
Google requires you to add each IP address individually. Select ADD and enter a single address from the list, then select Save. Repeat for each IP address.
Automatically detect external IP (recommended): Enable.
Disable Gmail spam evaluation on mail from this gateway; only use header value: Disable.
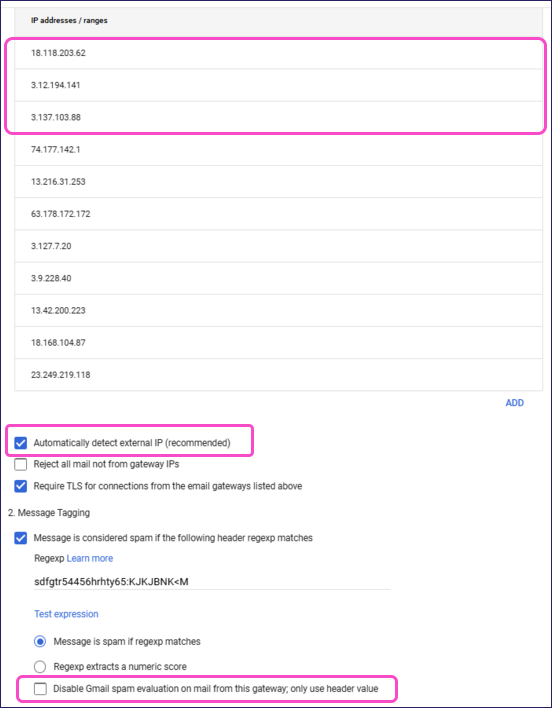
Select SAVE.
Add the domains used by Coro for phishing simulations, course enrollment, and policy hand-outs to your Google Workspace allowlist to make sure Google does not restrict delivery of such emails to your users.
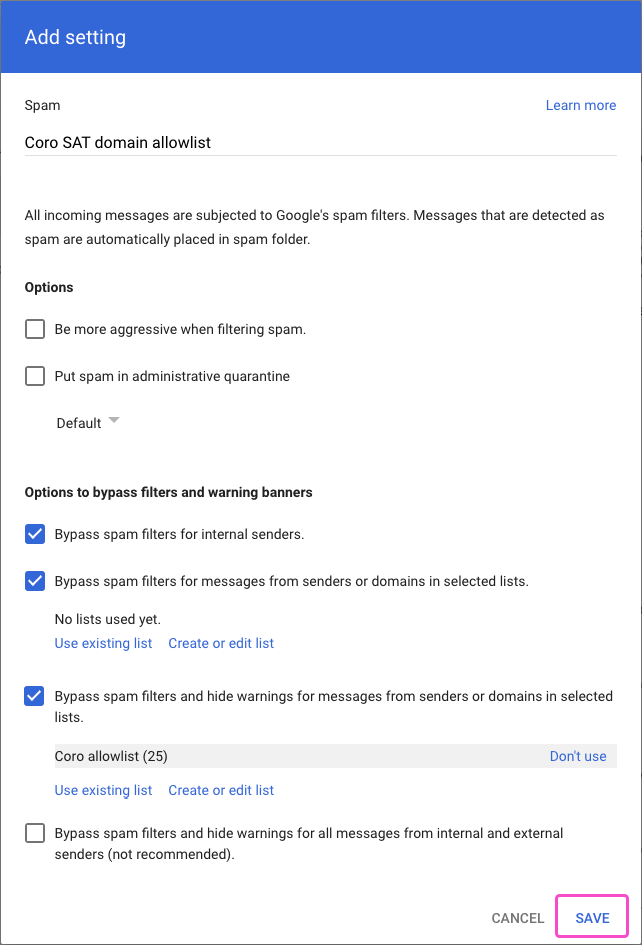
From the Spam, phishing, and malware page, locate the Spam section and select CONFIGURE:
Google displays the Add setting dialog:
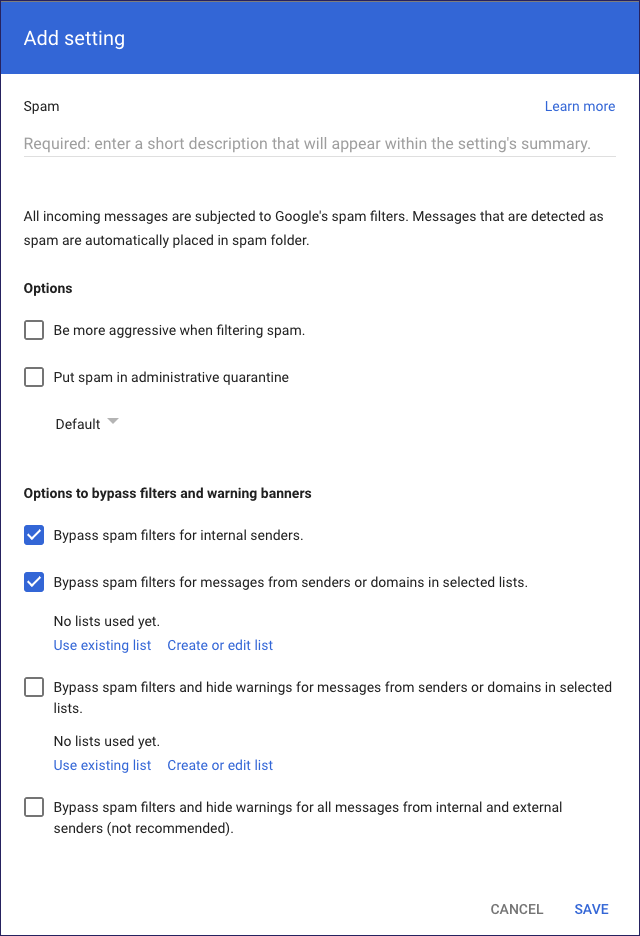
Enter a short description.
Enable Bypass spam filters and hide warnings for messages from senders or domains in selected lists., then select Create or edit list:

In the Manage address lists dialog, select ADD ADDRESS LIST:
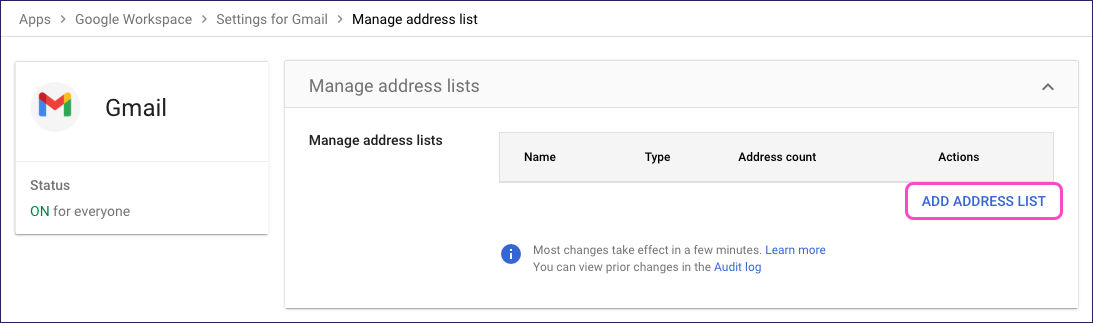
Google displays the Add address list dialog:

Enter a name for your new address list.
Select BULK ADD ADDRESSES.
Google displays the Bulk add addresses dialog:
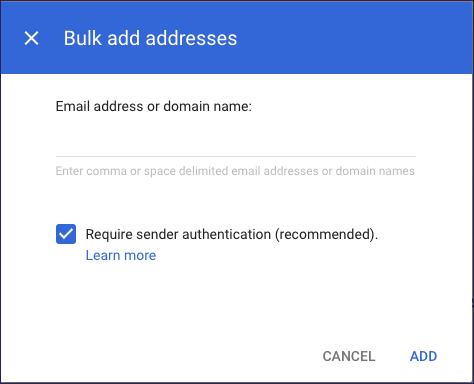
Copy and paste the following list of domains into the dialog:
365invoices.com,
accessyourcloud.co.uk,
amazoneorder.com,
bankfraudteam.com,
bluuebeams.com,
box.boxphishmail.com,
Boxphish.com,
coffee-vouchers.com,
dhlshiping.com,
dhlshipping.co.uk,
dpdupdates.co.uk,
dropbox-notifications.co.uk,
e-cards-mail.com,
electrosoftt.com,
eu.sat-coro.net,
fa-uk.com,
fed-ex-parcels.com,
file-transf3rs.com,
fileboxshare.com,
freshworked.co.uk,
gmaillogin.co.uk,
google-account-team.com,
google-notifications.co.uk,
google-notificatons.com,
hr-staff-updates.com,
insightfulsurveys.com,
isecurity-alerts.com,
just-eat-voucher.co.uk,
linkedin-network.com,
mail365-team.com,
microsoft-notifications.co.uk,
microsoft-security-alerts.com,
microsoftaccountalert.com,
mydeliverytracker.com,
netflix-password.co.uk,
netflix-update-details.com,
netflixnotifications.co.uk,
netlfix-update-details.com,
netlixnotifications.co.uk,
nhs-antibodytest.co.uk,
noreply-amazon.co.uk,
noreply-deliveroocredit.co.uk,
noreply-hmrcupdate.co.uk,
noreply-linkedinverify.co.uk,
noreply-microsoftpasswordreset.co.uk,
noreply-sage.com,
noreply-ubercredit.co.uk,
onedrivesharing.com,
royaal-maill.com,
sat-coro.net,
staff-payroll-updates.com,
theaccountsgroup.com,
traffordgov.com,
webcontracttar.co.uk,
who-travel-updates.com,
windowsmessages.com
Enable Require sender authentication, then select ADD.
Select SAVE.
Return to the Add setting dialog and select Use existing list:

Select your newly created address list:
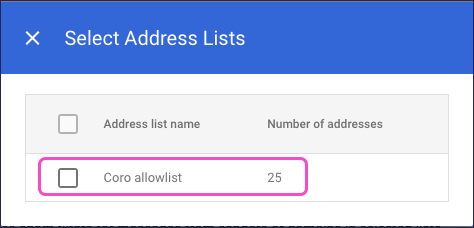
Select X to close the selection dialog.
Select SAVE to create your Coro SAT spam rule:
Coro supports SAT for users in custom email domains hosted by third-party providers. To learn more about activating SAT for custom domains, see Configuring Security Awareness Training.
To avoid Coro SAT simulations and training being quarantined or flagged as malicious by your email service, administrators must allowlist certain domains, IP addresses, and URLs.
Sending domains:
365invoices.com,
accessyourcloud.co.uk,
amazoneorder.com,
apple.isecurity-alerts.com,
bankfraudteam.com,
bluuebeams.com,
box.boxphishmail.com,
Boxphish.com,
coffee-vouchers.com,
dhlshiping.com,
dhlshipping.co.uk,
dpdupdates.co.uk,
drive.fileboxshare.com,
dropbox-notifications.co.uk,
e-cards-mail.com,
electrosoftt.com,
email.dpdupdates.co.uk,
eu.sat-coro.net,
fa-uk.com,
fed-ex-parcels.com,
file-transf3rs.com,
fileboxshare.com,
freshworked.co.uk,
gmaillogin.co.uk,
google-account-team.com,
google-notifications.co.uk,
google-notificatons.com,
hr-staff-updates.com,
info.bluuebeams.com,
info.dhlshipping.co.uk,
info.electrosoftt.com,
info.freshworked.co.uk,
info.gmaillogin.co.uk,
info.google-notificatons.com,
info.just-eat-voucher.co.uk,
info.mail365-team.com,
info.microsoft-security-alerts.com,
info.mydeliverytracker.com,
info.netlfix-update-details.com,
info.netlixnotifications.co.uk,
info.noreply-linkedinverify.co.uk,
info.onedrivesharing.com,
info.royaal-maill.com,
info.who-travel-updates.com,
insightfulsurveys.com,
isecurity-alerts.com,
just-eat-voucher.co.uk,
linkedin-network.com,
mail.365invoices.com,
mail.amazoneorder.com,
mail.bankfraudteam.com,
mail.dropbox-notifications.co.uk,
mail.fa-uk.com,
mail.file-transf3rs.com,
mail.google-account-team.com,
mail.google-notifications.co.uk,
mail.hr-staff-updates.com,
mail.insightfulsurveys.com,
mail.linkedin-network.com,
mail.microsoft-notifications.co.uk,
mail.netflix-password.co.uk,
mail.nhs-antibodytest.co.uk,
mail.noreply-amazon.co.uk,
mail.noreply-deliveroocredit.co.uk,
mail.noreply-hmrcupdate.co.uk,
mail.noreply-sage.com,
mail.noreply-ubercredit.co.uk,
mail.staff-payroll-updates.com,
mail.theaccountsgroup.com,
mail.traffordgov.com,
mail.webcontracttar.co.uk,
mail.windowsmessages.com,
mail365-team.com,
microsoft-notifications.co.uk,
microsoft-security-alerts.com,
microsoftaccountalert.com,
mydeliverytracker.com,
netflix-password.co.uk,
netflix-update-details.com,
netflixnotifications.co.uk,
netlfix-update-details.com,
netlixnotifications.co.uk,
nhs-antibodytest.co.uk,
noreply-amazon.co.uk,
noreply-deliveroocredit.co.uk,
noreply-hmrcupdate.co.uk,
noreply-linkedinverify.co.uk,
noreply-microsoftpasswordreset.co.uk,
noreply-sage.com,
noreply-ubercredit.co.uk,
onedrivesharing.com,
portal.coffee-vouchers.com,
promo.e-cards-mail.com,
royaal-maill.com,
sat-coro.net,
secure.accessyourcloud.co.uk,
security.microsoftaccountalert.com,
staff-payroll-updates.com,
theaccountsgroup.com,
traffordgov.com,
webcontracttar.co.uk,
who-travel-updates.com,
windowsmessages.com
Sending IP addresses:
23.249.219.118,
18.168.104.87,
13.42.200.223,
3.9.228.40,
3.127.7.20,
63.178.172.172,
13.216.31.253,
74.177.142.1
Simulation URLs:
*.sat-coro.net/*,
*.eu.sat-coro.net/*,
*.microsoft-notifications.co.uk/*,
*.dropbox-notifications.co.uk/*,
*.gmaillogin.co.uk/*,
*.file-transf3rs.com/*
For assistance or to discuss your specific email service configuration, contact Coro Support.