Coro enables admin users to export data from their workspace in CSV format. The data that can be exported includes:
Activity logs
Ticket logs
Protected users
Devices
EDR Telemetry
Coro provides ticket log exports as ZIP archives that contain one or more CSV files. Each ticket type is exported as a separate CSV file to maintain a clear and organized file structure.
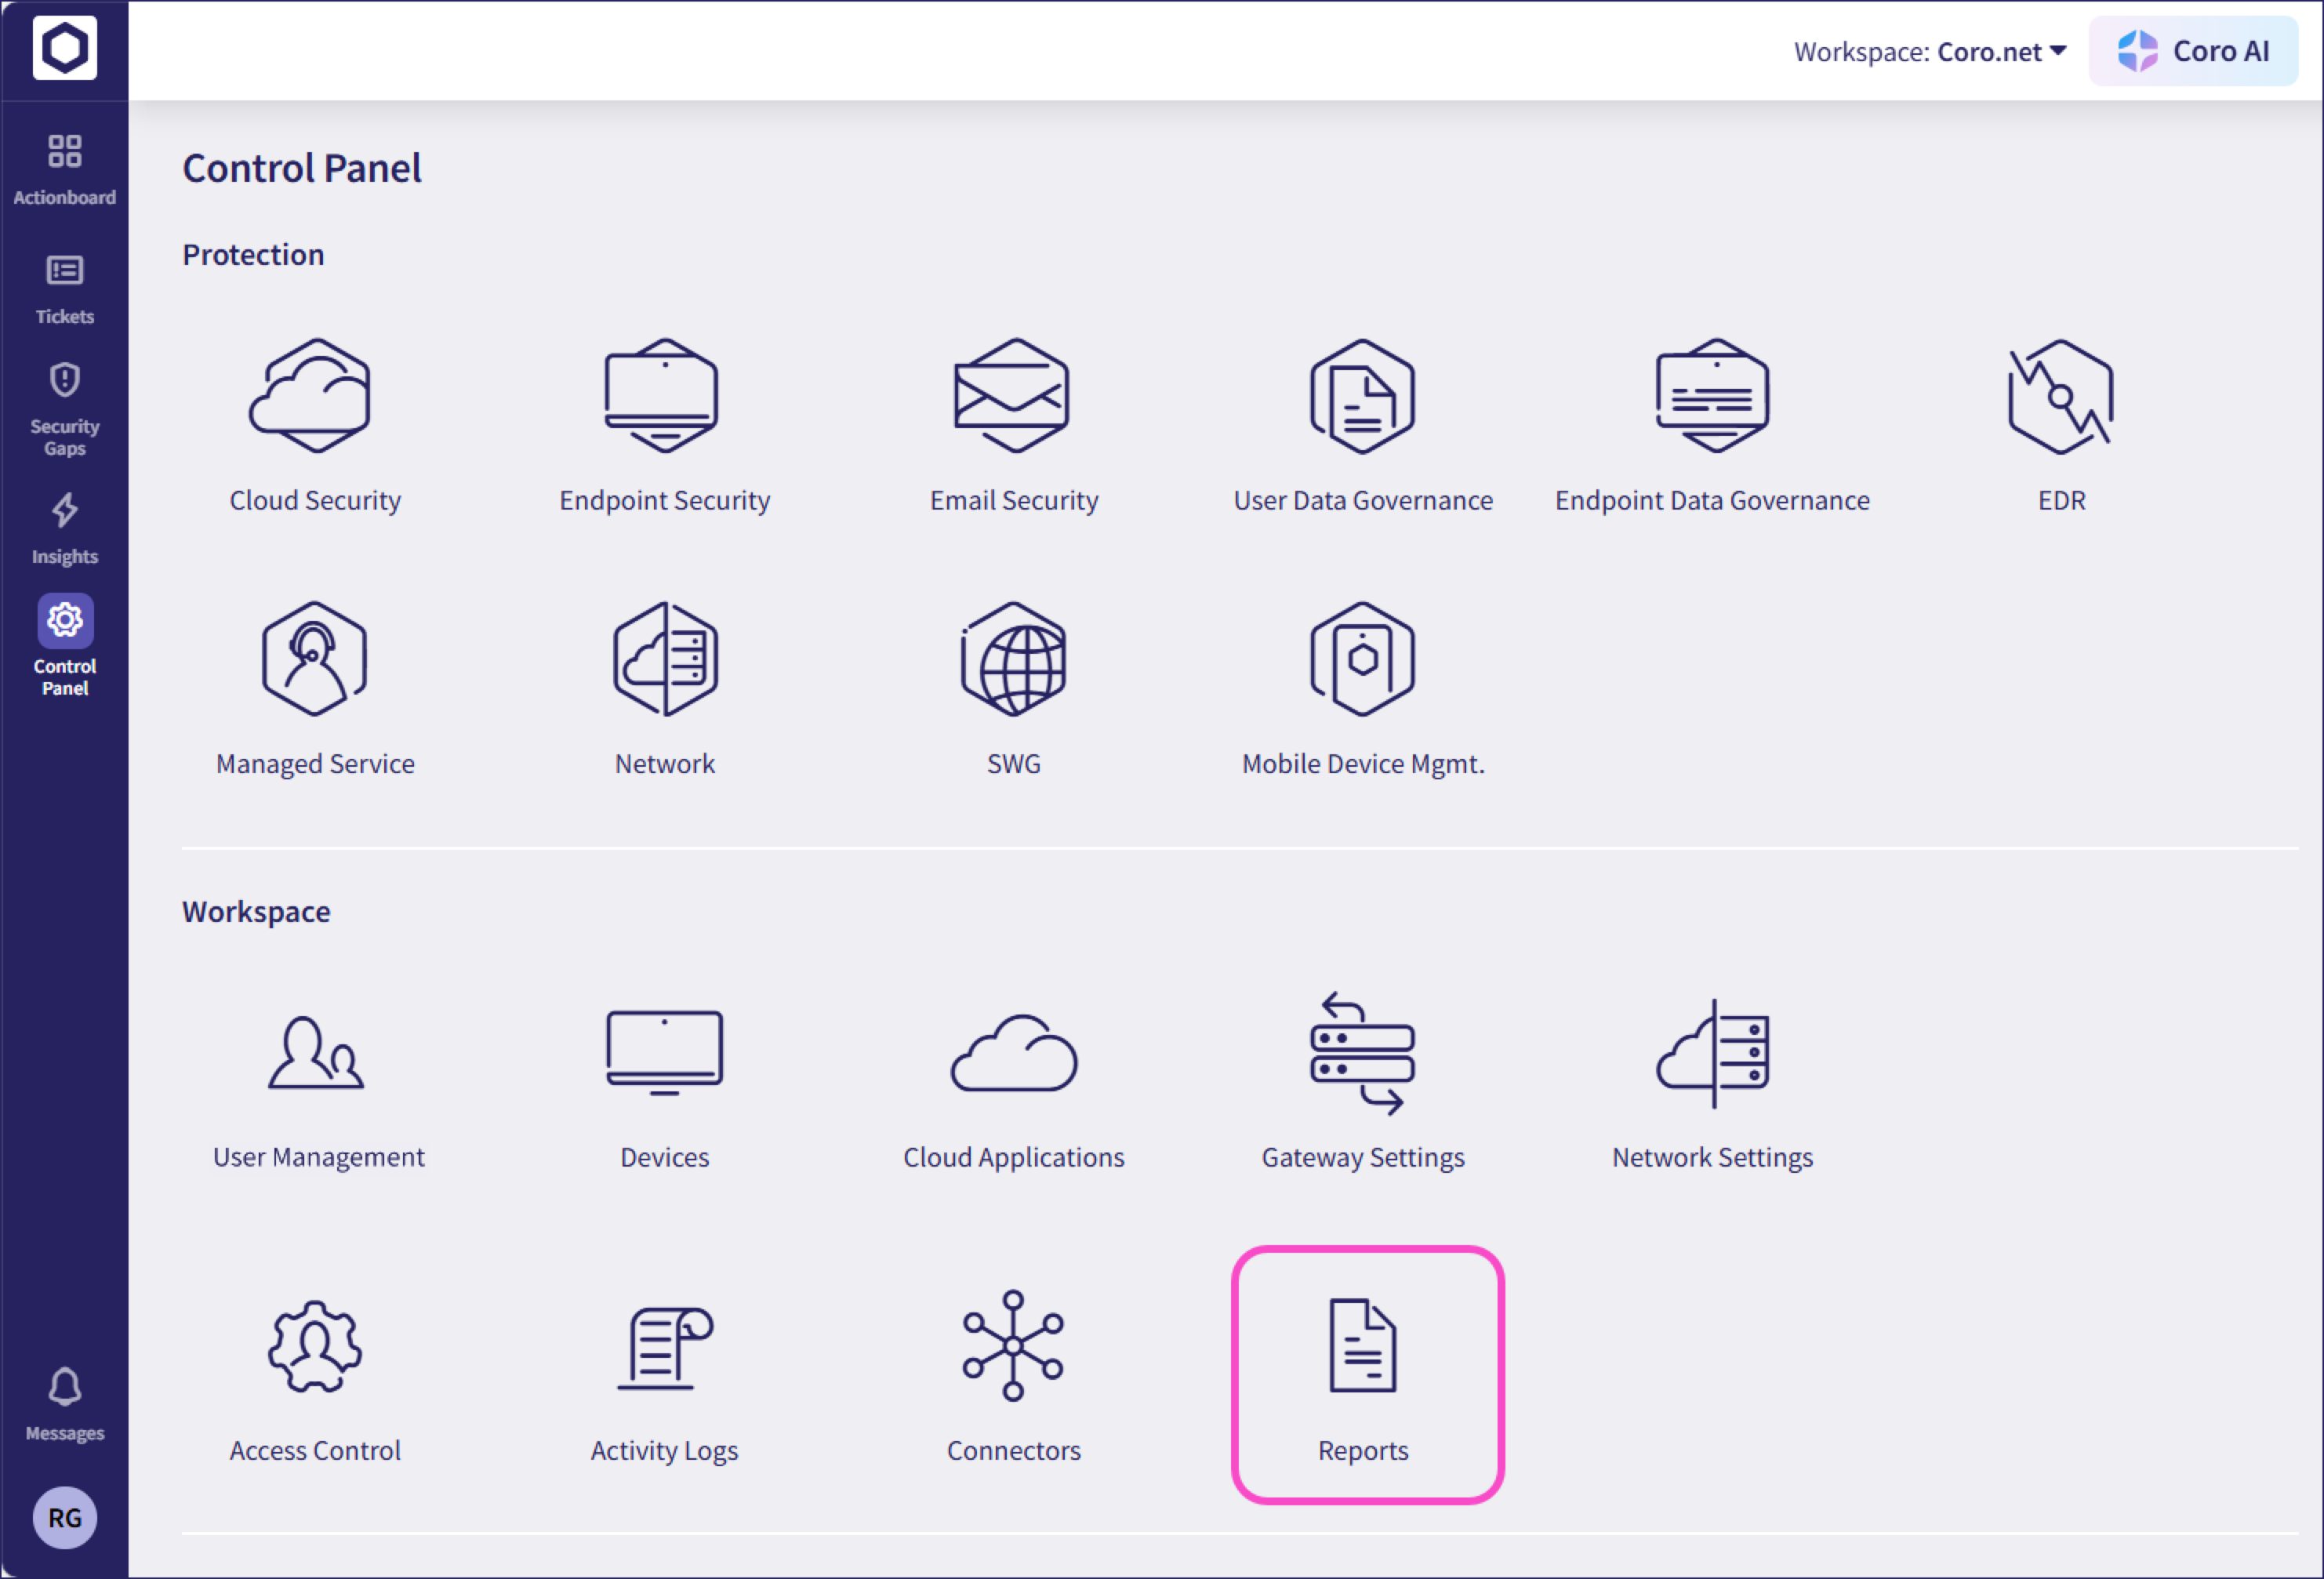
To view generated exports:
Go to Control Panel > Reports:
Select Exports:

Coro displays the Exports page:
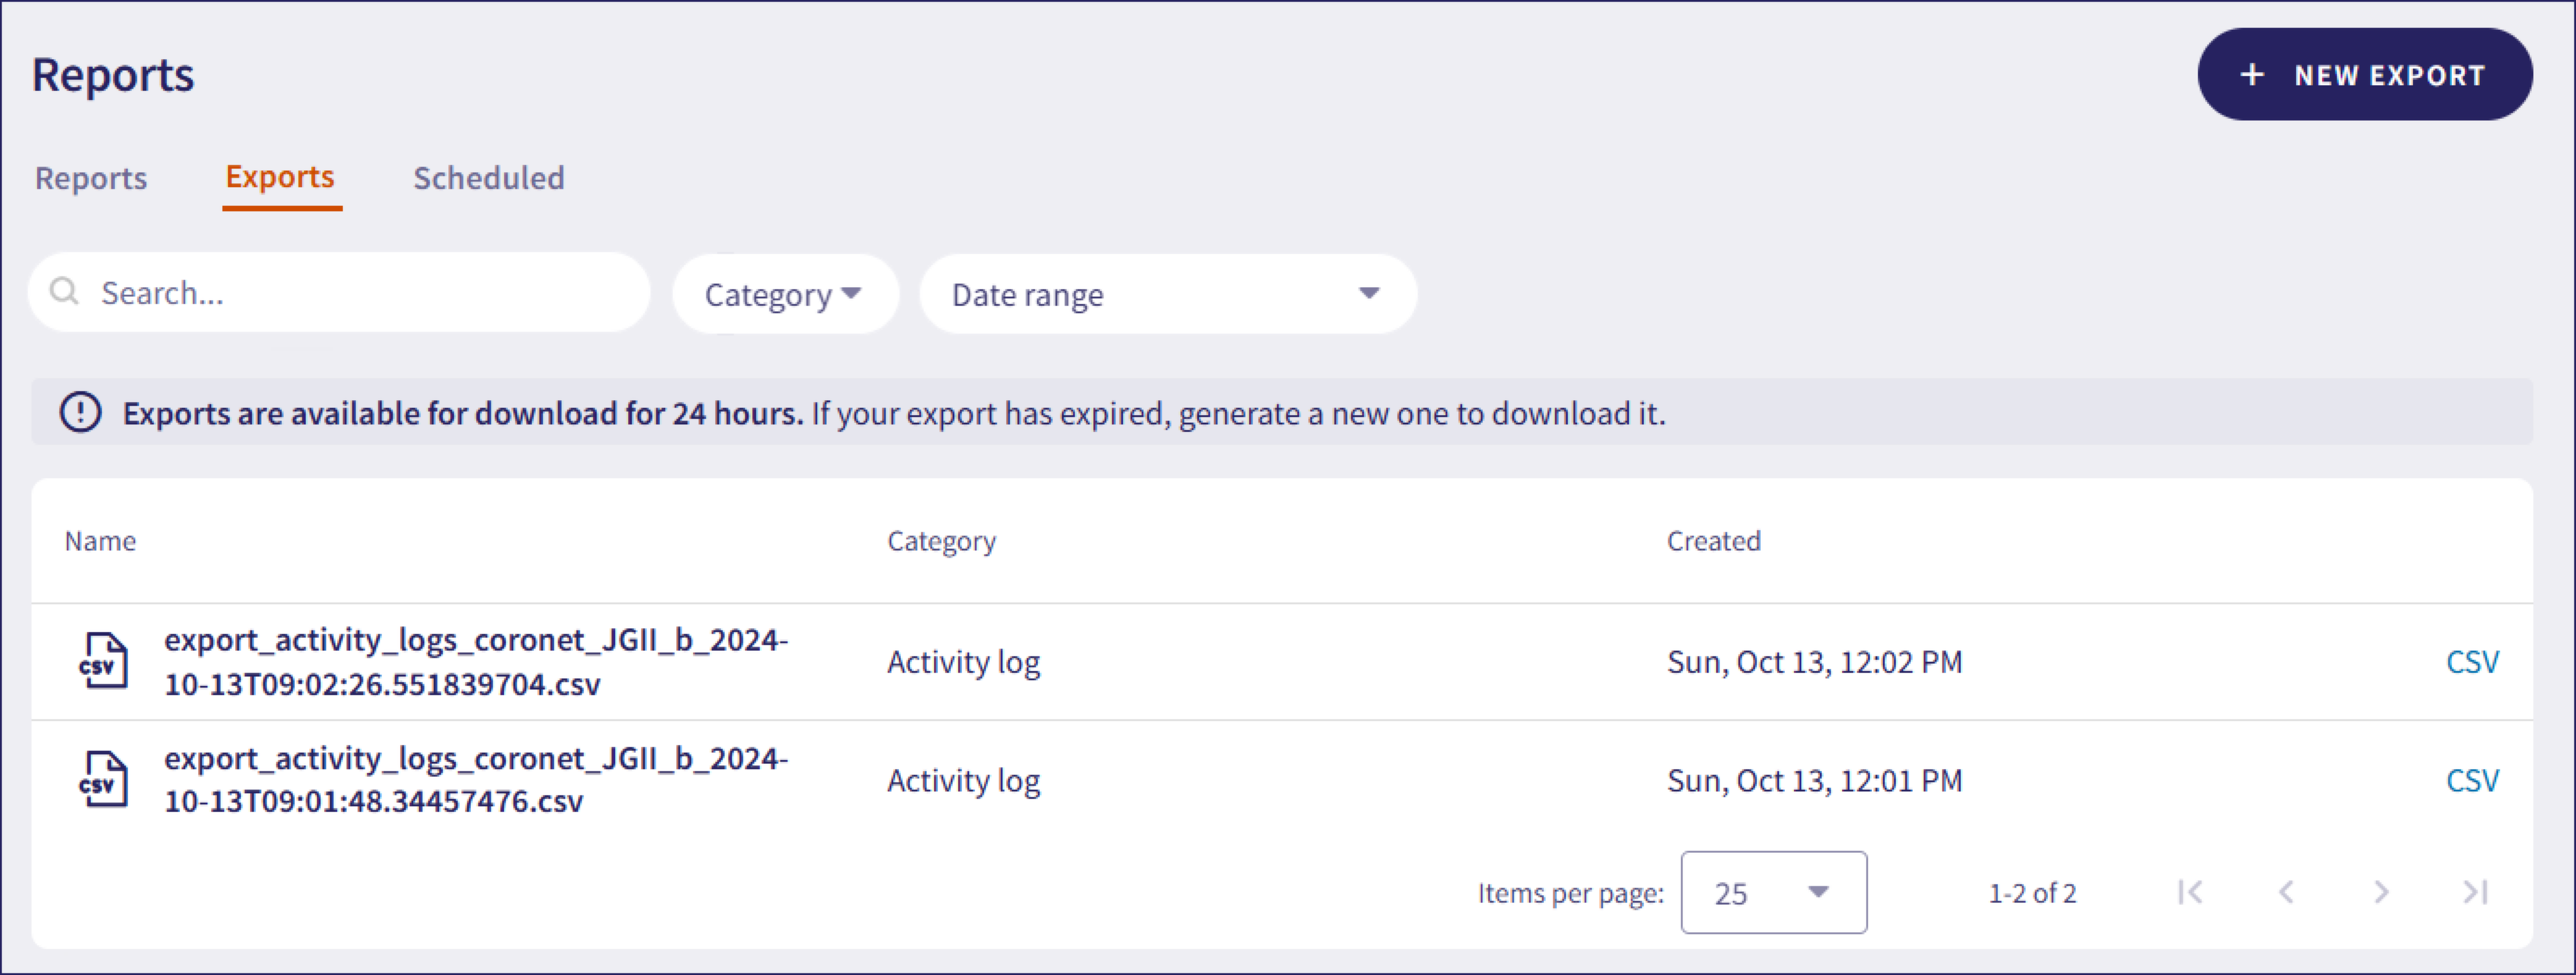
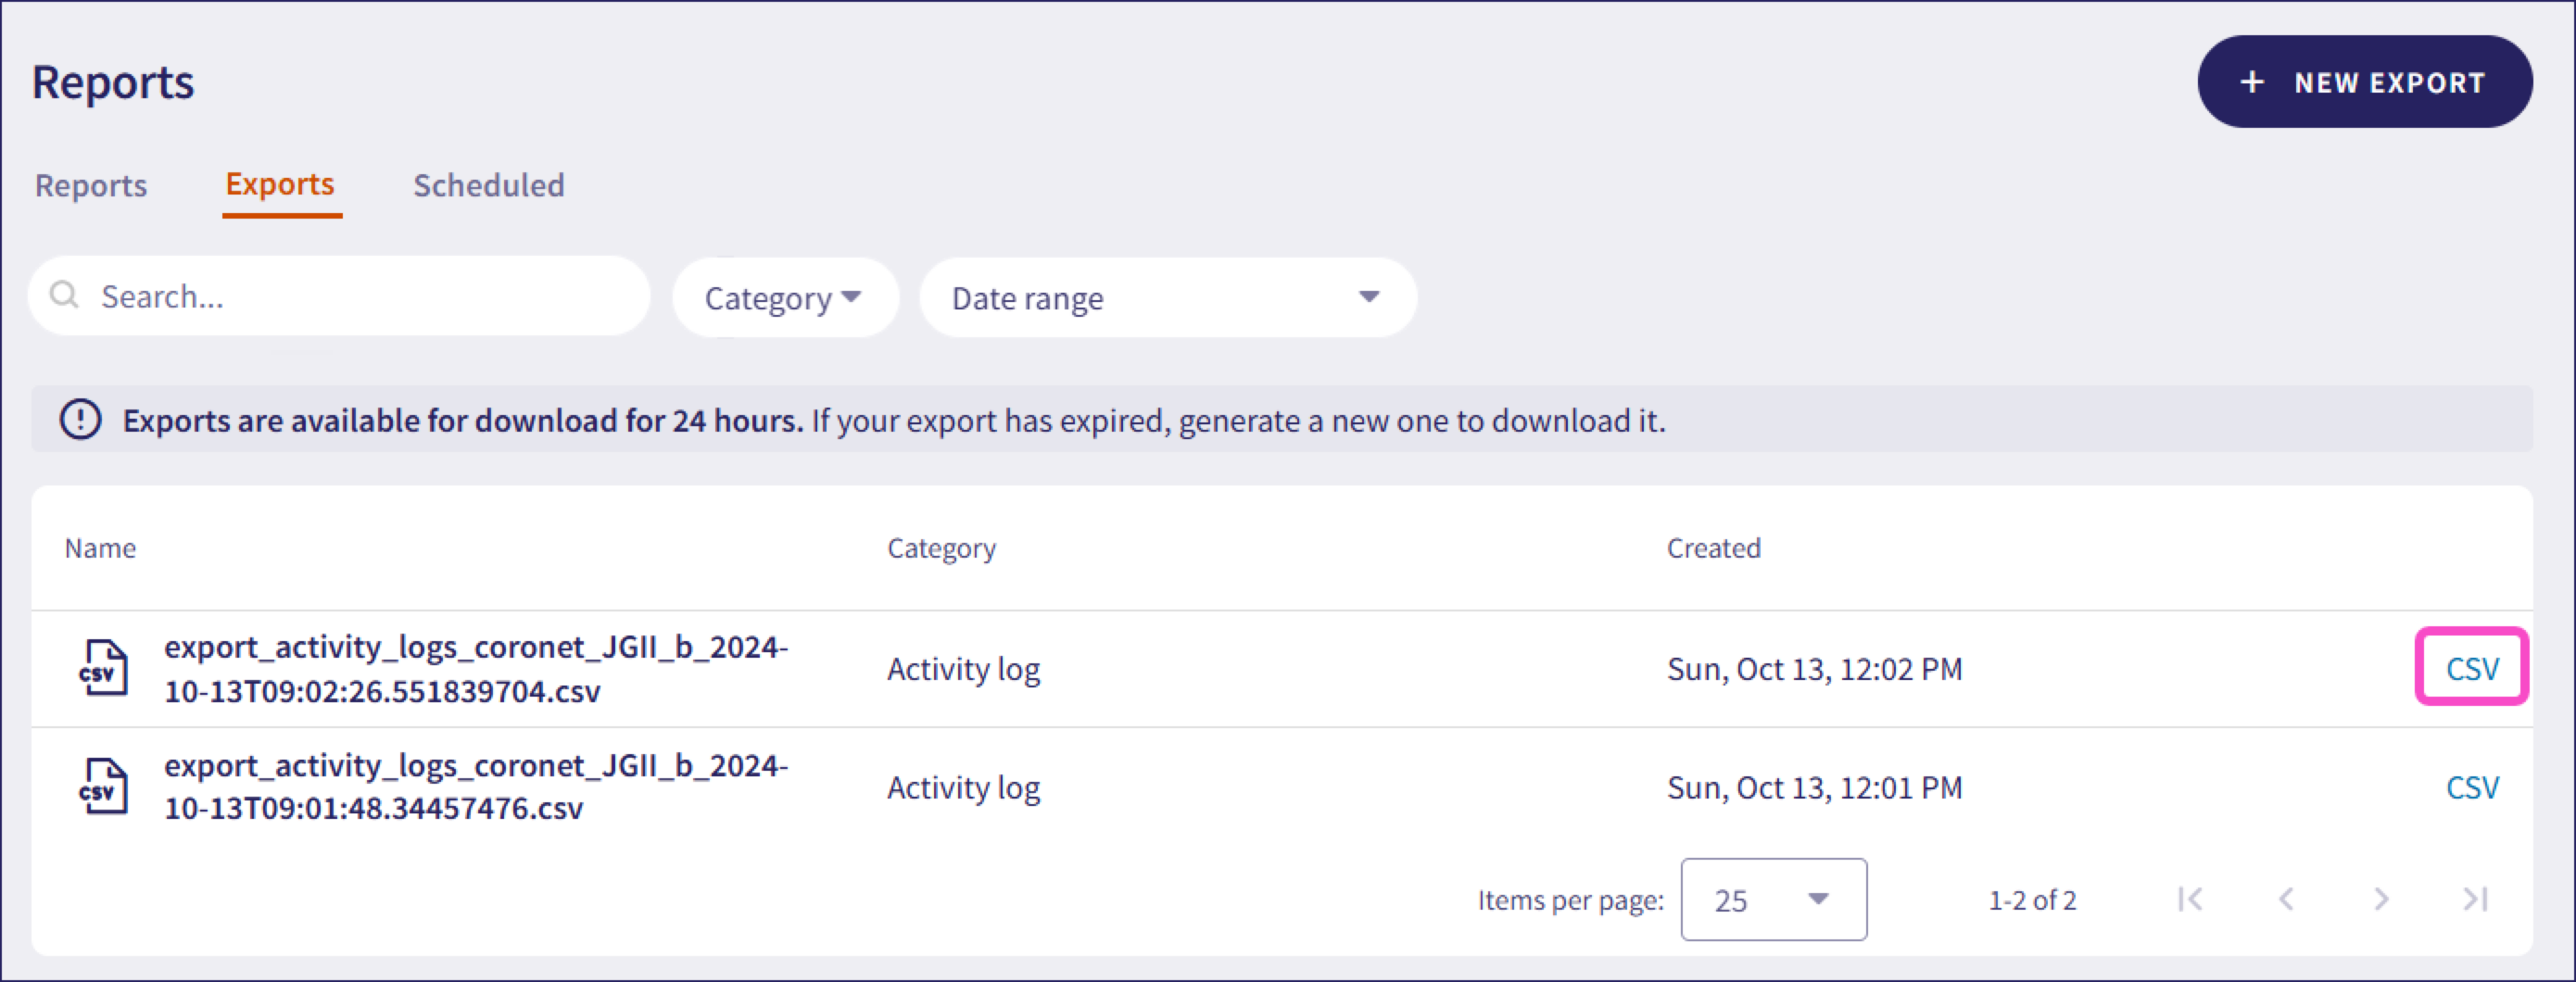
Coro lists exports generated in the past 24 hours. Admin users can download exports by selecting CSV:
After 24 hours, the export expires and a new one must be generated.
To create an export:
Select + NEW EXPORT:
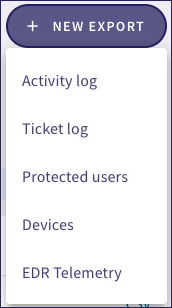
Select the export.
Enter the details to include in the export:
Activity log: Select all activities in the last 90 days, or specific activities such as Email Security or Endpoint Data Governance within a selected date range.
Ticket log: Select all tickets in the last 90 days, or specific tickets from selected modules or ticket types in a selected date range.
Protected users: Select all protected users, or users from specific cloud applications such as Google workspace or Microsoft 365.
Devices: Select all protected devices, or devices with specific operating system (OS) versions, Coro versions, vulnerabilities, or associated with specific group labels.
EDR Telemetry: Select all telemetry types, or selected telemetry types, and the date range (maximum of 14 days).
Select GENERATE.
Coro displays the export in the list.
Select CSV to download the export: