Creating and managing webhooks
Coro’s webhooks offer a streamlined way to automate client billing and track usage in real-time. By setting up event-driven workflows, you can receive instant notifications on changes like workspace status, user counts, and add-on activations, ensuring that billing is always accurate. This integration allows admin users with sufficient permissions to manage billing efficiently across multiple clients while maintaining transparency and control without manual intervention.
If a webhook request fails, up to three additional attemps are made. Coro waits for increasingly longer intervals before each new attempt. If the webhook fails all four times, it is disabled and logged in the activity log.
To create a webhook:
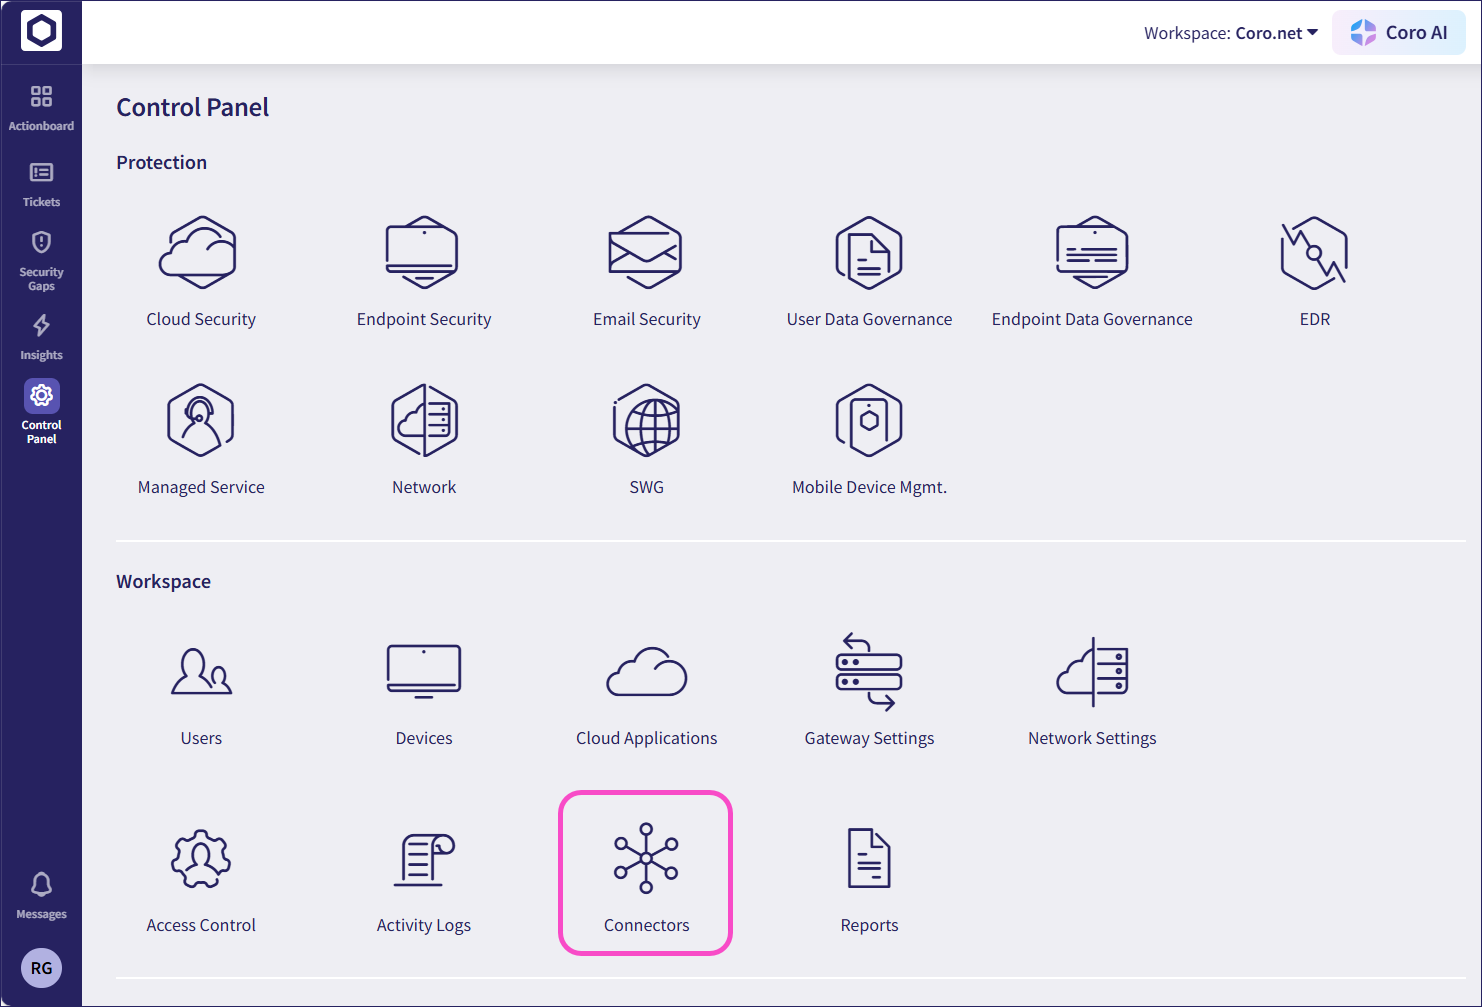
Sign in to the Coro console and from the Control Panel, select Connectors:
Select Webhooks:

Select CREATE WEBHOOK:

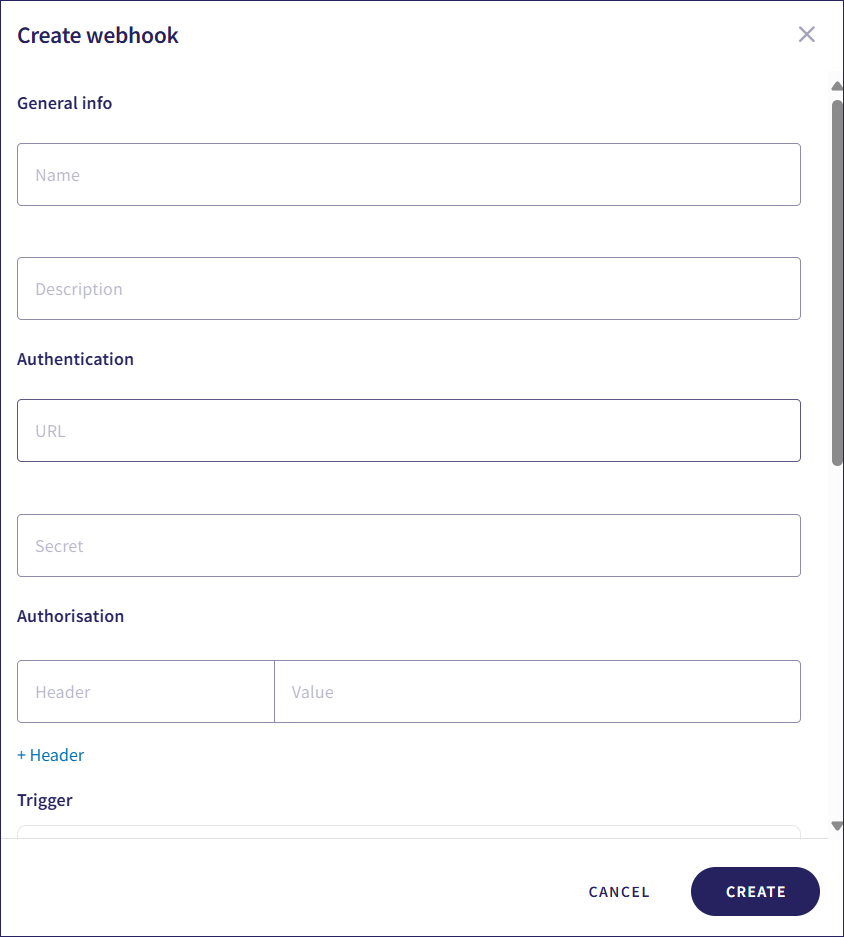
Enter the webhook details:
Name: A name for the webhook.
Description: A description of the webhook.
Authentication URL: The URL to which the webhook is sent.
Authentication Secret: Used to validate webhooks sent by Coro.
Here's how the validation works:
Coro generates a hash by signing the X-Coro-Hook-Id in the header sent with a webhook with the secret key you provide during webhook configuration. This results in the X-Coro-Signature in the header.
When you receive the webhook, verify its authenticity by recalculating the signature on your side. You use the same X-Coro-Hook-Id from the webhook and the secret key (which only you and Coro know, and should be stored in a secure location) to recreate the hash. If your calculated hash matches the X-Coro-Signature in the header, you can be confident that the webhook is legitimate and came from Coro.
This layered security model ensures that even if the webhook data were intercepted, it could not be altered or impersonated without access to the secret key used to generate the signature. By validating both the X-Coro-Hook-Id and the X-Coro-Signature, you ensure that the webhook payload has not been tampered with and originates from Coro.
Authorization Header and Value: Any headers and their values required by the receiving endpoint. Headers can be used for routing purposes or additional authorization.
Select the triggers for the webhook:
Trigger Description Workspace created A workspace is created. Workspace status updated A workspace subscription status is updated. The workspace status changes, for example from trial to subscription. Subscription updated A workspace subscription is updated. Modules or add-ons are enabled or disabled. Protected users added Protected users are added to the the workspace. Protected users updated Protected user details are updated. Protected users deleted Protected users are deleted from the workspace. Protected users count updated The number of protected users is updated. Users are added or deleted. Protected devices added Protected devices are added to the workspace. Protected devices updated Protected device details are updated. Protected devices deleted Protected devices are deleted from the workspace. Protected devices count updated The number of protected devices is updated. Devices are added or deleted. 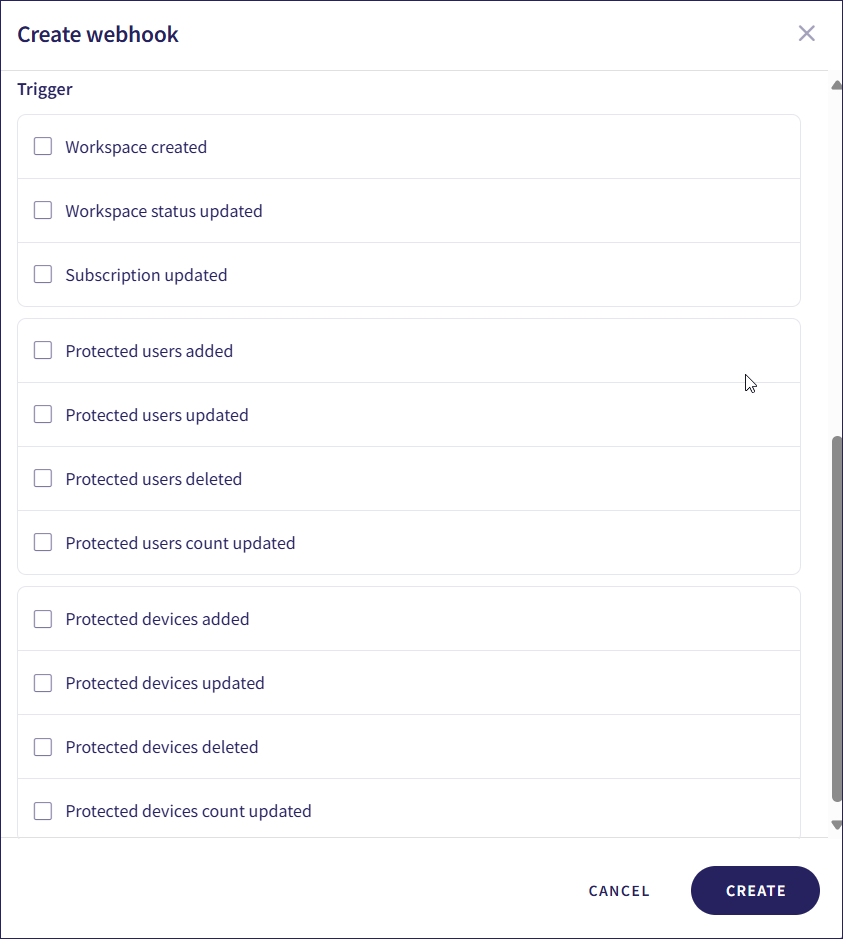
Select Apply to child workspace, if applicable. When selected, the configured webhook applies to any child workspaces of the current workspace.
Select CREATE.
The page refreshes and your webhook appears in the list of webhooks. A test webhook is sent to make sure that the configured URL successfully receives Coro webhooks.
Managing webhooks
To manage a webhook, select the three-dot menu next to the webhook:
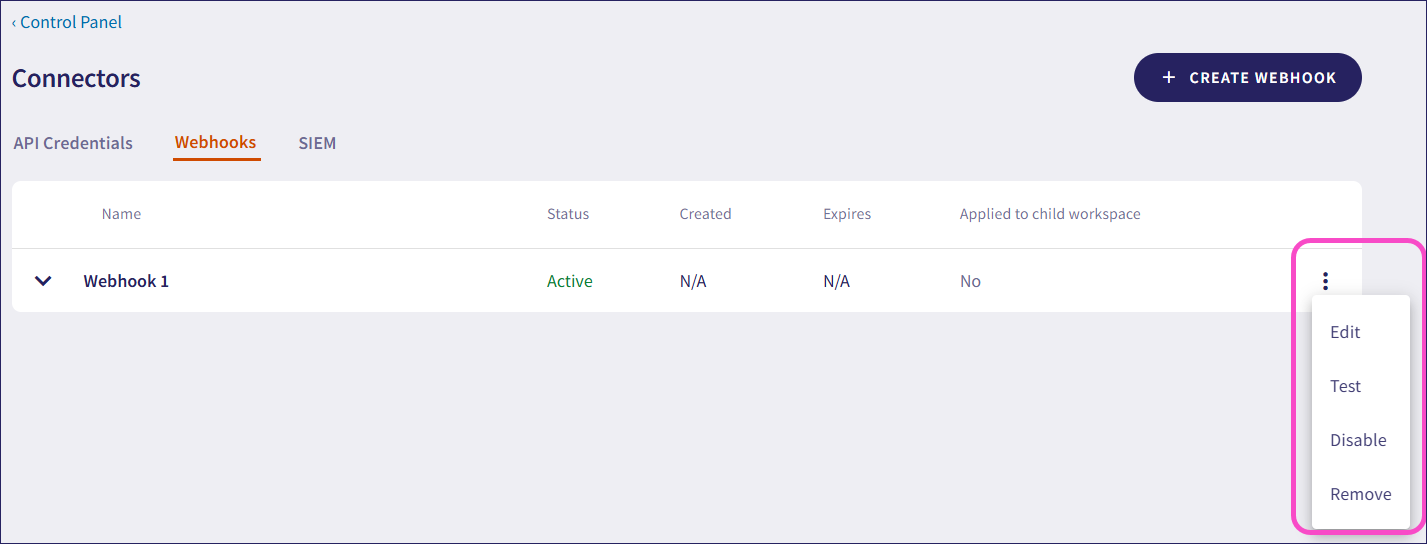
From the action menu, you can:
Edit your webhook configuration
Test the webhook configuration connection. A payload labeled as a test webhook type is sent to verify the connection without initiating a real event that the system might act upon
Disable the webhook without losing its configuration details
Remove the webhook configuration
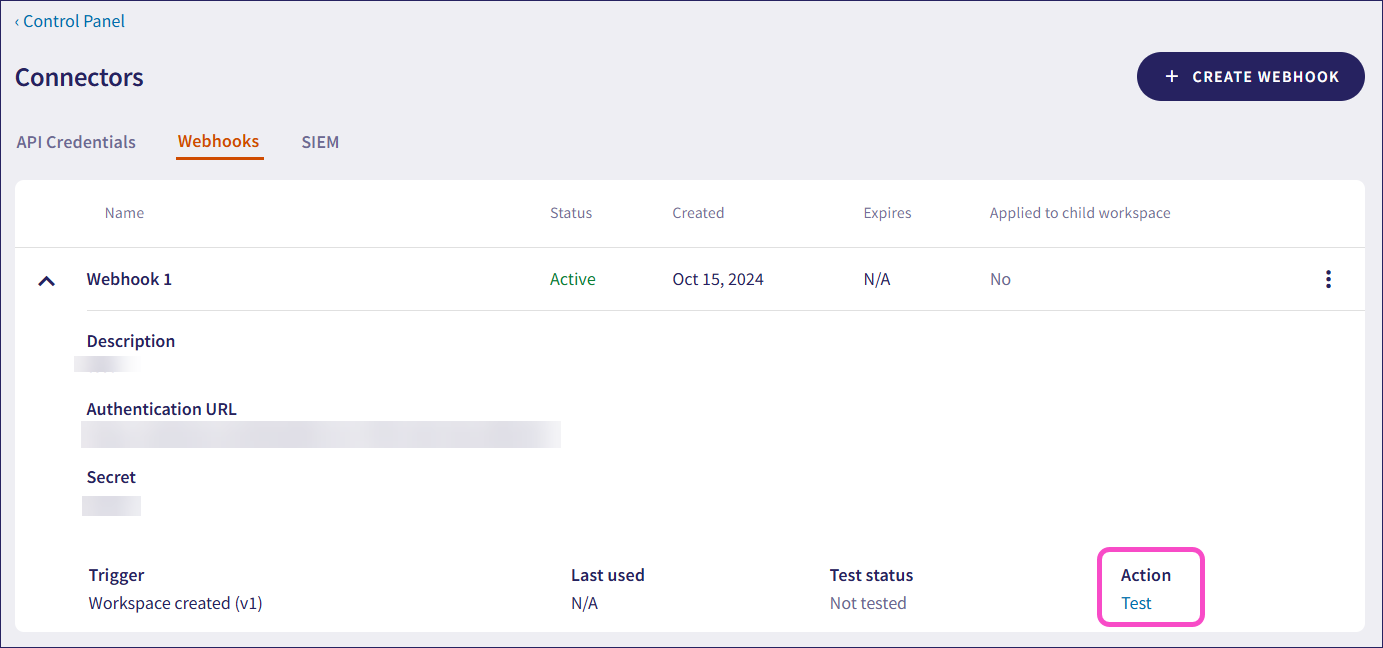
You can also view your webhook details by selecting the drop-down arrow next to the desired webhook:

From the webhook details, you can test the webhook configuration:
Webhook version management
Coro has a deprecation process for older webhook versions. Each time a new webhook version is released, the preceding version becomes a candidate for deprecation. This begins a six-month countdown, after which the old version is officially deprecated and eventually disabled.
Six months before deprecation
Email notification: Admin users receive an email notifying them of the upcoming deprecation date for the outdated webhook version. This communication marks the start of the deprecation period, giving admin users ample time to prepare for the transition.
Console message: The webhook record displays an expiration date, allowing admin users to see the timeline for each version's sunset.
One month before deprecation
Reminder email: A follow-up email is sent to remind admin users of the deprecation.
New webhook version draft: A draft of the latest webhook version is automatically created in the console. This allows admin users to preview and prepare for the update without making immediate changes.
One week before deprecation
Console notification: When admin users sign into the Connectors module, a pop-up notification appears, alerting them to the upcoming deprecation.
Warning message: The version set for deprecation displays a warning message.
Deprecation date
24 hours after the expiration date, the old webhook version is automatically disabled and grayed out.